
WELLTURN RS11
WELLTURN RS11 Dog Training Collar User Manual
Model: RS11
1. Introduction
This manual provides detailed instructions for the WELLTURN RS11 Dog Training Collar. This device is designed to assist in training dogs through various modes, promoting better communication and behavior. Please read this manual thoroughly before use to ensure proper and safe operation.

Image 1.1: The WELLTURN RS11 Dog Training Collar and its remote control unit.
2. Product Overview
The WELLTURN RS11 system consists of a remote transmitter and a collar receiver. The remote allows you to control the training modes and intensity levels, while the receiver delivers the chosen stimulation to your dog.
2.1 Components
- Remote Transmitter
- Collar Receiver
- Adjustable Nylon Collar Strap
- Charging Cable
- Test Light Tool
- Contact Points (short and long)
- User Manual
3. Key Features
- Multi-Mode Training: Offers Beep, Vibration, Static Shock, and Ultrasonic modes.
- Adjustable Intensity: 8 levels for Beep, 16 for Vibration, 99 for Static Shock, and 3 for Ultrasonic.
- Ultra-Long Range: Remote control effective up to 1000 meters (5 meters for ultrasonic mode).
- Waterproof Design: IP67 rated receiver, suitable for various weather conditions and water activities.
- Long-Lasting Battery: Up to 15 days of use and 3 months standby on a single charge.
- Dual Dog Control: Capable of controlling two dogs with an additional receiver (sold separately).
- Easy-to-Use Interface: Features an LCD screen and intuitive buttons for straightforward operation.
- Adjustable Collar: Suitable for dogs weighing between 4kg and 68kg.
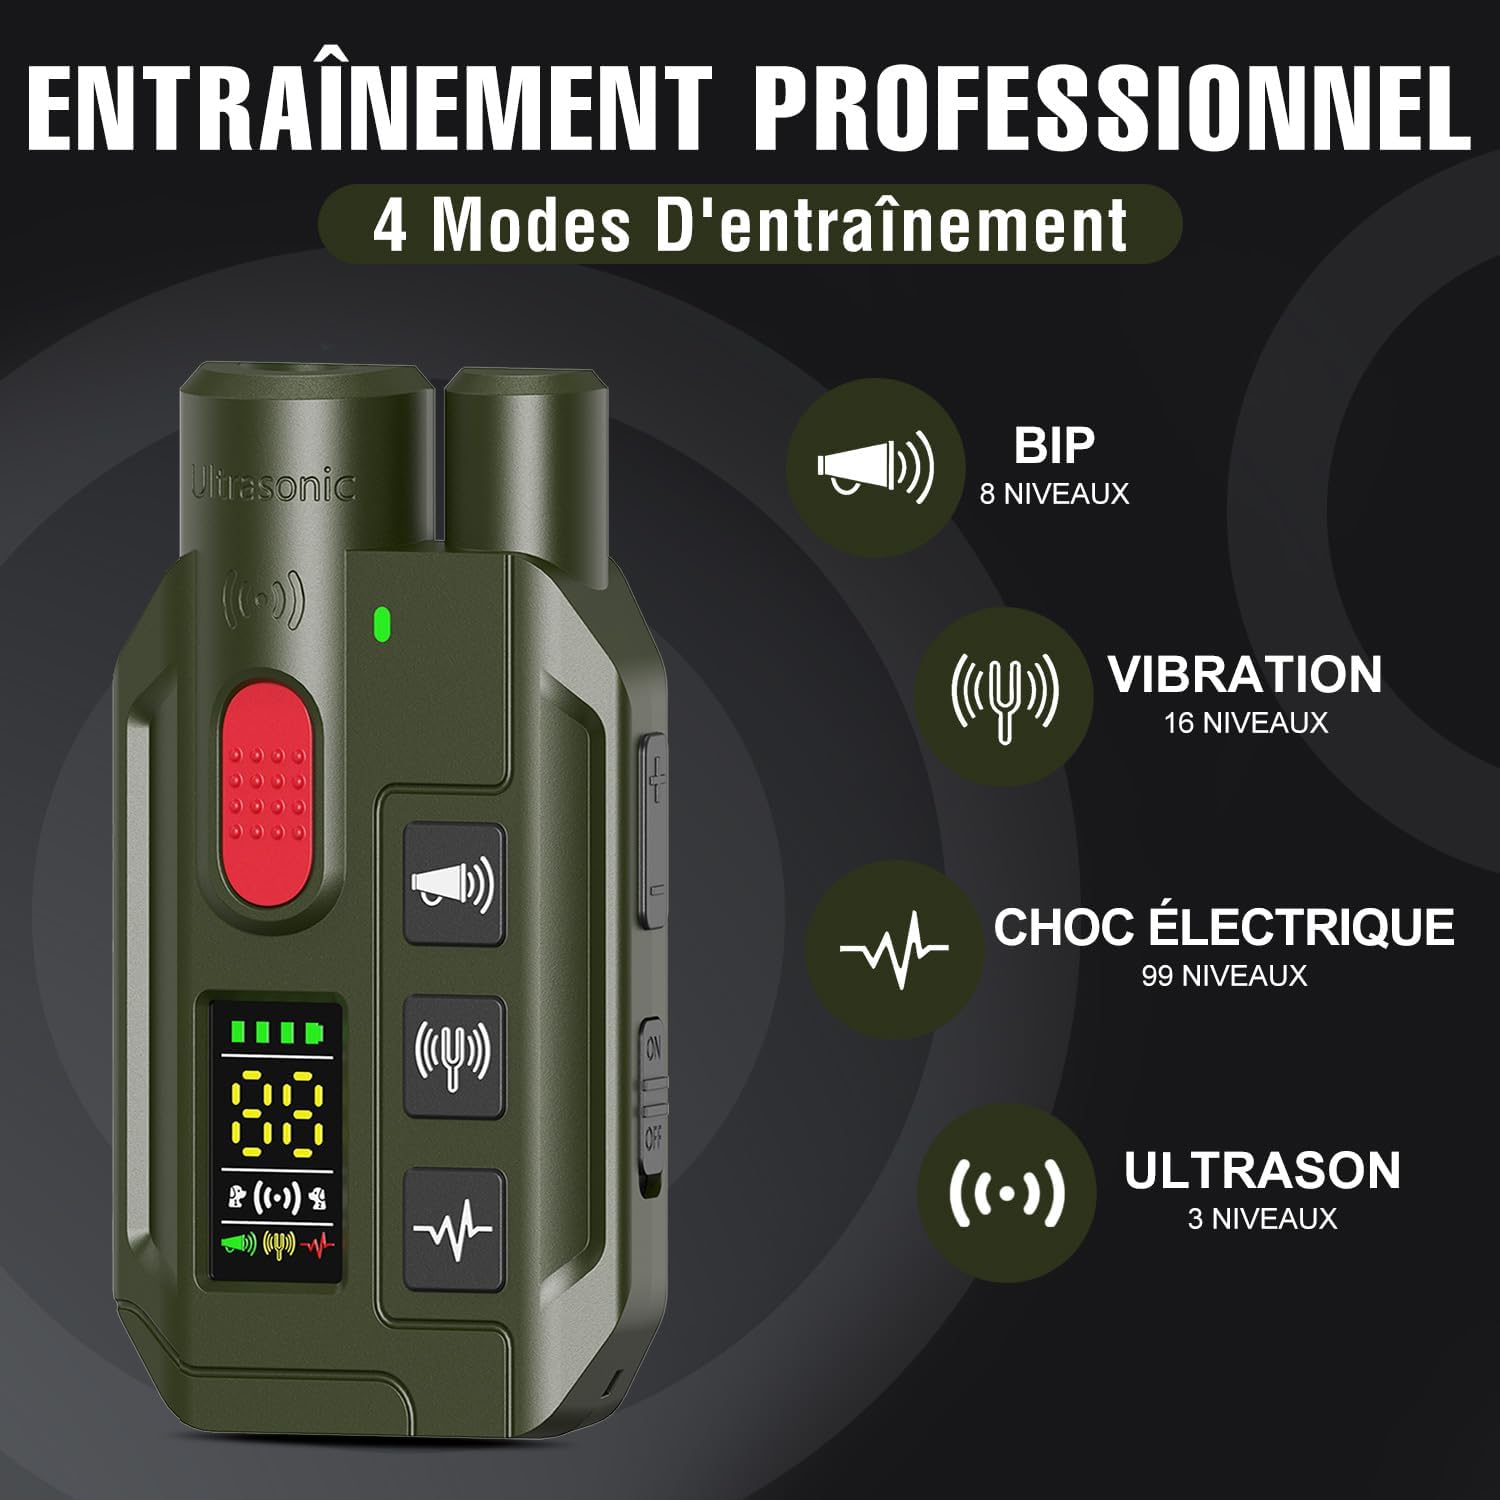
Image 3.1: The remote control displaying the four available training modes and their respective intensity levels.

Image 3.2: Illustration of the collar's long-range capability, showing a remote user and a dog at a distance.

Image 3.3: A dog swimming, highlighting the IP67 waterproof feature of the collar receiver.
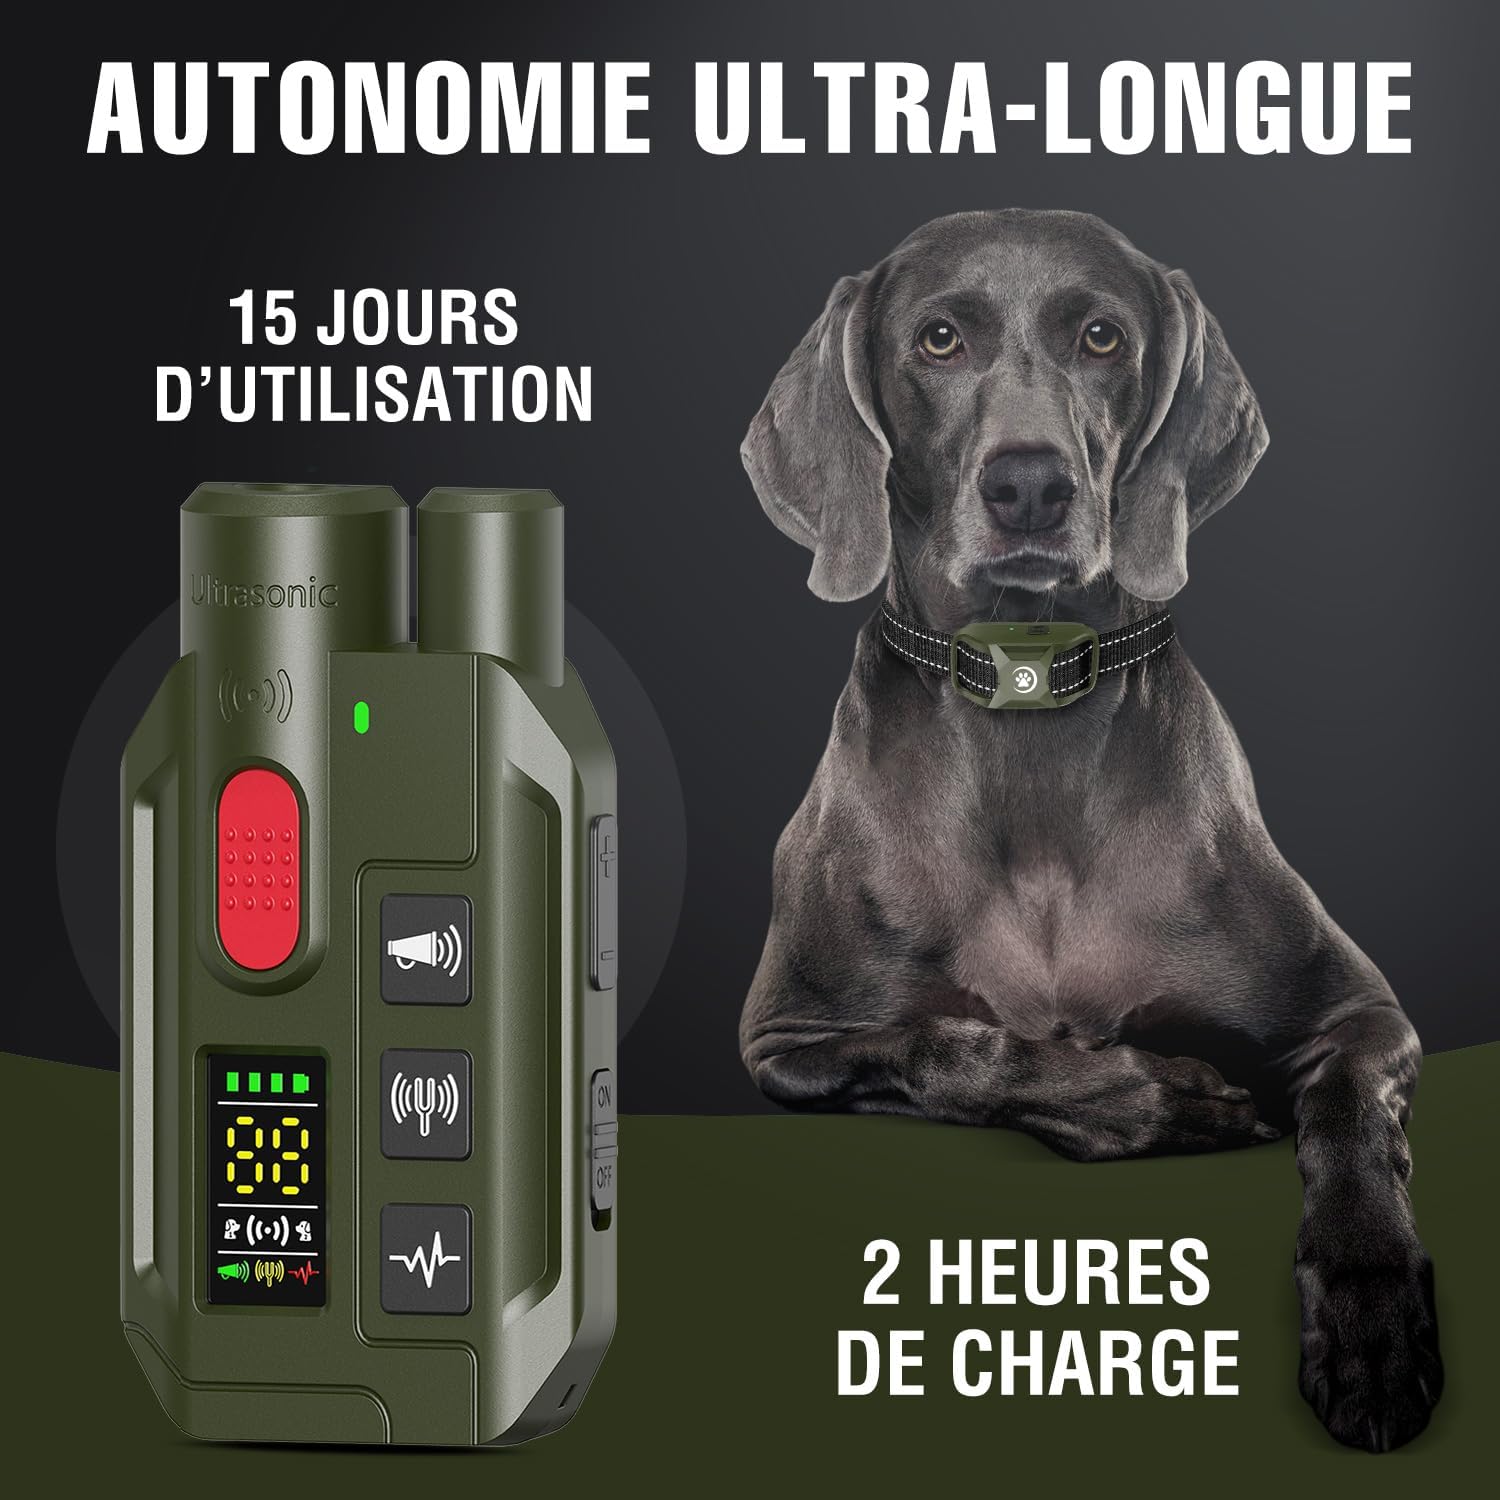
Image 3.4: Visual representation of the collar's extended battery life and quick charging time.

Image 3.5: Two dogs pictured with the remote, illustrating the dual-channel control feature for training multiple dogs.

Image 3.6: A group of dogs of different sizes wearing the collar, demonstrating its adjustable fit for various breeds.
4. Setup
4.1 Charging the Devices
- Connect the charging cable to the remote transmitter and collar receiver.
- Plug the other end of the cable into a standard USB power adapter (not included) or a computer USB port.
- The indicator light on both devices will show charging status (e.g., red for charging, green for fully charged).
- A full charge typically takes approximately 2 hours.
- Disconnect the devices once fully charged.
4.2 Pairing the Remote and Receiver
The remote and receiver are usually pre-paired from the factory. If re-pairing is necessary or if you are adding a second receiver:
- Ensure both devices are turned off.
- Turn on the remote transmitter.
- Press and hold the power button on the receiver until the indicator light flashes rapidly.
- Within 10 seconds, press any mode button (Beep, Vibration, or Static Shock) on the remote.
- If successful, the receiver's indicator light will stop flashing and remain solid, or beep to confirm pairing.
5. Operating Instructions
5.1 Turning On/Off
- To Turn On: Press and hold the power button on both the remote and receiver until the indicator light illuminates.
- To Turn Off: Press and hold the power button on both devices until the indicator light turns off.
5.2 Selecting and Adjusting Modes
The remote features dedicated buttons for each training mode and intensity adjustment buttons.
- Beep Mode: Press the 'Beep' button. Adjust intensity (8 levels) using the '+' and '-' buttons.
- Vibration Mode: Press the 'Vibration' button. Adjust intensity (16 levels) using the '+' and '-' buttons.
- Static Shock Mode: Press the 'Static Shock' button. Adjust intensity (99 levels) using the '+' and '-' buttons. Use this mode with caution and at the lowest effective level.
- Ultrasonic Mode: Press the 'Ultrasonic' button. Adjust intensity (3 levels) using the '+' and '-' buttons. Note the shorter effective range for this mode (5 meters).
5.3 Switching Between Dogs (Dual Dog Control)
If you have two receivers paired, use the dog selection button on the remote to switch between controlling Dog 1 and Dog 2.
6. Fitting the Collar
Proper fit of the collar receiver is crucial for effective and safe operation.
- Ensure the collar is turned off before fitting.
- Place the receiver on your dog's neck, with the contact points touching the skin.
- The collar should be snug, but not too tight. You should be able to fit one finger comfortably between the strap and your dog's neck.
- If your dog has long or thick fur, you may need to trim the fur around the contact points or use the longer contact points provided to ensure direct skin contact.
- Avoid leaving the collar on your dog for more than 12 hours per day to prevent skin irritation.
- Regularly reposition the collar on your dog's neck every 1-2 hours to prevent pressure sores.
7. Training Guidelines
For optimal results, integrate the training collar into a positive reinforcement training program.
- Start with Low Levels: Always begin with the lowest intensity level for any mode and gradually increase if necessary.
- Consistency is Key: Use the collar consistently to address specific behaviors.
- Short Training Sessions: Keep training sessions brief (10-15 minutes) to maintain your dog's focus.
- Positive Reinforcement: Reward desired behaviors immediately with praise or treats.
- Observe Your Dog: Pay close attention to your dog's reactions to determine the appropriate intensity level and mode.
- Avoid Overuse: The collar is a training aid, not a punishment device. Use it judiciously.
8. Maintenance
- Cleaning: Regularly clean the collar receiver and contact points with a damp cloth. Ensure they are dry before storage or next use.
- Inspect for Wear: Periodically check the collar strap and receiver for any signs of damage or wear.
- Battery Care: Charge the devices fully before long periods of inactivity. Store in a cool, dry place.
- Contact Points: Ensure contact points are clean and free of debris for proper function.
9. Troubleshooting
| Problem | Possible Cause | Solution |
|---|---|---|
| Collar not responding to remote | Low battery; Not paired; Out of range | Charge devices; Re-pair devices; Move closer to the dog |
| No static shock/vibration | Poor contact with skin; Intensity too low; Faulty unit | Adjust collar fit/contact points; Increase intensity; Contact support |
| Collar indicator light not working | Low battery; Device off; Faulty light | Charge device; Turn on device; Contact support |
| Ultrasonic mode ineffective | Dog not sensitive to ultrasonic; Out of 5m range | Try other modes; Ensure dog is within 5m range |
10. Specifications
- Model Number: RS11
- Recommended for Species: All dog sizes
- Package Dimensions: 14 x 13.8 x 4.4 cm
- Weight: 120 grams
- Battery: 1 A (included)
- Waterproof Rating: IP67
- Remote Control Range: Up to 1000 meters
- Ultrasonic Range: Up to 5 meters
- Battery Life (Usage): Up to 15 days
- Battery Life (Standby): Up to 3 months
- Charging Time: Approximately 2 hours
- Closure Type: Buckle
- Included Components: Remote control, Collar receiver, Collar strap, Charging cable, Test light, Contact points
11. Safety Information
- Keep Away from Children: This device is not a toy and should be kept out of reach of children.
- Not for Aggressive Dogs: Do not use this product on aggressive dogs. Consult a professional dog trainer or veterinarian for advice on aggressive behavior.
- Skin Irritation: Prolonged wear or improper fit can cause skin irritation. Monitor your dog's neck regularly for any signs of redness or sores.
- Static Shock: Use the static shock mode responsibly and at the lowest effective level. It is intended as a deterrent, not a punishment.
- Avoid Over-Correction: Excessive use of any correction mode can cause stress or anxiety in your dog.
- Environmental Considerations: Dispose of batteries and electronic components according to local regulations.
12. Warranty and Support
For warranty information or technical support, please refer to the product packaging or contact WELLTURN customer service directly. Contact details can typically be found on the manufacturer's official website or through your point of purchase.
For further assistance, please visit the WELLTURN brand page.
Related documentsRS11


Ask a question about this manual
Ask about setup, troubleshooting, compatibility, parts, safety, or missing instructions. Manuals+ will review the question and use this page’s manual context to help answer it.