Important Safety Instructions
Please read all instructions carefully before operating the appliance. Retain this manual for future reference.
- Electrical Safety: Ensure the power supply matches the appliance's requirements (115 Volts AC, 203 Watts). Do not operate with a damaged cord or plug.
- Water Connection: Connect to a potable water supply only. Ensure all water connections are secure to prevent leaks.
- Ventilation: Maintain adequate clearance around the appliance for proper ventilation. Do not block air vents.
- Flammable Refrigerant: This appliance uses R290a refrigerant, which is flammable. Handle with care and ensure proper ventilation during installation and servicing.
- Children Safety: Keep children away from the appliance. Supervise children to ensure they do not play with the ice maker.
- Cleaning: Always unplug the appliance before cleaning or performing maintenance.
- Drainage: Ensure the drain pipe is positioned correctly and below the machine's drain outlet for effective water drainage.
Product Overview
The ICYGLEE Commercial Under Counter Ice Maker Machine is designed for efficient and reliable ice production in commercial and home settings. It produces up to 80 pounds of clear ice daily and stores up to 24 pounds.
Key Components
- Ice Maker Unit (Stainless Steel)
- Removable Ice Bin
- Ice Scoop
- Water Inlet Hose
- Water Outlet Hose (Drain Hose)
- Control Panel (LCD Display)

Figure 1: ICYGLEE Commercial Under Counter Ice Maker Machine and included accessories (ice bin, water hoses, ice scoop).
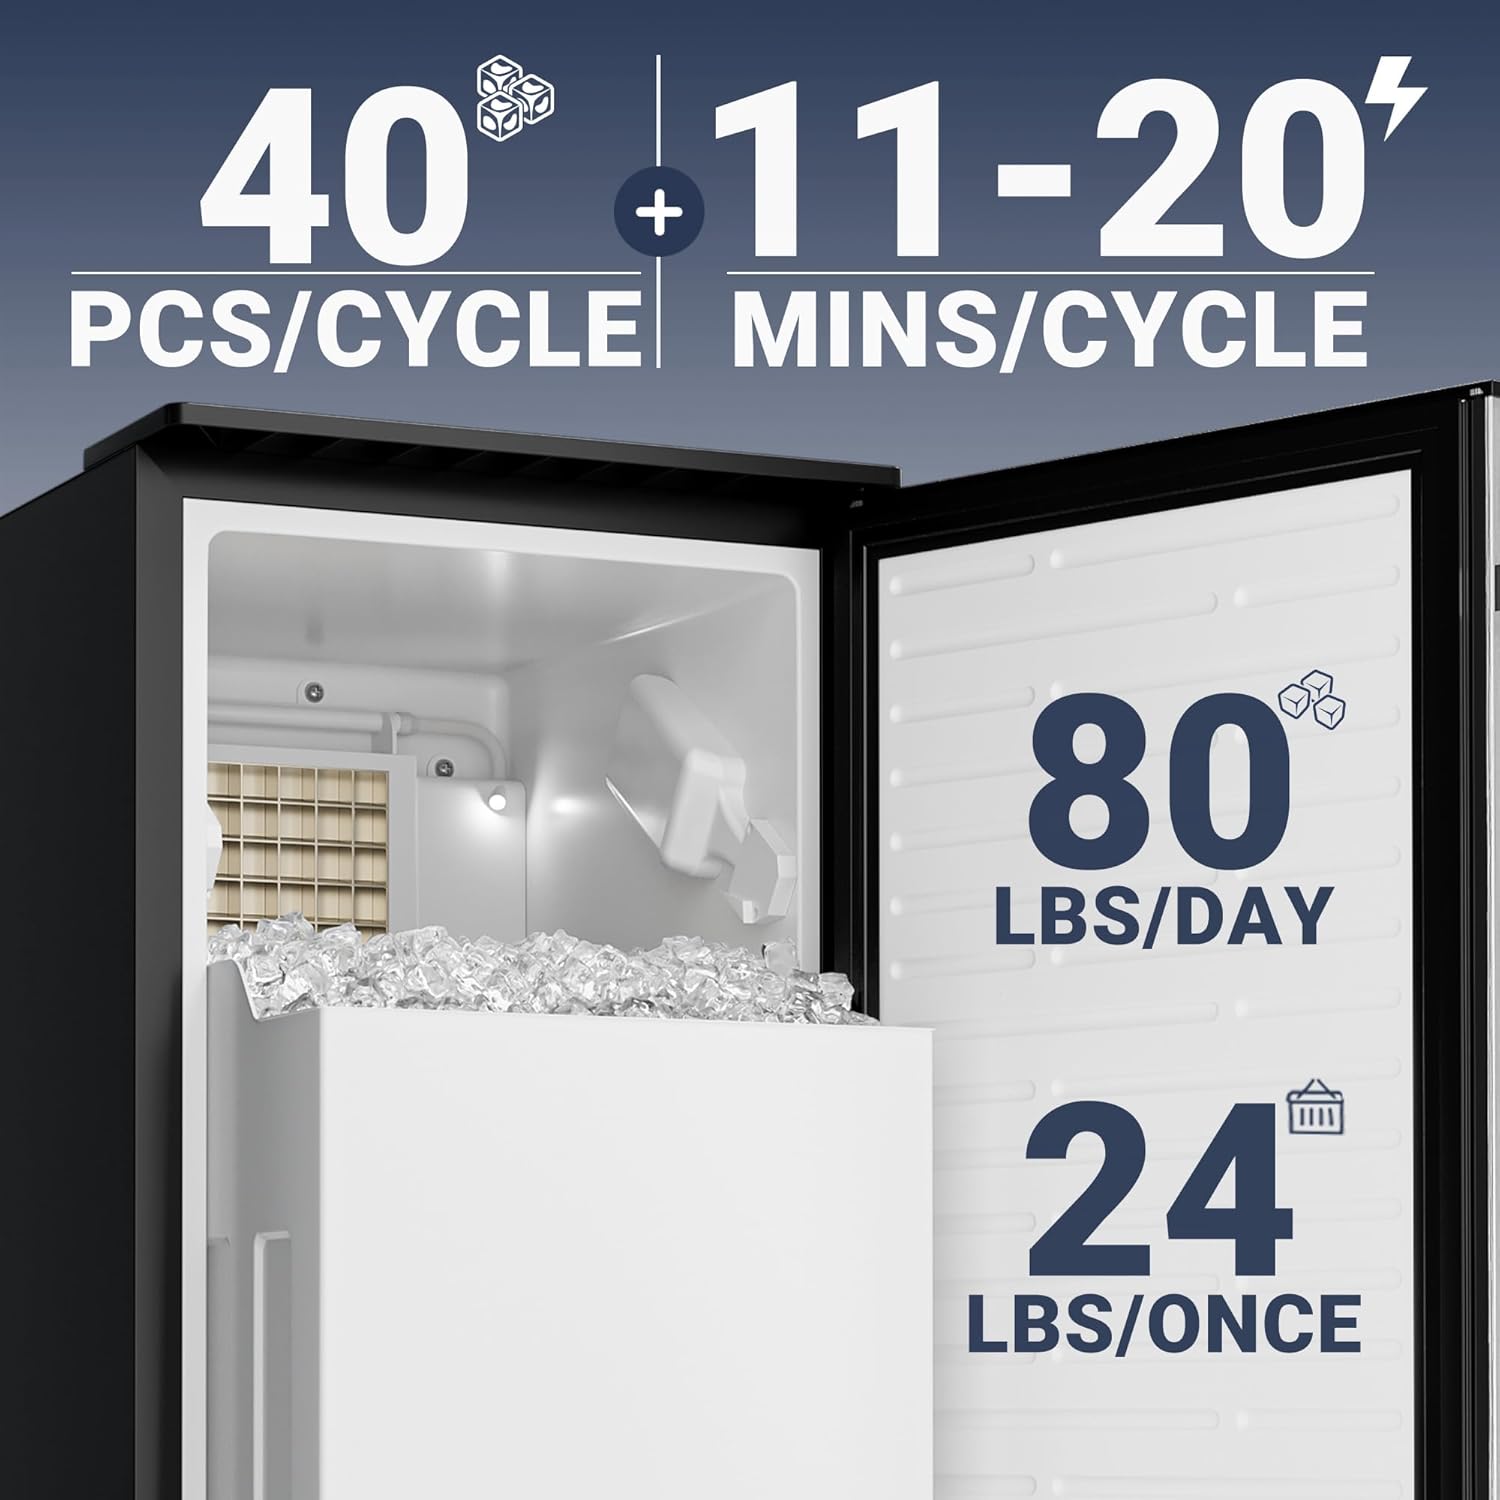
Figure 2: Illustration of the ice maker's production capacity (80 lbs/day) and storage capacity (24 lbs).
Setup and Installation
1. Unpacking
Carefully remove the ice maker from its packaging. Inspect for any shipping damage. Remove all packing materials, tape, and protective films.
2. Location Requirements
- Place the unit on a flat, stable surface capable of supporting its weight (approximately 12.87 kg / 28.37 lbs).
- Ensure the location is well-ventilated and away from direct sunlight or heat sources.
- Allow sufficient space around the unit for air circulation. The product dimensions are 51.8D x 38W x 86.1H Centimetres (20.4"D x 14.96"W x 33.9"H).
- The unit can be freestanding or installed under a counter.
3. Water Connection
Connect the ice maker to a cold water supply using the provided water inlet hose. Ensure the connection is tight to prevent leaks. Connect the water outlet (drain) hose to a suitable drain. It is crucial that the drain pipe is positioned below the machine's drain outlet for proper gravity drainage.
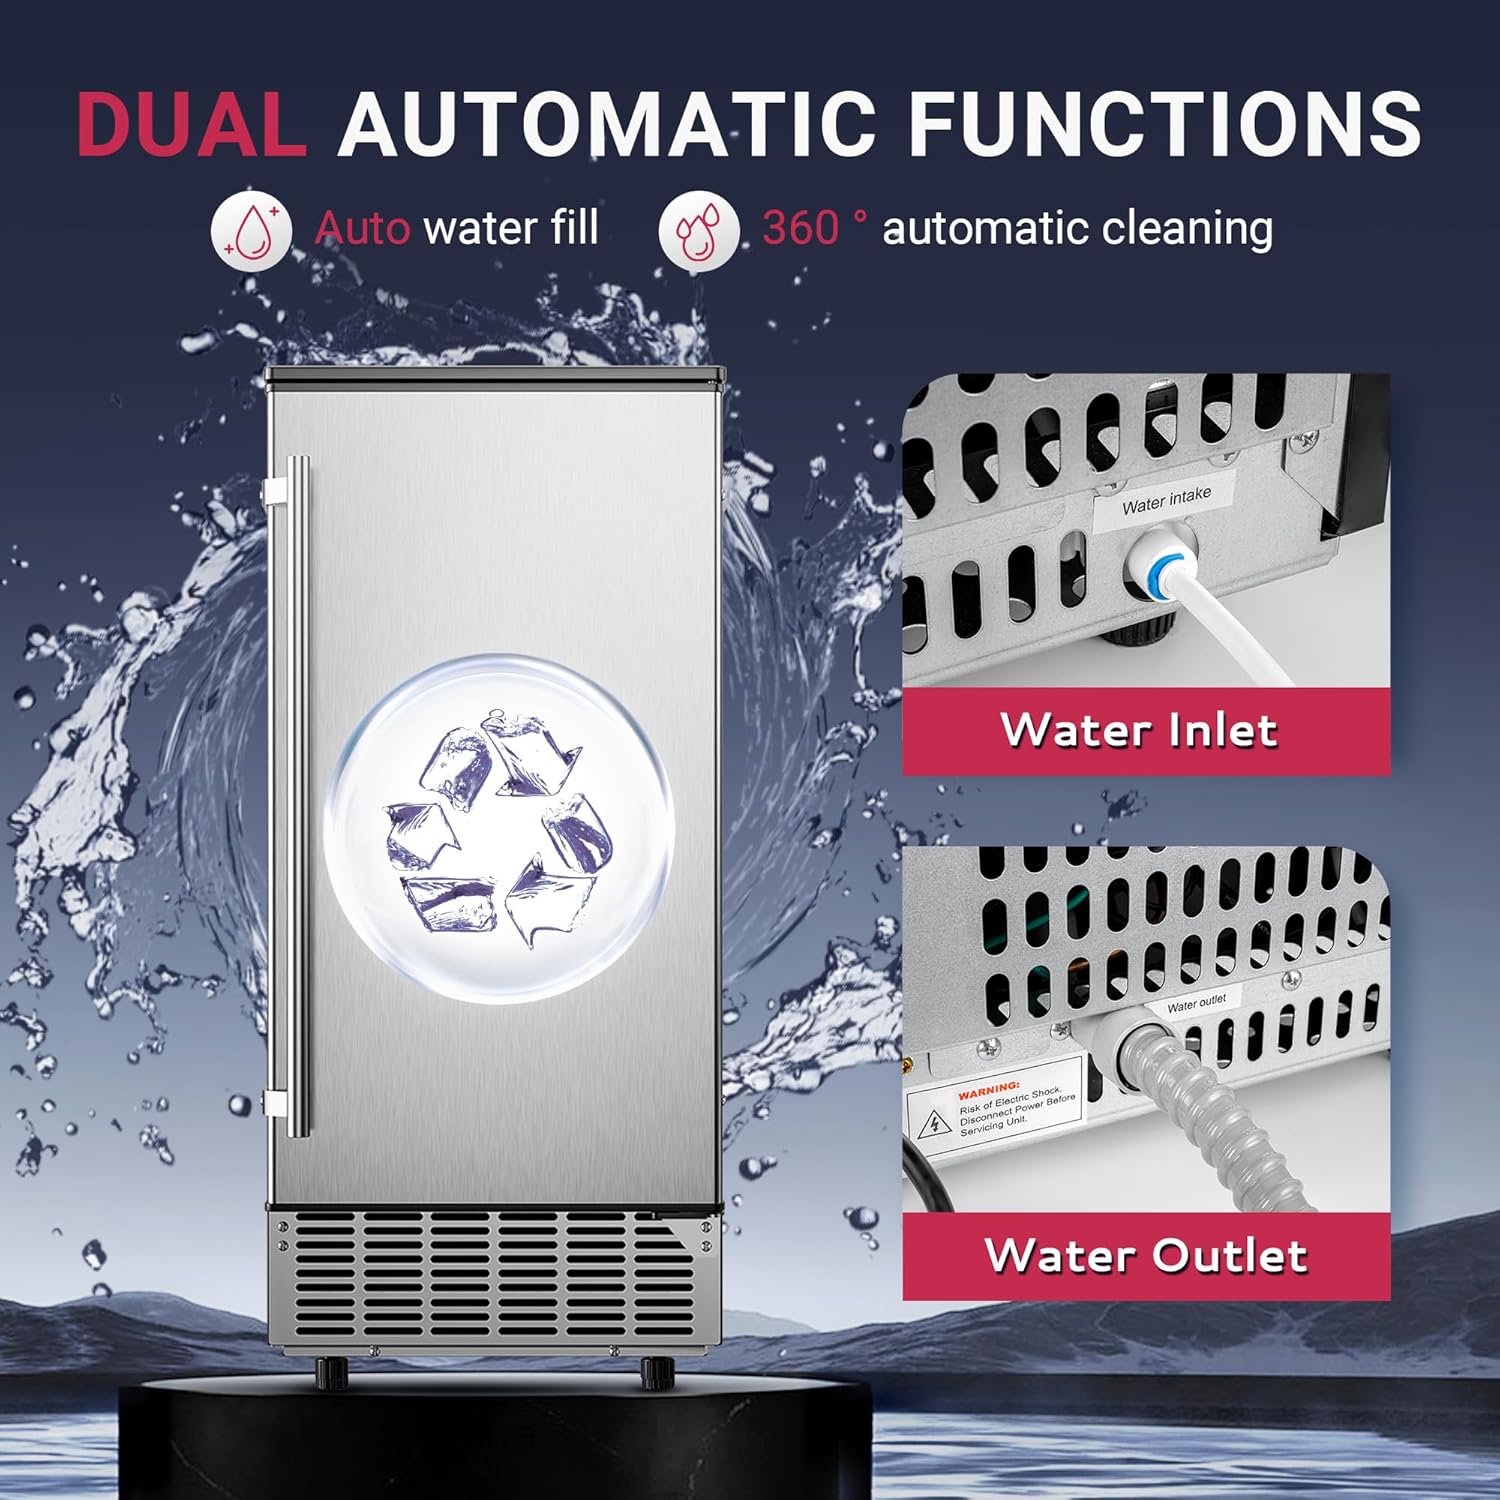
Figure 3: Water Inlet and Water Outlet connections. Ensure proper hose attachment and drainage.
4. Electrical Connection
Plug the ice maker into a grounded electrical outlet. Ensure the outlet meets the appliance's voltage requirements (115V AC).
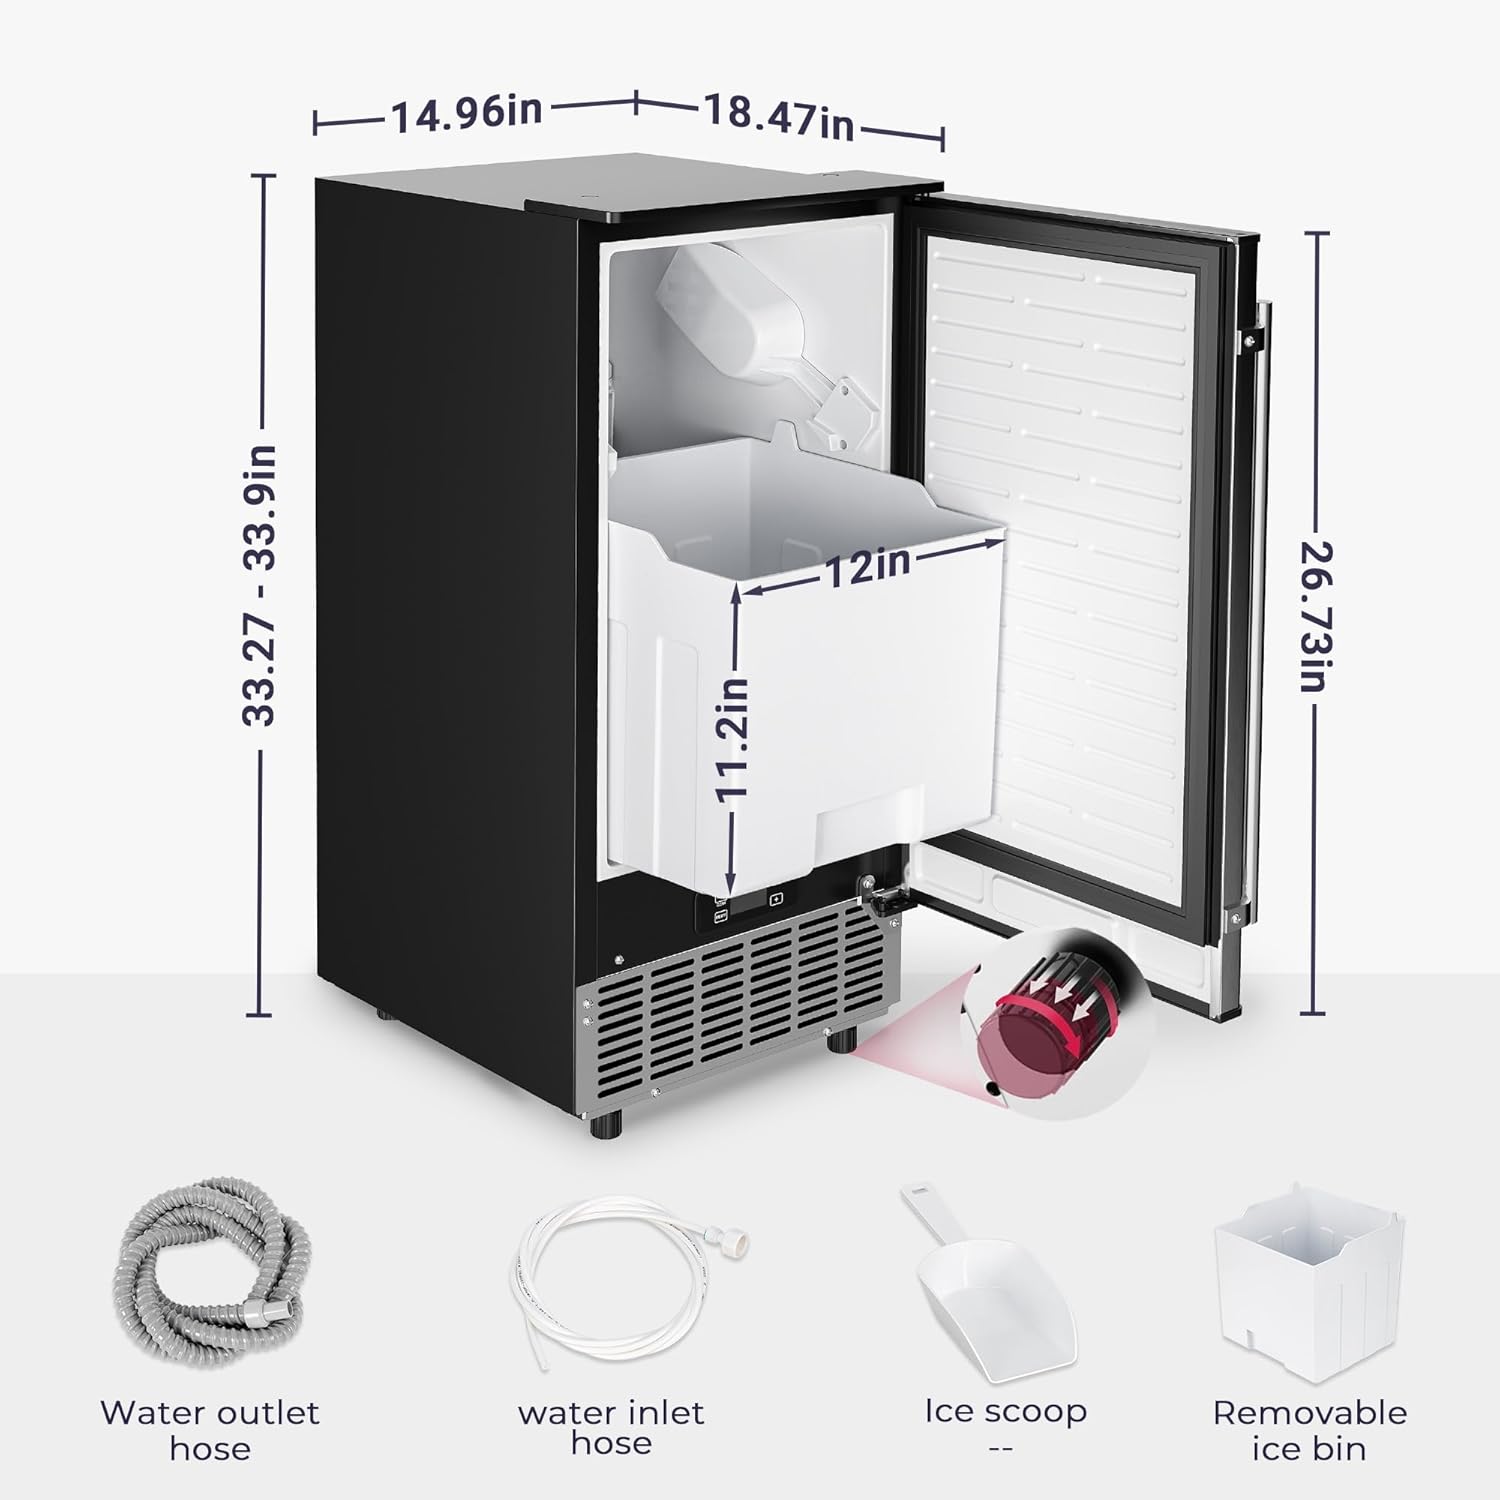
Figure 4: Detailed dimensions of the ice maker and visual representation of included accessories.
Operating Instructions
1. Control Panel Overview
The ice maker features an easy-to-operate smart LCD panel for controlling various functions.
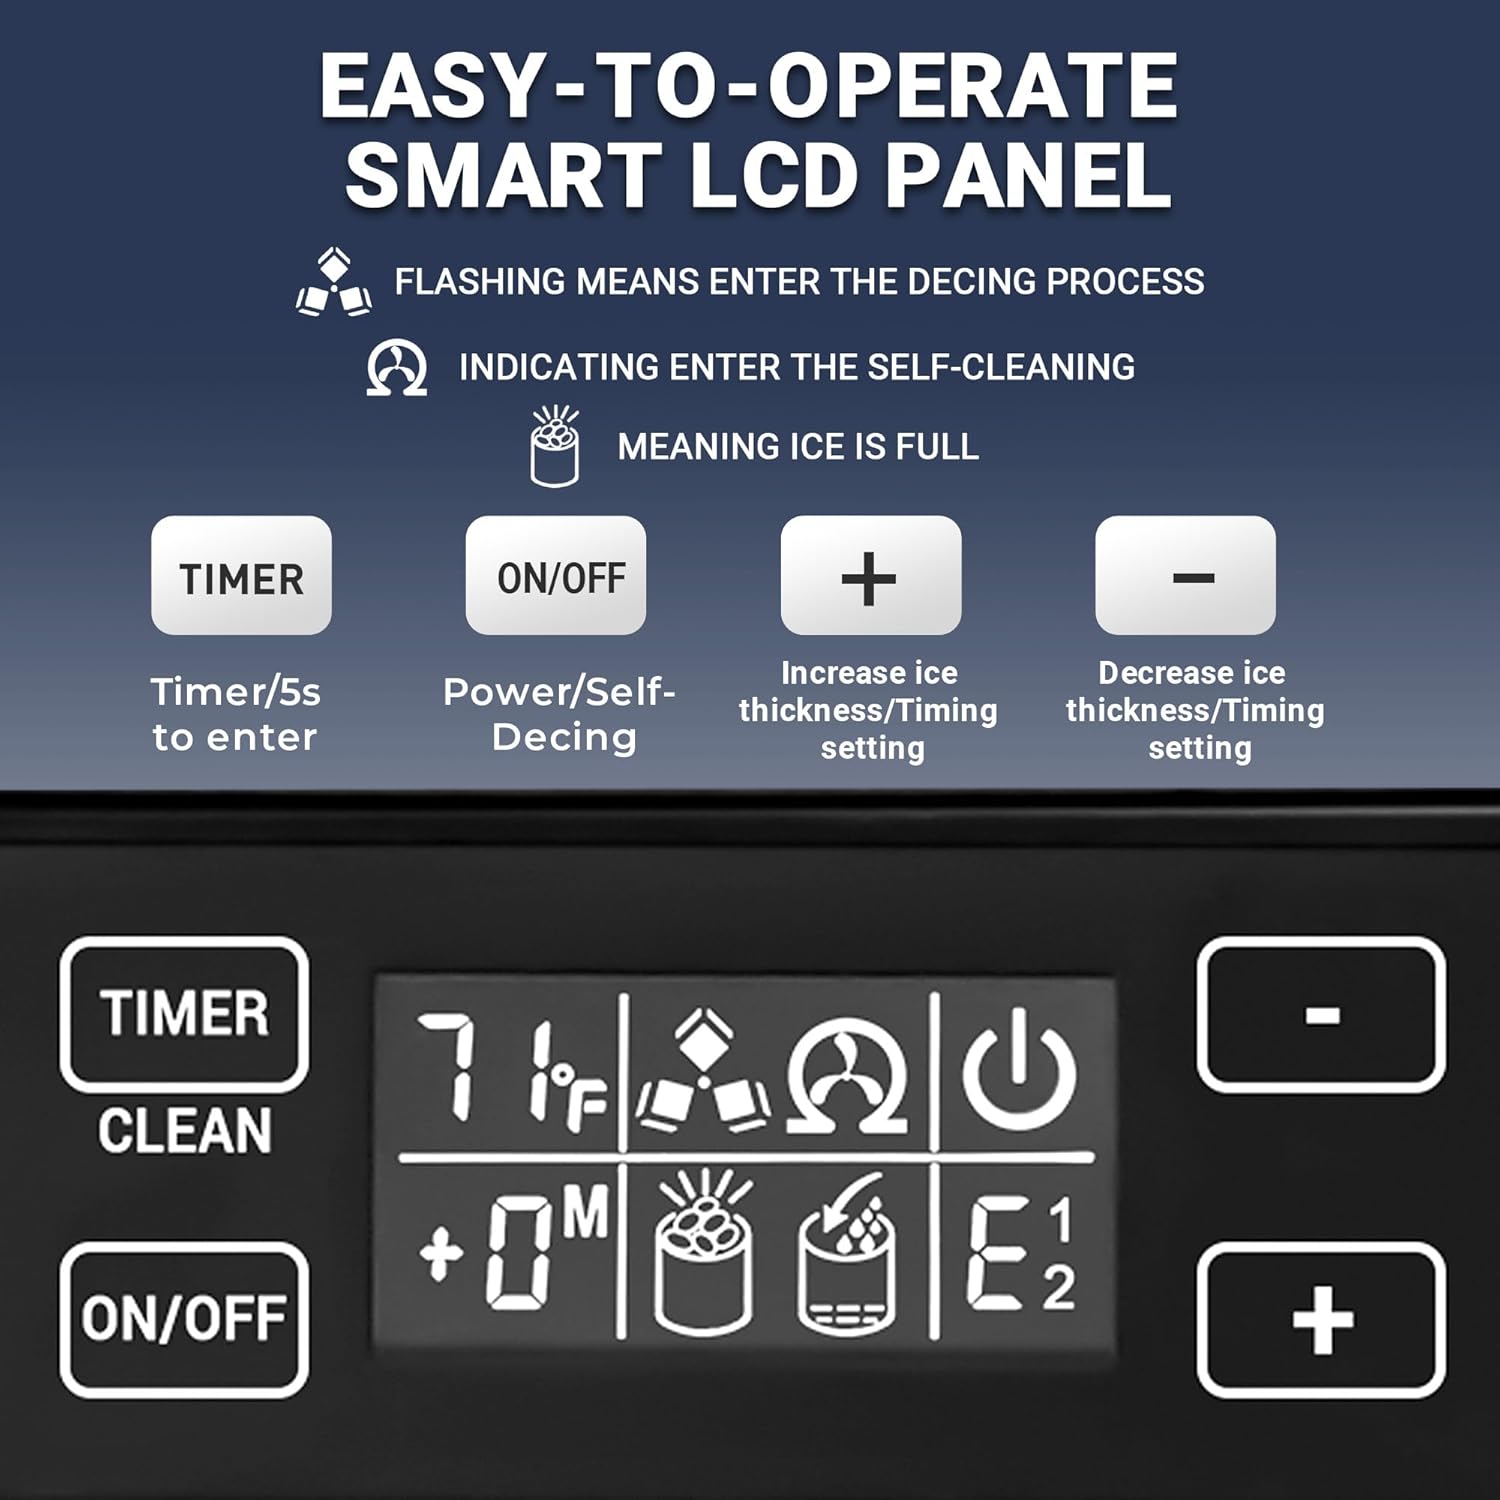
Figure 5: Smart LCD Control Panel. Key buttons include TIMER/CLEAN, ON/OFF, + (Increase), and - (Decrease).
- TIMER/CLEAN Button: Press to set the timer. Hold for 5 seconds to activate auto-cleaning.
- ON/OFF Button: Powers the unit on or off.
- '+' Button: Increases ice thickness or timing settings.
- '-' Button: Decreases ice thickness or timing settings.
- Indicators: Icons on the display indicate de-icing process, self-cleaning, water shortage, and ice full.
2. Initial Startup
After connecting water and power, press the ON/OFF button to start the ice production cycle. The machine will automatically fill with water and begin the ice-making process.
3. Ice Production
The ice maker produces clear ice cubes. Each cycle takes approximately 8 to 16 minutes, depending on the selected ice cube thickness and ambient conditions. The machine can produce up to 80 pounds of ice per day.
4. Adjusting Ice Cube Size
You can adjust the thickness of the ice cubes using the '+' and '-' buttons on the control panel. Thinner ice cubes are produced faster, while thicker cubes take longer.
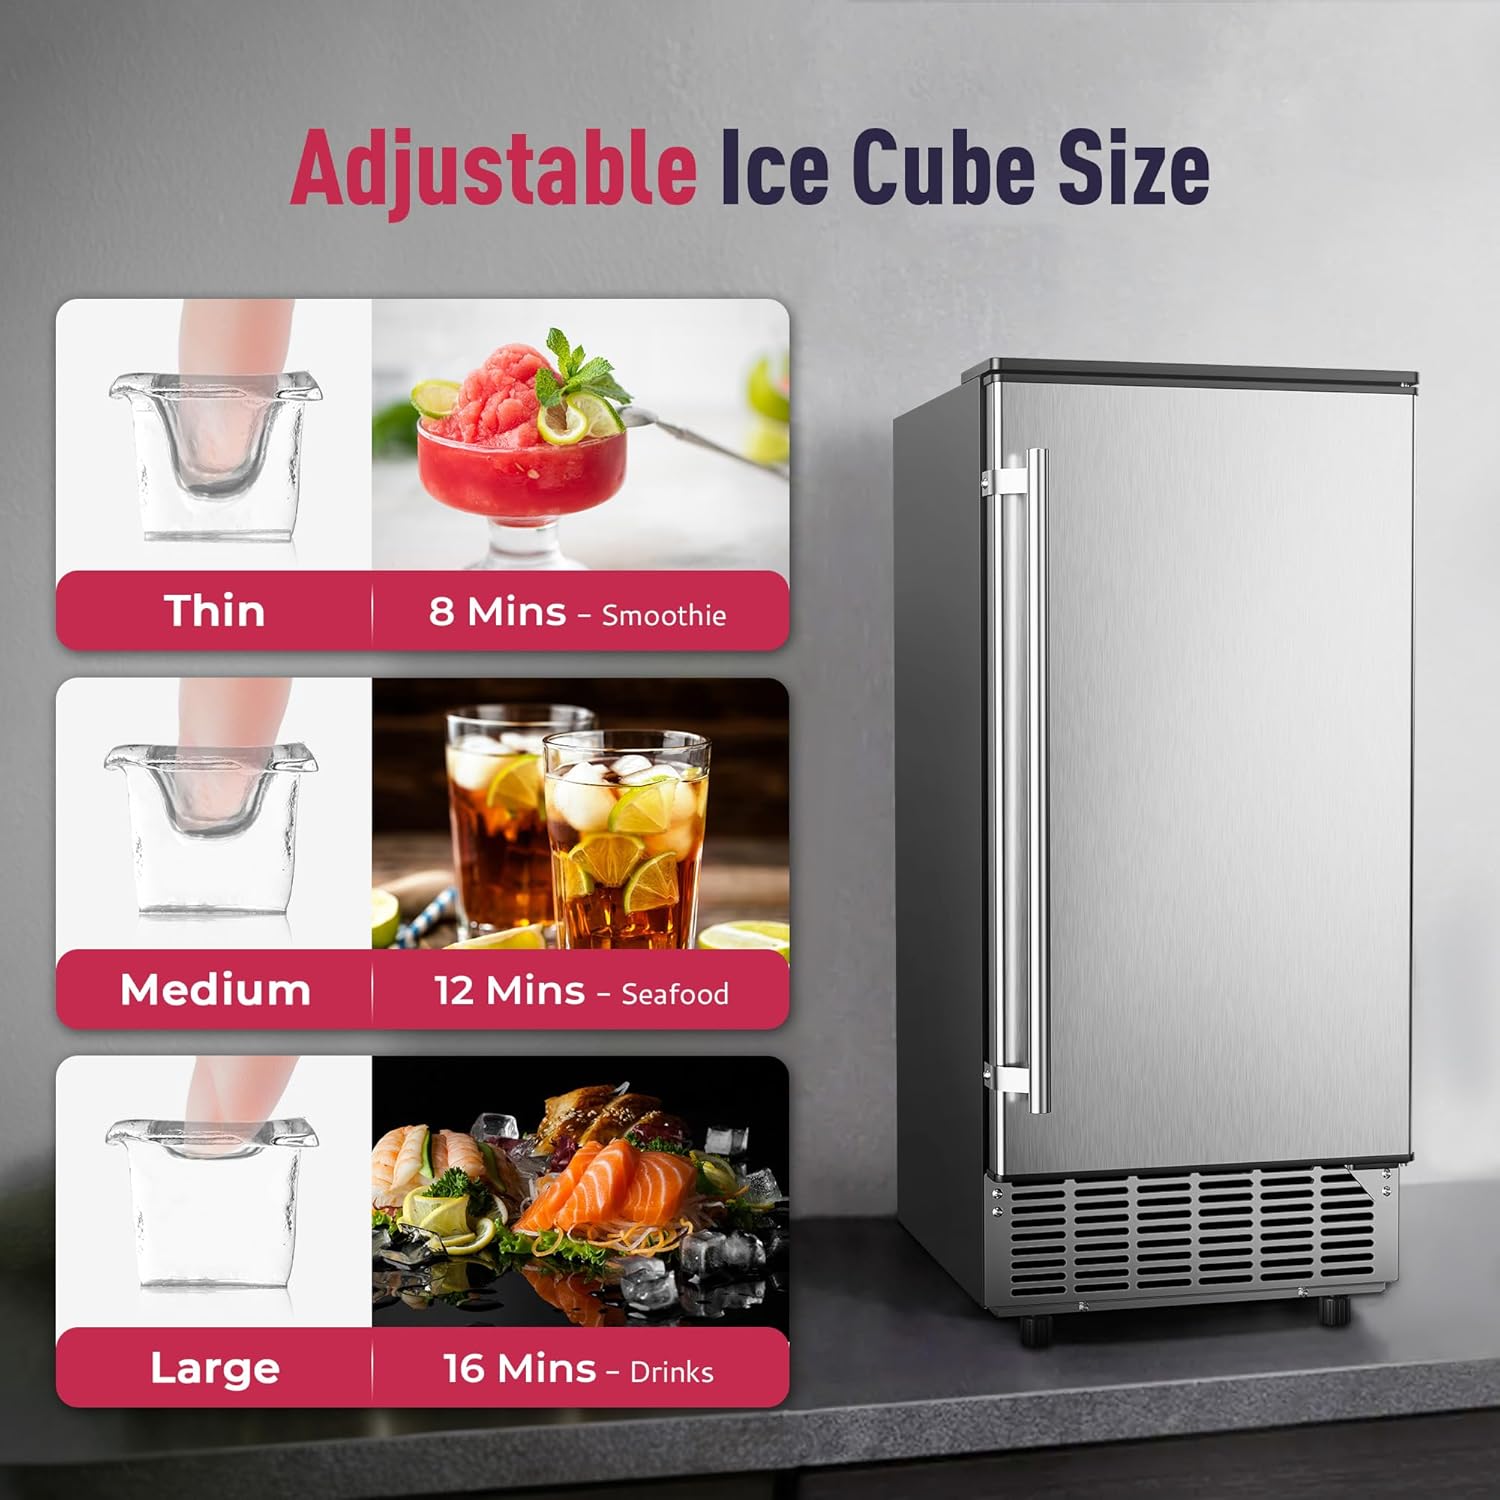
Figure 6: Adjustable Ice Cube Size options and typical production times.
5. Timer Function
The 24-hour timer function allows you to schedule ice production in advance. Press the TIMER button and use the '+' and '-' buttons to set the desired time for the machine to start or stop.
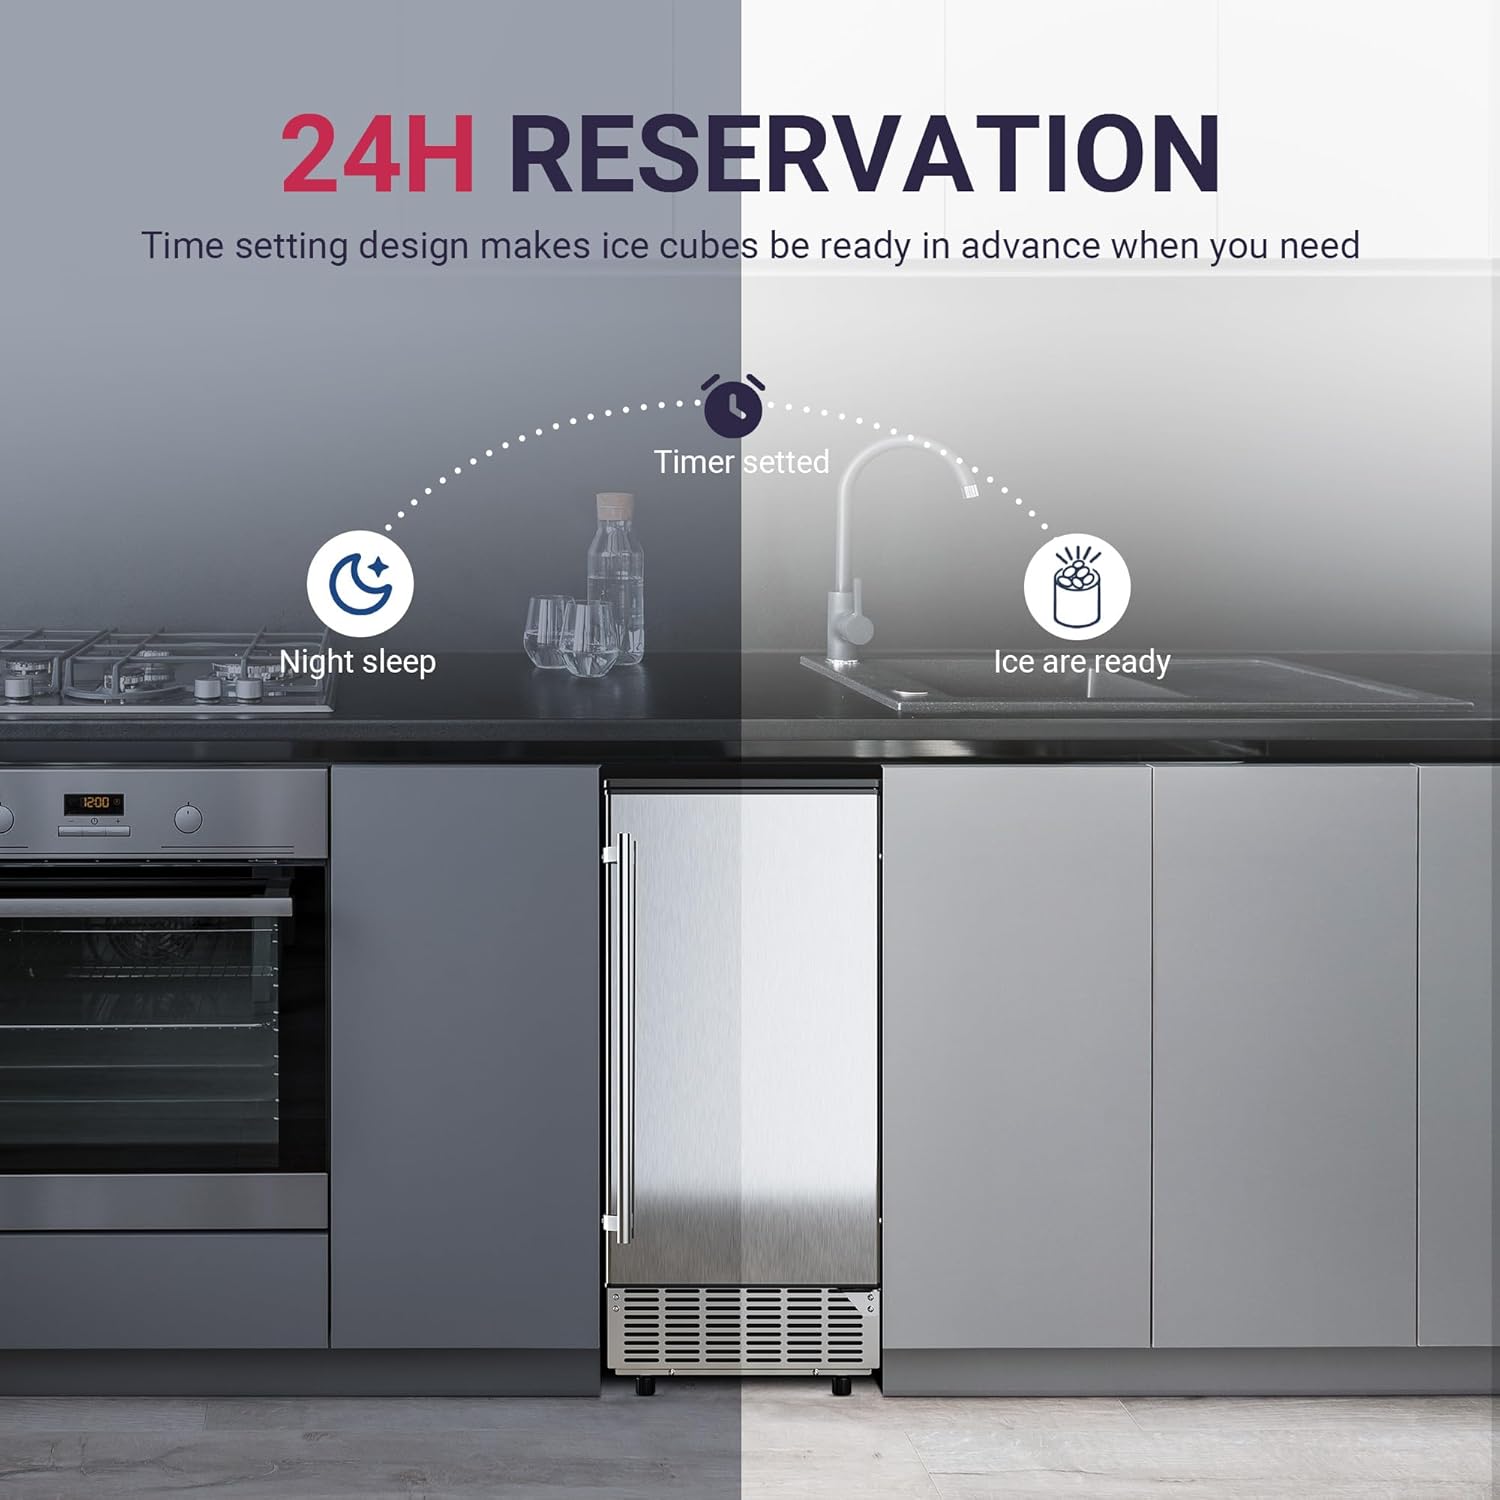
Figure 7: The 24-hour reservation feature allows for scheduled ice production.
Maintenance
1. Auto-Cleaning Function
The ice maker is equipped with an automatic cleaning function. To activate, hold the "Clean" button (often integrated with the TIMER button) for 5 seconds. This helps maintain the machine's efficiency and longevity.
2. Regular Cleaning
- Regularly clean the exterior with a soft, damp cloth.
- Clean the interior components, including the ice bin and water reservoir, periodically with a mild detergent and warm water. Rinse thoroughly.
- Ensure the water inlet filter is clean to prevent blockages.
3. Draining the Unit
For thorough cleaning or long-term storage, ensure the unit is completely drained. Disconnect the water inlet and ensure the drain hose is positioned to allow all water to flow out.
4. Long-Term Storage
If the ice maker will not be used for an extended period, drain all water, clean the unit thoroughly, and store it in a dry, well-ventilated area.
Troubleshooting
| Problem | Possible Cause | Solution |
|---|---|---|
| No ice production | No water supply; Water shortage indicator on; Power off; Clogged water filter. | Check water connection; Replenish water; Turn on power; Clean water filter. |
| Ice cubes too thin/small | Water temperature too high; Ambient temperature too high; Ice thickness setting too low. | Ensure cold water supply; Operate in cooler environment; Adjust ice thickness setting using '+' button. |
| Ice full indicator on, but bin not full | Ice sensor blocked or dirty. | Clean the ice sensor. |
| Water leakage | Loose water connections; Clogged drain pipe. | Check and tighten all water inlet/outlet connections; Clear any blockages in the drain pipe. Ensure drain pipe is below the machine's drain outlet. |
| Machine not turning on | No power; Power cord not properly plugged in. | Check power outlet; Ensure power cord is securely plugged into the unit and wall outlet. |
Specifications
| Feature | Detail |
|---|---|
| Brand | Icyglee |
| Model Name | Commercial Under Counter Ice Maker Machine |
| Manufacturer Reference | CIM002-80SI-USZX-AZ |
| Product Dimensions (D x W x H) | 51.8D x 38W x 86.1H Centimetres (20.4"D x 14.96"W x 33.9"H) |
| Weight | 12.87 kg (28.37 lbs) |
| Ice Production per Day | 80 Pounds |
| Ice Storage Capacity | 24 Pounds (10.89 kg) |
| Wattage | 203 Watts |
| Voltage | 115 Volts (AC) |
| Refrigerant | R290a |
| Material | Stainless Steel |
Warranty and Support
For warranty information or technical support, please refer to the purchase documentation or contact ICYGLEE customer service. Keep your purchase receipt and model number handy for faster service.
Contact information for support is typically available on the manufacturer's official website or through the retailer where the product was purchased.