Introduction
Thank you for choosing the BBRKIN CTC01 Fingerprint Biometric Safe. This safe is designed to provide secure storage for your valuables while offering convenient features such as biometric access, a digital display, and integrated wireless charging. Please read this manual thoroughly before operating the safe to ensure proper setup, usage, and maintenance.
Safety Information
- Always keep the override keys in a secure location away from the safe and out of reach of children. Do not store them inside the safe.
- Ensure the safe is placed on a stable, level surface.
- Do not attempt to disassemble or modify the safe. This may compromise its security and void the warranty.
- Keep the fingerprint sensor and keypad clean and dry for optimal performance.
- If storing firearms, always follow local laws and regulations regarding firearm storage.
Package Contents
Please check the package for the following items:
- BBRKIN CTC01 Biometric Safe x 1
- Override Key x 2
- Power Adapter x 1
- Security Cable x 1
- User Manual x 1
Product Overview
The BBRKIN CTC01 safe combines robust security with modern convenience features. Familiarize yourself with its components:

Figure 1: Front view of the BBRKIN CTC01 safe, showing the open drawer, digital display, and wireless charging pad on top. A phone, smartwatch, and earbuds are shown charging wirelessly.

Figure 2: Detail of the wireless charging area, highlighting the fast fingerprint access, wireless charging capability, keypad light, and wake-on-touch feature.

Figure 3: The LCD display on the safe's front panel, indicating current time, temperature, humidity, lock status, volume icon, adapter icon, and battery power icon.

Figure 4: Illustration of the safe's drawer storage capacity and dimensions (12.7"D x 9.4"W x 3.2"H exterior), suitable for handguns, jewelry, money, or other valuables.
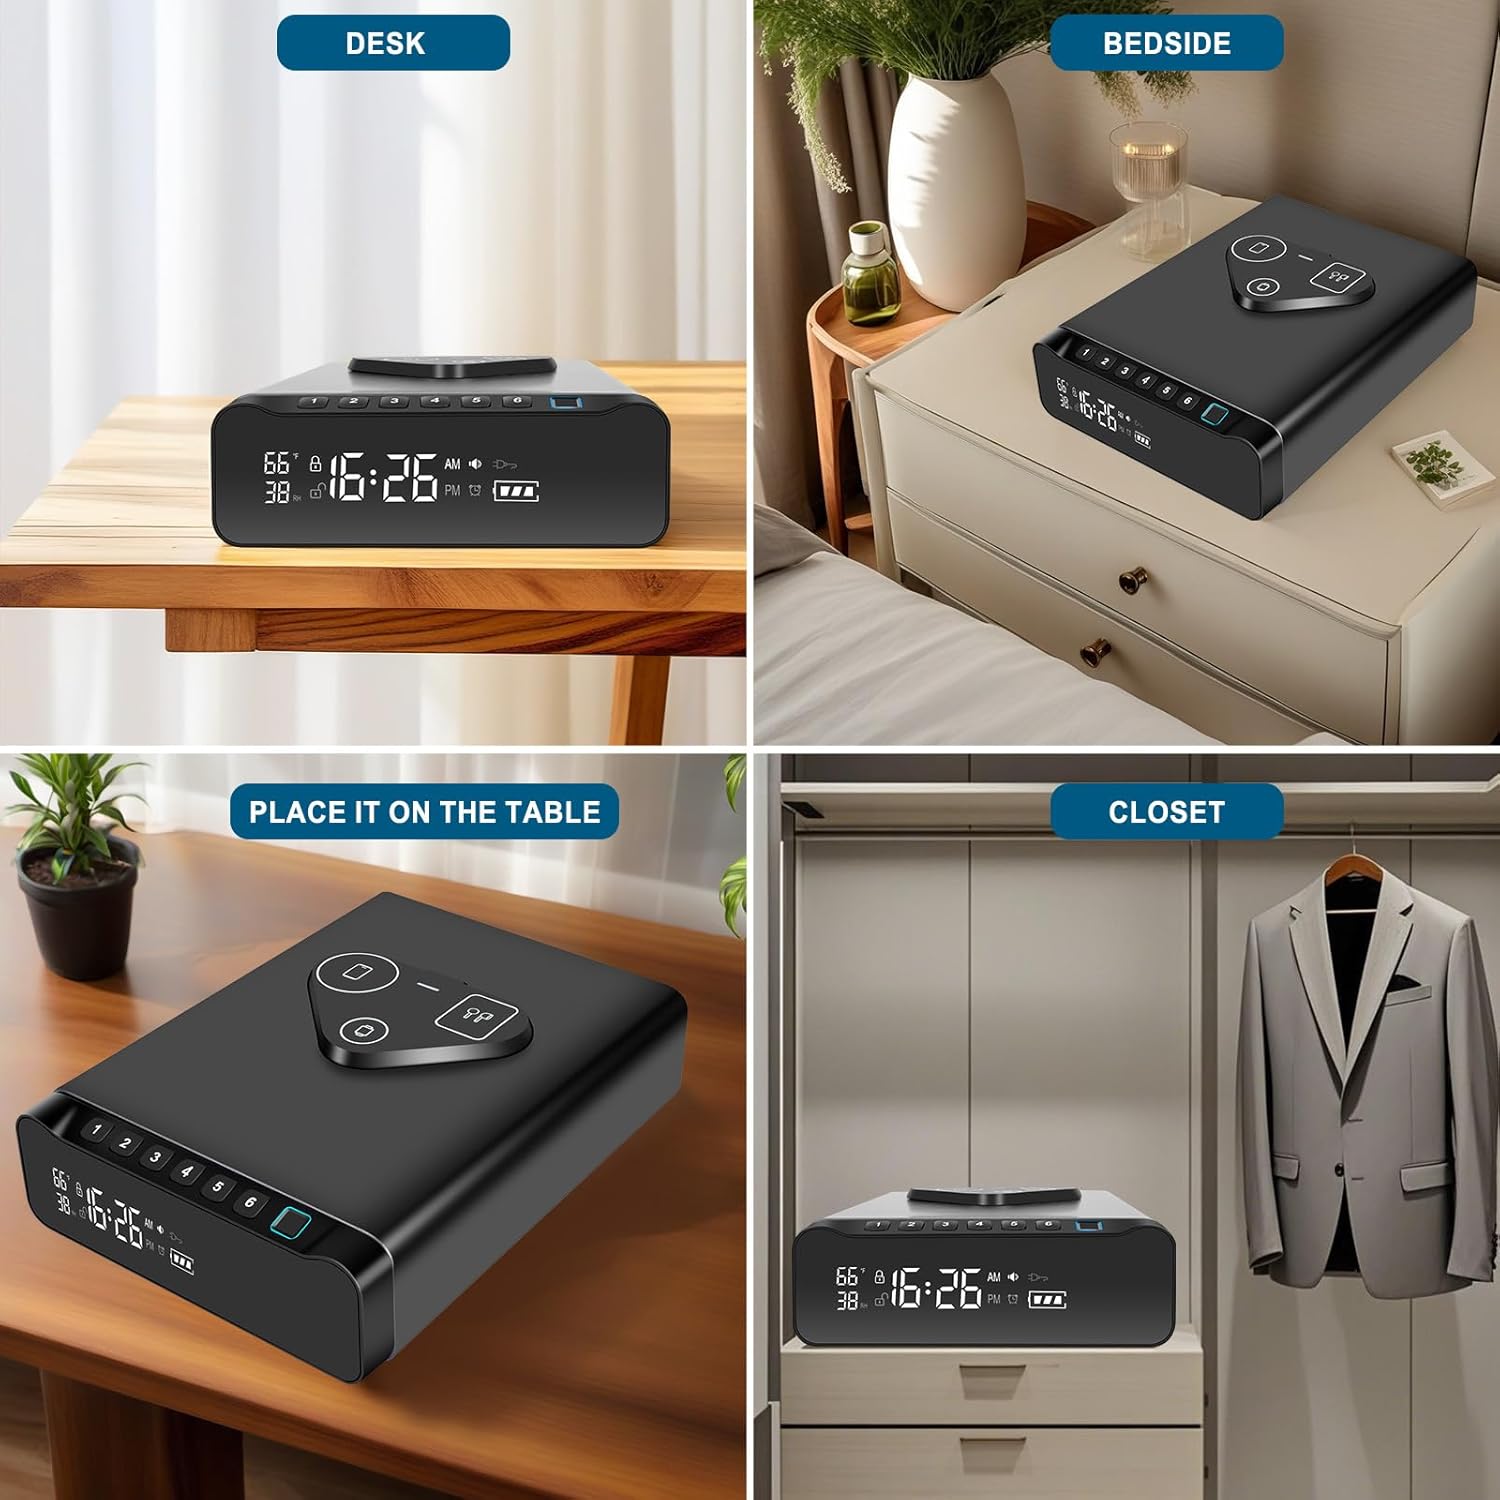
Figure 5: Rear view of the safe, indicating the connection points for the power adapter and the steel security cable.
Setup
1. Powering the Safe
The safe can be powered by the included AC adapter or by batteries (not included) as a backup. For continuous operation and wireless charging functionality, it is recommended to use the AC adapter.
- AC Power: Connect the provided power adapter to the DC IN port at the back of the safe and plug it into a wall outlet. The display will illuminate.
- Battery Power (Backup): Locate the battery compartment on the bottom of the safe. Insert 4 AA batteries (not included), ensuring correct polarity. The safe can operate on battery power, but wireless charging will not function.
2. Setting the Time and Date
Refer to the specific instructions in the included printed manual for detailed steps on setting the time and date on the LCD display.
3. Registering Fingerprints
The safe can store up to 100 unique fingerprints for quick access.
- Open the safe using the override key or default PIN (if applicable).
- Locate the 'SET' button inside the safe. Press and hold it until the display indicates 'Enroll Fingerprint'.
- Place your finger on the fingerprint sensor. Lift and place your finger multiple times from different angles as prompted by the safe's display or indicator lights. This ensures a comprehensive scan.
- Once registration is complete, the safe will confirm. Test the registered fingerprint immediately to ensure it works correctly.
- Repeat for additional fingerprints as desired.
4. Setting a PIN Code
You can set a personal identification number (PIN) for keypad access.
- Open the safe.
- Press the 'SET' button (or equivalent button for PIN setup) inside the safe. The display will prompt for PIN entry.
- Enter your desired 4-8 digit PIN code, then press the '#' or 'Confirm' button.
- Re-enter the same PIN code and press '#' or 'Confirm' again to verify.
- The safe will confirm successful PIN setup. Test the PIN immediately.
5. Using the Override Key
The override key provides mechanical access to the safe in case of battery failure or forgotten codes.
- Locate the keyhole, typically on the side or back of the safe.
- Insert one of the provided override keys into the keyhole.
- Turn the key to unlock the safe.
Operating Instructions
1. Opening the Safe
- Fingerprint Access: Place a registered finger on the fingerprint sensor. The safe will unlock and the drawer will open if the fingerprint is recognized.
- PIN Code Access: Touch the keypad to activate it. Enter your registered PIN code, then press the '#' or 'Confirm' button. The safe will unlock and the drawer will open.
- Key Access: Use the override key as described in the Setup section.
2. Using Wireless Charging
The safe features a 3-in-1 wireless charging pad for compatible devices (phone, smartwatch, earbuds).
- Ensure the safe is connected to AC power using the provided adapter. Wireless charging does not function on battery power.
- Place your compatible device(s) on the designated charging areas on top of the safe.
- For optimal charging, remove phone cases thicker than 2.5mm or those containing metal.
3. Understanding the LCD Display
The front LCD display provides real-time information:
- Time: Displays the current time.
- Temperature: Shows the ambient temperature.
- Humidity: Indicates the relative humidity.
- Battery Level: Shows the current battery status when operating on battery power.
- Lock Status: An icon indicates if the safe is locked or unlocked.
4. Alarm Clock Function
The integrated alarm clock can be set via the safe's controls. Refer to the detailed instructions in the included printed manual for setting and managing alarms.
5. Silent Mode
The safe can be set to silent mode to disable keypad beeps and other audible alerts. Consult the printed manual for instructions on activating and deactivating silent mode.
Maintenance
1. Battery Replacement
When the battery level indicator on the LCD display is low, replace the batteries promptly.
- Locate the battery compartment on the bottom of the safe.
- Unscrew the cover and remove the old batteries.
- Insert 4 new AA batteries, ensuring correct polarity.
- Replace the cover and screw it securely.
2. Cleaning
To maintain the appearance and functionality of your safe:
- Wipe the exterior with a soft, damp cloth. Avoid abrasive cleaners or solvents.
- Gently clean the fingerprint sensor and keypad with a dry, lint-free cloth.
Troubleshooting
- Safe does not open with fingerprint: Ensure your finger is clean and dry. Try re-registering your fingerprint. Ensure you are placing your finger correctly on the sensor.
- Safe does not open with PIN code: Ensure the keypad is active. Double-check the PIN entry. Try resetting the PIN code.
- Wireless charging not working: Ensure the safe is connected to AC power. Verify your device is wireless charging compatible. Remove thick or metallic phone cases.
- Display is blank: Check AC power connection. If on battery, replace batteries.
- Alarm sounds unexpectedly: Check alarm settings. Ensure no unauthorized access attempts have occurred.
Specifications
| Brand | BBRKIN |
| Model Number | CTC01 |
| Product Dimensions | 12.7"D x 9.4"W x 3.2"H |
| Item Weight | 12.73 pounds |
| Material | Alloy Steel |
| Lock Type | Biometric, Electronic Combination Lock, Key |
| Special Features | Alarm System, Anti-Theft, Biometric Fingerprint, Combination Lock, Wireless Charging, Humidity/Temperature Display, Alarm Clock |
| Mounting Type | Floor Mount (also suitable for tabletop) |
| Fingerprint Capacity | 100 fingerprints |
| Power Source | AC Adapter (included), 4x AA Batteries (not included) |
Warranty and Support
For warranty information or technical support, please refer to the contact details provided with your purchase documentation or visit the official BBRKIN website. Keep your purchase receipt as proof of purchase for any warranty claims.