1. Important Safety Instructions
Read and understand all safety warnings and instructions before operating this snow blower. Failure to follow these instructions may result in electric shock, fire, and/or serious injury.
- Always wear appropriate protective gear, including gloves and eye protection, when operating the snow blower.
- Keep hands and other body parts away from rotating parts.
- Ensure the power cord is in good condition and avoid cutting or damaging it during operation.
- Do not operate the snow blower on slopes that are too steep.
- Keep children and bystanders away from the operating area.
- Store the snow blower in a dry place when not in use to prevent damage from moisture.
For detailed safety information, refer to the complete safety manual included with your product.
2. Product Overview
The MAXLANDER 20-Inch 15A Corded Electric Snow Blower is designed for efficient snow removal from driveways, walkways, and patios. It features a powerful motor, adjustable chute, and dual LED headlights for enhanced visibility.

Figure 2.1: MAXLANDER 20-Inch 15A Corded Electric Snow Blower
Key Features:
- Efficient Snow Removal: 20-inch clearing width and 12-inch snow depth, with a 25-foot throwing distance.
- Powerful 15-Amp Motor: Delivers robust performance for clearing up to 840 pounds of snow per minute.
- 180° Rotating Chute: Allows precise control over snow discharge direction.
- Dual LED Headlights: Illuminates the path for safe operation in low-light conditions.
- Easy Maneuverability: Equipped with 5.5-inch large wheels for stable operation and flexible movement.
- Durable Auger: Engineered for long-term durability and efficient snow clearing.

Figure 2.2: Auger-Assist Drive System for efficient snow breaking
3. Assembly & Setup
Follow these general steps for assembling your snow blower. Refer to the detailed assembly instructions in your product manual for specific diagrams and fastener details.
- Unpack Components: Carefully remove all parts from the packaging. Verify all components are present against the packing list.
- Attach Handle Assembly: Secure the upper handle to the lower handle using the provided knobs and bolts. Ensure the handle is firmly in place.
- Install Chute: Attach the snow discharge chute to the main unit. Connect the chute rotation control rod as per instructions, ensuring smooth 180-degree rotation.
- Connect Power Cord: Ensure the snow blower is unplugged. Connect the power cord to the snow blower's receptacle. Use an outdoor-rated extension cord suitable for the amperage and length required.
- Perform Pre-Operation Check: Inspect all connections, ensure no loose parts, and check for any damage.

Figure 3.1: Double Safety Design (Press Safety Button, then Hold ON/OFF Trigger)
4. Operating Instructions
Before starting, ensure you have read the safety instructions and the snow blower is properly assembled.
Starting the Snow Blower:
- Connect the extension cord to a suitable outdoor power outlet.
- Press the safety button.
- While holding the safety button, squeeze the ON/OFF trigger to start the motor.
- Release the safety button once the motor is running.
Clearing Snow:
- Push the snow blower forward at a steady pace, allowing the auger to clear the snow.
- Avoid forcing the machine through heavy snow; take smaller passes if necessary.
- Adjust the discharge chute direction as needed to throw snow away from cleared areas.
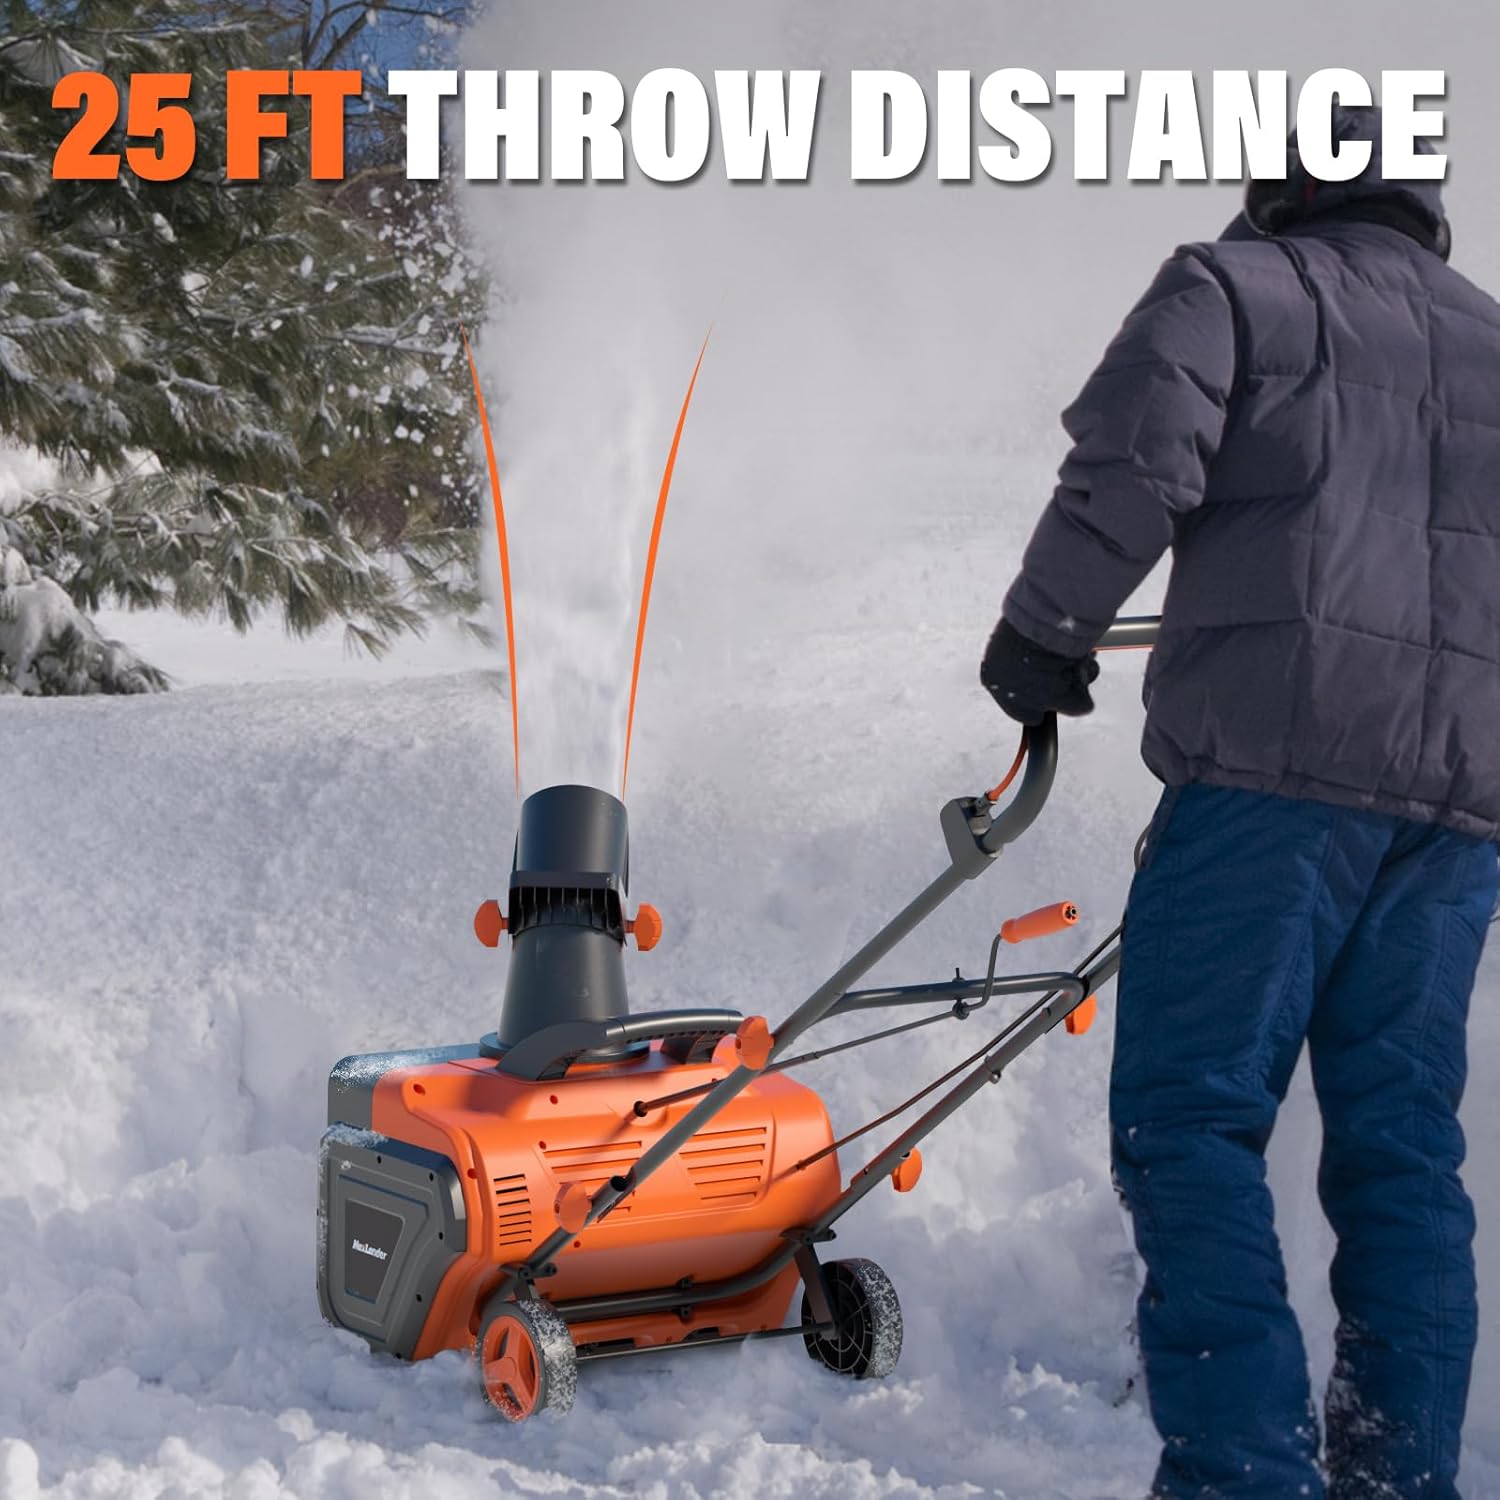
Figure 4.1: Snow being thrown up to 25 feet
Adjusting the Chute:
The 180-degree adjustable chute allows you to direct the snow. Use the control bar to rotate the chute to your desired position.

Figure 4.2: Adjusting the 180° rotating chute
Using LED Headlights:
The dual LED headlights automatically activate when the snow blower is running, providing illumination for early morning or evening snow removal.
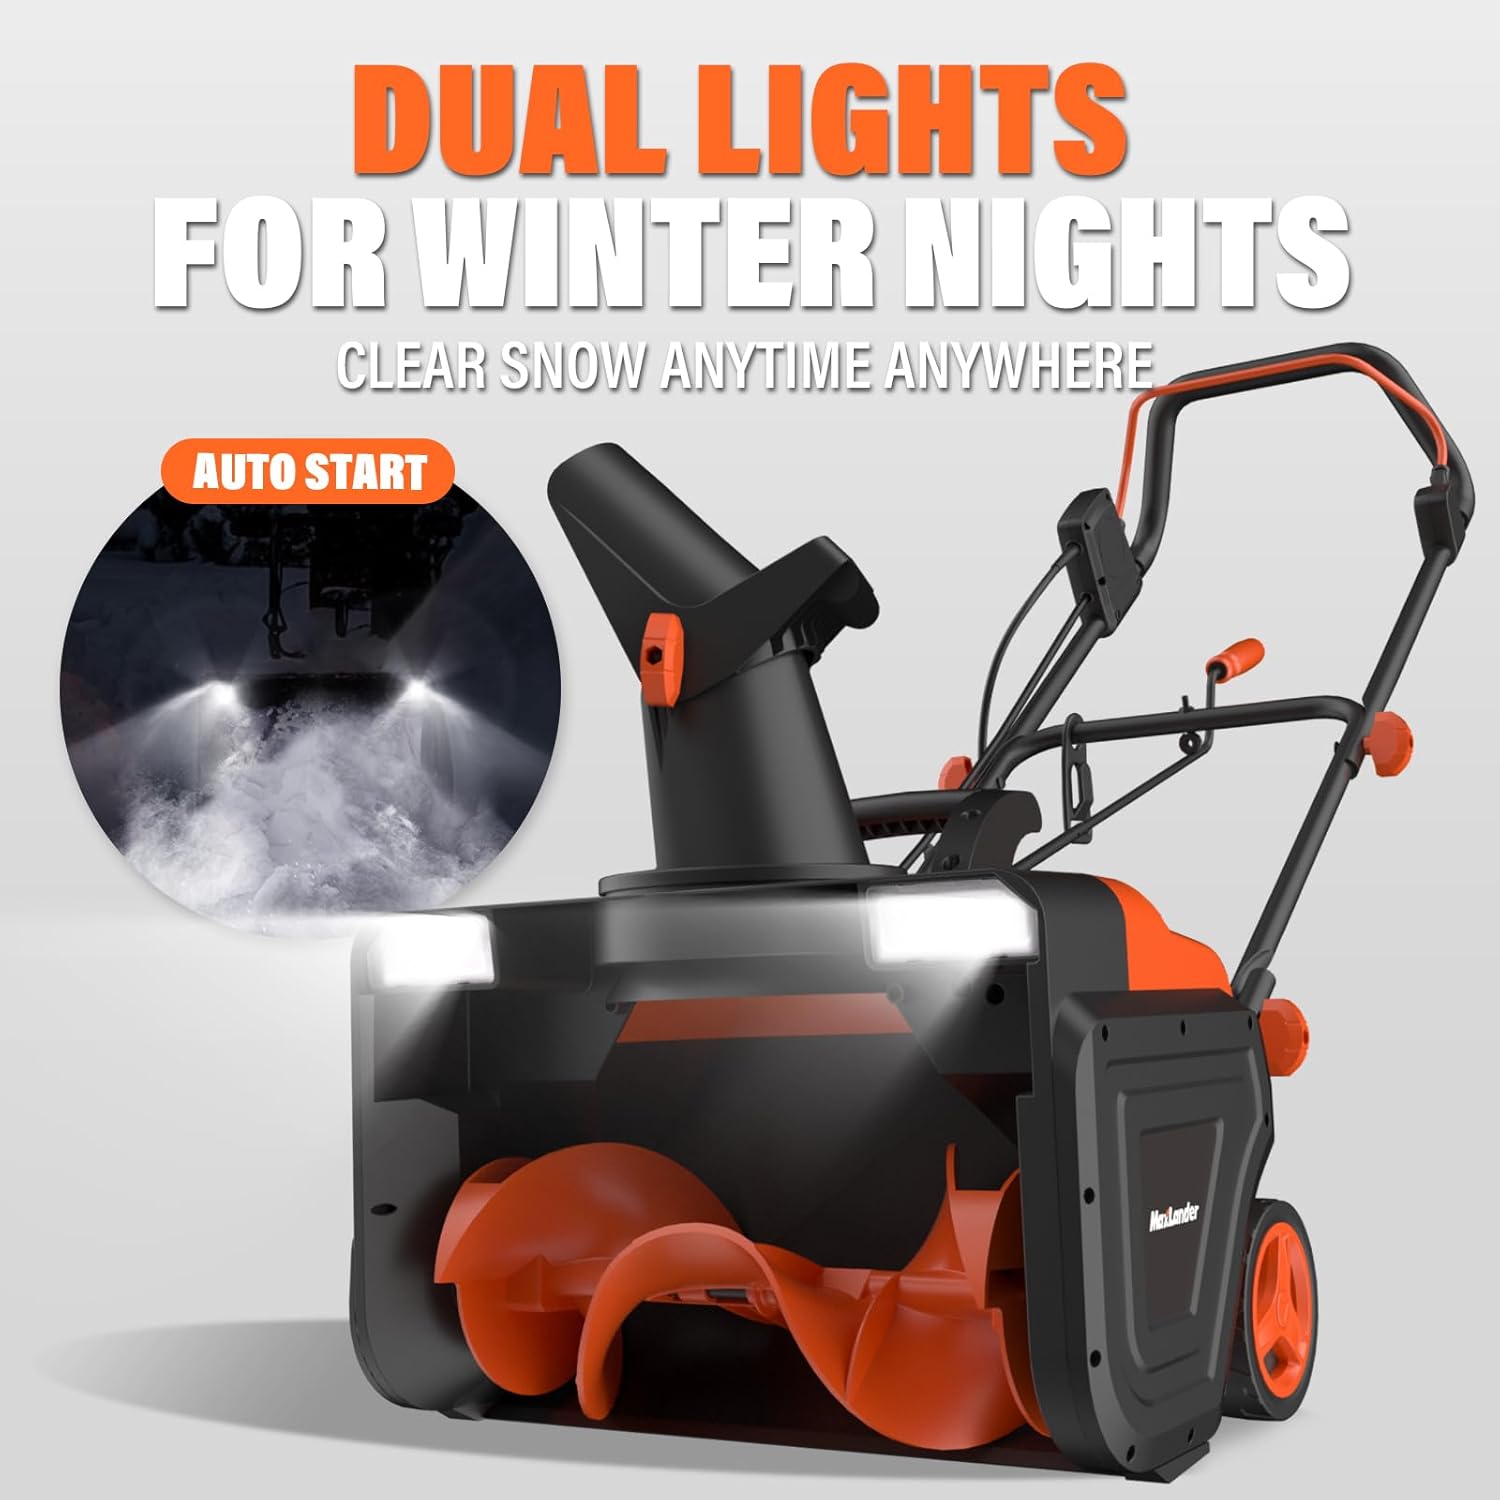
Figure 4.3: Dual LED headlights for improved visibility
5. Maintenance
Regular maintenance ensures optimal performance and extends the life of your snow blower. Always disconnect the power before performing any maintenance.
After Each Use:
- Clean the Unit: Remove any snow, ice, or debris from the auger, chute, and motor housing. Use a non-abrasive cloth.
- Inspect for Damage: Check for any loose fasteners, worn parts, or damage to the power cord.
Seasonal Storage:
- Clean Thoroughly: Ensure the unit is completely clean and dry before storing.
- Fold for Storage: The handle can be folded for compact storage.
- Store in a Dry Place: Keep the snow blower in a dry, protected area away from direct sunlight and moisture.

Figure 5.1: Snow blower folded for convenient storage
6. Troubleshooting
If you encounter issues with your MAXLANDER snow blower, refer to the table below for common problems and solutions.
| Problem | Possible Cause | Solution |
|---|---|---|
| Snow blower does not start | Power cord not connected; Safety button/trigger not engaged; Circuit breaker tripped. | Ensure cord is securely plugged in; Fully engage safety button and trigger; Reset circuit breaker. |
| Snow discharge is weak or clogged | Wet/heavy snow; Chute clogged; Auger obstructed. | Take smaller passes; Disconnect power, then clear chute/auger with a cleaning tool (never hands). |
| Excessive vibration | Loose fasteners; Damaged auger. | Check and tighten all fasteners; Inspect auger for damage and replace if necessary. |
If the problem persists after attempting these solutions, contact MAXLANDER customer support.
7. Specifications
Detailed technical specifications for the MAXLANDER Corded Electric Snow Blower, Model SPEG09.
| Specification | Value |
|---|---|
| Brand | MAXLANDER |
| Model Number | SPEG09 |
| Power Source | AC (Corded Electric) |
| Engine Type | Electric, 15-Amp |
| Clearing Width | 20 Inches |
| Ideal Snow Depth | 6 Inches (up to 12 Inches maximum) |
| Throwing Distance | Up to 25 Feet |
| Product Dimensions | 48.03"D x 36.61"W x 19.68"H |
| Item Weight | 28.4 pounds |
| Color | Orange & Black |
8. Warranty & Support
MAXLANDER products are designed for durability and performance. For specific warranty details, please refer to the warranty card included with your purchase or visit the official MAXLANDER website.
Customer Support:
For technical assistance, troubleshooting, or parts inquiries, please contact MAXLANDER customer service through their official channels.
Visit the MAXLANDER Store on Amazon for more information and product offerings.