Creality Falcon A1 Pro 20W
Creality Falcon A1 Pro 20W Laser Engraver User Manual
Model: Falcon A1 Pro 20W
1. Introduction
Welcome to the user manual for your new Creality Falcon A1 Pro 20W Laser Engraver. This guide provides essential information for setting up, operating, maintaining, and troubleshooting your device to ensure optimal performance and safety. Please read this manual thoroughly before using the engraver.
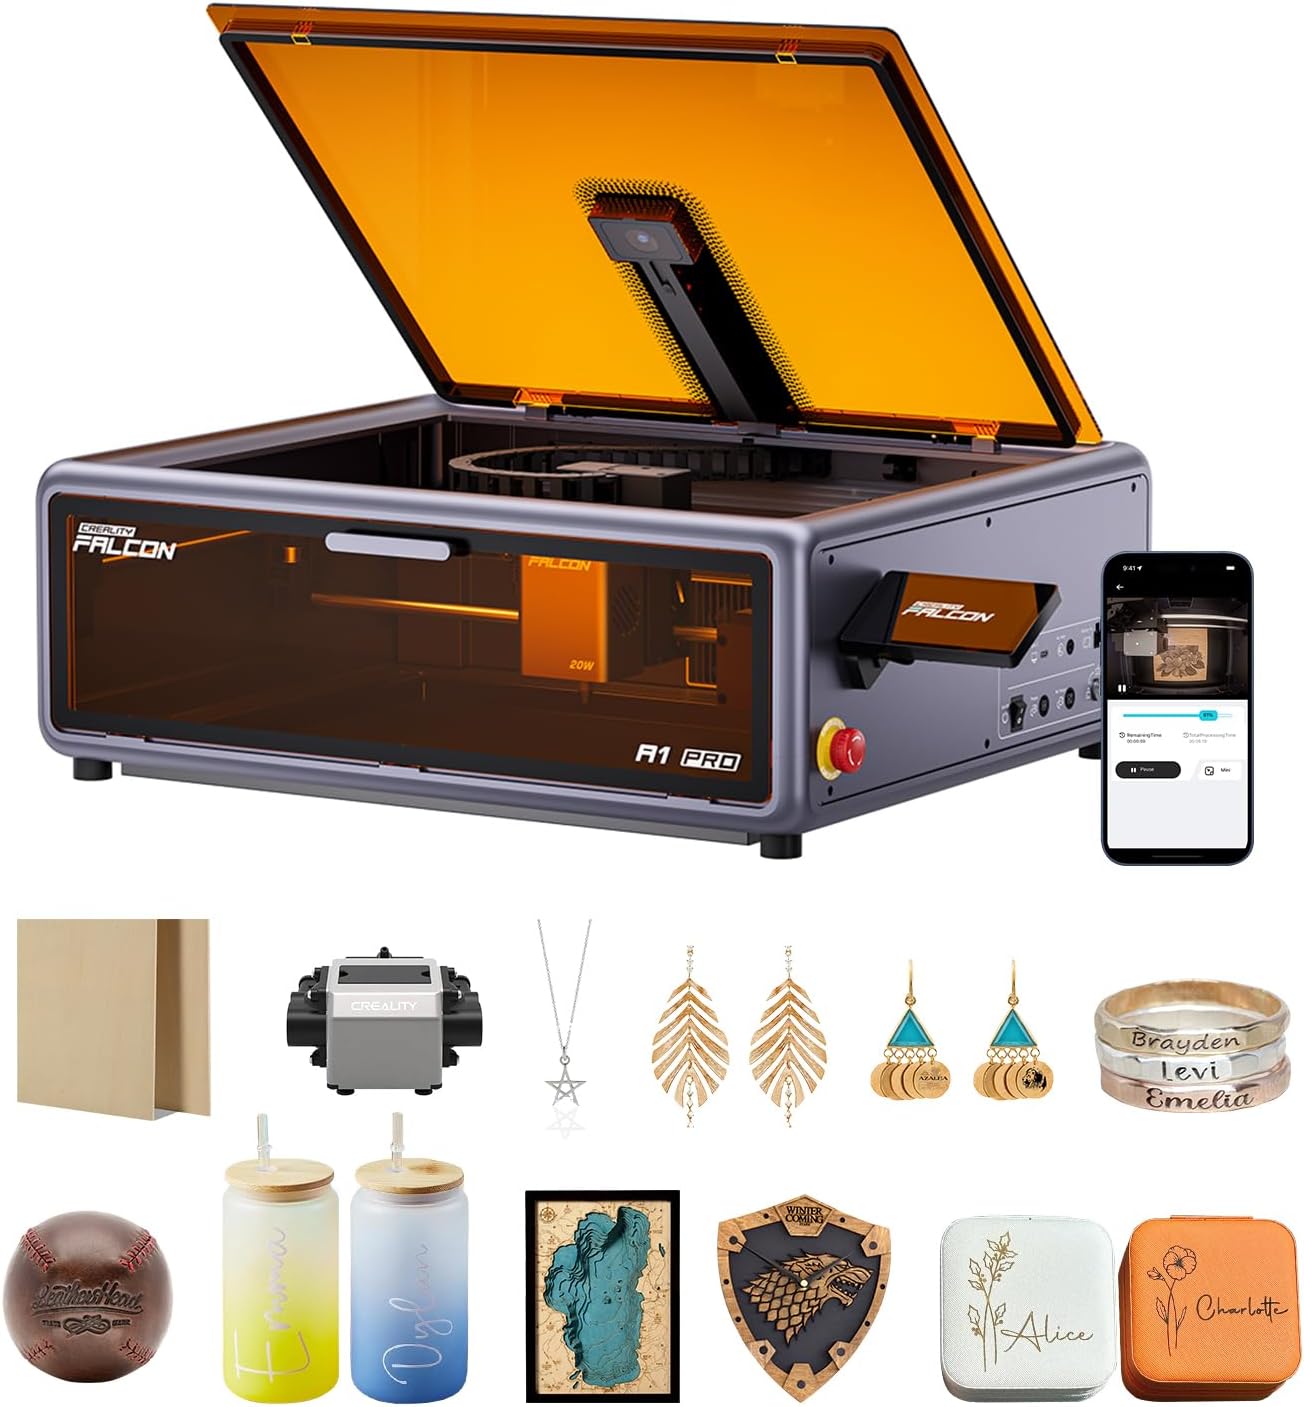
Image: The Creality Falcon A1 Pro 20W Laser Engraver, showcasing its compact design and various accessories for engraving and cutting.
2. Safety Information
Your safety is paramount. The Creality Falcon A1 Pro 20W is designed with multiple safety features. Always adhere to the following guidelines:
- Class 1 Safety: The enclosed design and dual protective covers filter 99% of light, protecting your eyes without the need for additional goggles during operation.
- Enclosed Design: The full enclosure blocks smoke and noise, making it suitable for home use.
- Emergency Stop: A prominent emergency stop button is integrated for immediate shutdown in case of any unexpected issues.
- Lid-Open Halt: The machine automatically halts operation if the lid is opened during processing, preventing laser exposure.
- Flame Detection: An AI-powered flame detection system provides instant protection by detecting flames, stopping operation, and sending immediate alerts via the app.
- Smoke Extraction: An internal fan and two cooling fans on the laser head facilitate efficient smoke removal.

Image: An overview of the safety features, highlighting the enclosed design, eye protection, extraction fan, smart laser leakproof, and emergency stop button.
3. Setup Guide
The Creality Falcon A1 Pro 20W laser engraver arrives 80% pre-assembled, ensuring a quick and easy setup process.
3.1 Unboxing and Initial Placement
Carefully remove the engraver from its packaging. Place the unit on a stable, level surface in a well-ventilated area. Ensure there is adequate space around the machine for operation and maintenance.

Image: The engraver shown in its packaging and with dimensions, emphasizing its space-saving design and ease of unboxing.
3.2 Connecting Power
Connect the power adapter to the engraver and then to a suitable power outlet. Ensure all connections are secure.
3.3 First Power On
Press the power button to turn on the engraver. The touchscreen display will illuminate, guiding you through any initial setup steps.
4. Operating Instructions
4.1 Smart Touch Screen & APP Control
The Falcon A1 Pro features a smartphone-style touchscreen for direct, cable-free operation. For enhanced control and real-time monitoring, download the Creality app on your mobile device. This allows you to monitor progress from anywhere.
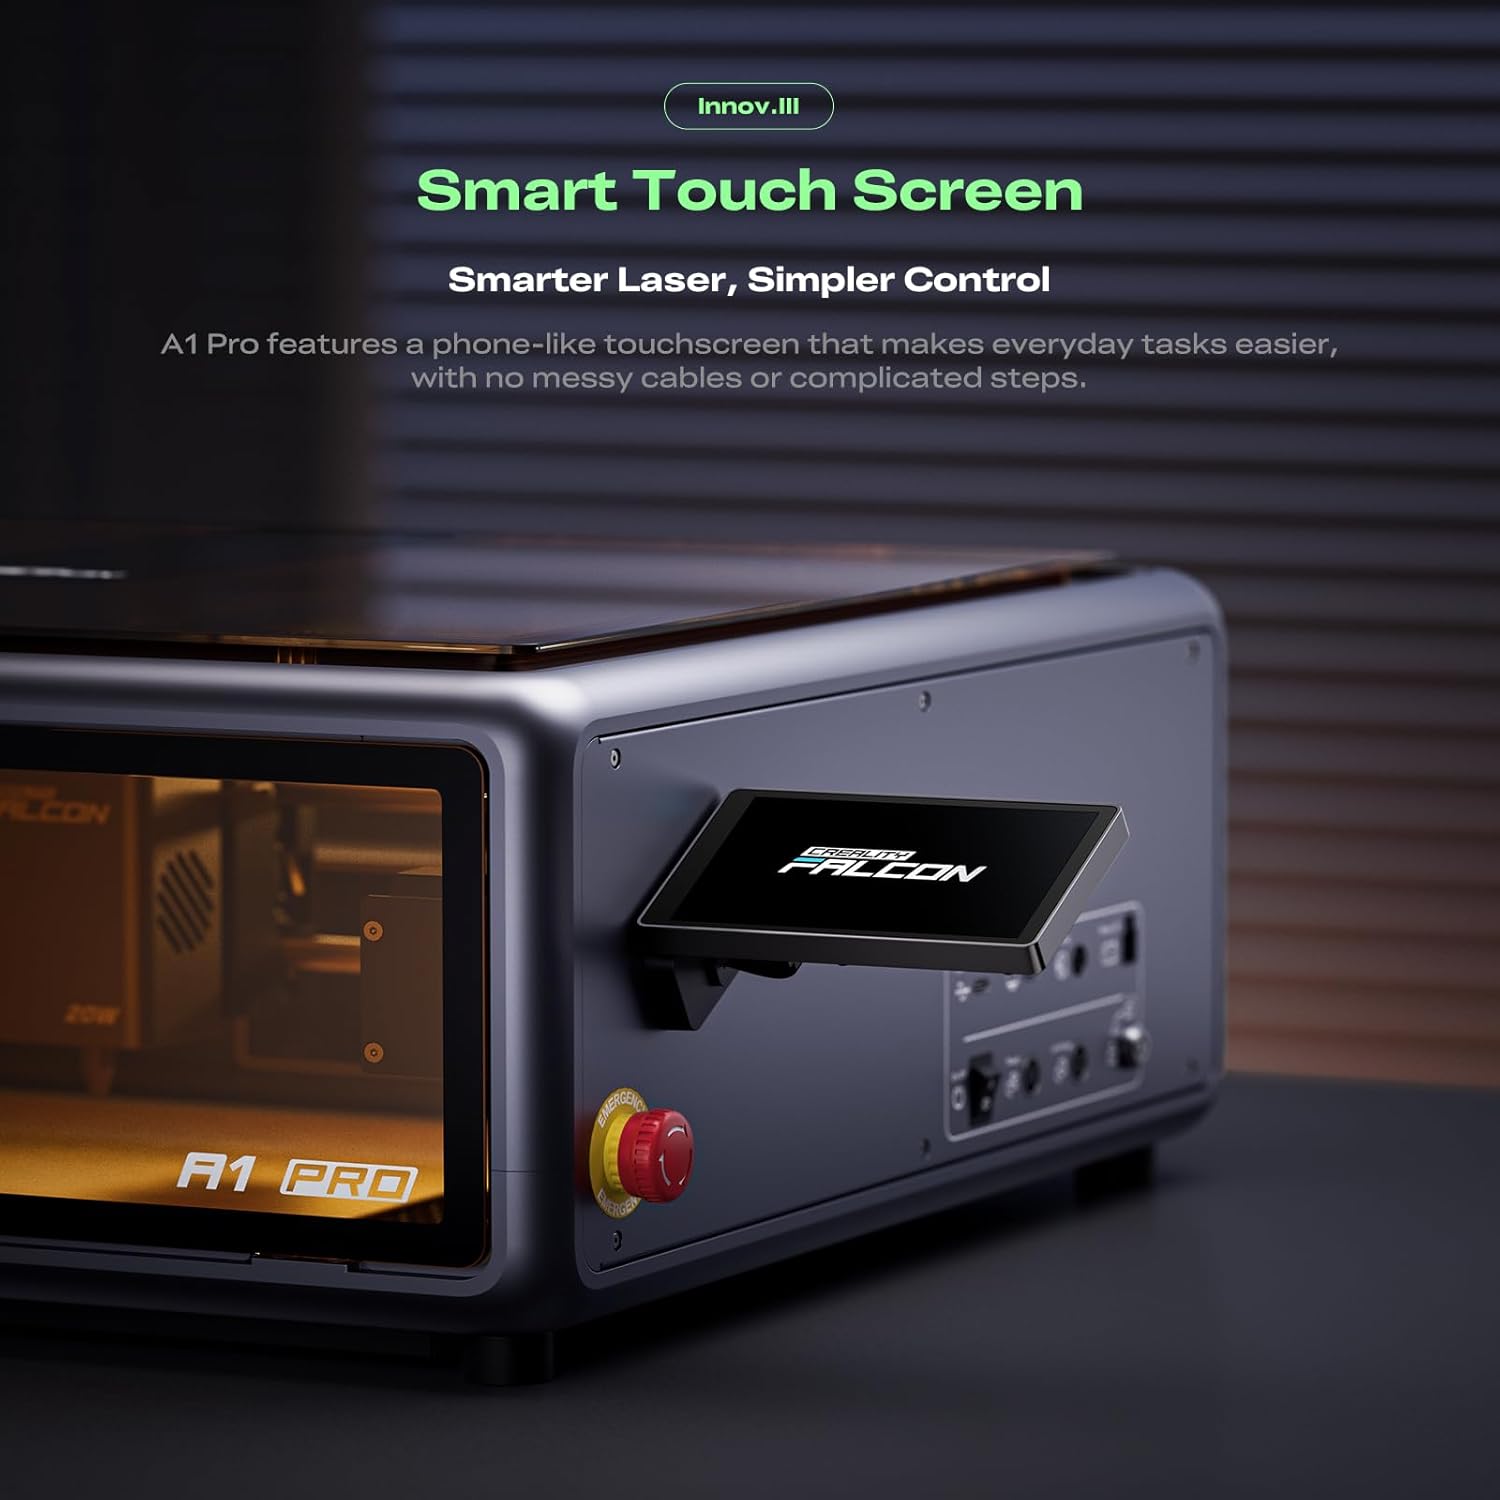
Image: The smart touch screen of the A1 Pro, designed for intuitive and cable-free control.

Image: The engraver in use, demonstrating real-time monitoring capabilities via the mobile application.
4.2 HD Camera & Autofocus
The integrated high-definition camera provides a full preview of the workspace, enabling precise object positioning. The AI vision system, red-dot ranging laser, and Z-axis auto-lift deliver automatic focusing within 3 seconds, ensuring accurate results.
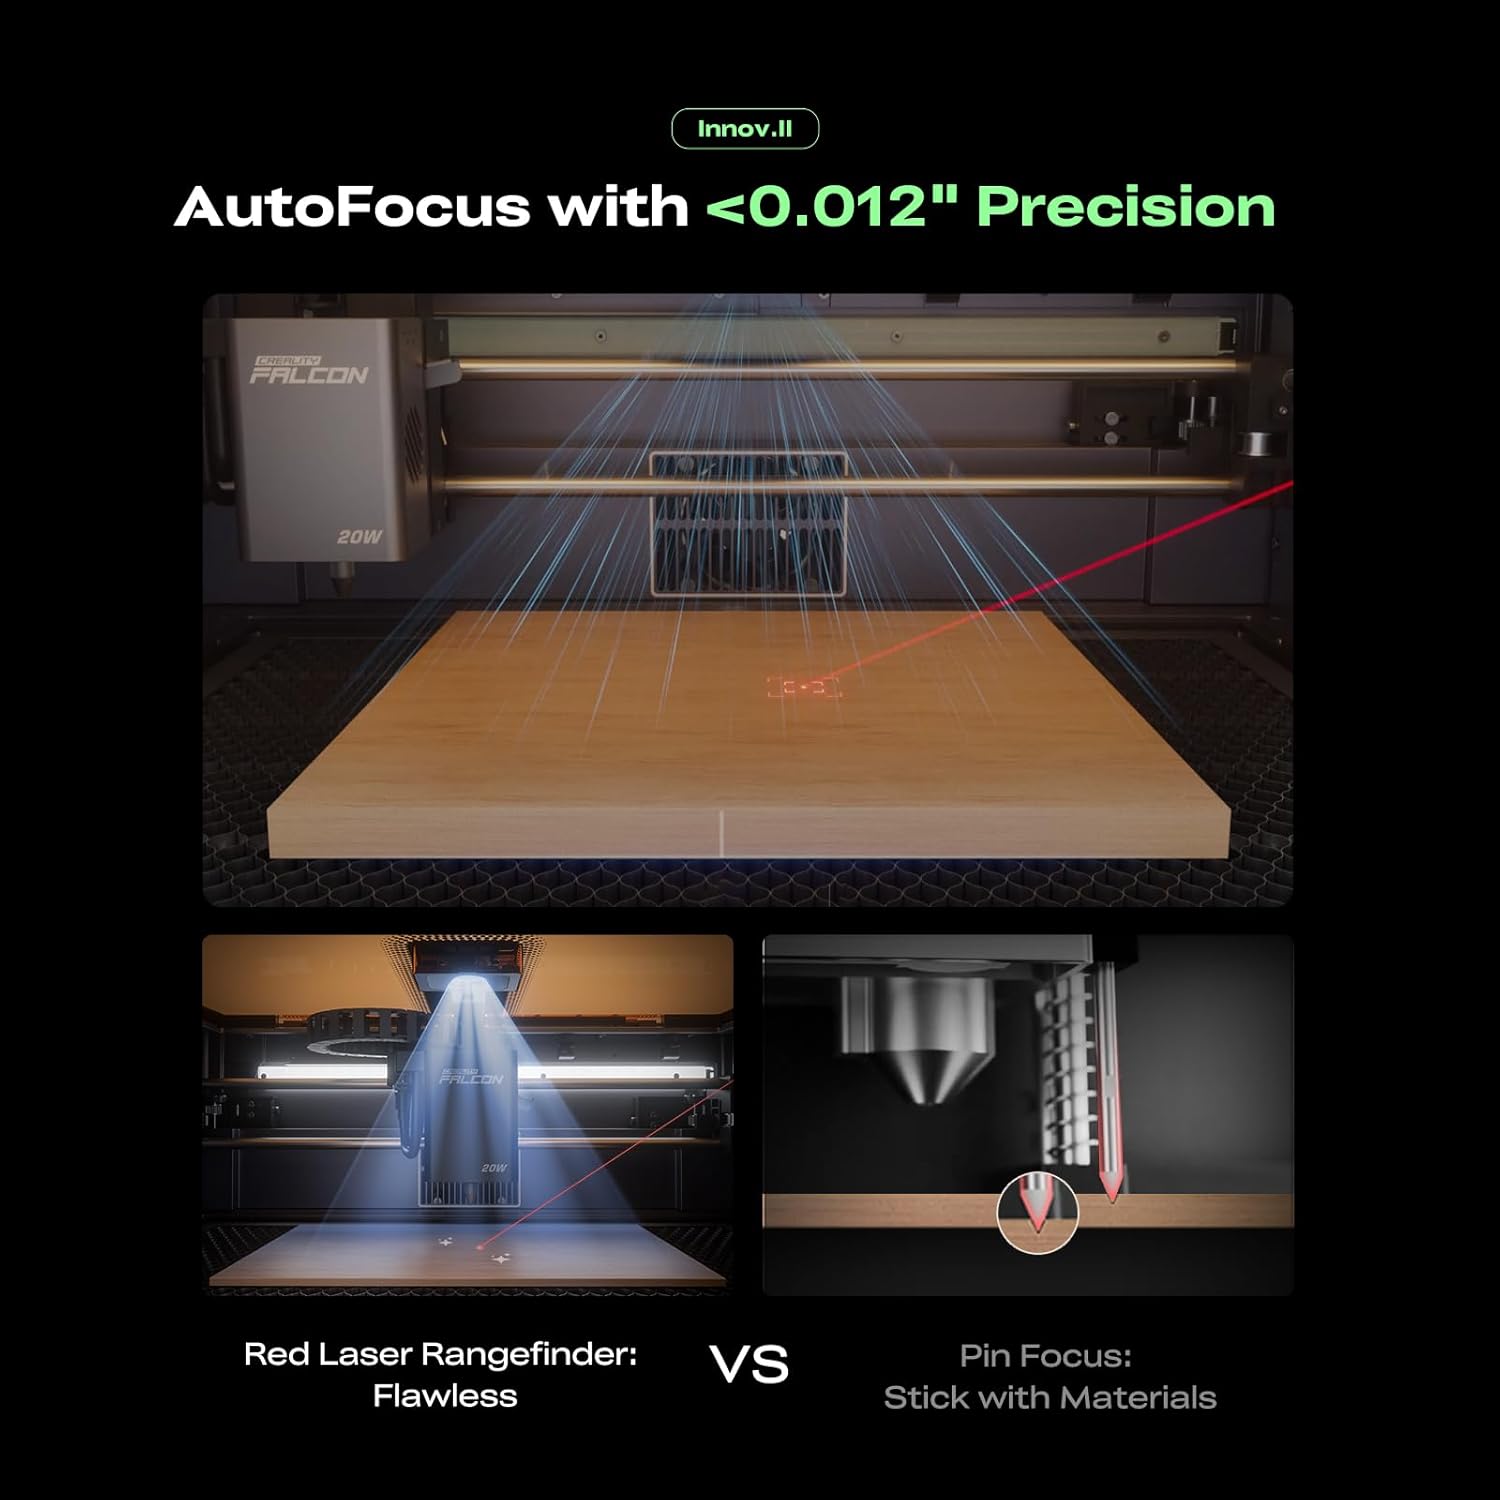
Image: Visual representation of the autofocus system, highlighting its precision with a red laser rangefinder.

Image: The HD camera's features, including pre-calibration, precise positioning, and full-frame viewing for accurate project setup.
4.3 Laser Module Switching (20W Blue & 2W Red Light)
The Falcon A1 Pro comes with a powerful 20W blue laser for cutting materials like 10mm basswood and 8mm black acrylic. An optional 2W infrared (IR) module (1064nm technology with a 0.03mm ultra-fine laser spot) can be purchased for high-precision engraving on items like photographs, jewelry, and business cards. Laser modules can be swapped tool-free in 3 steps.

Image: Demonstration of the 20W blue laser for cutting and the 2W IR laser for ultra-HD engraving.

Image: The two distinct laser modules, 20W and 2W IR, capable of working with over 350 materials.
4.4 Falcon Design Space Software
Manage your projects effortlessly with Falcon Design Space. This software provides intuitive guidance for model selection, printing, and monitoring, making the A1 Pro accessible to users of all experience levels.
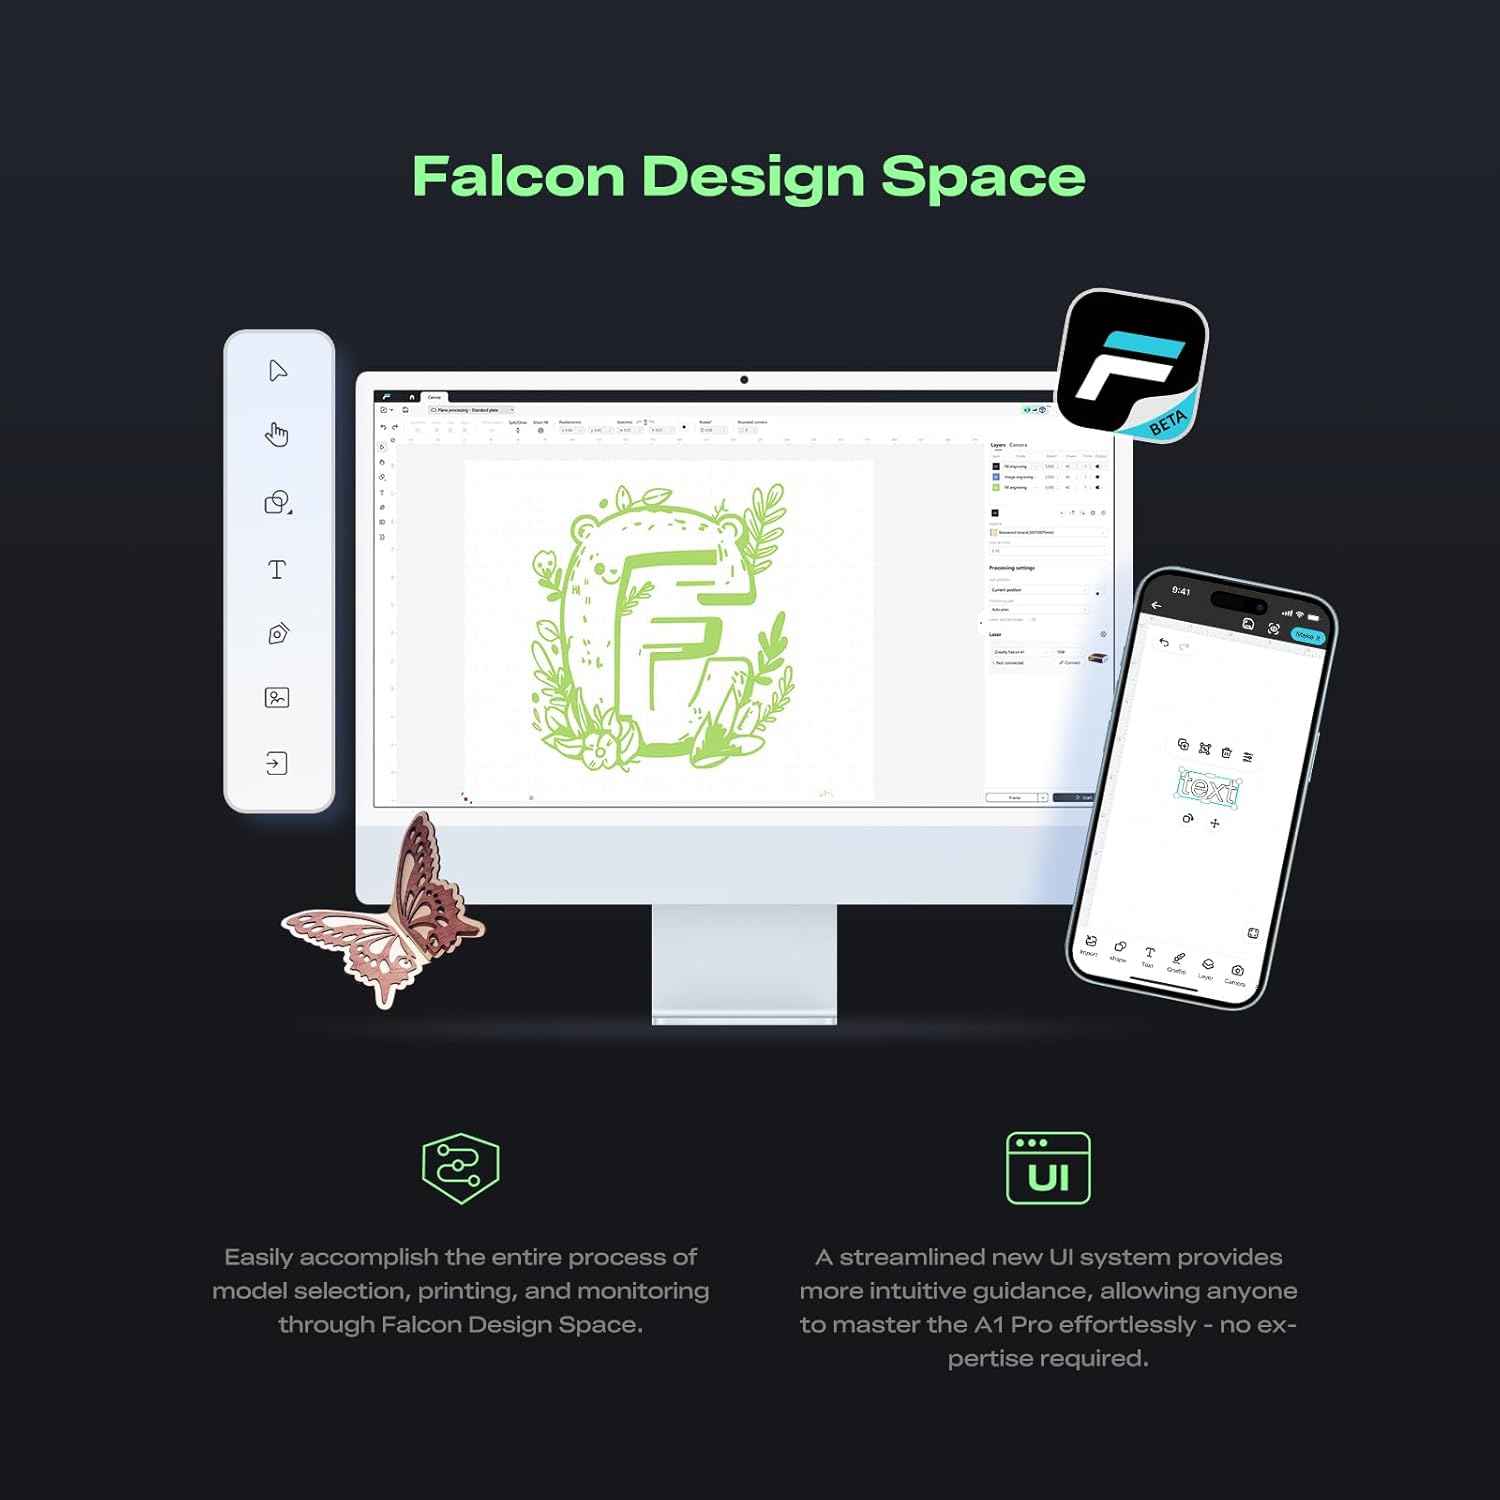
Image: The Falcon Design Space user interface, showing its streamlined design for easy model selection, printing, and monitoring.
5. Maintenance
Regular maintenance ensures the longevity and optimal performance of your Creality Falcon A1 Pro.
5.1 Cleaning the Engraver
Periodically clean the interior of the engraver, especially the laser lens and the work area, to remove dust and debris. Use a soft, lint-free cloth and appropriate cleaning solutions as recommended by Creality.
5.2 Smoke Purifier (Optional)
For a safer and healthier working environment, consider using the Falcon AP1 Smoke Purifier. It can remove 99% of PM2.5 and VOCs, ensuring clean air during laser processing.

Image: The Falcon A1 Pro paired with the Falcon AP1 Smoke Purifier for enhanced air quality during operation.
6. Troubleshooting
This section provides solutions to common issues you might encounter.
- Engraver Not Powering On:
Check if the power cable is securely connected to both the engraver and the power outlet. Ensure the power outlet is functional. - Laser Not Firing/Weak Output:
Verify that the laser module is correctly installed and clean. Check the material settings in the software to ensure they match your material. Ensure the autofocus has completed successfully. - Engraving/Cutting Inaccurate:
Confirm that the material is properly placed and secured. Re-run the autofocus process. Check for any obstructions in the laser path. Ensure the design in Falcon Design Space is correctly positioned. - App Connectivity Issues:
Ensure your engraver and mobile device are connected to the same Wi-Fi network. Restart both the engraver and the app. - Excessive Smoke/Odor:
Ensure the internal fan is operating. If using the optional smoke purifier, verify it is functioning correctly. Ensure proper ventilation in your workspace.
For issues not covered here, please refer to the official Creality support resources or contact customer service.
7. Specifications
| Feature | Detail |
|---|---|
| Product Dimensions | 30 x 25 x 15 inches |
| Item Model Number | Falcon A1 Pro 20W |
| Item Weight | 47 pounds |
| Manufacturer | Creality |
| Laser Output Power | 20W (Blue Laser), Optional 2W (IR Laser) |
| Engraving Speed | Up to 600 mm/s |
| Autofocus Accuracy | Within 0.012 inches (0.3mm) |
| Compatible Honeycomb Panel Size | 460 × 346mm (18.11” x 13.62”) |
8. Warranty and Support
For warranty information, please refer to the documentation included with your product or visit the official Creality website. Creality offers comprehensive customer support for any inquiries or assistance you may need.
Creality Official Store: Visit Creality Store on Amazon
For technical support, troubleshooting guides, and software updates, please visit the Creality support page or contact their customer service directly.