1. Introduction
The Generic Electric Shock Alarm Clock, Model KX-IIC, is designed to provide an effective and silent wake-up solution, particularly for heavy sleepers, individuals with hearing impairments, students, and office workers. This device utilizes a low-frequency electric pulse to deliver a strong, yet adjustable, reminder to promote alertness and combat fatigue. All settings are managed directly through the watch buttons, allowing for independent use without a smartphone.

Image: Electric Shock Reminder Watch highlighting its silent and powerful reminder capabilities.
2. Safety Information
- This device uses electric shock as a reminder method. Ensure you understand and are comfortable with this feature before use.
- Do not use if you have a pacemaker, defibrillator, or any other implanted electronic device.
- Consult a physician before use if you have any medical conditions, especially heart conditions, epilepsy, or are pregnant.
- Keep out of reach of children.
- Avoid contact with water or excessive moisture to prevent electric shock or damage to the device.
- If you experience any discomfort or adverse reactions, discontinue use immediately.
3. Product Overview
Components

Image: Front and back view of the Electric Shock Alarm Clock.
- Main Unit: Houses the display, control buttons, and internal electronics.
- Strap: Adjustable strap for comfortable wear on the wrist.
- Electrode Pads: Located on the underside of the main unit, made of 304 stainless steel for safe and effective low-frequency current delivery.
- Control Buttons: Used for navigation, setting adjustments, and mode activation.

Image: Detailed view of the large-area electrode pad.

Image: Explanation of low-frequency current and electrode pad function.
4. Setup
4.1. Charging the Device
Before initial use, fully charge the device. The watch features a 180mAh Lithium-ion Polymer Battery. A full charge takes approximately one hour, providing over 30 days of standby time or 7-10 days of continuous alarm usage.

Image: Battery specifications and charging information.
4.2. Time and Date Settings
To ensure accurate alarm functions, set the correct time and date on your device. Refer to the operation video for a visual guide on navigating the settings menu.
Video: Operation Manual for Electric Shock Reminder Watch. This video demonstrates how to set the time, date, and various alarm functions directly on the device.
General Navigation:
- Press the side button to wake the screen.
- Swipe left/right to switch between interfaces.
- Swipe down to return to the main screen.
- To access settings, swipe to the 'Settings' icon and tap.
- Navigate to 'Date and Time' to adjust.
- Tap on the numbers for year, month, day, hour, and minute to adjust. Use the up/down buttons or swipe to change values. Confirm your selection.
- Swipe left from the far right to return to the previous menu.
5. Operating Modes
5.1. Shock Mode (Manual Test)
This mode allows you to test the electric shock intensity. It is recommended to wear the watch on your arm for testing.
- From the main menu, select 'Shock'.
- Choose an intensity level (1-15).
- Click 'Zap' to perform an electric shock.
- Test several times to find your preferred intensity level.
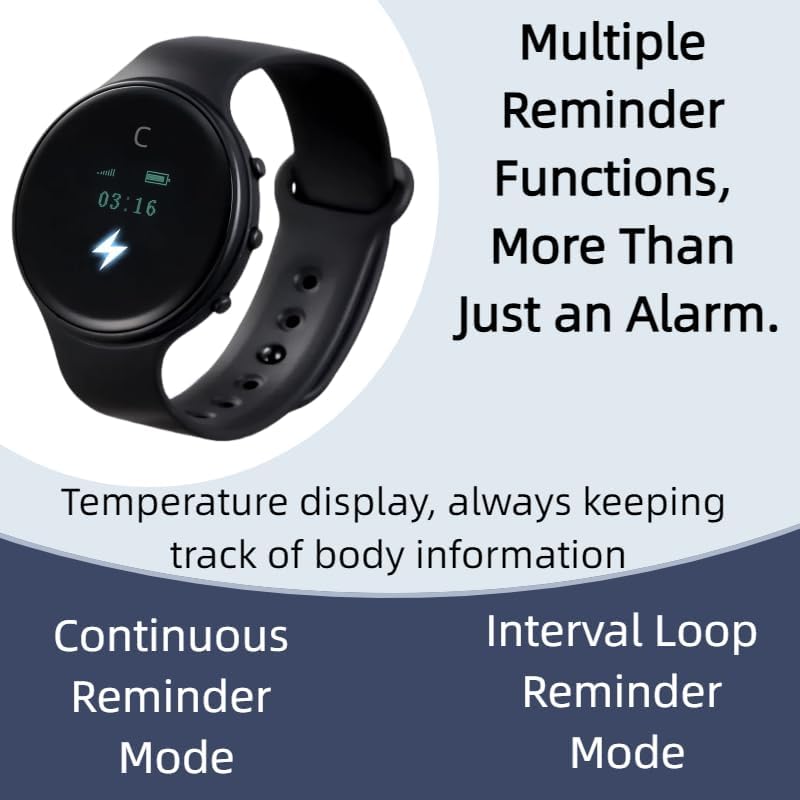
Image: 15 Adjustable Intensity Levels for the electric shock.
5.2. Shake Mode (Habit Breaking)
This mode is designed to help break unwanted habits by providing a physical reminder.
- From the main menu, select 'Shake'.
- Choose an appropriate intensity level.
- Turn on the switch. The watch will perform an electric shock when shaken.
- This function can be turned off when not needed.
5.3. Alarm Mode
The device supports multiple alarm settings (up to 5 groups) with customizable intensity and repetition.

Image: Three distinct alarm clock modes for various scenarios.

Image: Introduction to Alarm Clock Functionality.
- From the main menu, select 'Alarm'.
- Choose an alarm group (e.g., Alarm 1).
- Set the desired alarm time (hour and minute).
- Set the intensity and number of 'Zaps' (shocks).
- Select 'Repeat' to choose specific days of the week for the alarm to activate.
- After settings are complete, ensure the alarm switch is turned 'ON'.
- To stop an active alarm, press and hold the side button.
5.4. Anti-Fatigue Mode (Active Reminder)
This mode provides continuous or interval-based reminders to maintain alertness.

Image: Introduction to Active Reminder Mode.
- From the main menu, select 'Anti-Fatigue'.
- Continuous Reminder: Set to 'Strong Strike/Weak Strike'. Press and hold the Up Key for 2 seconds to turn on/off. Activates for 30 minutes.
- Loop Interval Reminder: Preset alert interval, cycle count, and duration. Press and hold the Down Key for 2 seconds to enable/disable. Alerts based on preset settings.
6. Wearing the Device
Wear the Electric Shock Alarm Clock snugly on your wrist, ensuring the electrode pads make good contact with your skin. This is essential for the electric pulse function to work effectively.

Image: Device worn on the wrist.
7. Maintenance
- Cleaning: Wipe the device and strap with a soft, dry cloth. Do not use harsh chemicals or abrasive cleaners.
- Storage: Store the device in a cool, dry place away from direct sunlight and extreme temperatures.
- Battery Care: To prolong battery life, avoid fully discharging the device frequently. Charge it regularly, even if not in active use.
8. Troubleshooting
| Issue | Possible Solution |
|---|---|
| Device not turning on. | Ensure the device is fully charged. If still unresponsive, try restarting the device. |
| No electric shock felt. | Check if the device is worn correctly with electrode pads making good skin contact. Increase the intensity level. Ensure the mode is activated. |
| Alarm not activating. | Verify that the alarm time is set correctly and the alarm is switched 'ON'. Check the repeat settings for the correct days. |
| Time/Date incorrect. | Follow the time and date setting instructions to adjust. |
9. Specifications
| Feature | Detail |
|---|---|
| Model Name | KX-IIC |
| Control Method | Push Button |
| Noise Control Features | Silent Alarm |
| Special Feature | Do not disturb others, Powerful alarm clock, Silent Clock |
| Batteries | 1 Nonstandard Battery (included) |
| Item Weight | 9.1 ounces |
| Package Dimensions | 6.73 x 4.69 x 3.82 inches |
| Color | Black |
10. Package Contents

Image: Contents of the product package.
- 1x Electric Shock Reminder Watch
- 1x Packing Box
- 2x Charging Cables
- 1x Strap Buckle
11. Warranty and Support
For warranty information and customer support, please refer to the documentation included with your purchase or contact the manufacturer directly. Keep your proof of purchase for any warranty claims.


