
Introduction
This manual provides detailed instructions for the operation and maintenance of your Brathird K3 Mini Body Camera. Please read this manual thoroughly before using the device to ensure proper functionality and to maximize its performance. The Brathird K3 is a compact, wearable camera designed for various recording needs, featuring 1080P video, infrared night vision, and a 180° rotating lens.
Product Overview
Key Features
- 1080P Video Recording: Captures high-definition video with clear detail.
- Infrared Night Vision: Equipped with 6 IR LEDs for clear recording up to 5-8 meters in low-light conditions.
- 180° Rotating Lens: Allows flexible adjustment of the recording angle.
- Expandable Storage: Built-in 64GB storage, expandable up to 256GB with a Micro SD card.
- Direct Smartphone Playback: Includes OTG cables (Type-C and Lightning) for direct viewing on compatible smartphones.
- One-Button Operation: Simple slide controls for intuitive recording and saving.
- Compact and Lightweight: Weighs only 23g with a portable back clip for easy attachment.
- Loop Recording: Automatically overwrites older files when storage is full.
Package Contents
- Brathird K3 Mini Body Camera
- USB Cable
- Type-C OTG Cable
- Lightning OTG Cable
- User Manual (this document)

Image: The Brathird K3 Mini Body Camera, showing its compact design, alongside various OTG cables for smartphone connectivity and a smartphone displaying recorded footage.

Image: An infographic illustrating the main features of the K3 Mini Body Camera, such as 1080P resolution, 180° rotating lens, and night vision capabilities.
Setup
1. Charging the Camera
- Connect the provided USB cable to the camera's charging port.
- Connect the other end of the USB cable to a USB power adapter (not included) or a computer's USB port.
- The indicator light will show charging status (refer to LED indicator section for details). Ensure the camera is fully charged before first use.
2. Inserting/Expanding Storage (Micro SD Card)
The camera comes with a built-in 64GB storage. If you wish to expand storage up to 256GB, insert a compatible Micro SD card into the designated slot. Ensure the camera is powered off before inserting or removing the card.
3. Setting Date and Time (via PC)
To ensure accurate timestamps on your recordings, connect the camera to a computer using the USB cable. The camera will appear as a removable disk. Create a text file named "time.txt" in the root directory of the camera's storage. Format the content as YYYY-MM-DD HH:MM:SS (e.g., 2025-10-29 17:30:00). Save the file and safely eject the camera. The time will be updated upon the next power-on.
Operating Instructions
Power On/Off
- To Power On: Slide the "OFF/ON" switch to the "ON" position. The indicator light will illuminate.
- To Power Off: Slide the "OFF/ON" switch to the "OFF" position. The indicator light will turn off.
Video Recording
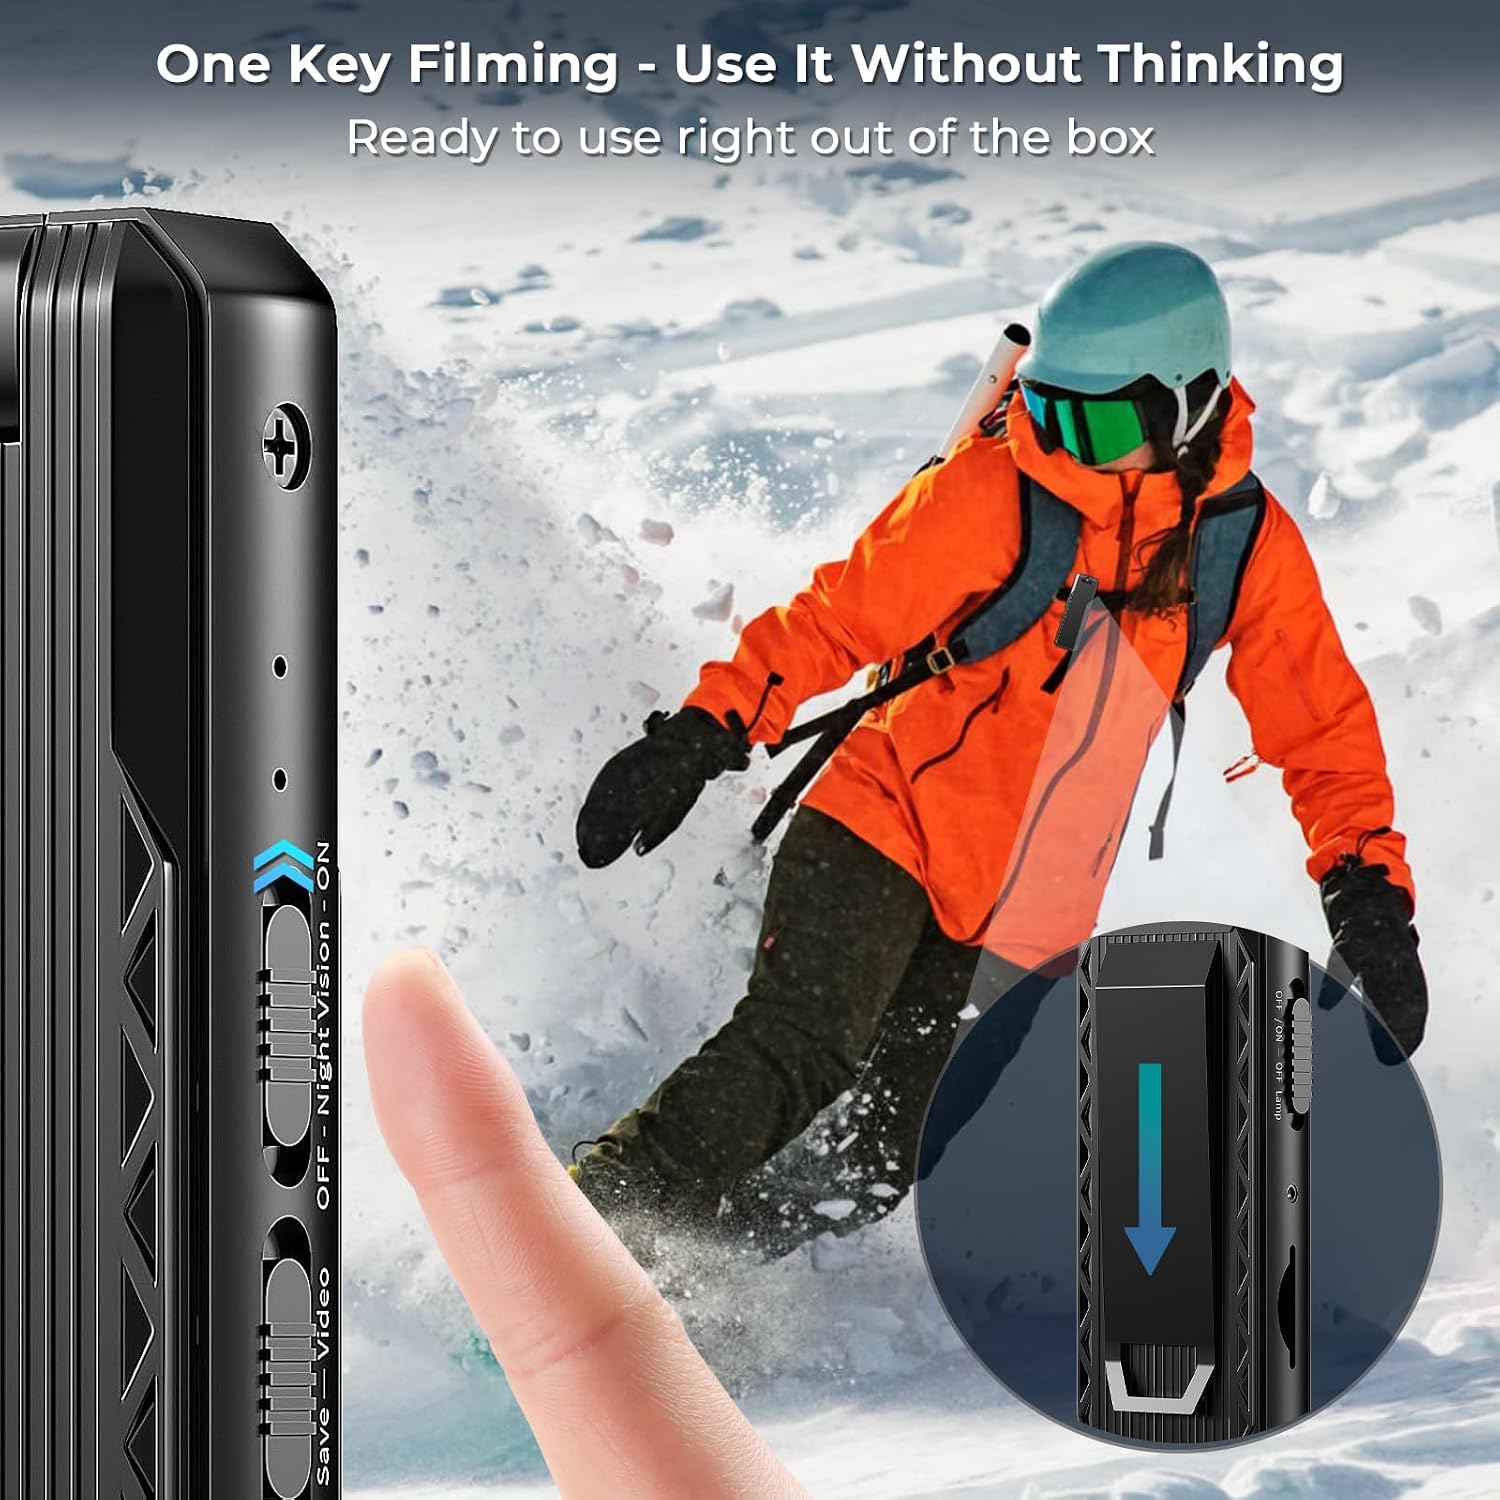
Image: A detailed view of the camera's intuitive slide switch, demonstrating how to initiate recording with a single motion.
- Ensure the camera is powered on.
- To Start Recording: Slide the "Save - Video" switch upwards. The indicator light will change to indicate recording is in progress.
- To Stop Recording and Save: Slide the "Save - Video" switch downwards. The indicator light will revert to standby mode, and the video file will be saved.
Infrared Night Vision

Image: A close-up showing the dedicated slide switch for activating the infrared night vision feature.
- To Activate Night Vision: Slide the "OFF - Night Vision - ON" switch to the "ON" position. The infrared LEDs will activate.
- To Deactivate Night Vision: Slide the "OFF - Night Vision - ON" switch to the "OFF" position.
Adjusting the Lens Angle

Image: The K3 camera demonstrating its 180° rotating lens, illustrating various possible recording angles.
The camera features a 180° rotating lens. Gently rotate the lens assembly to achieve your desired recording angle. This allows for versatile placement and capture.
Viewing Files on Smartphone/PC

Image: The camera connected to a smartphone via an OTG cable, illustrating the direct playback feature.

Image: Step-by-step guide for accessing camera files on both iPhone and Android devices using OTG cables.
- For Smartphones: Use the provided Type-C OTG cable for Android devices or the Lightning OTG cable for iPhones. Connect the camera to your smartphone. Access files through your phone's file manager or "Files" app (for iPhone, iOS version 13 and above). Ensure your Android phone supports OTG functionality.
- For PC: Connect the camera to your computer using the USB cable. The camera will appear as a removable disk, allowing you to browse and transfer files.
Loop Recording

Image: The K3 camera highlighting its loop recording capability, ensuring continuous capture by overwriting the oldest files.
The camera supports loop recording. When the storage space is full, the camera will automatically overwrite the oldest video files to make space for new recordings. This ensures continuous recording without manual intervention.
Maintenance
- Cleaning: Use a soft, dry cloth to clean the camera body and lens. Avoid using harsh chemicals or abrasive materials.
- Storage: Store the camera in a cool, dry place away from direct sunlight and extreme temperatures.
- Battery Care: For optimal battery life, charge the camera regularly and avoid fully discharging it for extended periods.
- Firmware Updates: Check the manufacturer's website periodically for any available firmware updates to improve performance or add features.
Troubleshooting
| Problem | Possible Cause | Solution |
|---|---|---|
| Camera does not power on. | Low battery; Power switch in OFF position. | Charge the camera; Ensure the power switch is in the ON position. |
| Cannot record video. | Insufficient storage space; Storage card error; Camera not powered on. | Check available storage; Format the Micro SD card (backup data first); Power on the camera. |
| Video playback is choppy or distorted. | Slow reading speed of storage card; Incompatible player software. | Use a high-speed Micro SD card; Try a different media player on your device. |
| Cannot connect to smartphone via OTG. | Incorrect cable; Smartphone does not support OTG; OTG function disabled. | Ensure correct OTG cable is used; Verify smartphone OTG compatibility; Enable OTG in smartphone settings (if applicable). |
| Night vision not working. | Night vision switch is OFF. | Slide the "OFF - Night Vision - ON" switch to the "ON" position. |
Specifications
| Feature | Detail |
|---|---|
| Model Number | K3 |
| Video Resolution | 1080p |
| Video Capture Format | AVC1 |
| Photo Sensor Technology | MOS |
| Max Webcam Image Resolution | 3 MP |
| Flash Memory Type | Micro SD (Built-in 64GB, expandable up to 256GB) |
| Item Weight | 1.6 ounces (approx. 45 grams) |
| Package Dimensions | 1 x 0.7 x 0.3 inches (approx. 2.5 x 1.8 x 0.8 cm) |
| Included Components | USB Cable, Type-C OTG Cable, Lightning OTG Cable |
| Battery Life | Up to 180 minutes (approx. 3 hours) |
| UPC | 748305059254 |
Warranty and Support
Brathird offers a 30-day free return and replacement policy for this product. For any operational issues, missing parts, charging problems, or general inquiries, please contact our customer support team.
- Customer Support Email: k3support@126.com
- Return/Replacement Policy: Free return and replacement within 30 days of purchase.

Image: A customer support representative, symbolizing the available after-sales service for the product.

