1. Introduction
Thank you for purchasing the Saker Sakerplus Handheld Steam Cleaner. This manual provides essential information for the safe and effective operation, maintenance, and troubleshooting of your device. Please read it thoroughly before first use and retain it for future reference.
Important Safety Instructions
- Always ensure the safety cap is securely tightened before operation.
- Do not open the safety cap while the unit is pressurized or hot. Allow the unit to cool down completely before refilling water.
- Keep the steam cleaner out of reach of children and pets.
- Do not direct steam at people, animals, or electrical appliances.
- Use only clean tap water. Do not add detergents, perfumes, or other chemicals to the water tank.
- Unplug the appliance from the power outlet when not in use and before cleaning or maintenance.
- Do not immerse the steam cleaner in water or other liquids.
2. Product Overview
The Saker Sakerplus Handheld Steam Cleaner is designed for deep cleaning various surfaces using high-temperature pressurized steam, eliminating the need for harsh chemicals.
Package Contents
- Saker Sakerplus Handheld Steam Cleaner Unit
- 9-Piece Accessory Set (Angled Nozzle, Nylon Brushes, Fabric Tool, Extension Hose, etc.)
- Measuring Cup
- Funnel
- Instruction Manual
Key Features
- Powerful Steam Cleaning: 1050W power, heats up in 3-5 minutes, delivers steam up to 239°F (115°C).
- Multi-Surface Use: Suitable for ceramic tile, sealed hardwood, marble, glass, fabric, car interiors, upholstery, grout, kitchen countertops, and window gaps.
- Safe & Eco-Friendly: Uses only water, no chemicals. Features child-lock safety cap and automatic shut-off.
- Compact & Lightweight: Weighs under 3 lbs, ergonomic handle, 9.8 ft power cord, 350ml water tank.
- 9-Piece Accessory Set: Versatile tools for various cleaning tasks.
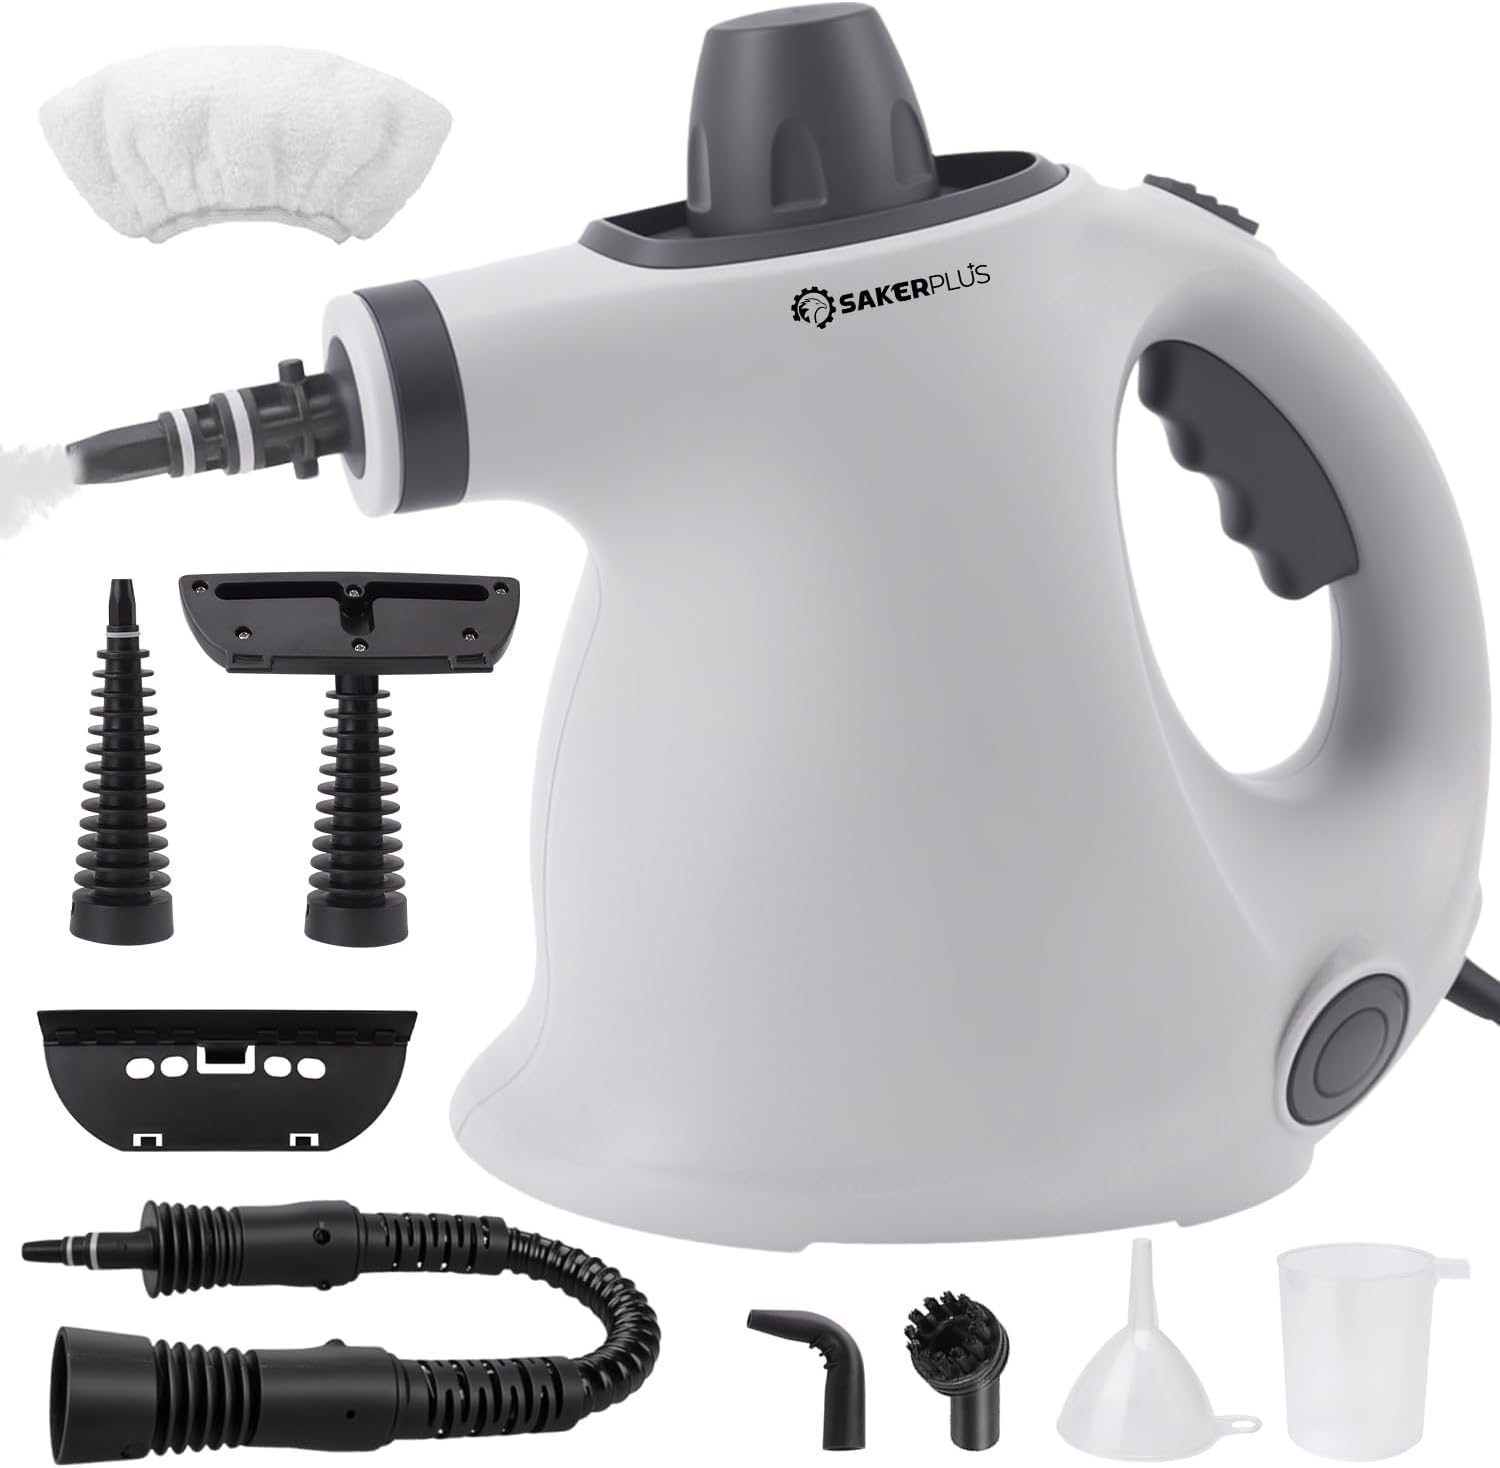
Image 1: Saker Sakerplus Handheld Steam Cleaner with its complete set of 9 accessories, including various nozzles, brushes, and fabric tools.

Image 2: Diagram highlighting key features of the Saker Sakerplus Steam Cleaner, including the safety cap, steam button, comfortable handle, power indicator light, power cable, and 360° rotating cardan joint.
3. Setup
- Unpack: Carefully remove all components from the packaging. Ensure all accessories listed in the "Package Contents" section are present.
- Fill Water Tank:
- Ensure the unit is unplugged and cool.
- Unscrew the safety cap counter-clockwise.
- Using the provided measuring cup and funnel, fill the water tank with up to 350ml of clean tap water. Do not overfill.
- Securely screw the safety cap back on clockwise until tight.
- Attach Accessory: Select the appropriate accessory for your cleaning task and firmly attach it to the nozzle of the steam cleaner. Ensure it clicks into place or is securely fastened.
4. Operating Instructions
- Power On: Plug the steam cleaner into a grounded electrical outlet. The power indicator light will illuminate, indicating the unit is heating up.
- Heat-Up Time: The unit will take approximately 3-5 minutes to reach operating temperature. The indicator light may change or turn off once ready, depending on the model.
- Begin Cleaning:
- Point the nozzle away from yourself and others.
- Press and hold the steam button to release steam. Release the button to stop the steam flow.
- Move the steam cleaner slowly over the surface to be cleaned. For stubborn stains, hold the steam over the area for a few seconds.
- Wipe the cleaned surface with a clean cloth if necessary.
- Refilling Water: If the steam output decreases significantly or stops, the water tank may be empty.
- Unplug the unit and allow it to cool down for at least 10-15 minutes.
- Carefully unscrew the safety cap.
- Refill with water as described in the "Setup" section.
- Replace the safety cap and plug the unit back in to resume cleaning.
- After Use: Unplug the unit and allow it to cool completely before storing.
Accessory Usage Guide

Image 3: Examples of the steam cleaner accessories in use, demonstrating the bent nozzle for toilets, extended nozzle for range hoods, glass-cleaning accessory for windows, round brushes for general scrubbing, fabric-cleaning accessory for upholstery, and cone-shaped nozzle for car wheels.
- Bent Nozzle: Ideal for hard-to-reach areas like toilet rims, corners, and crevices.
- Extended Nozzle: Provides extended reach for cleaning high surfaces or deep into appliances like range hoods.
- Glass-Cleaning Accessory: Use with a cloth cover for streak-free cleaning of windows, mirrors, and other glass surfaces.
- Round Brushes (Nylon): Effective for scrubbing stubborn dirt and grime from grout, tiles, and other durable surfaces.
- Fabric-Cleaning Accessory: Designed for refreshing and cleaning upholstery, curtains, and other fabric items. Use with a cloth cover.
- Cone-Shaped Nozzle: Concentrates steam for targeted cleaning, such as car wheels or intricate details.
5. Maintenance and Care
- Cleaning the Unit:
- Ensure the steam cleaner is unplugged and completely cool.
- Wipe the exterior of the unit with a soft, damp cloth. Do not use abrasive cleaners or solvents.
- Descaling (if necessary): Over time, mineral deposits may build up in the water tank, especially in hard water areas.
- Mix a solution of equal parts white vinegar and water.
- Pour the solution into the cool water tank (do not exceed max fill line).
- Allow it to sit for 30 minutes to an hour.
- Empty the tank and rinse thoroughly with clean water several times.
- Run a tank of clean water through the unit to flush out any remaining vinegar.
- Accessory Care:
- Clean accessories after each use. Rinse them under running water and allow them to air dry.
- Fabric covers can be hand-washed or machine-washed according to their care instructions.
- Storage: Store the steam cleaner and its accessories in a cool, dry place, away from direct sunlight and out of reach of children. Ensure the water tank is empty before storage.
6. Troubleshooting
| Problem | Possible Cause | Solution |
|---|---|---|
| No steam or low steam output. |
|
|
| Water leaking from nozzle. |
|
|
| Safety cap difficult to open. |
|
|
| Power indicator light not on. |
|
|
7. Specifications
| Feature | Detail |
|---|---|
| Model Name | CP97052 |
| Brand | Generic |
| Wattage | 1050W |
| Tank Volume | 350 ml |
| Heat-Up Time | 3-5 minutes |
| Maximum Temperature | 239°F (115°C) |
| Power Source | Electric |
| Form Factor | Handheld |
| Cord Length | 9.8 ft (approx.) |
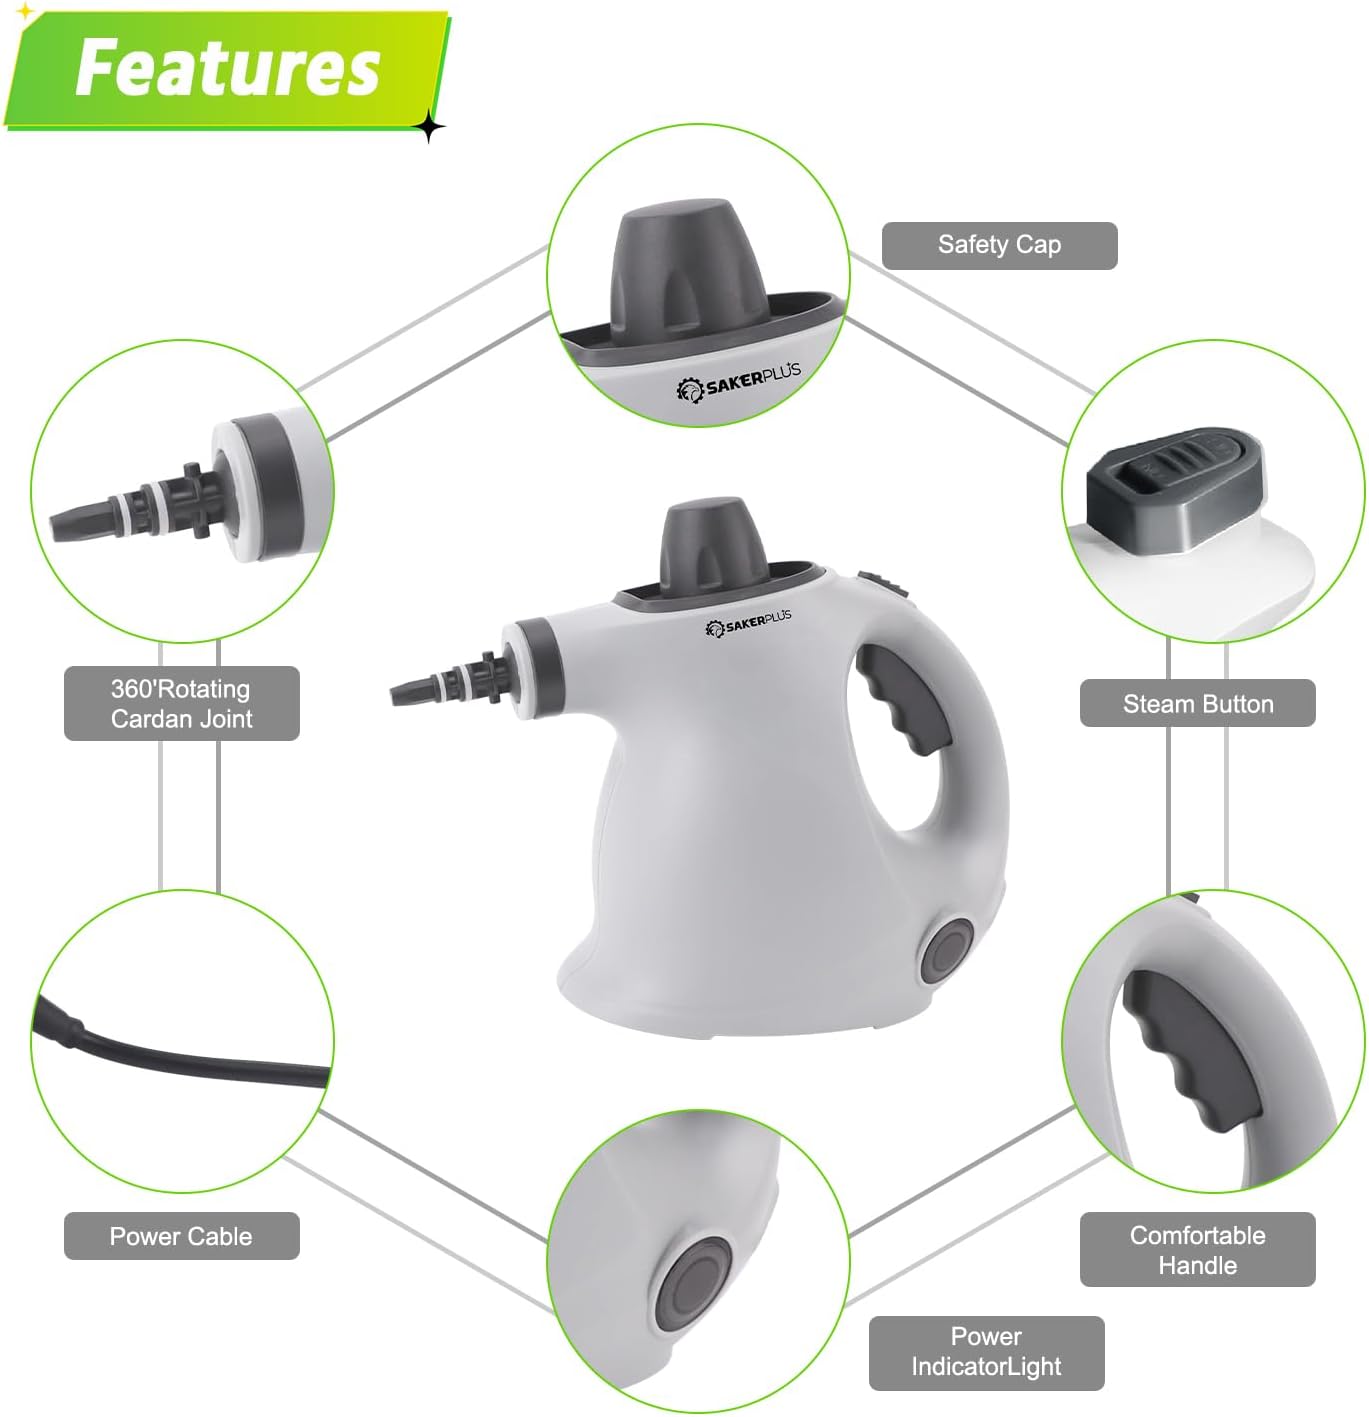
Image 4: Diagram showing the product dimensions of the Saker Sakerplus Steam Cleaner, with measurements of approximately 29 cm in length, 18.5 cm in width, and 23.5 cm in height.
8. Warranty and Support
This product is covered by a standard manufacturer's warranty. For specific warranty details, please refer to the documentation included with your purchase or contact the retailer.
For technical support, troubleshooting assistance beyond this manual, or to inquire about replacement parts, please contact the manufacturer or your point of purchase. Please have your model number (CP97052) and purchase date available when contacting support.