1. Introduction
This manual provides essential instructions for the safe and efficient operation, setup, and maintenance of your HPDMC S-100 Tire Balancer Machine. Designed for professional use in garages and shops, this heavy-duty wheel balancer ensures precise tire balancing for rims ranging from 12 to 24 inches. Please read this manual thoroughly before operating the machine to ensure proper usage and longevity.
2. Safety Instructions
Always prioritize safety when operating any machinery. Failure to follow these instructions may result in injury or damage to the equipment.
- Read the Manual: Ensure all operators have read and understood this entire manual before use.
- Personal Protective Equipment (PPE): Wear appropriate safety glasses and protective footwear.
- Work Area: Keep the work area clean, well-lit, and free from obstructions. Ensure adequate ventilation.
- Power Connection: Connect the machine only to a grounded 110V/60Hz power outlet. Do not use extension cords unless absolutely necessary and ensure they are rated for the machine's power requirements.
- Machine Stability: Ensure the machine is placed on a level, stable surface and properly secured before operation.
- Tire Handling: Use proper lifting techniques when handling heavy tires and wheels.
- Moving Parts: Keep hands, hair, and loose clothing away from all moving parts during operation.
- Emergency Stop: Familiarize yourself with the location and operation of the emergency stop button.
- Maintenance: Disconnect power before performing any maintenance or adjustments.
- Unauthorized Modifications: Do not modify the machine. Use only genuine replacement parts.
3. What's in the Box
Upon unpacking, verify that all components are present and undamaged:
- HPDMC S-100 Tire Balancer Machine (Main Unit)
- Standard accessories for tire mounting and balancing (e.g., cones, quick-release nut, rim width caliper) - (Note: Specific accessory list may vary, refer to packaging for full details.)
- User Manual
4. Specifications
Key technical specifications for the HPDMC S-100 Tire Balancer Machine:
| Voltage | 110V/60HZ |
| Power | 0.25KW |
| Balancing Accuracy | ±1g |
| Balancing Speed | ≤180r/min |
| Cycle Time | 7 seconds |
| Rim Diameter Range | 12"~24" (300mm~600mm) |
| Model Number | HPDMC-QBPHJS10000 |
| ASIN | B0FDQN7BDW |
5. Setup
Proper setup is crucial for accurate balancing and safe operation.
5.1 Unpacking and Placement
- Carefully remove the machine from its packaging.
- Place the machine on a solid, level concrete floor capable of supporting its weight and the weight of the heaviest wheel assembly.
- Ensure there is sufficient clear space around the machine for safe operation and tire handling.
- Secure the machine to the floor using appropriate anchor bolts (not included) if required by local safety regulations or for enhanced stability.
5.2 Electrical Connection
- Verify that the power supply matches the machine's requirements (110V/60Hz).
- Plug the power cord into a dedicated, grounded electrical outlet. Avoid sharing circuits with other high-power equipment.
- Ensure the power cord is routed safely to prevent tripping hazards or damage.
5.3 Initial Inspection
- Inspect all cables and connections for any signs of damage.
- Check that all bolts and fasteners are tight.
- Familiarize yourself with the control panel and its functions (refer to Section 6.1).

Image 1: Front view of the HPDMC S-100 Tire Balancer Machine with a tire mounted, showcasing its robust design and control panel.
6. Operating Instructions
This section outlines the general procedure for balancing a wheel using the S-100 machine.
6.1 Control Panel Overview
The S-100 features an anti-reflective, touch-pad display panel with intuitive tire and wheel assembly graphics. Key controls include:
- Display Screens: Show inner and outer imbalance values.
- Measurement Buttons: For inputting rim diameter, width, and offset.
- Balancing Modes: Standard, ALU (alloy wheel), FINE, OPT (optimization).
- START Button: Initiates the balancing cycle.
- STOP Button: Halts the balancing cycle.
- C Button: Calibration or clear function.

Image 2: Detailed view of the HPDMC S-100 control panel, showing the digital displays, graphic interface, and touch-pad buttons for operation.
6.2 Balancing Procedure
- Prepare the Wheel: Clean the wheel and tire assembly thoroughly to remove dirt, debris, and old balance weights.
- Mount the Wheel:
- Select the appropriate mounting cone for the wheel's center bore.
- Slide the wheel onto the balancer shaft, ensuring it sits flush against the mounting flange.
- Secure the wheel firmly with the quick-release nut. Ensure it is centered and tight.
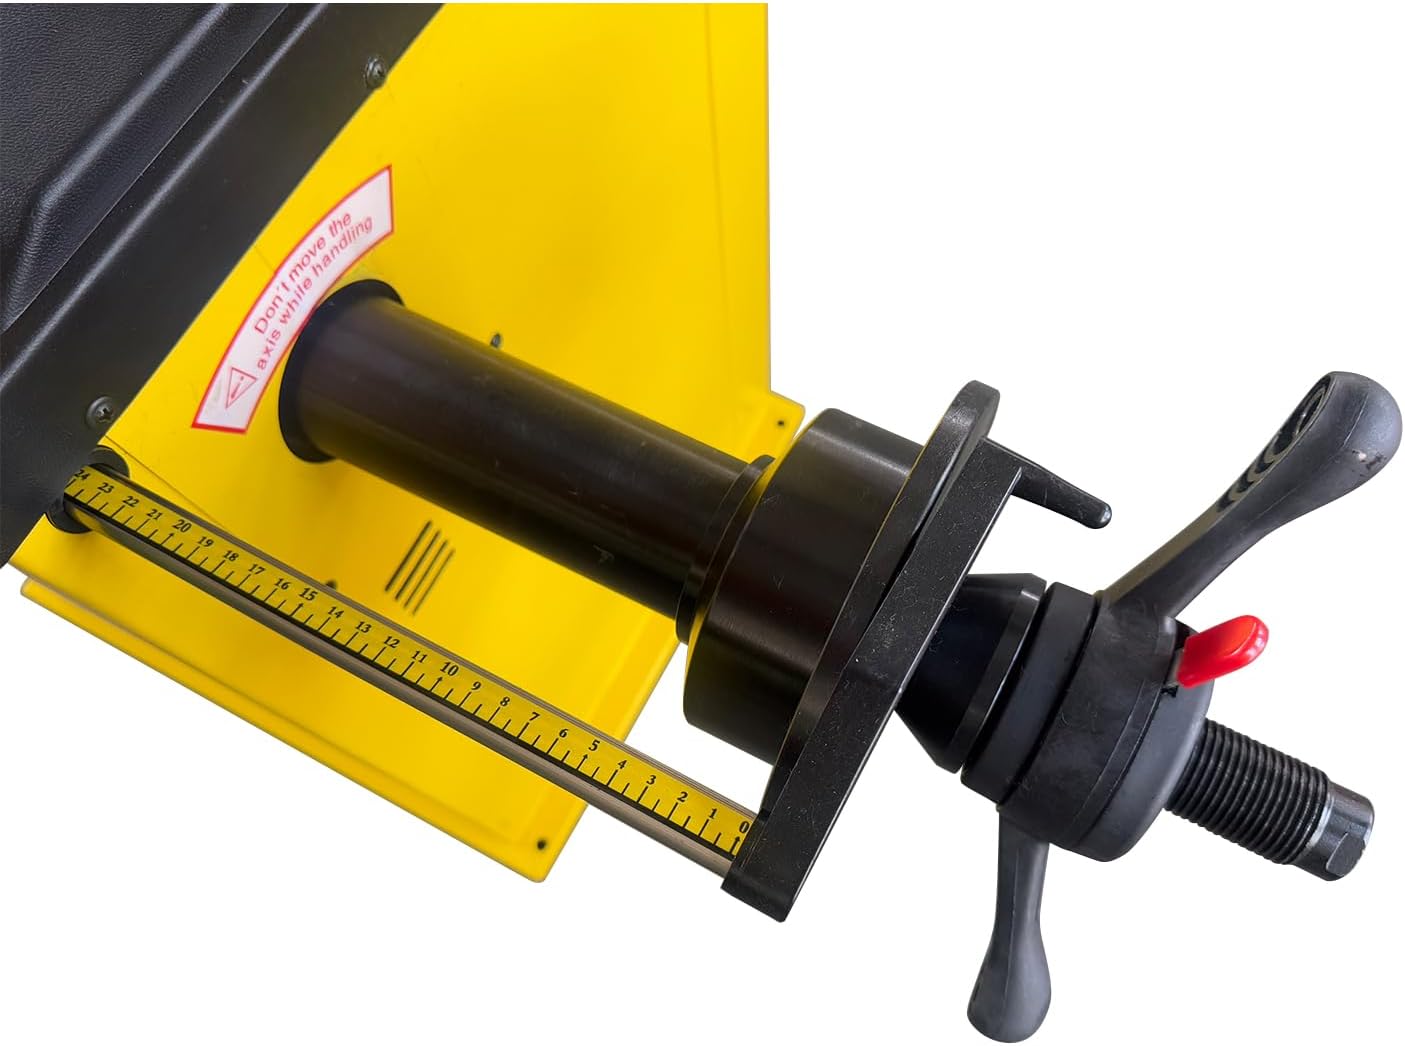
Image 3: View of the balancer shaft and measuring arm, used for accurately determining rim dimensions.
- Input Wheel Data:
- Use the measuring arm to determine the rim's offset (distance from machine to rim edge).
- Manually input the rim diameter and width using the control panel buttons. The graphic display will assist in data entry.
- Select the appropriate balancing mode (e.g., Standard for steel wheels, ALU for alloy wheels).
- Start Balancing Cycle: Press the START button. The machine will spin the wheel and measure the imbalance. The cycle time is approximately 7 seconds.
- Read Results: The display will show the required weight amounts for the inner and outer planes of the wheel, along with their placement locations.
- Apply Weights: Rotate the wheel manually until the display indicates the correct position for weight placement. Apply the specified balance weights to the inner and outer rims.
- Re-check Balance: Press START again to verify the balance. Repeat the process if any imbalance is still detected.
- Remove Wheel: Once balanced, press the STOP button, loosen the quick-release nut, and carefully remove the wheel.
7. Maintenance
Regular maintenance ensures the longevity and accuracy of your tire balancer.
- Daily Cleaning: Wipe down the machine, especially the shaft and control panel, to remove dust, dirt, and tire debris.
- Shaft Inspection: Regularly inspect the balancer shaft for any damage or wear. Keep it clean and free of rust.
- Cone and Nut Maintenance: Clean and inspect mounting cones and the quick-release nut for wear. Replace if damaged to ensure proper wheel mounting.
- Calibration: Perform periodic calibration checks as per the machine's internal instructions (usually accessible via the 'C' button or a specific menu) to maintain balancing accuracy. Refer to the machine's on-screen prompts for calibration procedures.
- Electrical Check: Periodically inspect the power cord and plug for damage.
- Lubrication: Consult the machine's internal diagrams or manufacturer's guidelines for any specific lubrication points.
8. Troubleshooting
This section addresses common issues you might encounter.
| Problem | Possible Cause | Solution |
|---|---|---|
| Machine does not power on. | No power supply; tripped circuit breaker; damaged power cord. | Check power connection and outlet. Reset circuit breaker. Inspect power cord for damage. |
| Inaccurate balancing results. | Improper wheel mounting; incorrect data input; machine out of calibration; dirty shaft/cones. | Ensure wheel is securely mounted and centered. Verify data input. Perform calibration. Clean shaft and cones. |
| Wheel vibrates during spin. | Wheel not properly secured; excessive imbalance; damaged wheel/tire. | Re-mount wheel securely. Check for large imbalance values. Inspect wheel and tire for structural damage. |
| Display shows error code. | Specific internal fault. | Refer to the machine's on-screen error code guide or contact customer support with the specific code. |
9. Warranty and Support
The HPDMC S-100 Tire Balancer Machine comes with a 1-Year Full Warranty from the date of purchase, covering manufacturing defects and malfunctions under normal use.
For technical assistance, warranty claims, or to order replacement parts, please contact HPDMC customer support. Have your model number (S-100 or HPDMC-QBPHJS10000) and purchase information ready when contacting support.
Contact information for HPDMC can typically be found on their official website or your purchase documentation.