1. Introduction
This manual provides essential instructions for the safe and efficient installation, operation, and maintenance of your Homeward Bath Neptune Sit-In Tub. Please read this manual thoroughly before installation and use, and retain it for future reference.
Safety Information
- Always ensure proper installation by a qualified professional.
- Verify water temperature before entering the tub using the 2-inch deep reservoir near the drain.
- Utilize the integrated grab bars for stability when entering and exiting.
- Ensure the tub door is securely closed and locked before filling with water.
- Do not use abrasive cleaners or harsh chemicals on the tub surface.
2. Product Features
The Homeward Bath Neptune Sit-In Tub is designed for ease of access and comfort, particularly for individuals requiring assistance. Key features include:
- Sit-In Design: Allows comfortable entry without lowering to the floor.
- Right Side Drain: Configured for right-side plumbing connections.
- Integrated Safety Grab Bars: Provides support for enhanced safety.
- Effortless Door Mechanism: Button-release opening and locking to prevent accidental opening.
- Removable Front Skirt/Panel: Facilitates easy drain installation and access to components.
- Hoyer Lift Compatible Skirt: Designed to accommodate Hoyer Lifts for caregiver assistance.
- Handheld Shower and Faucet: Included for convenience.
- Quick Fill and Drain: Engineered for efficient water management.

Figure 2.1: The Neptune Sit-In Tub with its door open, showcasing the spacious interior and integrated features. This view highlights the accessibility design.
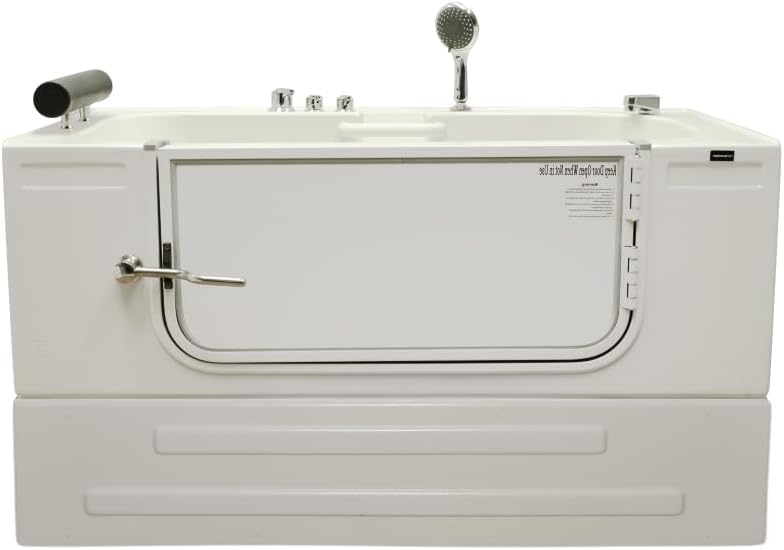
Figure 2.2: The Neptune Sit-In Tub with its door securely closed, ready for use. This image demonstrates the compact and integrated appearance when not in use.
3. Setup and Installation
The Neptune Sit-In Tub is delivered in two boxes: one for the frame and one for the tub itself. Professional installation is recommended.
3.1 Unpacking and Inspection
- Carefully unpack all components.
- Inspect for any shipping damage. Report any damage immediately to the carrier and supplier.
- Ensure all parts listed in the packing manifest are present.
3.2 Frame Assembly and Placement
- Assemble the metal frame according to the separate frame assembly instructions (not included in this manual).
- Position the assembled frame in the desired installation location. Ensure the floor is level and capable of supporting the tub's weight when filled.
3.3 Tub Placement and Securing
- Carefully lift and set the tub onto the assembled frame.
- Secure the tub to the frame using the pre-fastened brackets. Refer to the detailed installation diagrams for correct alignment and fastening.
3.4 Plumbing Connections
- The front skirt/panel is removable to provide access for drain and water supply connections.
- Connect the hot and cold water supply lines to the faucet assembly.
- Connect the tub drain to the household drainage system. Ensure all connections are watertight.
- Test all plumbing connections for leaks before reattaching the front skirt/panel.

Figure 3.1: Technical drawing illustrating the front and top views of the Neptune Sit-In Tub with key dimensions. This diagram is crucial for planning installation space and plumbing.
4. Operating Instructions
4.1 Entering the Tub
- Ensure the tub is empty.
- Press the button-release mechanism to open the tub door. The door is designed to pass above most toilets when opening.
- Carefully sit into the tub. Use the integrated grab bars for support as needed.
- Close the tub door firmly until it locks securely. A click indicates it is properly sealed.
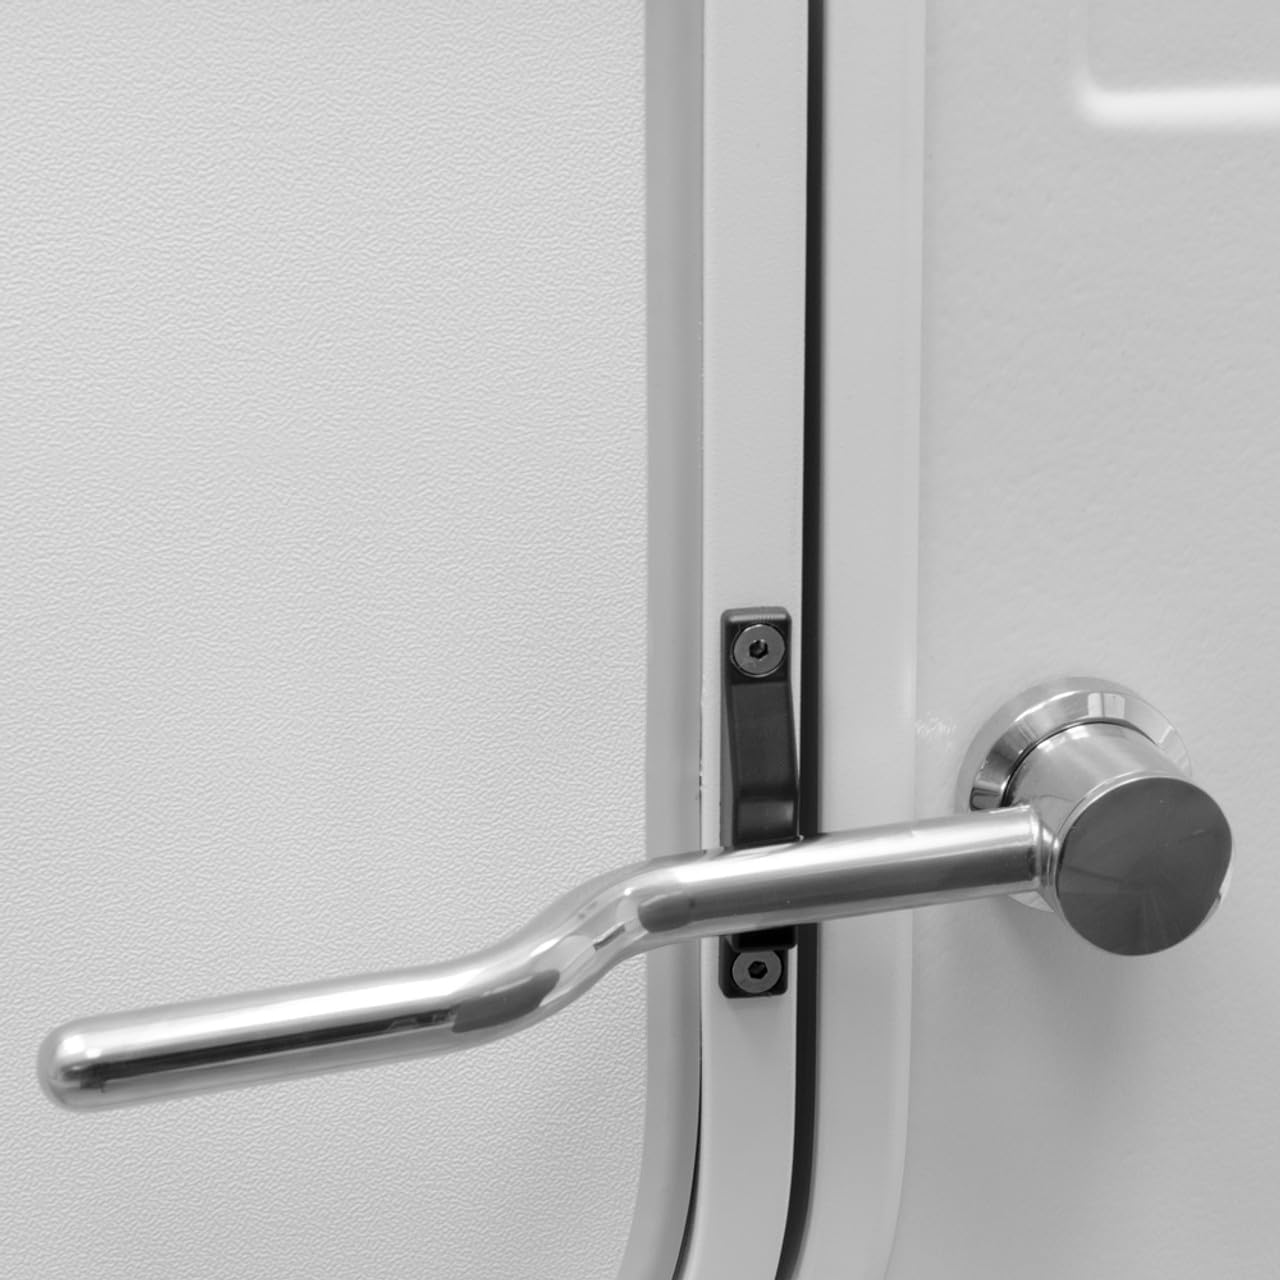
Figure 4.1: Detail of the tub door handle and locking mechanism. This shows the ergonomic design for easy opening and secure closing.
4.2 Filling the Tub
- Once seated and the door is securely closed, turn on the faucet to begin filling the tub.
- Before fully entering the water, test the temperature in the 2-inch deep reservoir near the drain and foot area. Adjust water temperature as necessary.
- Fill the tub to your desired level.
4.3 Draining the Tub
- After use, pull the drain stopper to initiate draining. The tub is designed to drain quickly.
- Wait until the tub is completely empty before attempting to open the door.
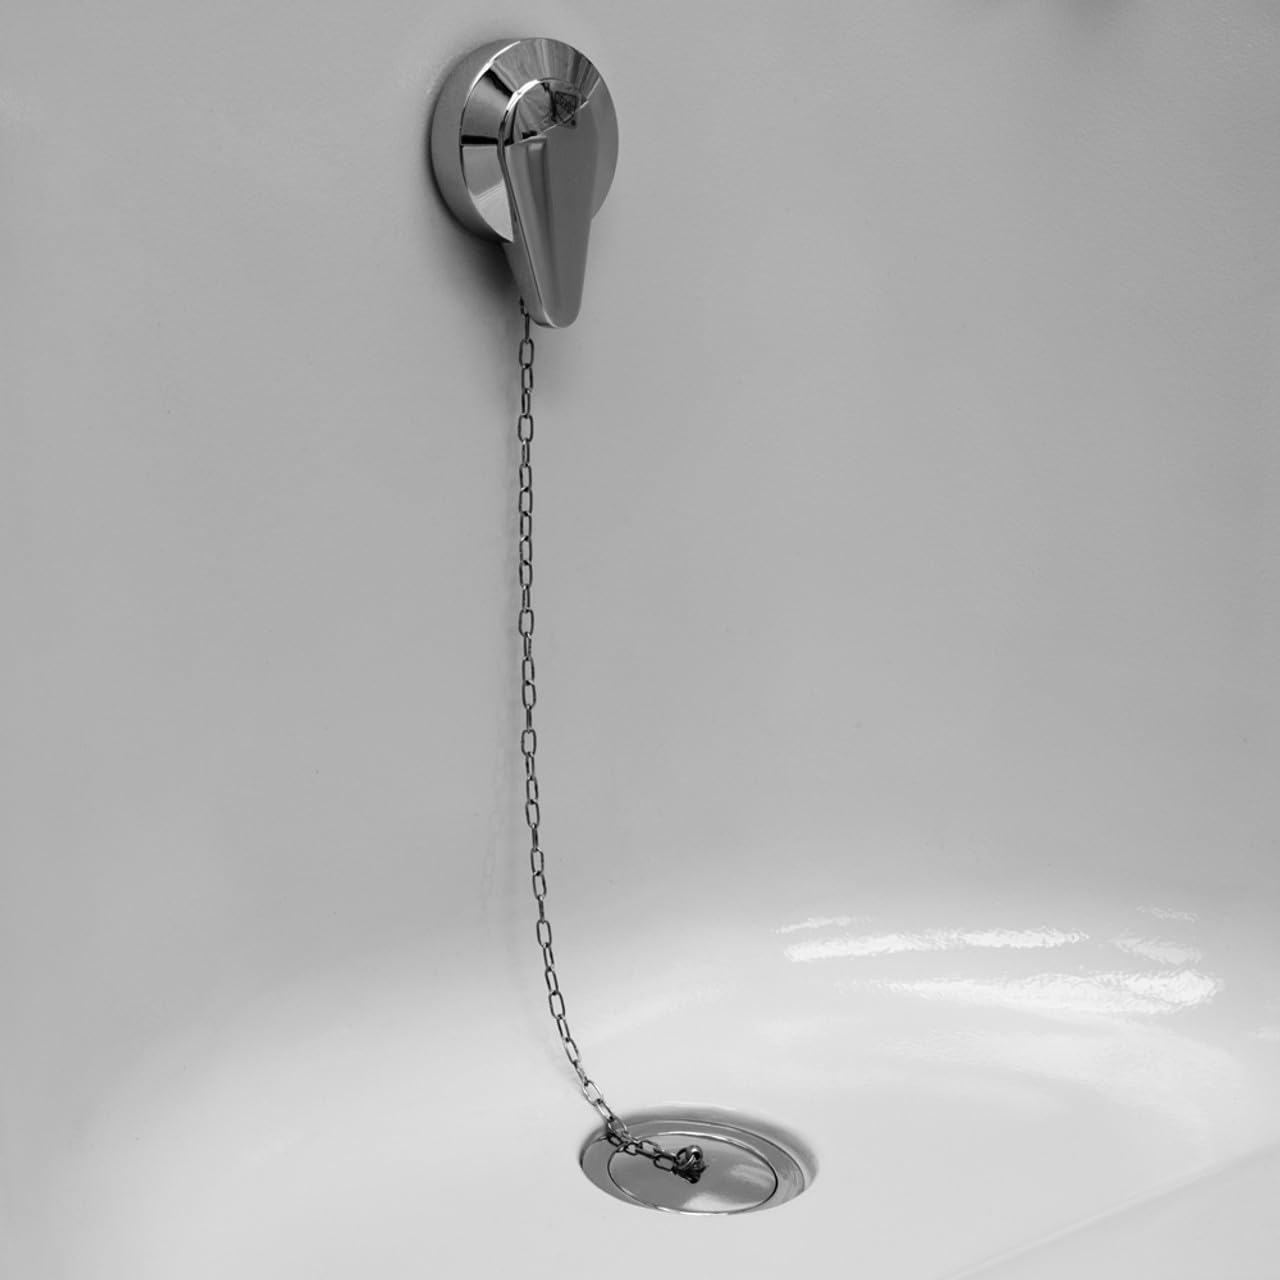
Figure 4.2: Close-up view of the tub drain and stopper mechanism. This illustrates the design for efficient water drainage.
4.4 Exiting the Tub
- Ensure the tub is fully drained.
- Press the button-release mechanism to open the tub door.
- Carefully exit the tub, using the grab bars for support.

Figure 4.3: Detail of an integrated safety grab bar. These bars provide crucial support for users entering and exiting the tub.
5. Maintenance
5.1 Cleaning the Tub
- Clean the tub regularly with a soft cloth and mild, non-abrasive bathroom cleaner.
- Avoid using harsh chemicals, abrasive pads, or solvents, as these can damage the tub's surface.
- Rinse thoroughly with clean water after cleaning.
5.2 Door Seal Care
- Periodically inspect the door seal for any signs of wear or damage.
- Keep the door seal clean and free of debris to ensure a watertight closure.
5.3 Drain Maintenance
- Regularly remove any hair or debris from the drain to prevent blockages.
- If a blockage occurs, use a non-corrosive drain cleaner or consult a plumber.
6. Troubleshooting
| Problem | Possible Cause | Solution |
|---|---|---|
| Tub door does not seal properly. | Debris on seal, worn seal, improper closure. | Clean seal, ensure door is fully closed and locked. If worn, contact support for replacement. |
| Water drains slowly. | Drain blockage (hair, soap scum). | Clear drain of debris. Use a non-corrosive drain cleaner. |
| Leaks from plumbing connections. | Loose connections, damaged seals. | Tighten connections. Inspect and replace seals if damaged. Professional assistance may be required. |
| Faucet not providing hot/cold water. | Water supply issues, faucet malfunction. | Check household water supply. Consult a plumber if issue persists. |
7. Specifications
- Model: Right Side w/ Full Skirt
- Brand: Homeward Bath
- Product Dimensions: 59"L x 33"W x 33.5"H
- Color: White
- Drain Location: Right Side
- Included Components: Hoyer Lift Compatible Skirt, Neptune Sit-in Tub, Handheld Shower, Faucet
- UPC: 810528028925
- ASIN: B0FDLG9VGL
8. Warranty and Support
For warranty information, technical support, or to order replacement parts, please contact Homeward Bath customer service. Refer to your purchase documentation for specific warranty terms and contact details.
You can also visit the official Homeward Bath store for more information: Homeward Bath Store