Introduction
This manual provides detailed instructions for the safe and effective use of your Generic ZQ01337 7-in-1 Stage Light System. This versatile lighting unit is designed for various events, including parties, DJ sets, clubs, and stage performances. Please read this manual thoroughly before operation and retain it for future reference.
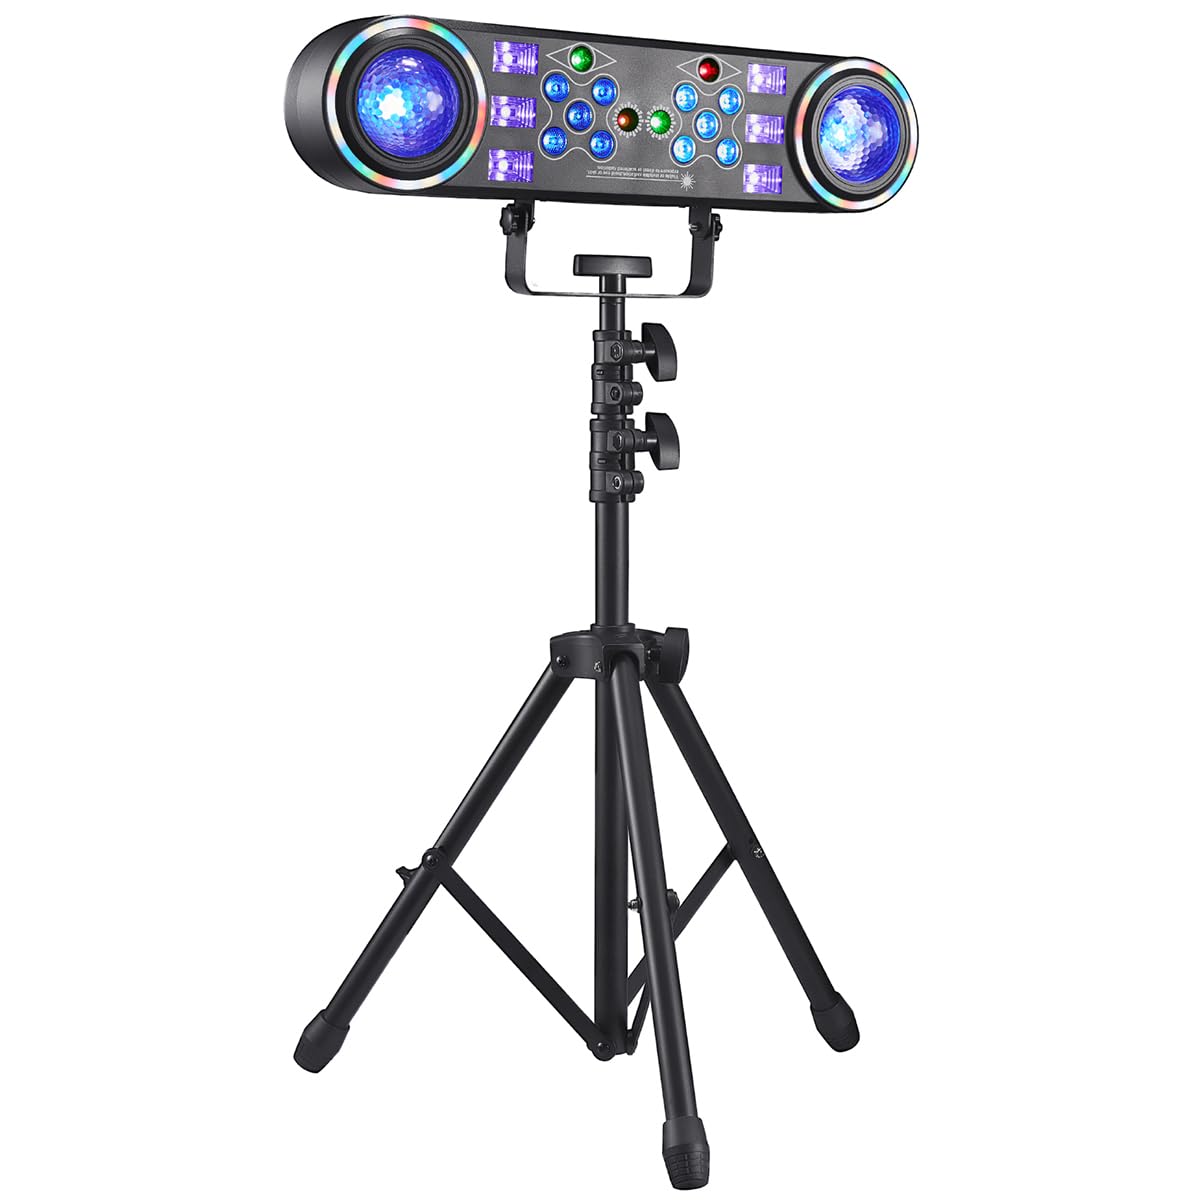
Figure 1: Overview of the Generic ZQ01337 7-in-1 Stage Light System.
Package Contents
Verify that all items listed below are included in your package. If any items are missing or damaged, please contact customer support.
- 7-in-1 Stage Light System Unit
- Light Stand
- Power Cable
- User Manual (this document)
Important Safety Instructions
To reduce the risk of electric shock, fire, or injury, always follow these basic safety precautions:
- Read all instructions before using the product.
- Do not expose the unit to rain or moisture.
- Do not open the housing. There are no user-serviceable parts inside. Refer all servicing to qualified service personnel.
- Ensure the unit is placed on a stable surface or securely mounted to the stand.
- Keep away from flammable materials.
- Unplug the unit from the power outlet when not in use or before cleaning.
- Do not look directly into the light source when the unit is operating.
- Ensure proper ventilation around the unit to prevent overheating.
Setup Guide
- Assemble the Stand: Carefully unpack the light stand components. Follow the stand's specific instructions to assemble it securely. Ensure all locking mechanisms are tightened.
- Mount the Light Unit: Attach the 7-in-1 Stage Light System to the top of the assembled stand using the provided mounting hardware. Ensure it is firmly secured and balanced.
- Positioning: Place the assembled light system in the desired location, ensuring it is stable and has adequate clearance for ventilation.
- Connect Power: Insert the power cable into the power input port on the light unit, then plug the other end into a standard electrical outlet (AC 100-240V, 50/60Hz).
- Initial Power On: Locate the power switch on the unit and turn it to the "ON" position. The lights should illuminate, indicating the unit is receiving power.
Operating Instructions
The ZQ01337 offers multiple lighting effects and control modes. Familiarize yourself with the control panel or remote control (if included) to navigate these options.
Control Panel Overview
The control panel typically includes a display screen and several buttons (e.g., MODE, UP, DOWN, ENTER) to select and adjust settings.
Lighting Modes
- Auto Mode: The light system cycles through various pre-programmed patterns and colors automatically.
- Sound Activated Mode: The lights respond to ambient sound or music. Adjust sensitivity if available.
- Strobe Mode: Produces rapid flashes of light. Speed can often be adjusted.
- UV (Blacklight) Mode: Emits ultraviolet light, causing certain materials to glow.
- Disco Ball Effect: Projects rotating patterns, simulating a traditional disco ball.
- Colorful/RGB Mode: Allows selection of specific colors or color combinations (Red, Green, Blue, White, etc.).
- DMX Mode: For professional control using a DMX controller (requires DMX cables and a compatible controller, not included). Refer to the DMX channel chart in the specifications for details.
Adjusting Settings
Use the UP/DOWN buttons to navigate through options and the ENTER button to confirm selections. The MODE button typically switches between main operating modes.
Maintenance
Regular maintenance ensures the longevity and optimal performance of your stage light system.
- Cleaning: Disconnect power before cleaning. Use a soft, dry cloth to wipe the exterior of the unit. For lenses, use a soft, lint-free cloth and a mild glass cleaner if necessary. Do not use abrasive cleaners or solvents.
- Ventilation: Ensure ventilation openings are clear of dust and debris. Periodically use compressed air to clear vents.
- Storage: When not in use for extended periods, store the unit in its original packaging or a protective case in a cool, dry place, away from direct sunlight and extreme temperatures.
- Cable Inspection: Regularly inspect the power cable and any other connected cables for signs of damage. Replace damaged cables immediately.
Troubleshooting
If you encounter issues with your stage light system, refer to the following common problems and solutions:
| Problem | Possible Cause | Solution |
|---|---|---|
| Light unit does not power on. | No power supply; Power cable loose; Unit switch off. | Check power outlet; Ensure power cable is securely connected; Turn power switch to ON. |
| Sound activated mode not working. | Microphone sensitivity too low; No sound detected; Mode not selected. | Increase microphone sensitivity (if adjustable); Ensure music/sound is playing near the unit; Select Sound Activated Mode. |
| Lights are dim or flickering. | Low power supply; Overheating; Internal fault. | Ensure stable power supply; Check for proper ventilation; Contact customer support if problem persists. |
| Remote control not responding. | Dead battery; Obstruction; Not pointed correctly. | Replace remote battery; Remove obstructions; Point remote directly at the unit's IR receiver. |
Specifications
| Brand | Generic |
| Model Number | ZQ01337 |
| Part Number | ZQ01337X1US |
| Product Dimensions (L x W x H) | 15.7 x 8.5 x 31.5 inches (assembled) |
| Material | Plastic |
| Included Components | Light kit included (main unit, stand, power cable) |
| Batteries Required | No |
| Power Input | AC 100-240V, 50/60Hz (typical for stage lights, inferred) |
Warranty and Support
This product is covered by a standard manufacturer's warranty. For specific warranty terms and conditions, please refer to the documentation provided with your purchase or contact the retailer.
For technical support, troubleshooting assistance, or to inquire about replacement parts, please contact Generic customer service through your purchase platform or the contact information provided by the seller.
Note: Protection plans may be available for purchase separately. These plans are offered by third parties and are not directly associated with the manufacturer's warranty.