1. Introduction
This manual provides detailed instructions for the setup, operation, and maintenance of your TONGCAM Hidden Camera Photo Frame. This device is designed for discreet indoor security monitoring, offering reliable surveillance without requiring a WiFi connection. Please read this manual thoroughly before using the product to ensure proper functionality and safety.
2. Product Features
- Discreet Design: Elegant photo frame conceals a hidden security camera while maintaining full functionality as a decorative picture frame for your home or office.
- Versatile Functionality: Camera operates without WiFi dependency, perfect for reliable indoor surveillance and monitoring.
- Storage Capacity: Compatible with SD cards up to 64GB (not included) for extended recording capability.
- Customizable Display: Features replaceable photo option, allowing you to personalize the frame while maintaining surveillance functionality.
- Easy Setup: Simple plug-and-record operation with no network configuration required, ideal for immediate security monitoring.
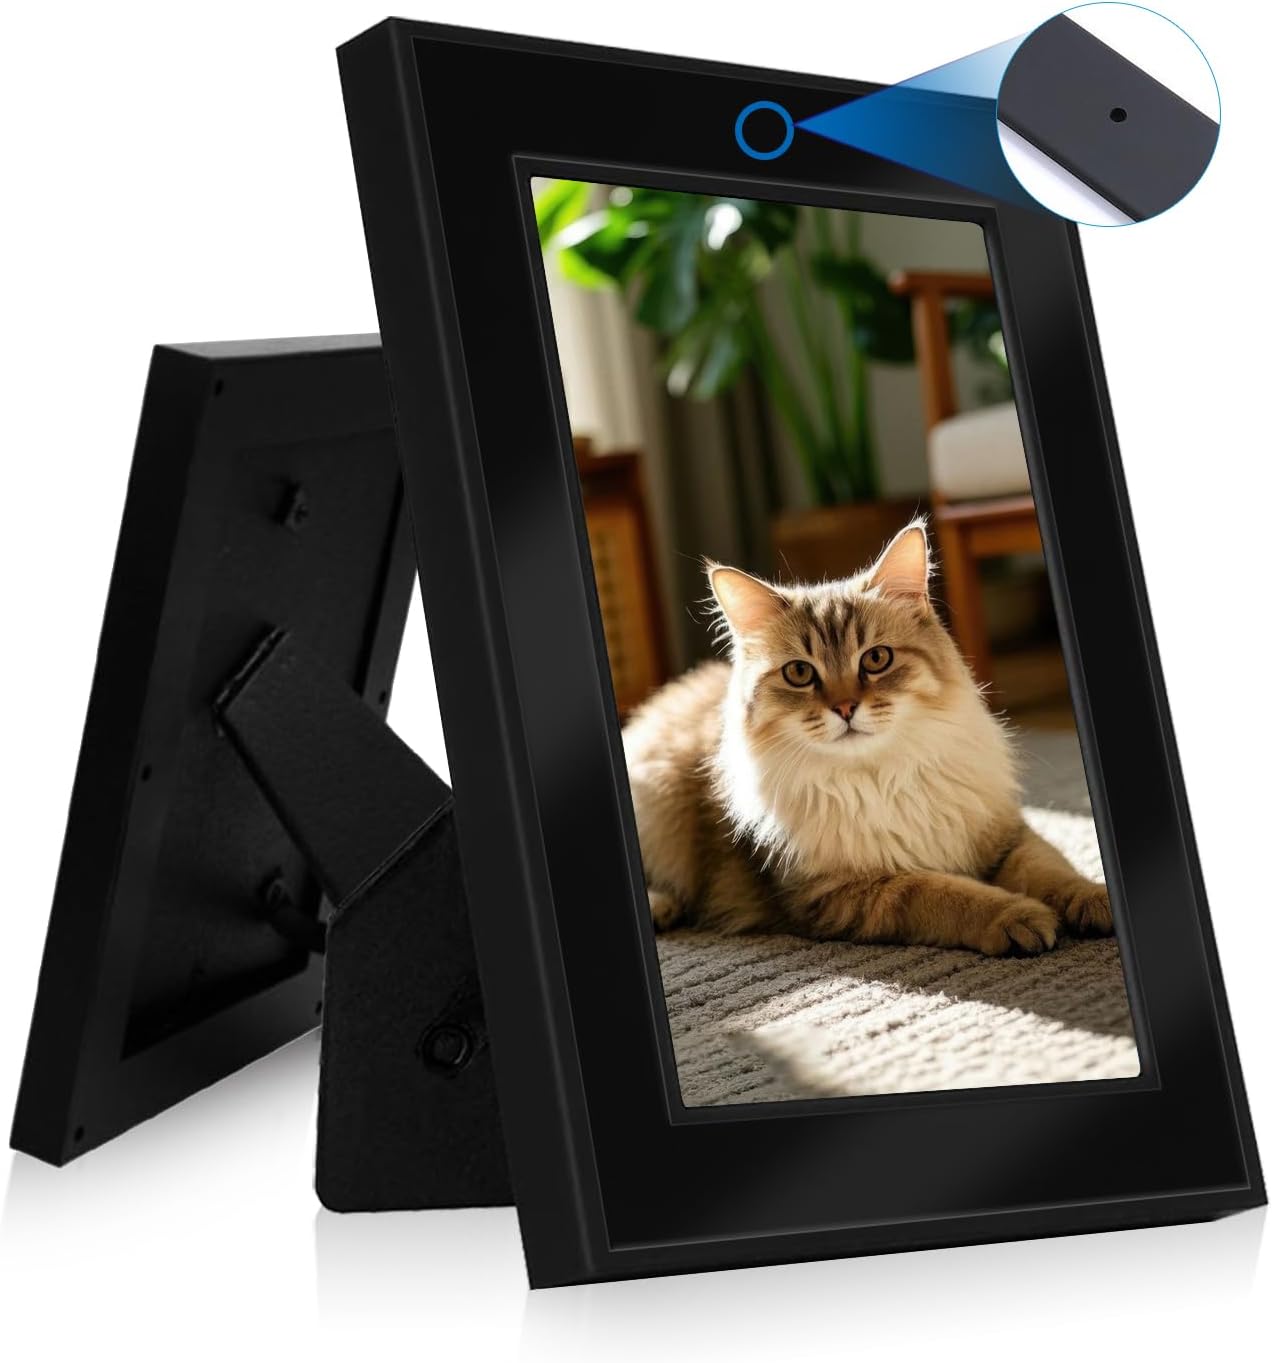
Image: The TONGCAM Hidden Camera Photo Frame, highlighting the discreetly placed camera lens.

Image: Visual comparison demonstrating the Full HD 1080P video recording capability of the camera.
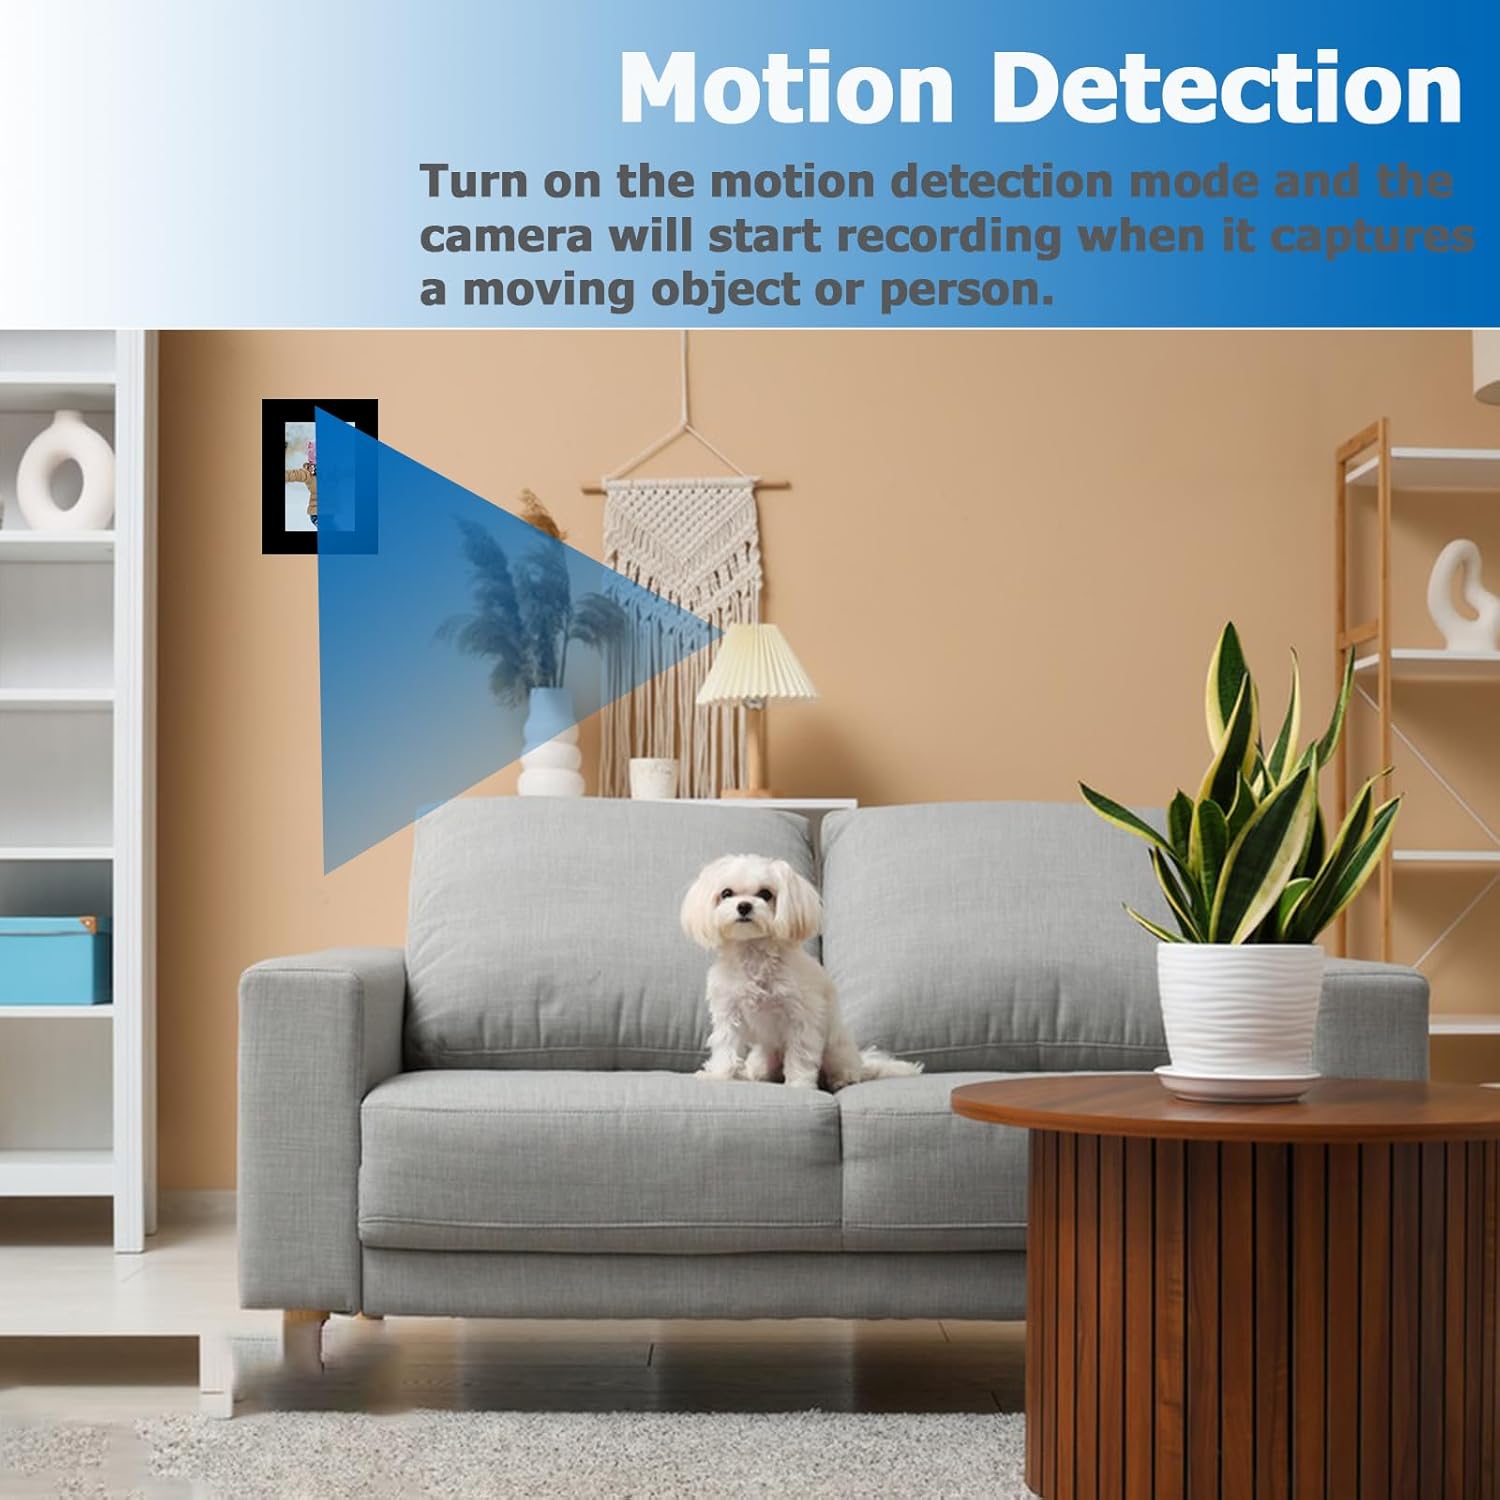
Image: Illustration of the motion detection feature, showing the camera's field of view.

Image: Explanation of the loop recording feature, ensuring continuous surveillance by overwriting old files.
3. What's in the Box
- Photo Frame
- Hidden Camera (integrated)
- User Manual
4. Setup Instructions
4.1. Inserting the Micro SD Card
The camera requires a Micro SD card (up to 64GB, not included) for recording. Ensure the camera is turned off before inserting the card.
- Locate the SD card slot on the side of the camera frame.
- Orient the Micro SD card correctly, with the gold contacts facing down.
- Gently push the Micro SD card into the slot until it clicks into place. You may use the provided reset pin to fully insert it.
Video: Demonstrates how to correctly insert the Micro SD card into the camera frame.
4.2. Powering On the Camera
- Locate the ON/OFF switch on the side of the camera frame.
- Slide the switch to the "ON" position. The blue indicator light will turn on.
- The camera is now powered on and ready for operation.
4.3. Resetting the Camera
If the camera is unresponsive or not functioning as expected, a reset may be necessary.
- With the camera powered on, locate the reset button (a small pinhole) on the side.
- Use the provided reset pin or a similar thin object to press and hold the reset button for 7-8 seconds.
- Release the button. The blue light will turn off and then turn on again, indicating a successful reset.
Video: Shows the process of powering on and resetting the camera. Note: WiFi connection steps shown in this video are not applicable to this 'No WiFi' model.
5. Operating Instructions
5.1. Continuous Recording Mode
- Ensure a Micro SD card is inserted and the camera is powered on.
- Locate the mode switch (labeled R, M, L) and slide it to the "L" position for continuous recording.
- Press the camera button (power button) until both red and blue lights turn on, then off. The red light will blink three times and go out. The camera will now automatically start continuous recording.
- During recording, no indicator lights will flash. Video files are saved every 5 minutes, and the oldest video will be overwritten when the card is full (loop recording).
- To stop recording and save data, short press the camera button. The red light will turn on, indicating standby mode.
- To turn off the camera, long press the camera button until both red and blue lights turn on and then off. The camera will save the current video file and shut down.
5.2. Motion Detection Mode
- Ensure a Micro SD card is inserted and the camera is powered on.
- Locate the mode switch (labeled R, M, L) and slide it to the "M" position for motion detection recording.
- Press the camera button (power button) until both red and blue lights turn on. When the red and blue lights turn off, the blue light will turn on. The blue light will blink three times and go out. The camera will now automatically start recording when motion is detected.
- During recording, no indicator lights will flash. Video files are saved every 5 minutes, and the oldest video will be overwritten when the card is full (loop recording).
- To stop recording and save data, short press the camera button. The red light will turn on, indicating standby mode.
- To turn off the camera, long press the camera button until both red and blue lights turn on and then off. The camera will save the current video file and shut down.
Video: Demonstrates the camera's continuous recording and motion detection operating modes.
Video: Provides a visual guide on operating the photo frame spy camera, including recording modes.
6. Viewing Video Files
To view recorded video files, you need to remove the Micro SD card from the camera.
6.1. Removing the Micro SD Card
- Ensure the camera is turned off.
- Using the reset pin or a similar thin object, gently press the Micro SD card into its slot until you hear a click.
- Release the card, and it will pop out slightly, allowing you to remove it.
6.2. Viewing Files via Card Reader
- Insert the removed Micro SD card into a compatible card reader (not included).
- Connect the card reader to your computer's USB port.
- Access the "Removable Disk" drive on your computer and open the video files to view them.
6.3. Viewing Files via USB Cable
- Connect the camera to your computer using the included USB cable.
- After successful connection, the red and blue indicator lights will turn on and then off, and the red indicator will start flashing.
- Access the "Removable Disk" drive on your computer and open the video files to view them.
Video: Illustrates how to remove the SD card and view video files using a card reader or USB cable.
7. Replacing the Photo
You can personalize your hidden camera frame by replacing the default photo.
- Hold the frame holder and press down the clip at the bottom of the photo frame.
- Pull out the photo frame back panel.
- Remove the existing photo and the protective film from both sides of the acrylic board.
- Insert your new photo (photo size should not exceed 5.9 x 3.9 inches) into the frame, ensuring it is positioned correctly.
- Place the acrylic board back into the frame, fixing the bottom first, then slightly bending and mounting the top.
- Put the clip of the back plate into the picture frame, and press the clip down firmly. Push the frame backplane forward to fix it in the photo frame.

Image: Step-by-step guide on how to replace the photo within the frame.
Video: Demonstrates the process of replacing the photo in the frame.
8. Troubleshooting
- Product does not respond after pressing the on button: The product battery may be low. Charge the product with the adapter for more than 6 hours.
- Unable to view videos on SD card: This may be due to player and file format incompatibility. Try using the VLC media player.
- There are no files on the SD card: Format the SD card to FAT32. If the SD card is damaged, replace it.
- The red light keeps flashing: The product does not recognize the SD card. Try replacing the SD card or resetting the device.
Image: Common troubleshooting steps for the camera frame.
9. Specifications
| Feature | Specification |
|---|---|
| Indoor/Outdoor Usage | Indoor |
| Compatible Devices | SD Cards Up To 64GB |
| Power Source | Battery Powered |
| Controller Type | Push Button |
| Mounting Type | Tabletop Mount |
| Video Capture Resolution | 1080p, 720p |
| Color | Black |
| Number of Items | 1 |
| Included Components | Hidden Camera, Photo Frame, User Manual |
| Number of Channels | 1 |
| Form Factor | Picture Frame |
| Effective Video Resolution | 1920 |
| Viewing Angle | 90 Degrees |
| Installation Type | Freestanding |
| Night Vision Range | 15 Feet |
| Frame Rate | 30fps |
| Material | Glass, Plastic |
| Wattage | 2 watts |
| Item dimensions L x W x H | 1.5 x 7 x 8 inches |
| Water Resistance Level | Not Water Resistant |
| Batteries Required? | Yes |
| Flash Memory Type | SD |
| Item Weight | 8 ounces |
| Shape | Rectangular |
| Low light technology | Infrared LED |
| Alert Type | Motion Only |
| Room Type | Nursery, Office |
| Light Source Type | Infrared LED |
| Video Capture Format | VID |
| Specific Uses For Product | Indoor Security, Surveillance |
| Unit Count | 1.0 Count |
| Control Method | Push Button |
| Number of IR LEDs | 8 |
| Flash Memory Supported Size Maximum | 64 GB |
| Audio Visual Recording Capabilities | HD Video Recording With Photo Frame Concealment |
| Product Dimensions | 1.5 x 7 x 8 inches |
| Batteries | 1 AA batteries required. (included) |
| Manufacturer | TONGCAM |
| Recommended Uses For Product | Home Security, Indoor Security, Monitoring |
| Connectivity Technology | No WiFi, SD Card |
| Special Feature | Hidden Camera, Photo Frame Design, Replaceable Photo, SD Card Recording |
10. Warranty and Support
For any questions or support needs regarding your TONGCAM Hidden Camera Photo Frame, please contact us. We are committed to resolving any issues promptly.
Contact Email: lanmgl@163.com