1. Introduction
This manual provides essential information for the safe and efficient operation of your VEVOR LSSJ-515 Pottery Wheel. Please read these instructions thoroughly before initial use and retain them for future reference. Proper understanding and adherence to these guidelines will ensure optimal performance and longevity of your equipment.
1.1 Safety Precautions
- Always ensure the pottery wheel is placed on a stable, level surface.
- Connect the unit to a properly grounded power outlet.
- Keep hands and loose clothing away from the rotating wheel head during operation.
- Do not allow children to operate the machine without adult supervision.
- Disconnect power before cleaning or performing any maintenance.
- Avoid splashing water directly onto the control panel or motor housing.
2. Components Overview
Familiarize yourself with the main parts of your VEVOR LSSJ-515 Pottery Wheel:
- Main Unit: Houses the motor, control panel, and adjustable legs.
- Turntable (Wheel Head): The rotating disc where clay is centered and formed. Made of aluminum alloy, 11 inches (28 cm) in diameter.
- Detachable Water Basin: Collects water and clay slurry during use, designed for easy removal and cleaning.
- Foot Pedal: Provides variable speed control for hands-free operation.
- Control Panel: Features power switch and rotation direction switch.
- Adjustable Legs: Allows for height adjustment of the unit.
- Tool Set: Includes 8 stainless steel tools and 8 wood shaping tools for various pottery techniques.

Image: Overview of the VEVOR LSSJ-515 Pottery Wheel, showing the main unit, turntable, and foot pedal.
3. Setup Instructions
3.1 Unpacking and Placement
- Carefully remove all components from the packaging.
- Place the main unit on a sturdy, level surface. Ensure there is adequate space around the unit for comfortable operation and to prevent accidental contact with walls or other objects.
3.2 Adjusting Leg Height
The pottery wheel features adjustable legs to accommodate different user heights and working preferences. The height can be adjusted within a range of 0 to 6 inches (0 to 150 mm).
- Loosen the securing screws on each leg using the provided hex wrench.
- Extend or retract each leg to the desired height. Ensure all legs are adjusted to the same height for stability.
- Tighten the securing screws firmly on each leg to lock the height in place.
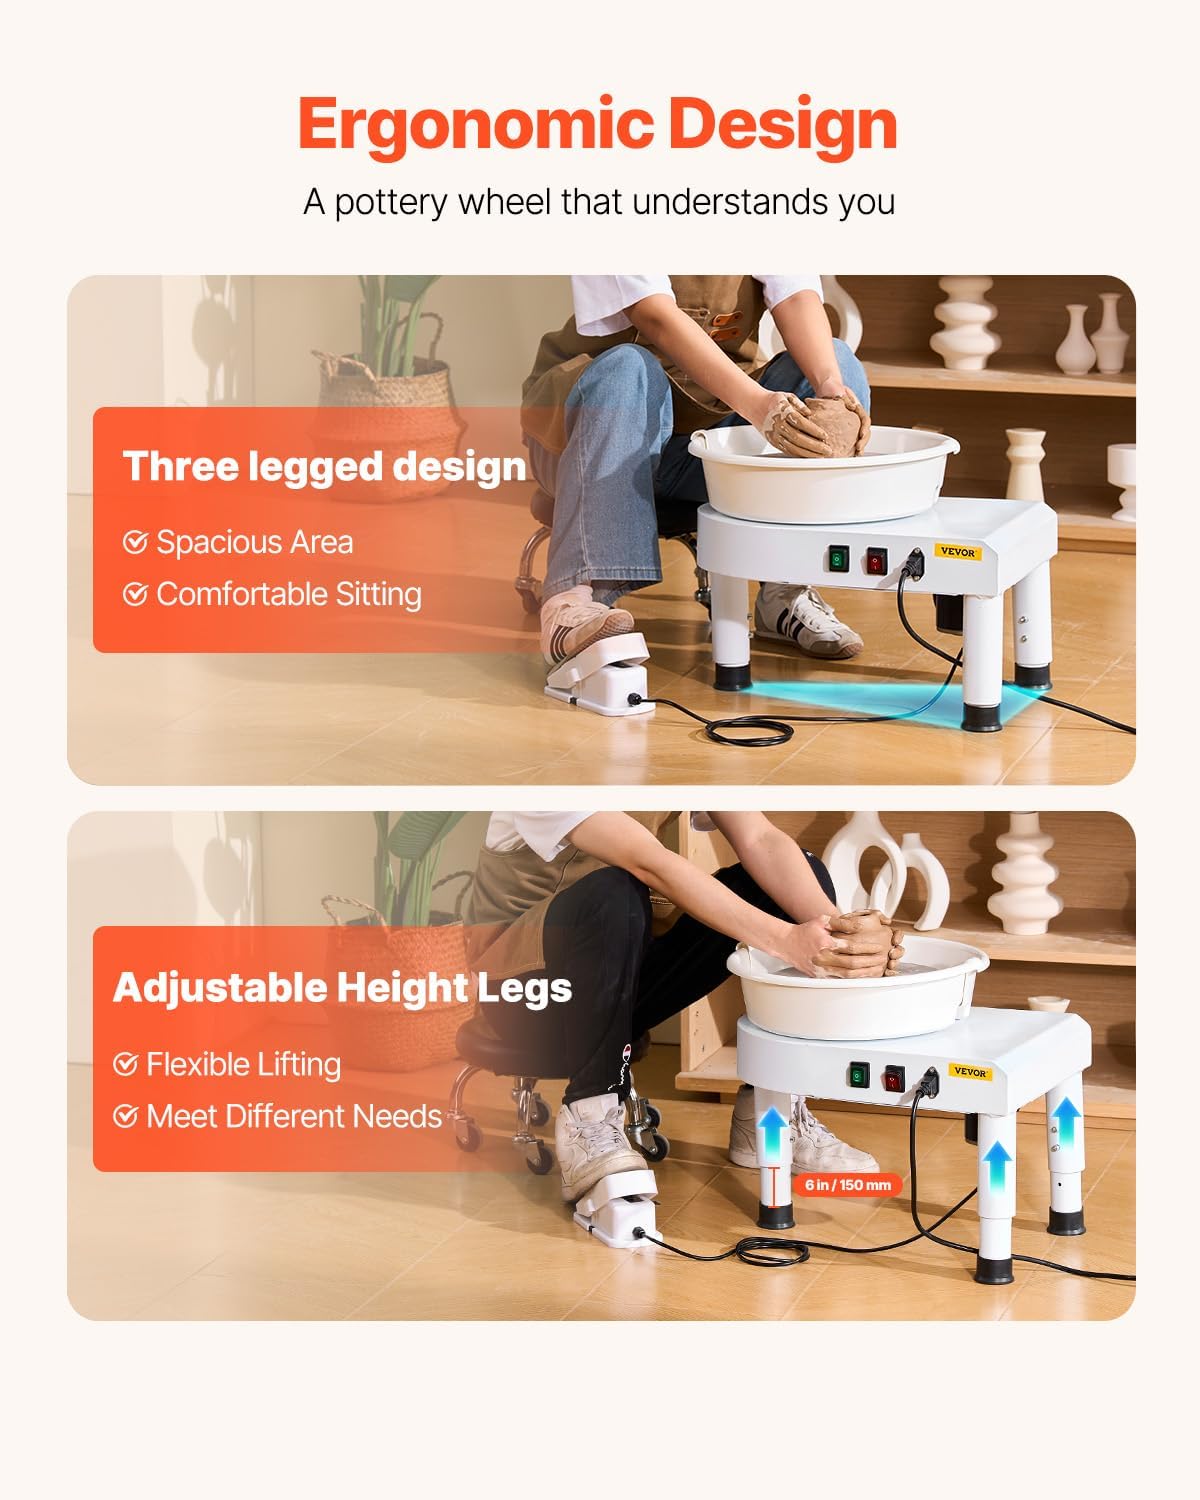
Image: Illustration of the adjustable leg feature, showing how to extend and secure the legs for ergonomic use.
3.3 Attaching the Water Basin
- Align the two halves of the detachable water basin around the turntable.
- Gently press the basin halves together until they securely fit around the base of the turntable. Ensure the basin is properly seated to prevent leaks.

Image: The detachable water basin, shown in two parts for easy assembly and cleaning around the turntable.
3.4 Power Connection
- Connect the foot pedal cable to the designated port on the control panel.
- Plug the main power cord into a compatible single-phase three-wire grounded electrical outlet. The unit includes an earth leakage protection device for safety.
4. Operating Instructions
4.1 Powering On and Off
Locate the red power switch on the control panel. Press it to turn the unit ON or OFF.
4.2 Adjusting Rotation Direction
The green switch on the control panel allows you to change the direction of the turntable's rotation (clockwise or counterclockwise) to suit your working preference.

Image: The intuitive control panel with power and direction switches, alongside the variable speed foot pedal.
4.3 Speed Control with Foot Pedal
The foot pedal provides variable speed control, allowing you to adjust the turntable's rotation speed from 60 to 300 revolutions per minute (rpm). Press down on the pedal to increase speed and release to decrease it. This hands-free control enables precise shaping.
4.4 Working with Clay
- Prepare your clay by wedging it to remove air bubbles and achieve a consistent texture.
- Place a piece of clay (up to 11 lbs / 5 kg) firmly in the center of the turntable.
- Begin rotating the wheel at a moderate speed using the foot pedal.
- Use water and your hands to center the clay, then proceed with shaping your desired ceramic piece.

Image: A user actively shaping clay on the VEVOR LSSJ-515 Pottery Wheel, demonstrating its use.
5. Maintenance
5.1 Cleaning
- Always disconnect the power supply before cleaning.
- Remove the detachable water basin and clean it thoroughly with water.
- Wipe down the turntable and the main unit with a damp cloth to remove any clay residue. Avoid using abrasive cleaners or excessive water directly on electrical components.
- Ensure all parts are dry before reassembling or storing the unit.
5.2 Storage
When not in use, store the pottery wheel in a dry, clean environment, away from direct sunlight and extreme temperatures. Ensure the power cord is neatly coiled and stored to prevent damage.
6. Troubleshooting
- Wheel not turning: Check if the power cord is securely plugged in and the power switch is ON. Ensure the foot pedal is connected.
- Excessive noise during operation: Verify that the water basin is correctly installed and not rubbing against the turntable. Check for any loose components or obstructions. The unit operates at a low noise level of less than 60dB under normal conditions.
- Turntable wobbles: Ensure the pottery wheel is on a stable, level surface. Check that the adjustable legs are securely tightened and set to an even height.
- Difficulty centering clay: This is often related to user technique. Ensure proper clay preparation and consistent pressure. If the wheel itself is unstable, refer to the 'Turntable wobbles' point.
If issues persist after attempting these troubleshooting steps, please contact VEVOR customer support.
7. Specifications
| Feature | Specification |
|---|---|
| Model Number | LSSJ-515 |
| Power | 350W |
| Speed Range | 60-300 rpm |
| Turntable Size | 11 in / 28 cm |
| Clay Capacity | 11 lbs / 5 kg |
| Retractable Table Range | 0-6 in / 0-150 mm |
| Working Noise | <60dB |
| Pedal Cable Length | 70.8 in / 1.8 m |
| Net Weight | 30.86 lbs / 14 kg |
| Product Dimensions | 19.69 x 16.14 x 15.75 inches |
8. Warranty and Support
8.1 Warranty Information
For detailed warranty information, please refer to the warranty card included with your purchase or visit the official VEVOR website. Keep your proof of purchase for any warranty claims.
8.2 Customer Support
If you have any questions, require technical assistance, or need to report an issue with your VEVOR LSSJ-515 Pottery Wheel, please contact VEVOR customer support. Contact details can typically be found on the VEVOR website or in your product packaging.


