1. Introduction
Thank you for choosing the Great voell 24-inch Curved Gaming Monitor. This manual provides essential information for setting up, operating, and maintaining your monitor. Please read it thoroughly before use to ensure proper functionality and to maximize your viewing experience.
This monitor features a 24-inch curved display with FHD 1080P resolution, a 165Hz refresh rate, and 1ms response time, enhanced by AMD FreeSync technology for smooth visuals. Its 98% sRGB color gamut ensures vibrant and accurate color reproduction.
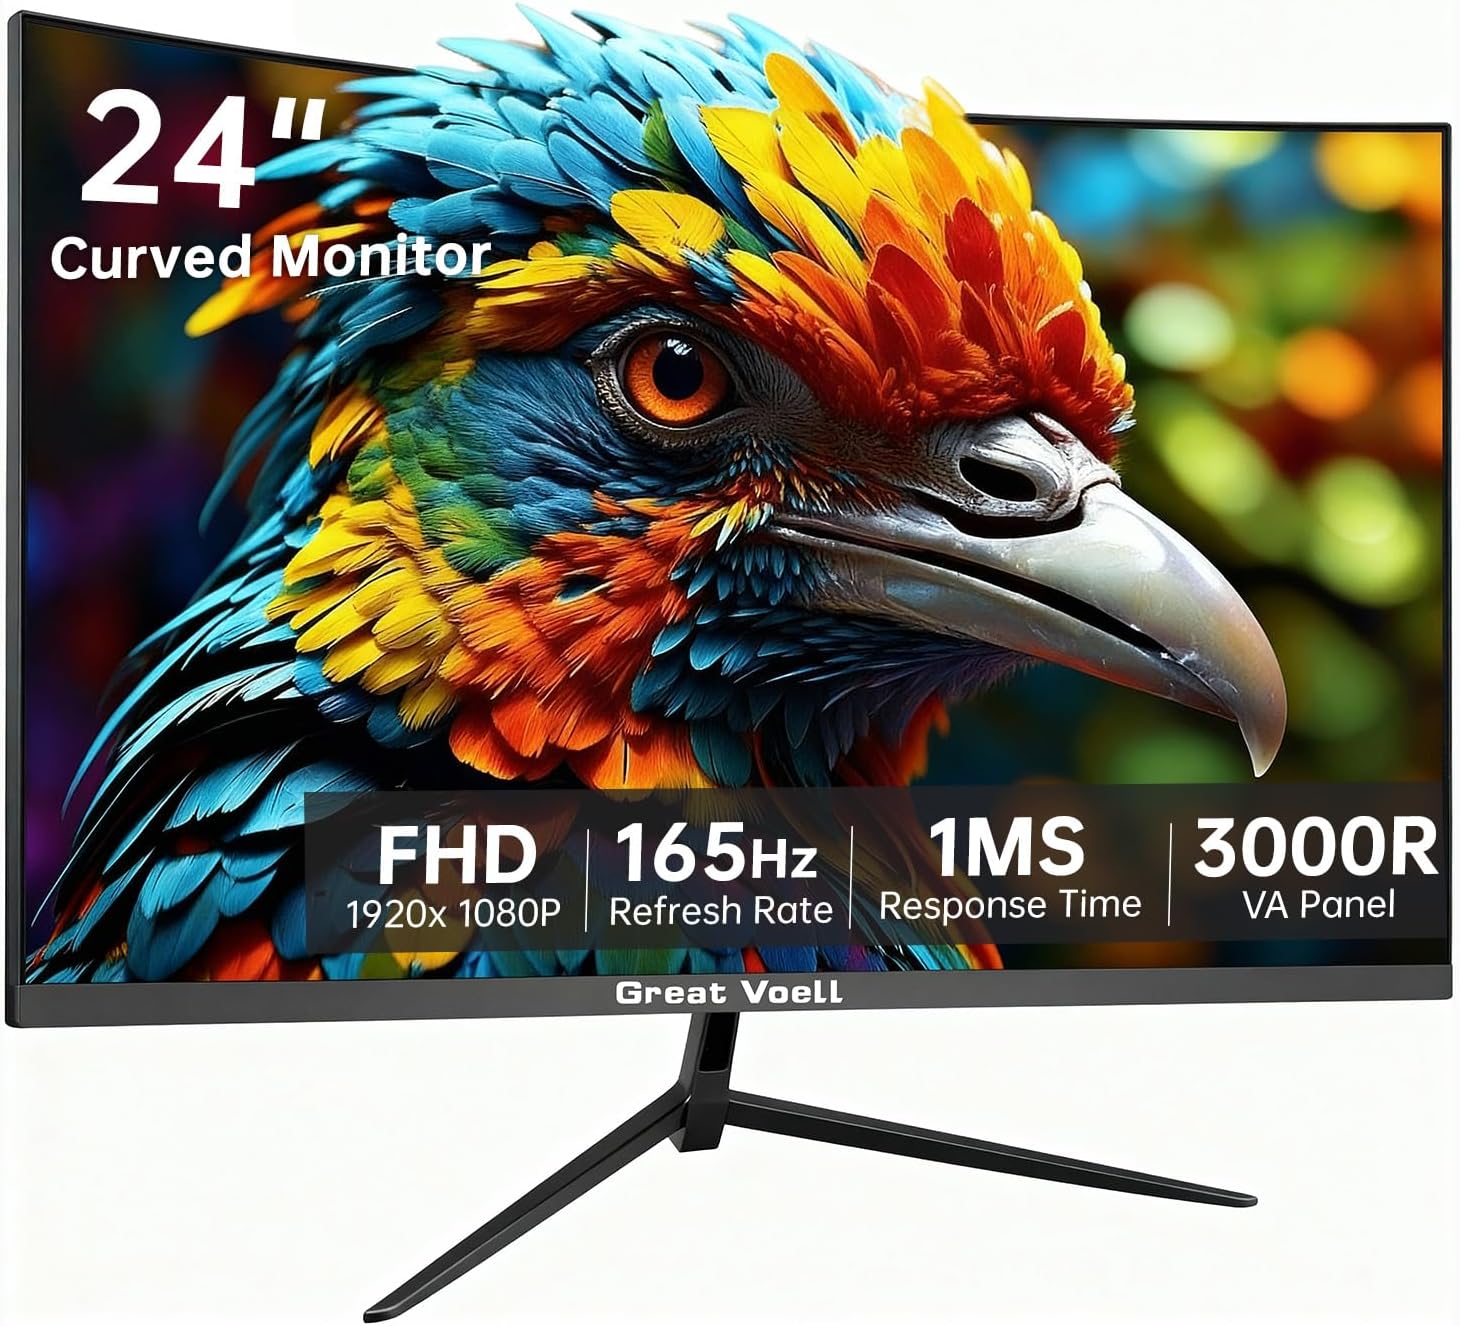
Image 1.1: Front view of the Great voell 24-inch Curved Gaming Monitor.

Image 1.2: Example of a dual monitor setup with Great voell curved monitors, showcasing their application in gaming, design, and entertainment environments.
2. Safety Information
Please observe the following safety precautions to prevent damage to the monitor and ensure your safety:
- Do not expose the monitor to rain, moisture, or extreme temperatures.
- Ensure proper ventilation around the monitor. Do not block ventilation openings.
- Use only the power adapter supplied with the monitor.
- Avoid placing heavy objects on the power cord.
- Disconnect the power plug from the outlet if the monitor will not be used for an extended period.
- Do not attempt to service the monitor yourself. Refer all servicing to qualified personnel.
3. Package Contents
Verify that all items are present in your package:
- Great voell 24-inch Curved Gaming Monitor
- Monitor Stand (Base and Neck)
- Power Adapter and Power Cable
- HDMI Cable
- User Manual (this document)
- Screws for stand assembly (if applicable)
4. Setup
4.1 Assembling the Stand
- Carefully remove the monitor from its packaging, keeping it protected on a soft, flat surface.
- Attach the stand neck to the monitor panel. Ensure it clicks securely into place or is fastened with the provided screws.
- Attach the stand base to the stand neck, securing it with the thumb screw or screws provided.
- Place the assembled monitor on a stable, level desk.
4.2 VESA Mounting
The monitor is compatible with 75x75mm VESA mounts, allowing for flexible installation on a wall mount or monitor arm (sold separately).
- Remove the stand if it is already attached.
- Follow the instructions provided with your VESA mount to attach the monitor securely.

Image 4.1: Rear view of the monitor showing VESA mounting points for alternative installation options.
4.3 Connecting Your Monitor
Connect the monitor to your computer or other devices using the appropriate cables.
- Power Connection: Connect the power adapter to the monitor's DC input port, then plug the power cable into a power outlet.
- Video Connection: Use the provided HDMI cable to connect your computer's HDMI output to one of the monitor's HDMI input ports. Alternatively, use a DisplayPort (DP) cable if your device supports it.
- Audio Connection: If your device supports audio output via HDMI/DP, the monitor may play audio. For external speakers or headphones, connect them to the monitor's audio output jack (if available).

Image 4.2: Rear view of the monitor displaying available input ports including HDMI 2.0, DisplayPort 1.4, USB 2.0, and DC power input.
5. Operating Instructions
5.1 Power On/Off
Press the power button, typically located on the bottom right side of the monitor, to turn the monitor on or off. The power indicator light will illuminate when the monitor is on.
5.2 On-Screen Display (OSD) Menu
The OSD menu allows you to adjust various monitor settings. Use the control buttons (usually located on the bottom right or rear of the monitor) to navigate the menu.
- Menu Button: Opens the OSD menu.
- Navigation Buttons: Used to move up, down, left, or right through menu options.
- Enter/Select Button: Confirms a selection or enters a sub-menu.
- Exit Button: Exits the current menu or OSD.
5.3 Display Settings
Adjust these settings for optimal visual performance:
- Brightness/Contrast: Adjust to your preferred viewing level.
- Color Settings: Fine-tune color temperature, hue, and saturation. The monitor supports 98% sRGB for accurate colors.
- Resolution: Ensure your computer's display settings are set to the monitor's native resolution of 1920x1080 (FHD).
- Refresh Rate: Set your computer's display refresh rate to 165Hz for the smoothest experience.

Image 5.1: Visual representation of vibrant colors and the clarity difference between FHD (1920x1080) and HD (1280x720) resolutions on the monitor.

Image 5.2: Illustration of the monitor's 4000:1 contrast ratio, demonstrating richer details and purer colors compared to lower contrast displays.
5.4 AMD FreeSync
This monitor supports AMD FreeSync technology, which synchronizes the monitor's refresh rate with your graphics card's frame rate to eliminate screen tearing and stuttering during gaming.
- Ensure your graphics card is AMD FreeSync compatible.
- Enable FreeSync in your graphics card's control panel software.
- Verify that FreeSync is enabled in the monitor's OSD menu (if applicable).

Image 5.3: Depiction of the monitor's 165Hz refresh rate and Adaptive-Sync technology, ensuring smooth motion sequences and rapid response without stuttering.
5.5 Ergonomic Adjustments
The monitor offers various adjustments for comfortable viewing:
- Tilt: Adjust the screen angle forward or backward (-5° to 20°).
- Vertical Lift: Adjust the screen height (up to 130mm).
- Rotation: Rotate the screen right or left (up to 30°).

Image 5.4: Illustrations demonstrating the monitor's ergonomic capabilities, including tilt, vertical lift, and rotation for customized viewing comfort.
6. Maintenance
6.1 Cleaning the Monitor
- Always unplug the monitor before cleaning.
- Use a soft, lint-free cloth lightly dampened with water or a mild, non-abrasive screen cleaner.
- Do not spray cleaner directly onto the screen.
- Avoid using benzene, thinner, ammonia-based cleaners, or abrasive materials.
7. Troubleshooting
If you encounter issues with your monitor, refer to the following common problems and solutions:
| Problem | Possible Cause | Solution |
|---|---|---|
| No power | Power cable not connected; Power outlet faulty | Ensure power cable is securely connected; Test power outlet with another device. |
| No signal | Video cable not connected; Incorrect input source selected | Check video cable connections (HDMI/DP); Select correct input source via OSD menu. |
| Image is blurry or distorted | Incorrect resolution; Cable issue | Set display resolution to 1920x1080; Try a different video cable. |
| Screen tearing/stuttering | FreeSync not enabled; Graphics card driver issue | Enable AMD FreeSync in OSD and graphics card settings; Update graphics drivers. |
| No sound | Audio cable not connected; Volume too low; Incorrect audio output selected | Ensure external speakers/headphones are connected; Adjust volume; Select monitor as audio output in OS settings. |
8. Specifications
| Feature | Specification |
|---|---|
| Model Number | Q240B16 |
| Screen Size | 24 Inches |
| Panel Type | Curved VA Panel (1500R curvature) |
| Resolution | 1920 x 1080 (FHD 1080p) |
| Aspect Ratio | 16:9 |
| Refresh Rate | 165Hz |
| Response Time | 1ms |
| Color Gamut | 98% sRGB |
| Contrast Ratio | 4000:1 |
| Adaptive Sync | AMD FreeSync |
| Connectivity | HDMI 2.0, DisplayPort 1.4, USB 2.0, DC Power |
| VESA Compatibility | 75x75mm |
| Product Dimensions | 6.65 x 16.3 x 21.25 inches |
| Item Weight | 7.48 pounds |
| Manufacturer | Shenzhen Yundacheng Technology Co. |
9. Warranty and Support
The Great voell 24-inch Curved Gaming Monitor is backed by a 2-year warranty from the date of purchase. This warranty covers manufacturing defects and ensures thorough pre-delivery inspection, including 1,200 hours of aging tests and 36 procedures, such as simulations for light, temperature, humidity, and drop tests.
For technical support, warranty claims, or further assistance, please contact Great voell customer service through the retailer's platform or the official Great voell support channels. Please have your model number (Q240B16) and purchase information ready when contacting support.
For more information, visit the official Great voell website or contact your local distributor.