Introduction
This manual provides detailed instructions for the installation, operation, and maintenance of your Meiqils 4 Channel 2K Dash Cam. Please read this manual thoroughly before using the device to ensure proper functionality and safety. Keep this manual for future reference.
What's in the Box
Verify that all items are present in your package:
- 1x 4 Channel Dash Cam (Front, Rear, Left, Right Cameras integrated)
- 1x Type-C Charging Cable
- 1x 64GB SD Card
- 1x GPS Module
- 1x Installation Tool

Image: Contents of the Meiqils 4 Channel 2K Dash Cam package.
Product Features
The Meiqils 4 Channel 2K Dash Cam offers advanced features for comprehensive vehicle surveillance:
- 4-Channel Recording: Simultaneously records from front (170° wide-angle), left, right (150° each), and a waterproof rear camera (150°).
- High Resolution: Captures 2K video from the front camera and 1080P from the rear, left, and right cameras in dual recording mode. The front camera can record up to 4K when used alone.
- Seamless Loop Recording: Automatically overwrites the oldest video files when the included 64GB Micro-SD card (supports up to 256GB) is full, ensuring continuous recording.
- Night Vision: Equipped with sensors for clear recording in low-light conditions.
- Advanced 5GHz WiFi & App Control: Connects to a dedicated app for faster video downloads (up to 8MB/s) and convenient remote management.
- Built-in G-Sensor: Detects sudden impacts or collisions and automatically locks the current video file to prevent overwriting.
- 24/7 Parking Monitor: Activates time-lapse recording mode after the engine is turned off, providing continuous surveillance for up to 24 hours.
- GPS Module: Records vehicle position and speed, providing valuable data for incident reconstruction.
- 3-inch IPS Screen: Provides instant footage verification and clear display.
- WDR (Wide Dynamic Range): Enhances video quality in varying light conditions.
- Motion Detection: Records when motion is detected, conserving storage space.

Image: Illustration of the 4-channel recording capability.

Image: Overview of additional powerful functions.
Product Overview
Familiarize yourself with the dash cam's components and dimensions:

Image: Product dimensions and screen size.
Setup and Installation
Follow these steps for proper installation of your dash cam:
- Mounting the Main Unit: Attach the main dash cam unit to your vehicle's windshield using the provided suction cup mount. Ensure it is positioned to capture a clear view of the road ahead without obstructing your driving view.
- Connecting the Rear Camera: Route the 20ft extension cable from the main unit to the rear of your vehicle. Mount the waterproof rear camera on the rear window or license plate area. The rear camera can be adjusted up to a full 360° angle.
- Connecting the GPS Module: Connect the GPS module to the designated port on the main unit. Position the GPS module in an area with a clear view of the sky for optimal signal reception.
- Power Connection: Use the Type-C charging cable to connect the dash cam to your vehicle's power outlet (e.g., cigarette lighter). For 24/7 parking monitoring, a hardwire kit (included) is required for continuous power.
- Insert SD Card: Insert the 64GB Micro-SD card into the designated slot on the dash cam. Ensure it is inserted correctly.

Image: Easy installation guide.
Operating Instructions
Basic Operation
- Power On/Off: The dash cam will automatically power on and begin recording when your vehicle starts. It will power off when the engine is turned off (unless 24/7 parking mode is active).
- Recording Modes: The dash cam supports various recording modes including continuous loop recording, emergency recording (G-Sensor activated), and parking monitoring.
- Screen Display: The 3-inch IPS screen displays live views from the cameras. You can switch between camera views using the menu buttons.
Loop Recording
The dash cam records video in segments. When the memory card is full, the earliest recorded video will be automatically deleted to make space for new recordings. This ensures continuous operation without manual intervention.

Image: Loop Recording functionality.
G-Sensor (Emergency Recording)
The built-in G-Sensor detects sudden acceleration, braking, or collisions. When triggered, it automatically locks the current video segment, protecting it from being overwritten by loop recording. This ensures critical footage is saved for evidence.

Image: G-Sensor for emergency recording.
24/7 Parking Monitor
With the optional hardwire kit (included), the dash cam can monitor your vehicle continuously even when parked. It automatically switches to time-lapse recording mode after the engine is turned off, providing surveillance against bumps or vandalism.

Image: 24-hour parking monitoring setup.
Night Vision
The dash cam is equipped with advanced night vision technology to ensure clear video capture in low-light and nighttime conditions, enhancing safety and visibility.
WiFi & App Control
The dash cam features 5GHz WiFi connectivity for seamless integration with its dedicated mobile application. This allows for:
- Live View: Stream real-time video from the dash cam to your smartphone.
- Video Download: Quickly download recorded footage to your phone at speeds up to 8MB/s.
- Settings Adjustment: Configure dash cam settings directly from the app.
- Sharing: Easily share videos and photos.
To connect:
- Power on the device and check WiFi information on the dash cam screen.
- Download the 'Vidure' app from your smartphone's app store (Google Play or App Store).
- Connect your smartphone to the dash cam's WiFi network.
- Open the app and add the dash cam as a device.
- Once connected, you can access all app features.
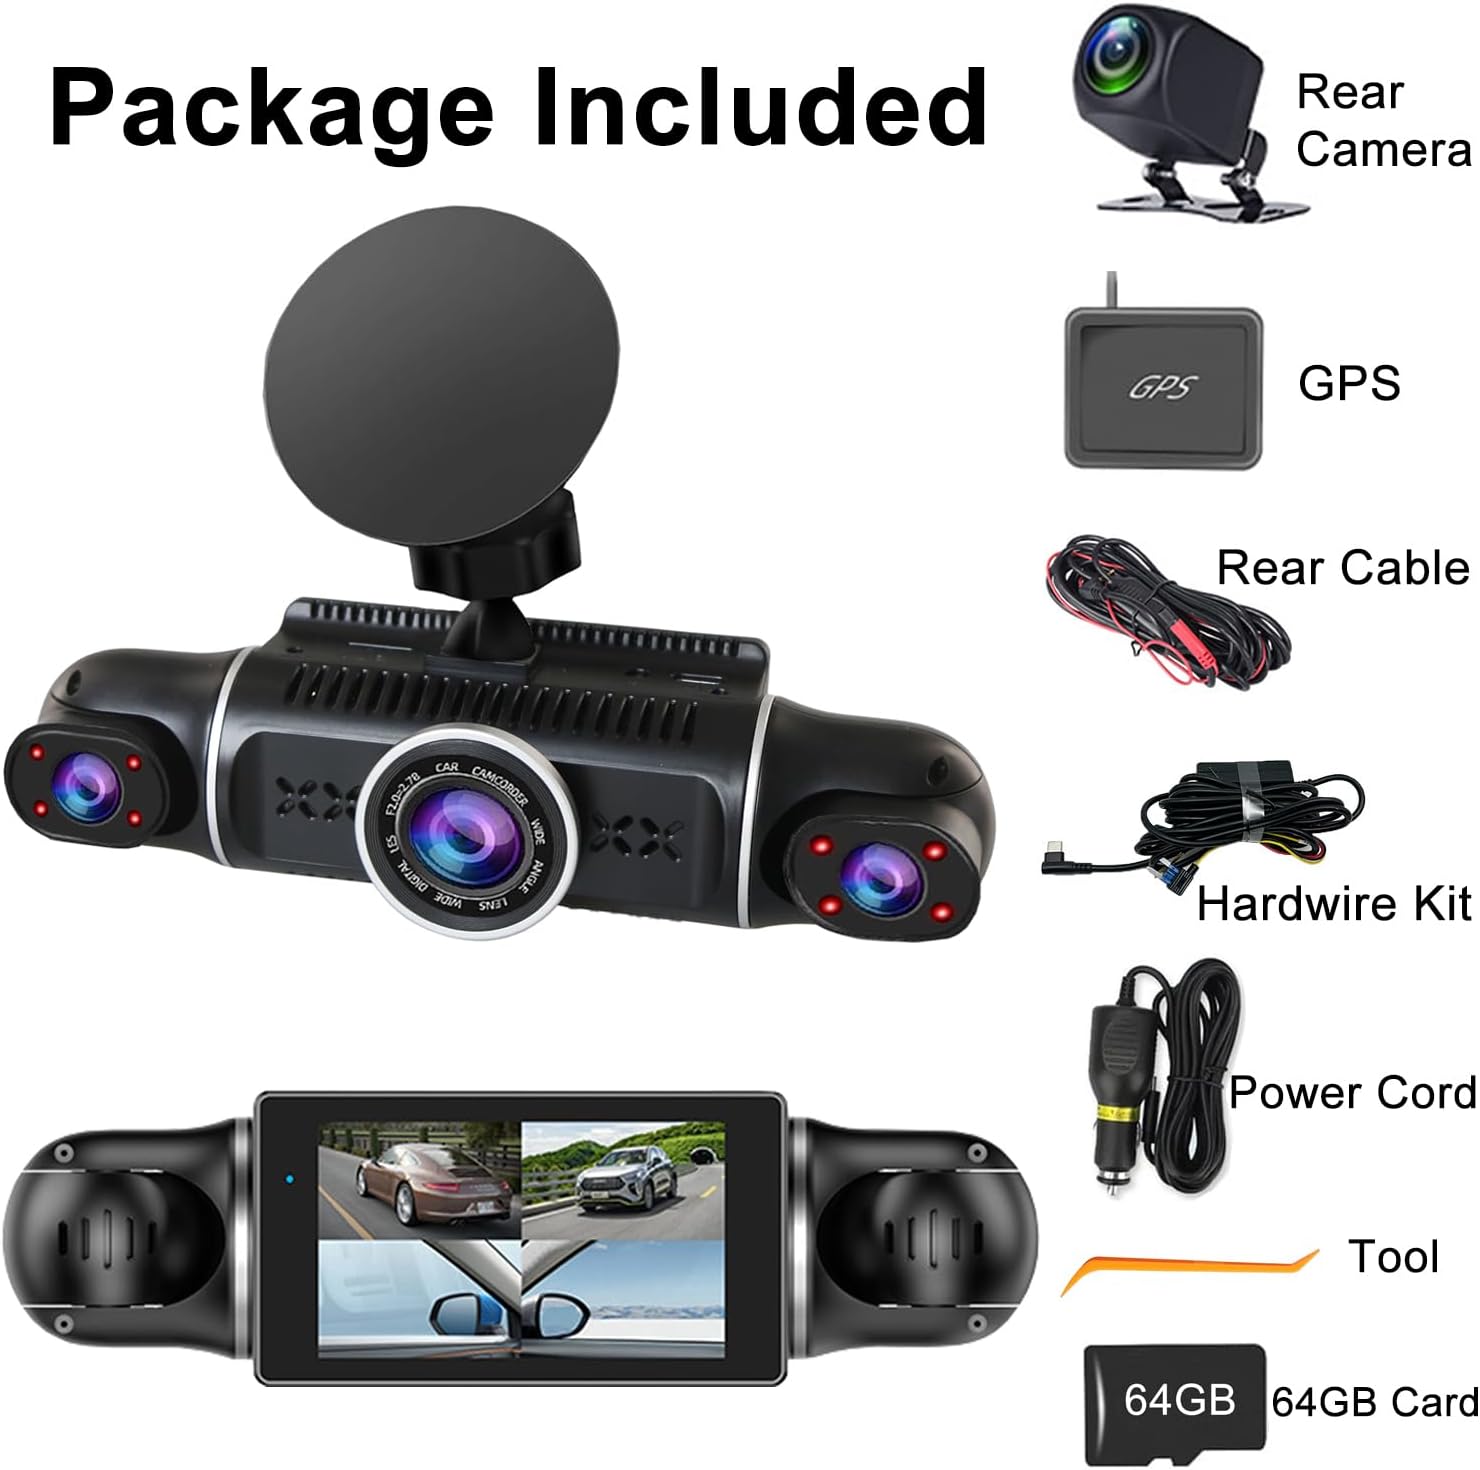
Image: WiFi and App Control setup.
GPS Functionality
The included GPS module provides accurate location and speed data, which is embedded into your video recordings. This information can be crucial for insurance claims or legal disputes, offering verifiable evidence of your vehicle's journey.
Troubleshooting
If you encounter issues with your dash cam, refer to the following common problems and solutions:
- Dash Cam Not Powering On: Ensure the power cable is securely connected to both the dash cam and the vehicle's power outlet. Check the vehicle's power outlet for functionality.
- Recording Stops Unexpectedly: Check if the SD card is full (loop recording should prevent this, but a faulty card might cause issues). Format the SD card regularly. Ensure the power supply is stable.
- Poor Video Quality: Clean the camera lenses. Ensure the dash cam is securely mounted and not vibrating. Check video resolution settings.
- WiFi Connection Issues: Ensure the dash cam's WiFi is enabled. Restart both the dash cam and your smartphone. Make sure you are within range of the dash cam's WiFi signal.
- GPS Not Working: Ensure the GPS module is connected correctly and has a clear view of the sky. It may take a few minutes to acquire a signal.
- Dash Cam Overheats: Ensure the dash cam is not exposed to direct sunlight for extended periods, especially in hot weather. Ensure proper ventilation around the device.
If problems persist, contact customer support for further assistance.
Specifications
| Feature | Detail |
|---|---|
| Product Dimensions | 7.48 x 7.28 x 2.56 inches |
| Item Weight | 1.52 pounds |
| Model Number | 4 Channel 2K Dash Cam |
| Batteries | 1 Lithium Polymer battery (included) |
| Connectivity | USB, Wireless (5GHz WiFi) |
| Video Capture Resolution | 1440p (2K) Front, 1080p Rear/Left/Right |
| Screen Size | 3 Inches (IPS) |
| Mounting Type | Windshield Mount |
| Special Features | 4 Channel, G-Sensor, 360° View, Loop Recording, WDR, WiFi, 24/7 Parking Monitor, Night Vision, Motion Detection, 64GB SD Card, 170° Wide Angle, App Control |
| Color | Black |
| Vehicle Service Type | Bus, Car, Minivan, Truck |

Image: Feature comparison table.
Warranty and Support
For warranty information and customer support, please refer to the contact details provided on the product packaging or visit the official Meiqils website. Keep your purchase receipt as proof of purchase.