Introduction
This instruction manual provides comprehensive information for the installation, operation, and maintenance of your PM POPMAKE CG6T Solar Security Camera. Please read this manual thoroughly before using the product to ensure proper function and safety. This camera is designed for outdoor surveillance, offering advanced features such as 2K resolution, AI motion detection, two-way audio communication, and full-color night vision, all powered by an integrated solar panel for continuous operation.
Safety Information
- Ensure the camera is installed in a location that receives adequate sunlight for optimal solar charging.
- Do not submerge the camera in water. While it is IP65 waterproof, it is not designed for underwater use.
- Use only the provided charging cable and accessories.
- Avoid placing the camera near strong magnetic fields or sources of interference.
- Keep out of reach of children.
- Operating temperature range: Consult specifications for details.
Package Contents
Please verify that all items are present in your package:
- PM POPMAKE CG6T Solar Security Camera
- Charging Cable
- Instruction Manual
- Mounting Screws
- Mounting Stand
Product Overview
Familiarize yourself with the components of your solar security camera.

Figure 1: Front view of the PM POPMAKE CG6T Solar Security Camera, showing the integrated solar panel on top, camera lens, motion sensors, and LED lights. The camera is mounted on a wall bracket.
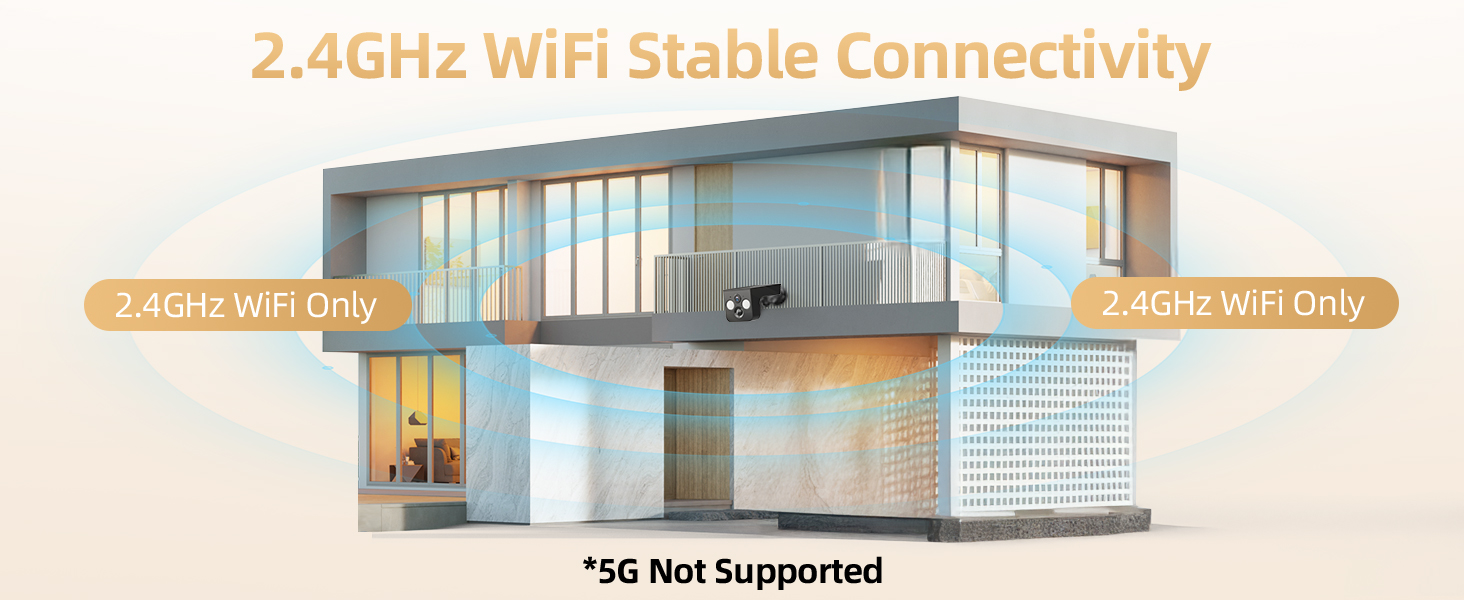
Figure 2: Illustration highlighting the wireless design of the camera, emphasizing easy installation without the need for electrical wiring.
- Solar Panel: Integrated on top for continuous power.
- Camera Lens: Captures 2K resolution video.
- PIR Motion Sensor: Detects heat signatures for accurate motion detection.
- LED Lights: Provide illumination for color night vision and act as a deterrent.
- Microphone: For audio input during two-way talk.
- Speaker: For audio output during two-way talk and siren alerts.
- Mounting Bracket: For secure installation on walls or other surfaces.
- Micro SD Card Slot: Supports local storage up to 128GB (card not included).
- Reset Button: Used for resetting the device.
- Charging Port: For initial charging or supplementary charging if needed.
Setup Guide
1. Initial Charging
Although the camera is solar-powered, it is recommended to fully charge the battery using the provided USB cable before the first use. Connect the charging cable to the camera's charging port and a standard 5V USB power adapter (not included). The indicator light will show charging status.
2. App Installation
Download the "Vicohome" app from your smartphone's app store (Google Play Store for Android or Apple App Store for iOS). Alternatively, scan the QR code provided in the quick start guide or on the product packaging to download the app.
- Open the Vicohome app and create a new account or log in if you already have one.
- Follow the on-screen instructions to add a new device.
3. Connecting to Wi-Fi
The camera supports 2.4GHz Wi-Fi networks only. 5GHz Wi-Fi is not supported.
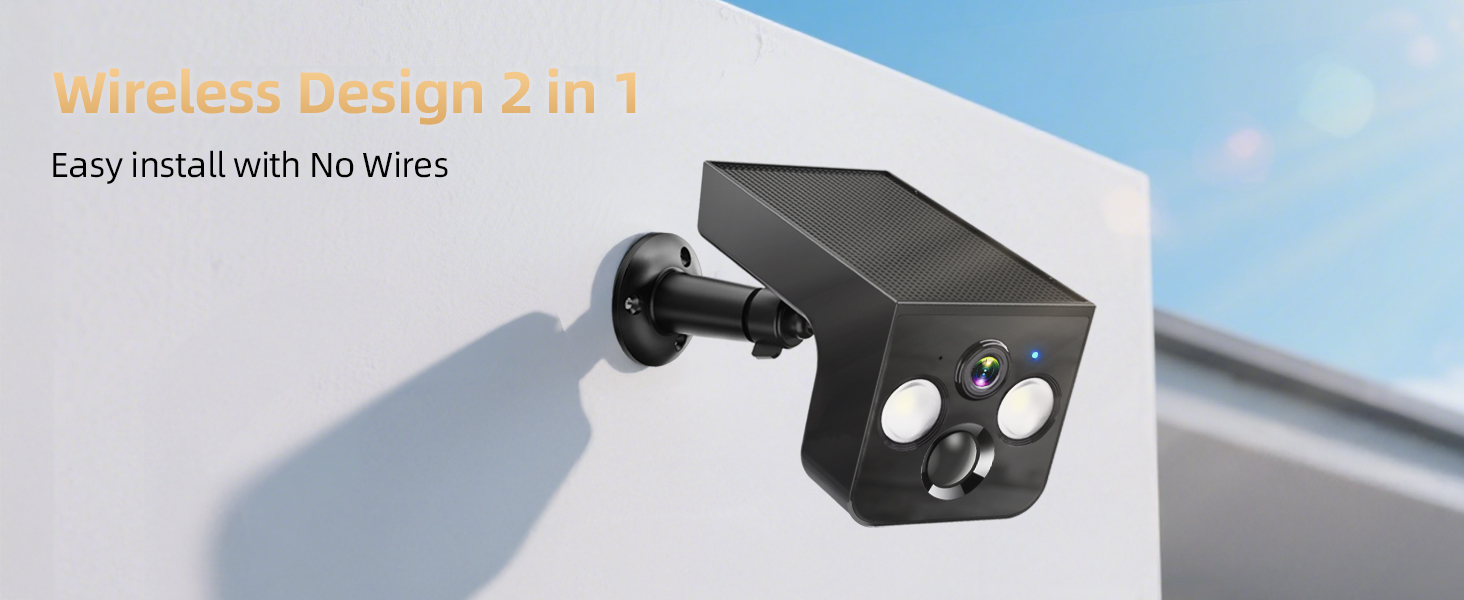
Figure 3: Illustration demonstrating the camera's connectivity to a 2.4GHz Wi-Fi network, indicating that 5GHz networks are not supported.
- Power on the camera. The indicator light will flash blue, indicating it's ready for pairing.
- In the Vicohome app, select "Add Device" and choose your camera model.
- Enter your 2.4GHz Wi-Fi network name (SSID) and password.
- The app will generate a QR code. Hold the QR code approximately 6-8 inches (15-20 cm) in front of the camera lens until you hear a confirmation sound.
- Once connected, the indicator light will turn solid blue.
4. Mounting the Camera
Choose a mounting location that provides a clear view of the area you wish to monitor and receives ample direct sunlight for the solar panel. Ensure the Wi-Fi signal is strong at the chosen location.
- Mark the positions for drilling using the mounting bracket as a template.
- Drill pilot holes and insert wall anchors if mounting on masonry or drywall.
- Secure the mounting bracket to the wall using the provided screws.
- Attach the camera to the mounting bracket and adjust the angle for optimal coverage and solar exposure.
Operation
1. Live View
Open the Vicohome app and select your camera from the device list to access the live video feed. You can view real-time footage from your camera at any time.
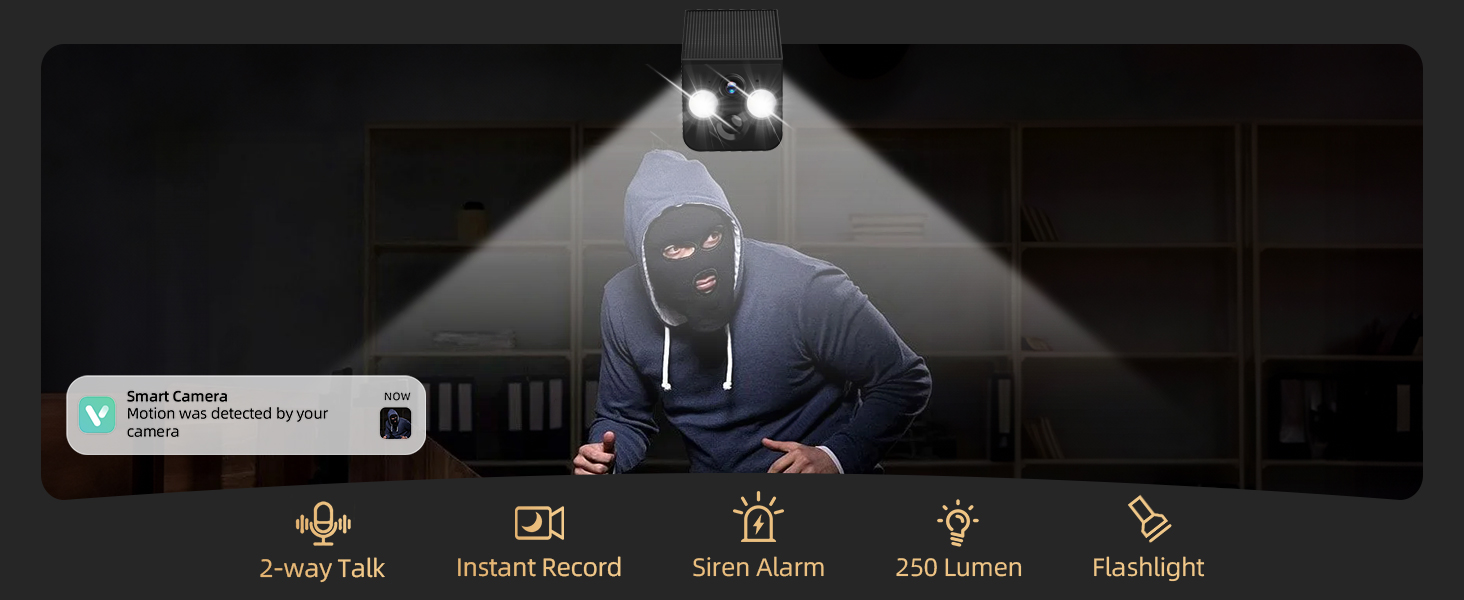
Figure 4: The Vicohome app interface displaying live video feed and options for accessing recorded footage from cloud or local storage.
2. Motion Detection and Alerts
The camera features advanced PIR motion detection and AI recognition to minimize false alarms.
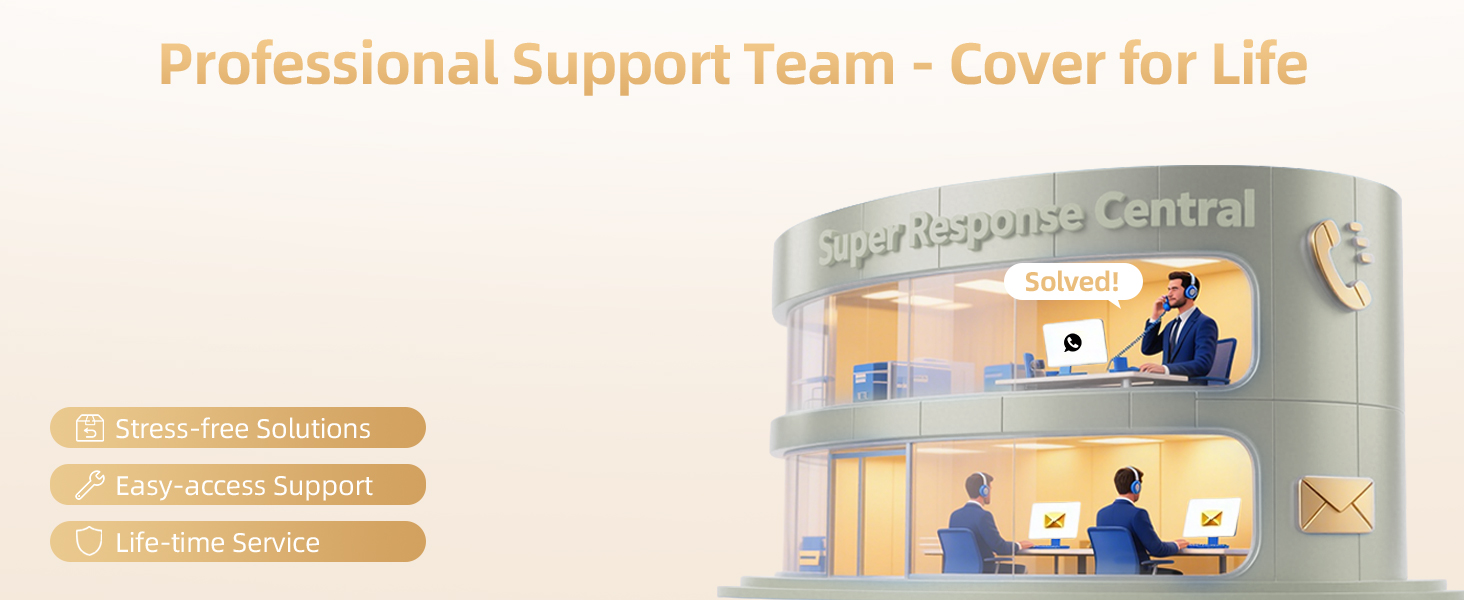
Figure 5: Visual representation of the camera's AI motion detection capabilities, distinguishing between humans, pets, packages, and vehicles.
- PIR Motion Detection: The camera detects movement based on heat signatures.
- AI Recognition: (Subscription may be required) Differentiate between people, pets, packages, and vehicles to receive more relevant alerts.
- Alert Settings: Customize notification sensitivity, detection zones, and alert types (e.g., push notifications, siren, flashlight) within the app settings.
3. Two-Way Audio
Use the two-way audio feature to communicate with visitors or deter unwanted individuals.
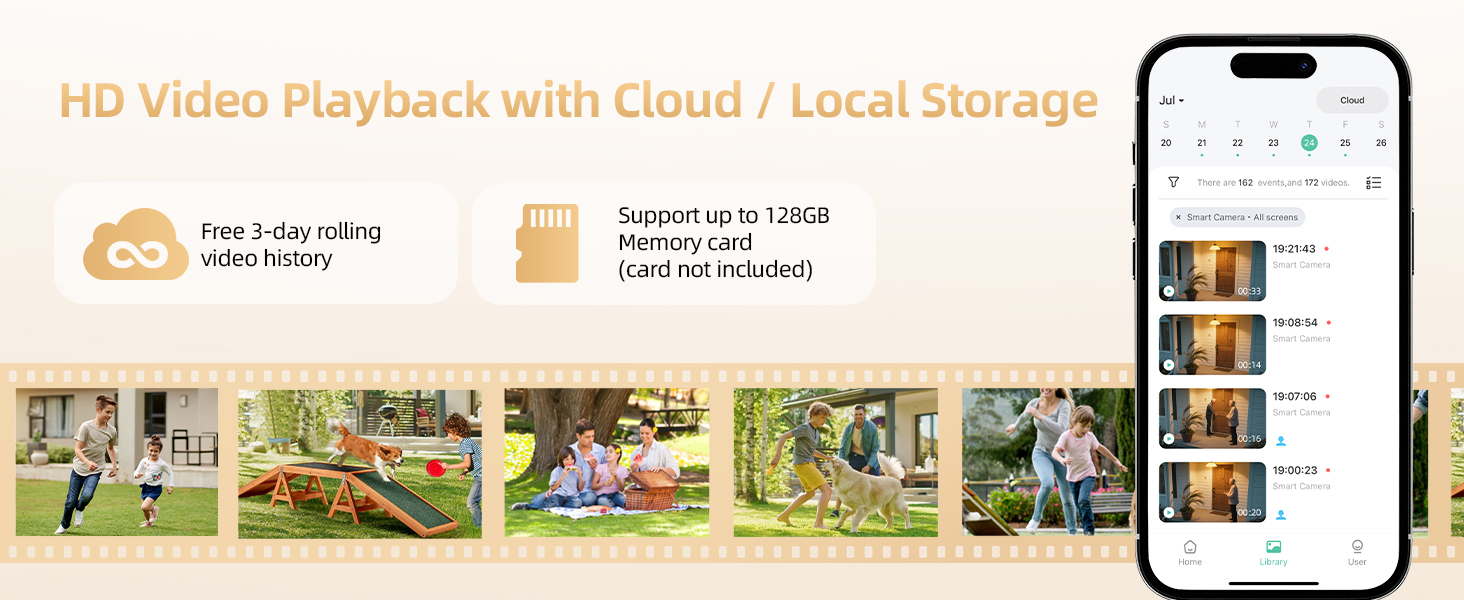
Figure 6: Depiction of the two-way audio function, allowing real-time communication through the camera.
- From the live view, tap the microphone icon to speak through the camera's speaker.
- Tap the speaker icon to hear audio from the camera's microphone.
4. Night Vision
The camera provides clear visibility even in low-light conditions.
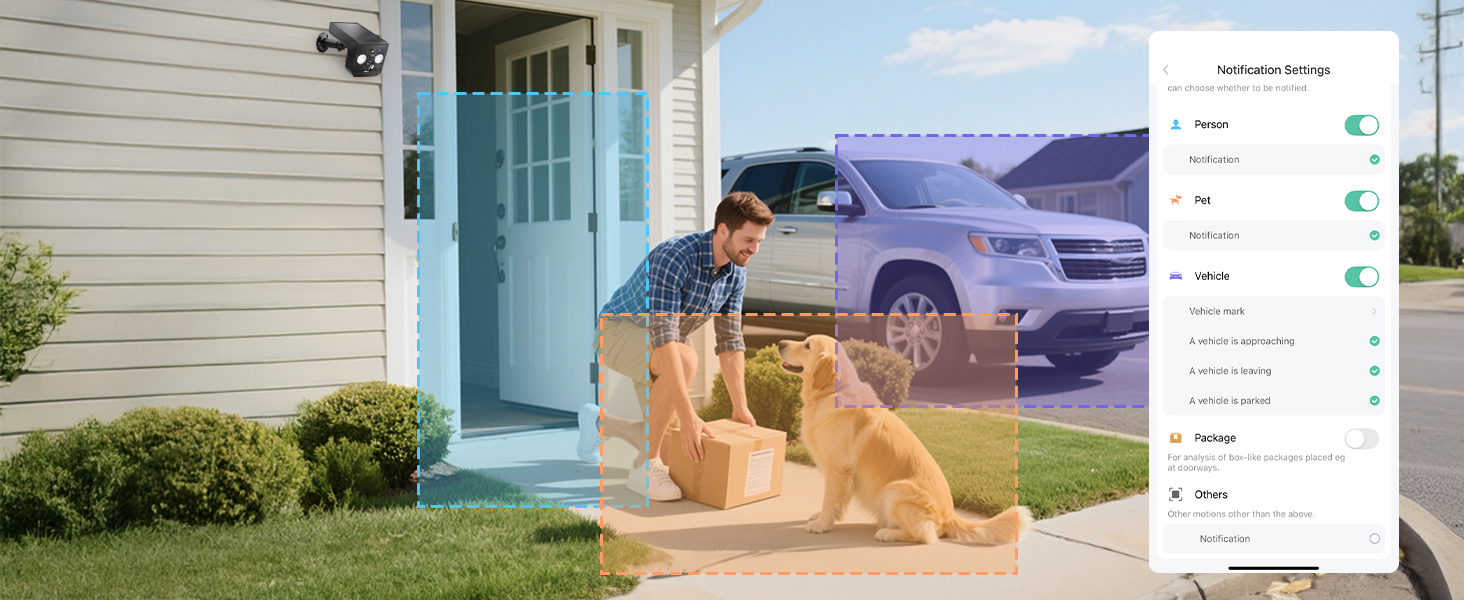
Figure 7: A split image illustrating the difference between full-color night vision and traditional infrared night vision, showcasing the camera's ability to capture color in darkness.
- Color Night Vision: Utilizes built-in LED lights to capture full-color video in dark environments.
- Infrared Night Vision: Automatically switches to black and white infrared mode when light conditions are extremely low.
5. Recording and Playback
Your camera supports both cloud storage and local Micro SD card storage.
- Cloud Storage: Enjoy free 3-day rolling video history. Longer plans may be available via subscription.
- Micro SD Card Storage: Insert a Micro SD card (up to 128GB, not included) into the camera's designated slot for local recording.
- Playback: Access recorded videos through the "Library" or "Playback" section in the Vicohome app.
6. Privacy Sleep Mode
Activate Privacy Sleep Mode to temporarily disable recording and alerts during specific times.
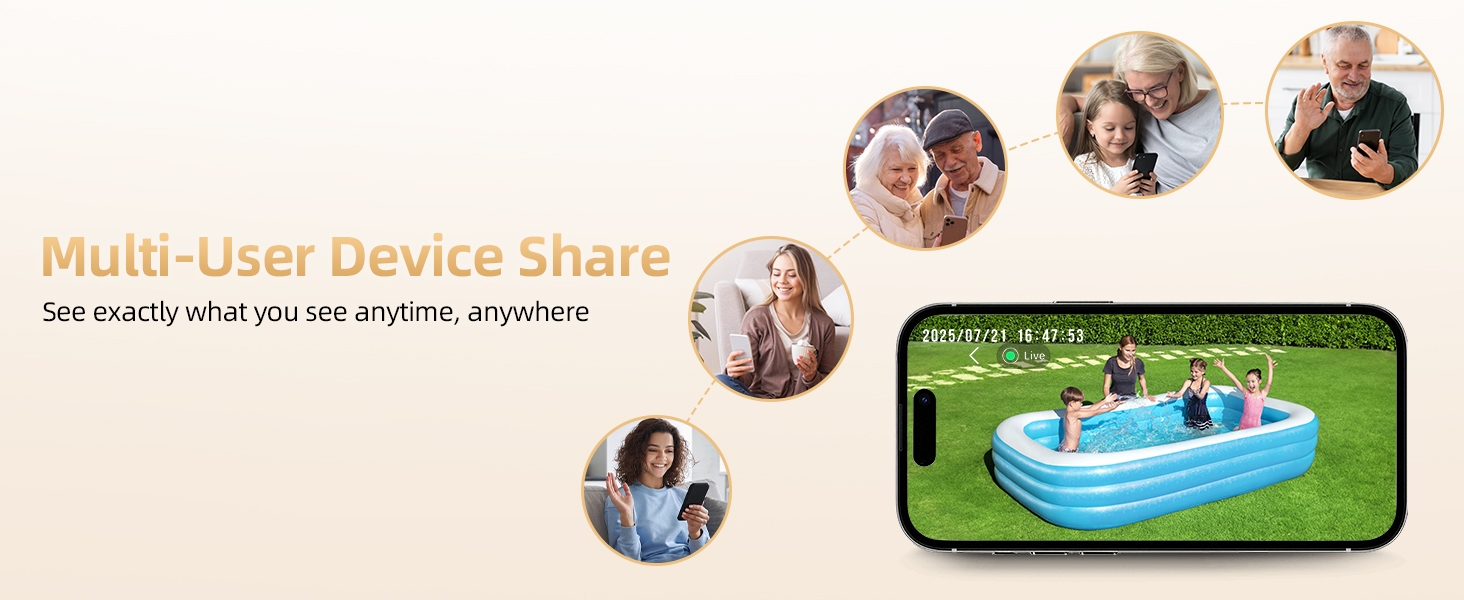
Figure 8: The Vicohome app interface displaying options to schedule and activate the One-Tap Privacy Sleep Mode.
- Navigate to the camera settings in the app.
- Enable "Schedule Sleep" and set your desired auto on/off times.
7. Multi-User Sharing
Share access to your camera's live feed and recordings with family members or trusted individuals.
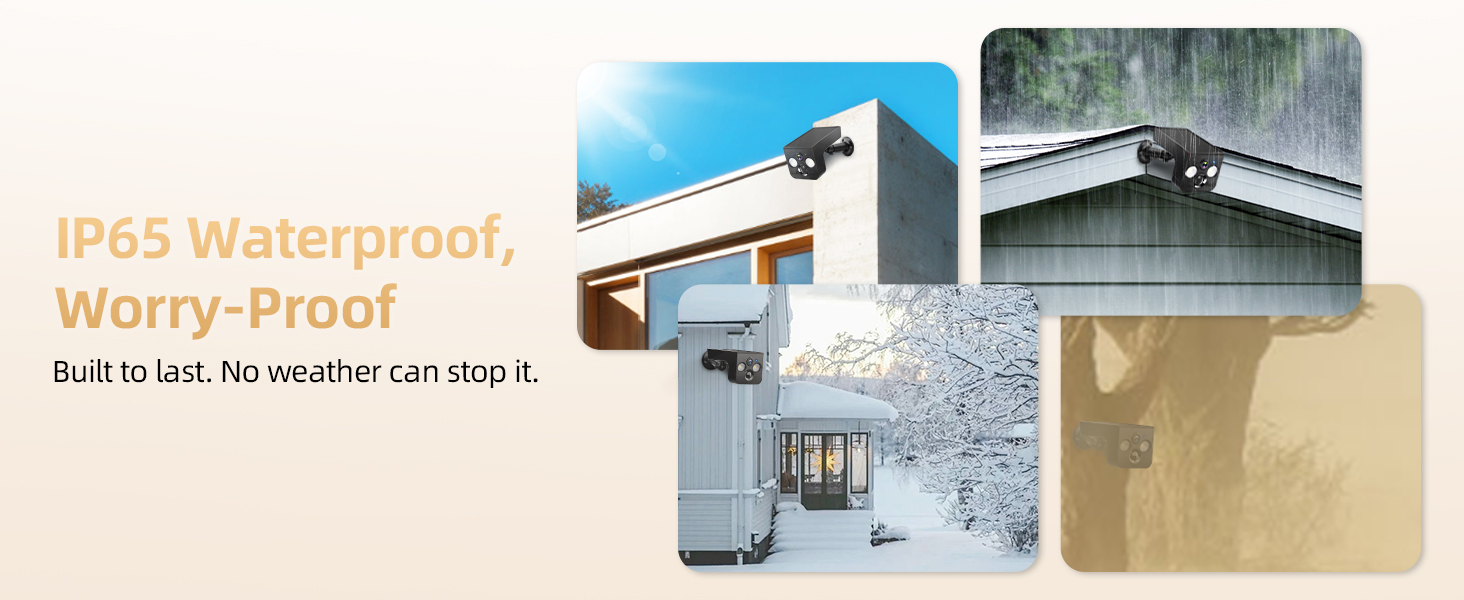
Figure 9: Diagram illustrating the multi-user device sharing feature, allowing several individuals to view the camera's live feed simultaneously.
- In the app, go to camera settings and find the "Share Device" option.
- Invite others by entering their Vicohome account details. You can revoke access at any time.
Maintenance
- Cleaning: Regularly wipe the camera lens and solar panel with a soft, damp cloth to ensure clear vision and efficient charging. Avoid abrasive cleaners.
- Solar Panel Efficiency: Ensure the solar panel is free from obstructions (e.g., leaves, snow, dirt) to maximize sunlight absorption.
- Battery Health: While solar-powered, extreme prolonged cloudy weather or low sunlight conditions may require occasional manual charging via the USB port to maintain battery health.
- Firmware Updates: Check the Vicohome app periodically for firmware updates to ensure optimal performance and new features.
Troubleshooting
| Problem | Possible Cause / Solution |
|---|---|
| Camera won't power on. | Battery may be depleted. Charge the camera fully using the USB cable. |
| Cannot connect to Wi-Fi. |
|
| Poor video quality. |
|
| Motion alerts are too frequent/infrequent. | Adjust motion detection sensitivity and detection zones in the app settings. Utilize AI recognition if available. |
| Solar panel not charging effectively. | Ensure the solar panel is clean and receives direct sunlight for several hours daily, free from obstructions. |
Specifications
| Feature | Detail |
|---|---|
| Model Name | CG6T |
| Indoor/Outdoor Usage | Outdoor |
| Power Source | Solar Powered (Built-in rechargeable battery) |
| Connectivity Protocol | Wi-Fi (2.4GHz only) |
| Video Capture Resolution | 1296p (2K) |
| Effective Still Resolution | 3 MP |
| Viewing Angle | 110 Degrees |
| Night Vision Range | 33 Feet (Color Night Vision supported) |
| Water Resistance Level | IP65 Waterproof |
| Storage Options | Micro SD (up to 128GB, not included), Cloud Storage (3-day free rolling history) |
| Audio | 2-Way Audio |
| Motion Detection | PIR Motion Sensor, AI Recognition (Human, Pet, Package, Vehicle) |
| Dimensions (L x W x H) | 5.5 x 3 x 3.5 inches |
| Item Weight | 1.12 pounds |
| Included Components | Charging Cable, Instruction Manual, Mounting Screw, Stand |
Warranty and Support
PM POPMAKE is committed to providing reliable products and customer satisfaction. While specific warranty terms may vary, the manufacturer offers professional support for the lifetime of the product.
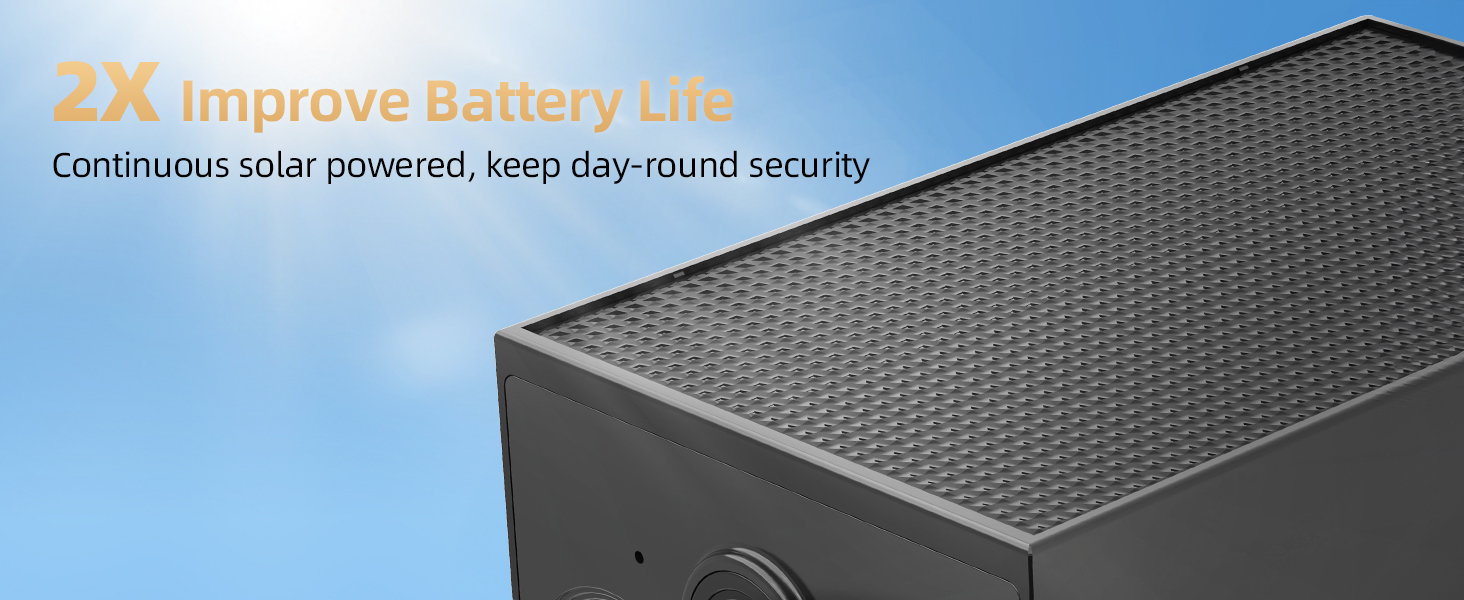
Figure 10: Depiction of the PM POPMAKE professional support team, emphasizing stress-free solutions, easy-access support, and lifetime service.
For technical assistance, troubleshooting, or any inquiries regarding your PM POPMAKE CG6T Solar Security Camera, please refer to the contact information provided in the product packaging or visit the official PM POPMAKE website for support resources.


