Introduction
This manual provides instructions for the installation, operation, maintenance, and troubleshooting of the Generic Carburetor. This carburetor is designed as a replacement part for a wide range of Briggs & Stratton and Toro lawn mower engines.
Compatibility:
- Briggs & Stratton Engines:
- Replacement for Briggs & Stratton part numbers: 799871, 790845, 796707, 794304.
- Most 122000 Model Engines, Stratton Quantum Engine 4 Cycle Mower, 675 series engine, 190cc Carburetor.
- Specific models: 128L05, 128L07, 128M02, 128M05, 128M07, 128T02, 128T05, 128T07, 12F802, 12F805, 12F807, 12F809, 12F812, 12F882, 12F887, 12F889, 12H802, 12H805, 12H807, 12H809, 12H812, 12H882, 12H887.
- BS 122K02 series engines including: 122K02-0015-E1, 122K02-0016-E1, 122K02-0018-E1, 122K02-0025-E1, 122K02-0101-E1, 122K02-0110-E1, 122K02-0111-E1, 122K02-0112-E1, 122K02-0113-E1, 122K02-0115-E1, 122K02-0116-E1, 122K02-0117-E1, 122K02-0119-E1, 122K02-0122-E1, 122K02-0124-E1, 122K02-0149-E1, 122K02-0150-E1, 122K02-0152-E1, 122K02-0167-E1, 122K02-0172-E1, 122K02-0177-E1, 122K02-0290-E1, 122K02-0308-E1, 122K02-0309-E1, 122K02-0329-E1, 122K02-0330-E1, 122K02-0337-E1, 122K02-0572-E1, 122K02-0573-E1, 122K02-0574-E1, 122K02-0577-E1, 122K02-0623-E1.
- Toro Lawn Mowers:
- Models: 20066, 20067, 20068, 20090, 20090C, 20091, 20091C, 20092, 20092C, 20093, 20093C, 20095, 20095C, 20112, 20113, 20330, 20330C, 20331, 20331C, 20332, 20332C, 20333, 20334, 20334C, 20350, 20351, 20352, 20655, 20656, 20658, 20792, 20793, 20795, 20817.
This carburetor features an auto-choke system, simplifying engine starting.
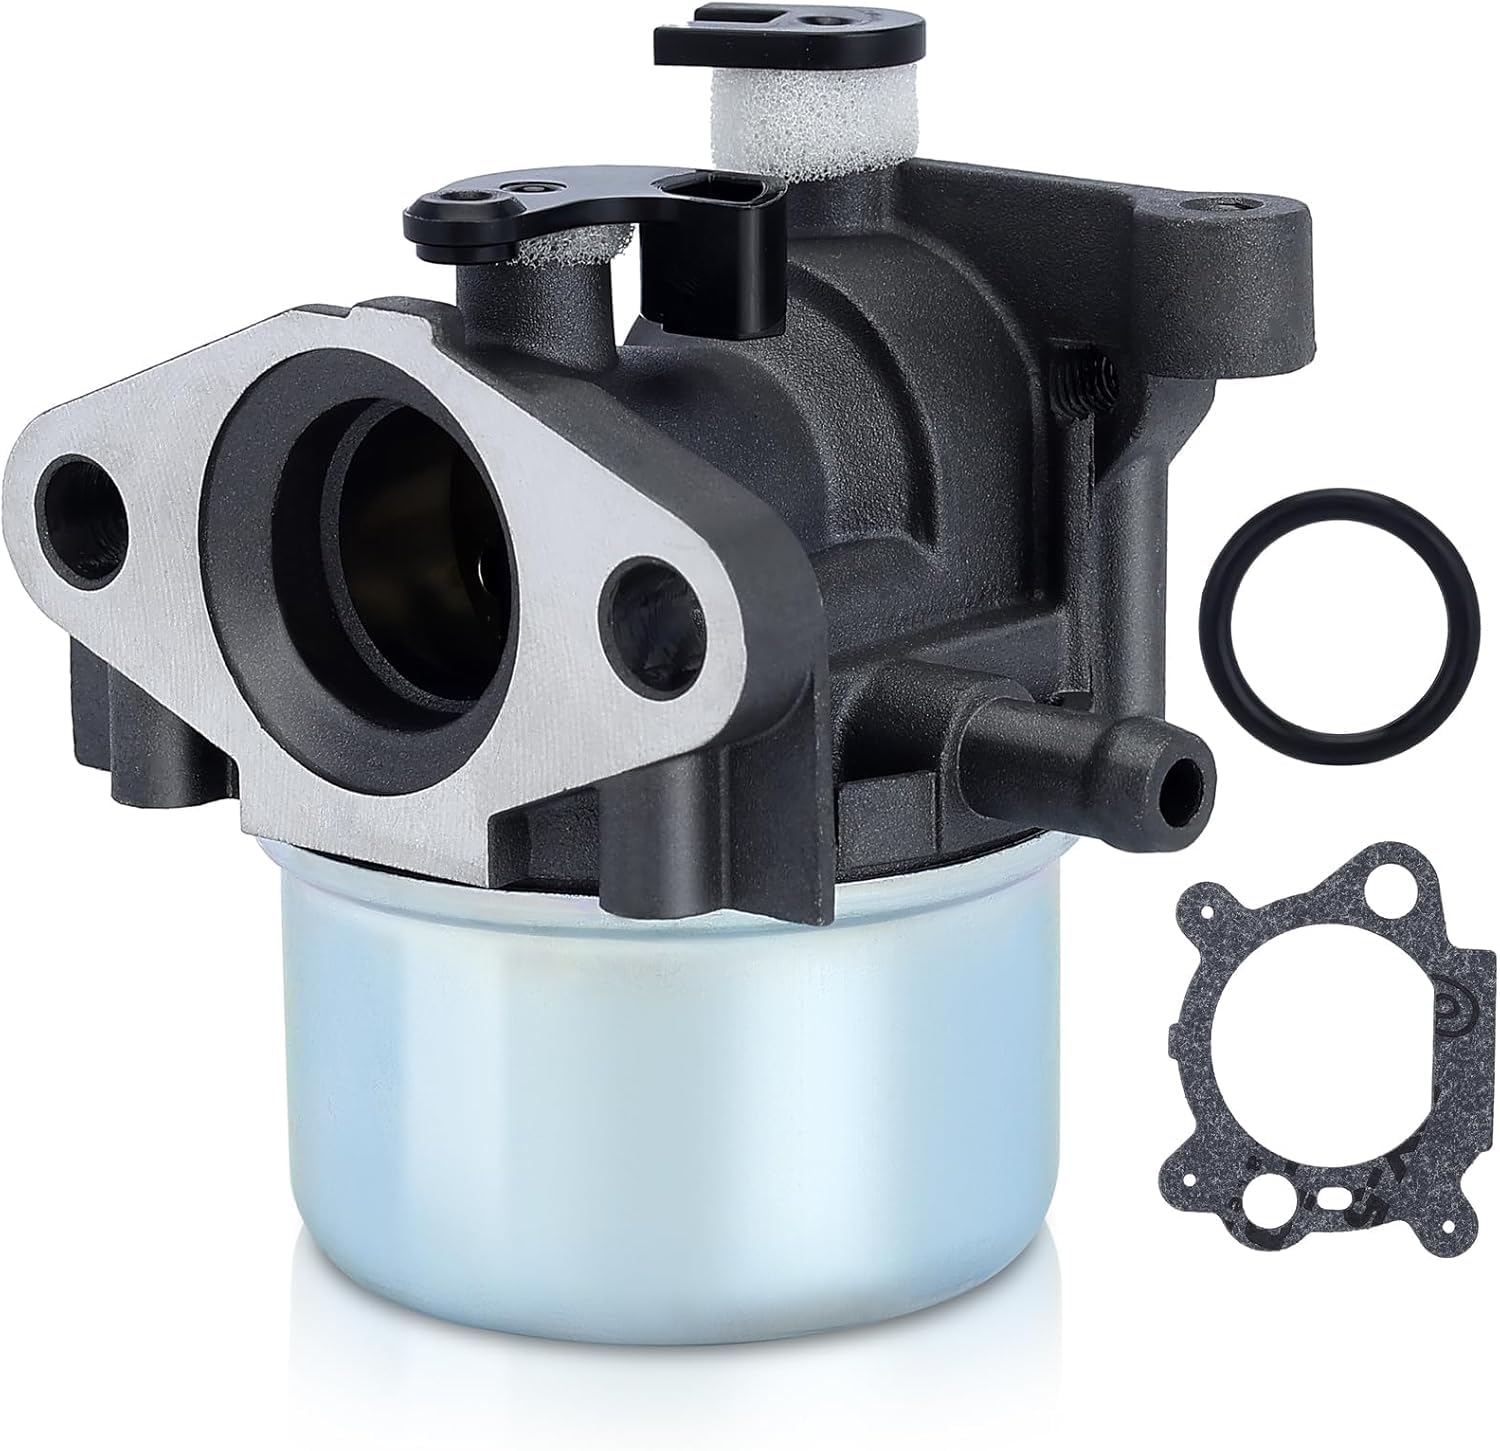
Image: Front view of the Generic Carburetor, showing the fuel bowl and main body.
Setup and Installation
Proper installation is crucial for optimal engine performance. If you are unsure about any step, consult a qualified technician or refer to your engine's specific service manual.
Safety Precautions:
- Always disconnect the spark plug wire before performing any maintenance or installation.
- Ensure the engine is cool to the touch.
- Work in a well-ventilated area.
- Have a fire extinguisher nearby when working with fuel.
Required Tools:
- Socket wrench set
- Screwdriver set
- Pliers
- Fuel line clamps or plugs
- Clean rags
Installation Steps:
- Prepare the Engine: Disconnect the spark plug wire. Turn off the fuel supply valve, if present. Place clean rags under the carburetor area to catch any spilled fuel.
- Remove Air Filter Assembly: Carefully remove the air filter housing and filter element to gain access to the carburetor.
- Disconnect Linkages and Hoses:
- Disconnect the fuel line from the carburetor. Use a clamp or plug to prevent fuel leakage from the tank.
- Carefully detach any throttle and choke linkages connected to the carburetor. Note their positions for reassembly.
- Disconnect any vacuum lines or other small hoses.
- Remove Old Carburetor: Unscrew the mounting bolts or nuts that secure the carburetor to the engine manifold. Gently pull the old carburetor away from the engine. Be mindful of any gaskets between the carburetor and the engine.
- Inspect and Clean: Inspect the engine manifold and mounting surfaces for any debris or old gasket material. Clean thoroughly to ensure a proper seal with the new carburetor.
- Install New Carburetor:

Image: The new carburetor shown with replacement gaskets. Ensure these are properly seated during installation.
- Place new gaskets (if supplied) onto the engine manifold, then carefully position the new carburetor.
- Secure the carburetor with the mounting bolts or nuts. Tighten them evenly to prevent warping, but do not overtighten.
- Reconnect Components:

Image: Side view of the carburetor, highlighting the fuel inlet connection point.

Image: Top view of the carburetor, showing the throttle plate and linkage attachment points.
- Reconnect the fuel line, ensuring it is securely fastened and free of leaks.
- Reattach all throttle and choke linkages to their original positions. Verify smooth operation.
- Reconnect any vacuum lines or other hoses.
- Reinstall Air Filter Assembly: Reattach the air filter housing and insert a clean air filter element.
- Final Checks: Double-check all connections, ensuring everything is tight and properly routed.
Operating Instructions
After successful installation, the engine should be ready for operation. This carburetor features an auto-choke system, which automatically adjusts for cold starts.
- Restore Fuel Supply: Open the fuel supply valve (if applicable).
- Prime the System (if necessary): Some engines may require priming the fuel system after a carburetor replacement. Refer to your engine's manual for specific priming procedures.
- Reconnect Spark Plug: Reconnect the spark plug wire.
- Start the Engine: Follow your engine's standard starting procedure. The auto-choke system will manage the fuel-air mixture for starting.
- Monitor Performance: After starting, allow the engine to warm up. Listen for smooth operation and check for any fuel leaks or unusual noises.
Maintenance
Regular maintenance helps ensure the longevity and proper function of your carburetor and engine.
- Fuel Quality: Always use fresh, clean fuel. Stale or contaminated fuel is a common cause of carburetor issues. Consider using a fuel stabilizer, especially during storage.
- Fuel Filter: Regularly check and replace the fuel filter according to your engine's maintenance schedule. A clogged fuel filter can restrict fuel flow to the carburetor.
- Air Filter: Keep the air filter clean. A dirty air filter can restrict airflow, leading to a rich fuel mixture and poor engine performance.
- Carburetor Cleaning: If performance issues arise, the carburetor may need cleaning. This typically involves disassembling the carburetor, cleaning jets and passages with carburetor cleaner, and replacing gaskets. This task is often best performed by a qualified technician.
- Storage: Before long-term storage, run the engine until it runs out of fuel, or drain the fuel tank and carburetor bowl to prevent fuel degradation and gumming.
Troubleshooting
This section addresses common issues you might encounter after installing a new carburetor. For complex problems, consult a professional.
| Problem | Possible Cause | Solution |
|---|---|---|
| Engine will not start |
|
|
| Engine runs rough or stalls |
|
|
| Fuel leaks |
|
|
Specifications
- Product Type: Carburetor
- Brand: Generic
- Model Numbers: 122T02-0175-B1, 122T02-0176-B1 (and compatible models as listed in Introduction)
- Manufacturer Part Number: 799866
- Product Dimensions: Approximately 1 x 1 x 1 inches
- Choke System: Auto-choke
- Lift Type: Manual (as per manufacturer specifications)
Warranty and Support
This product comes with a money-back guarantee. If you are not satisfied with your purchase, a refund can be made within 90 days from the date of purchase.
For any questions regarding compatibility or technical assistance, please contact the seller. Support is committed to resolving issues within 24 hours.
Please ensure to verify the model compatibility before purchasing and installing the part.


