1. Introduction
This manual provides comprehensive instructions for the installation, setup, operation, and maintenance of your Toeeklsa 8Core Android 13 Car Stereo Radio. This unit is designed specifically for Toyota FJ Cruiser models from 2006 to 2020, offering a 9-inch touchscreen display with advanced features such as wireless CarPlay, Android Auto, GPS navigation, Bluetooth 5.0, Wi-Fi, DSP sound processing, and FM/AM/RDS radio.
Please read this manual thoroughly before installation and use to ensure proper function and to maximize your experience with the product. Keep this manual for future reference.

Image 1.1: Overview of the Toeeklsa 8Core Android 13 Car Stereo Radio features, including CarPlay, Android Auto, rear camera support, FM/AM/RDS radio, Android 13 OS, Bluetooth, 4-core processor, GPS, and WiFi connectivity.
2. Safety Information
- Ensure the vehicle is turned off and the battery is disconnected before beginning installation to prevent electrical shorts or damage.
- Professional installation is recommended. If installing yourself, follow all wiring diagrams and instructions carefully.
- Do not operate the device in a manner that distracts you from driving. Always prioritize road safety.
- Avoid exposing the unit to extreme temperatures, direct sunlight for prolonged periods, or excessive moisture.
- Use only specified power cables and accessories to prevent damage or fire.
3. Package Contents
Verify that all items are present in the package before proceeding with installation:
- 9 Inch Android Radio Unit
- Canbus Box
- Power Cable
- 4 PIN USB Cable
- 6 PIN USB Cable
- GPS Antenna
- External Microphone
- Backup Camera (AHD)
4. Installation Guide
This unit is designed for plug-and-play installation in Toyota FJ Cruiser models (2006-2020). No cutting or modification of original car wiring is typically required. The unit is compatible with factory JBL amplifiers.
4.1. Pre-Installation Steps
- Park the vehicle on a level surface and engage the parking brake.
- Turn off the vehicle's ignition and remove the key.
- Disconnect the negative terminal of the car battery to prevent electrical hazards.
- Carefully remove the existing factory radio and trim panels. Refer to your vehicle's service manual for specific instructions on panel removal.

Image 4.1: Comparison of the Toyota FJ Cruiser dashboard before and after the installation of the Toeeklsa 9-inch car stereo, showing the integrated appearance.
4.2. Wiring Connections
Connect the provided wiring harness to the corresponding ports on the new head unit and the vehicle's factory wiring. Ensure all connections are secure.
- Power Cable: Connect the main power harness to the vehicle's power supply.
- Canbus Box: Integrate the Canbus box as per the wiring diagram to ensure compatibility with vehicle features like steering wheel controls.
- USB Cables: Connect the 4-PIN and 6-PIN USB cables for external device connectivity.
- GPS Antenna: Mount the GPS antenna in a location with a clear view of the sky, typically on the dashboard or under the windshield.
- External Microphone: Connect the external microphone and route it to a suitable location for clear voice input (e.g., near the rearview mirror or sun visor).
- Backup Camera: Connect the backup camera wiring to the unit and install the camera at the rear of the vehicle. Ensure proper power and video signal connections.
4.3. Mounting the Unit
- Carefully slide the new head unit into the dashboard opening, ensuring all wires are tucked away and not pinched.
- Secure the unit using the factory mounting brackets or provided hardware.
- Reinstall the trim panels, ensuring they snap securely into place.

Image 4.2: The Toeeklsa car stereo unit fully installed in the dashboard of a Toyota FJ Cruiser, showcasing its seamless integration and the Apple CarPlay interface on the screen.
5. Setup and Initial Configuration
After installation, reconnect the car battery and power on the unit. Follow the on-screen prompts for initial setup.
5.1. Wireless CarPlay & Android Auto
To connect your smartphone for wireless CarPlay or Android Auto:
- On your smartphone, enable Bluetooth and Wi-Fi.
- On the car stereo, open the "Tlink5" application.
- Pair your phone with the car stereo via Bluetooth.
- Once paired, the Tlink5 app will automatically initiate the CarPlay or Android Auto connection.

Image 5.1: Visual guide demonstrating the steps to connect a smartphone for wireless CarPlay or Android Auto using Bluetooth and the Tlink5 application on the car stereo.

Image 5.2: An illustration showing the process of connecting a smartphone to the car stereo for wireless CarPlay or Android Auto, highlighting the Bluetooth and Tlink5 app steps.
5.2. Wi-Fi Connection
To access online features, connect the unit to a Wi-Fi network:
- Go to the "Settings" menu on the car stereo.
- Select "Network & Internet" or "Wi-Fi".
- Turn on Wi-Fi and select your desired network from the list.
- Enter the password if prompted and connect.
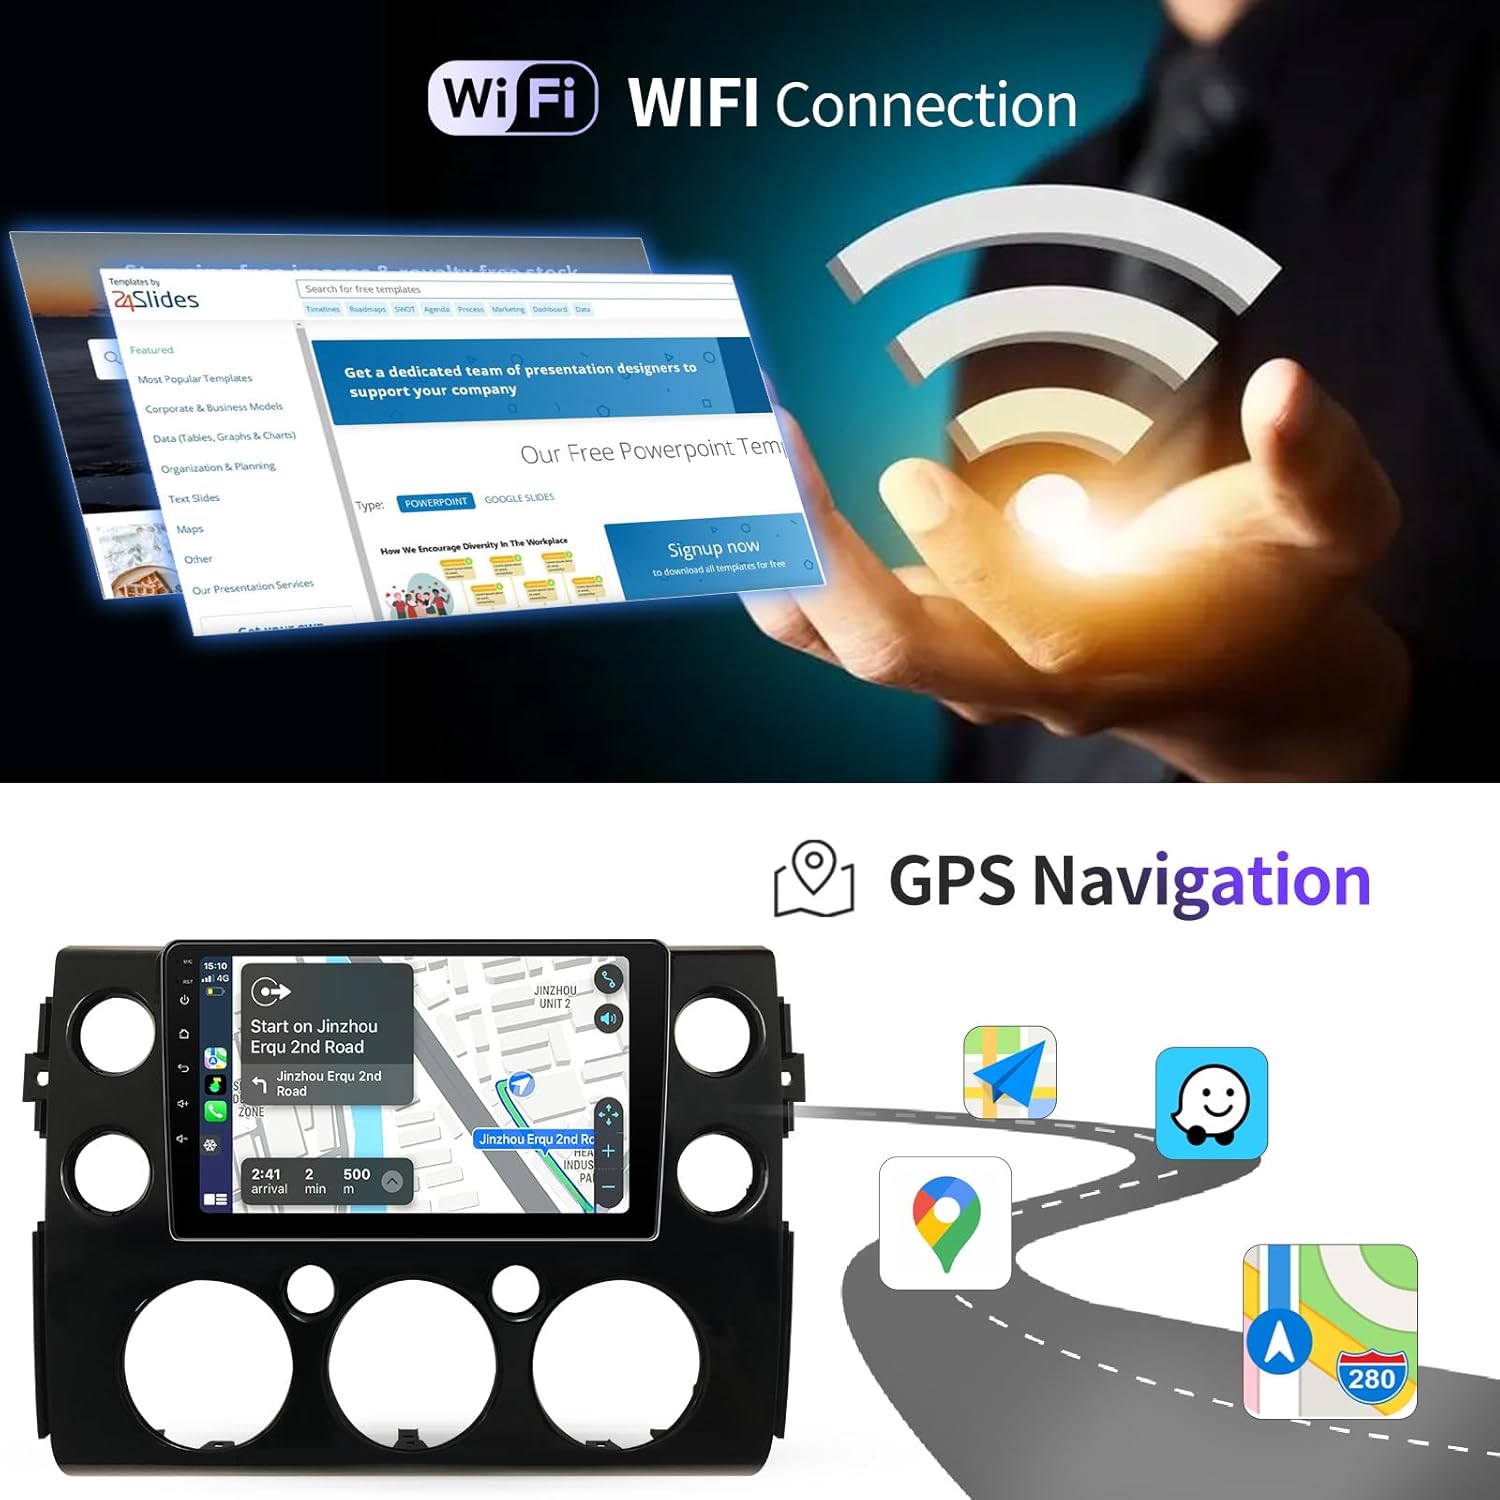
Image 5.3: Visual representation of the car stereo's Wi-Fi connectivity and GPS navigation capabilities, showing the unit's interface and common navigation app icons.

Image 5.4: An image illustrating the car stereo's Wi-Fi support, enabling access to a wide range of applications like Google Maps, YouTube, Spotify, and social media platforms.
5.3. GPS Navigation
The unit supports both online and offline navigation. For online maps, ensure a Wi-Fi connection. For offline maps, download map data to the unit's internal storage.
- Open the pre-installed navigation application (e.g., Google Maps, Waze).
- Enter your destination to receive real-time updates, traffic warnings, and voice guidance.
- Customize routes and language settings within the navigation app.
6. Operating Instructions
6.1. Touch Screen Operation
The 9-inch IPS touchscreen responds to touch gestures similar to a smartphone. Tap to select, swipe to scroll, and pinch to zoom (where applicable).

Image 6.1: Details of the 9-inch IPS touchscreen, highlighting its 1280x720 HD resolution, wider viewing angle, 2.5D glass screen, and fast response time for a clear and responsive user experience.
6.2. Radio (FM/AM/RDS)
Access the "Radio" application to listen to FM or AM broadcasts. The RDS (Radio Data System) feature displays station information where available.
- Search: Use the manual or automatic search functions to find stations.
- Presets: Save your favorite stations for quick access.

Image 6.2: Display showing the voice control features (Siri, Google Assistant), Bluetooth 5.0 for hands-free calls and music, and the FM radio interface with frequency display.

Image 6.3: The FM/AM/RDS radio interface, illustrating how to tune into different frequencies and enjoy radio broadcasts.
6.3. DSP and 48-Band Equalizer
The built-in Digital Sound Processor (DSP) with a 48-band equalizer allows for precise audio customization.
- Access the "DSP" or "Equalizer" settings from the main menu.
- Adjust frequency bands, select preset sound effects (Jazz, Pop, Vocal, Heavy Metal, Normal), and configure sound field settings for optimal listening.
- Customize sound output for different seating positions within the vehicle.

Image 6.4: Screenshots of the DSP and 48-band equalizer interface, showing options for adjusting sound frequencies, selecting audio presets, and configuring sound zones within the vehicle.

Image 6.5: An illustration detailing the DSP sound processing capabilities and the 48-band equalizer, demonstrating how audio output can be optimized for superior sound quality.
6.4. Bluetooth 5.0
Connect your smartphone via Bluetooth for hands-free calling and audio streaming.
- Pairing: Enable Bluetooth on your phone and the car stereo. Search for the stereo on your phone and pair.
- Hands-Free Calls: Make and receive calls directly from the stereo interface.
- Audio Streaming: Play music from your phone through the car's speakers.

Image 6.6: Visual representation of Bluetooth 5.0 functionality, showing interfaces for hands-free phone calls and streaming music from a connected mobile device.
6.5. Steering Wheel Control (SWC)
The unit supports your vehicle's existing steering wheel controls, allowing you to manage audio and calls safely.
- Access the "Steering Wheel Control" settings in the unit's menu.
- Follow the on-screen instructions to map your steering wheel buttons to specific functions (e.g., volume up/down, track skip, answer/end call).

Image 6.7: Display showing the backup camera view with parking guidelines and an illustration of the steering wheel controls, indicating how they can be used to operate the car stereo.

Image 6.8: An image depicting the steering wheel control interface on the car stereo, showing various button functions that can be assigned for convenient operation while driving.
6.6. Backup Camera
When the vehicle is shifted into reverse, the display automatically switches to the backup camera view. The AHD camera provides clear images, including night vision capabilities.
- Ensure the camera is properly installed and connected as per Section 4.2.
- The camera offers a 170° wide-angle view and is waterproof.

Image 6.9: An illustration highlighting the key features of the backup camera: HD resolution, AHD technology, night vision, 170-degree wide-angle view, and waterproof design for enhanced safety.
6.7. Split Screen Functionality
The split-screen feature allows you to run two applications simultaneously on the display, such as navigation and media playback.
- To activate, long-press the recent apps button or follow specific gestures depending on the Android version.
- Select two compatible applications to display side-by-side.

Image 6.10: An example of the split-screen feature, demonstrating how a navigation application and a video playback application (like YouTube) can be viewed concurrently on the car stereo display.
7. Maintenance
- Cleaning the Screen: Use a soft, lint-free cloth to gently wipe the touchscreen. For stubborn smudges, slightly dampen the cloth with water or a screen-safe cleaner. Avoid abrasive materials or harsh chemicals.
- Software Updates: Periodically check for software updates through the unit's settings menu to ensure optimal performance and access to new features. A Wi-Fi connection is required for updates.
- General Care: Keep the unit free from dust and debris. Ensure proper ventilation around the unit to prevent overheating.
8. Troubleshooting
| Problem | Possible Cause | Solution |
|---|---|---|
| Unit does not power on. | Loose power connection, blown fuse, vehicle battery disconnected. | Check power cable connections. Inspect vehicle fuses. Ensure car battery is connected. |
| No sound. | Volume too low, mute activated, speaker wiring issue, incorrect audio output settings. | Increase volume. Check mute status. Verify speaker connections. Adjust audio settings. |
| CarPlay/Android Auto not connecting. | Bluetooth/Wi-Fi off on phone, Tlink5 app not open, phone not paired. | Ensure phone's Bluetooth/Wi-Fi is on. Open Tlink5 app. Re-pair phone via Bluetooth. |
| GPS signal weak or inaccurate. | GPS antenna obstructed or improperly placed, no internet connection for online maps. | Relocate GPS antenna to a clear area. Ensure Wi-Fi is connected for online maps. |
| Steering Wheel Controls not working. | Canbus box not connected, SWC settings not configured. | Verify Canbus box connection. Configure SWC settings in the unit's menu. |
| Backup camera not displaying. | Camera wiring loose, camera faulty, vehicle not in reverse. | Check camera connections. Ensure vehicle is in reverse. Test camera if possible. |
9. Specifications
- Model: B0FDGC8B53
- Compatible Vehicles: Toyota FJ Cruiser (2006-2020)
- Operating System: Android 13
- CPU: 8-Core Processor
- RAM: 4GB
- ROM (Internal Storage): 32GB
- Display Size: 9 Inches
- Display Type: IPS Touch Screen
- Resolution: 1280*720 HD
- Connectivity:
- Wireless Apple CarPlay
- Wireless Android Auto
- Bluetooth 5.0 (Hands-free calling, music streaming)
- Wi-Fi (2.4GHz)
- 4G (Requires external dongle/SIM, if supported by specific model variant)
- USB (4-PIN, 6-PIN)
- Audio Features:
- DSP (Digital Sound Processor)
- 48-Band Equalizer
- FM/AM/RDS Radio
- Subwoofer Output Support
- Navigation: GPS (Online/Offline maps, North America map type)
- Camera Support: AHD Backup Camera (HD, Night Vision, 170° Wide Angle, Waterproof)
- Special Features: Steering Wheel Control (SWC), Split Screen, Voice Control (Siri/Google Assistant via CarPlay/Android Auto)
- Item Weight: Approximately 5 pounds
- Package Dimensions: 23 x 17 x 6 inches

Image 9.1: A visual comparison illustrating the clarity and detail provided by the 3rd generation 1280x720 IPS screen compared to older 800x560 and 1024x640 resolutions.

Image 9.2: An illustration highlighting the powerful 8-Core CPU, 4GB RAM, and 32GB ROM, emphasizing stable and fast performance, up to 180% faster than previous generations.
10. Warranty and Technical Support
Toeeklsa provides a 1-year product warranty and lifetime technical support for this car stereo unit. A 30-day money-back guarantee is also offered for any reason.
For any questions regarding use or installation, please contact technical support. Online replies are typically provided within 24 hours.
To contact support:
- Visit the seller's storefront on Amazon (Tokesla).
- Locate the "Ask a question" button to submit your inquiry.

Image 10.1: A guide illustrating the steps to contact technical support through the Amazon platform by navigating to the seller's page and using the "Ask a question" feature.