1. Introduction
Thank you for choosing the Pursuit 800A Car Jump Starter. This device is designed to provide a powerful and safe solution for jump-starting vehicles, charging portable electronic devices, and offering emergency lighting. Please read this manual thoroughly before use to ensure proper operation and to prevent damage to the product or your vehicle.

Image 1.1: The Pursuit 800A Car Jump Starter with its included booster clamps.
2. Safety Information
Your safety is paramount. This jump starter incorporates multiple safety features. Always follow these guidelines:
- Spark-Proof Technology: Designed to prevent sparks during connection.
- Reverse Polarity Protection: Protects against incorrect connection to battery terminals.
- Over-Charge Protection: Prevents damage from excessive charging.
- Short-Circuit Protection: Safeguards against short circuits.
- High and Low-Temperature Protection: Ensures safe operation within optimal temperature ranges.
- Over-Load Protection: Prevents damage from excessive current draw.
- Over-Voltage Protection: Protects against voltage surges.
- Over-Current Protection: Limits current to safe levels.
- AI-Software Monitoring: Provides intelligent monitoring for enhanced safety.
Despite these features, always exercise caution:
- Do not immerse the device in water.
- Do not disassemble the unit.
- Keep out of reach of children.
- Use only the provided booster clamps and charging cable.
- Ensure proper ventilation during use.

Image 2.1: Visual representation of the various safety protections integrated into the device.
3. Package Contents
Verify that all items are present in your package:
- Pursuit 800A Car Jump Starter Unit
- Booster Clamps (Red and Black)
- USB Charging Cable
- User Guide (This manual)

Image 3.1: All items included in the Pursuit 800A Car Jump Starter package.
4. Product Overview
Familiarize yourself with the components of your jump starter:
- USB Output Port: For charging external devices.
- Function Button: Activates LED light and checks battery status.
- Jump Start Output: Port for connecting booster clamps.
- Type C Charge Input: For recharging the jump starter unit.
- LED Light: Multi-mode flashlight.

Image 4.1: Labeled diagram of the Pursuit 800A Car Jump Starter's features and ports.
5. Charging the Jump Starter
Before first use, fully charge the jump starter. It recharges in approximately 3 hours via a USB port at 2.1 amps.
- Connect the provided USB charging cable to the Type C Charge Input port on the jump starter.
- Connect the other end of the USB cable to a suitable USB power adapter (not included) or a powered USB port.
- The LED indicators on the unit will illuminate to show charging progress. All indicators will be solid when fully charged.
6. Operating Instructions
6.1. Jump Starting a Vehicle
The Pursuit 800A Car Jump Starter is suitable for gasoline engines up to 5.0L and diesel engines up to 2.0L.
- Ensure the jump starter is sufficiently charged.
- Insert the jump starter cable into the Jump Start Output port on the Pursuit 800A Jump Starter. Ensure a firm connection.
- Connect the red (+) booster clamp to the positive (+) terminal of the vehicle's battery.
- Connect the black (-) booster clamp to the negative (-) terminal of the vehicle's battery.
- Once connected, the indicator on the booster clamps will show a solid green light if the connection is correct. If it shows a red light or beeps, check the connections for reverse polarity.
- Start the car engine.
- Once the engine starts, immediately remove the booster clamps from the vehicle battery, first the black (-) clamp, then the red (+) clamp.
- Disconnect the jump starter cable from the jump starter unit.

Image 6.1: Visual guide for connecting the jump starter to a vehicle battery.
6.2. Using as a Portable Power Bank
The jump starter can charge smartphones, tablets, earphones, and other USB-powered devices.
- Connect your device's USB charging cable to the USB Output Port on the jump starter.
- Connect the other end of the cable to your electronic device.
- The jump starter will automatically begin charging your device.

Image 6.2: The jump starter functioning as a portable power bank for various devices.
6.3. Using the LED Flashlight
The built-in LED flashlight offers three modes for various situations.
- Press and hold the Function Button for 3 seconds to turn on the flashlight (solid light mode).
- Press the Function Button again to cycle through the modes: SOS mode (slow flash), Strobe mode (fast flash).
- Press and hold the Function Button again for 3 seconds to turn off the flashlight.
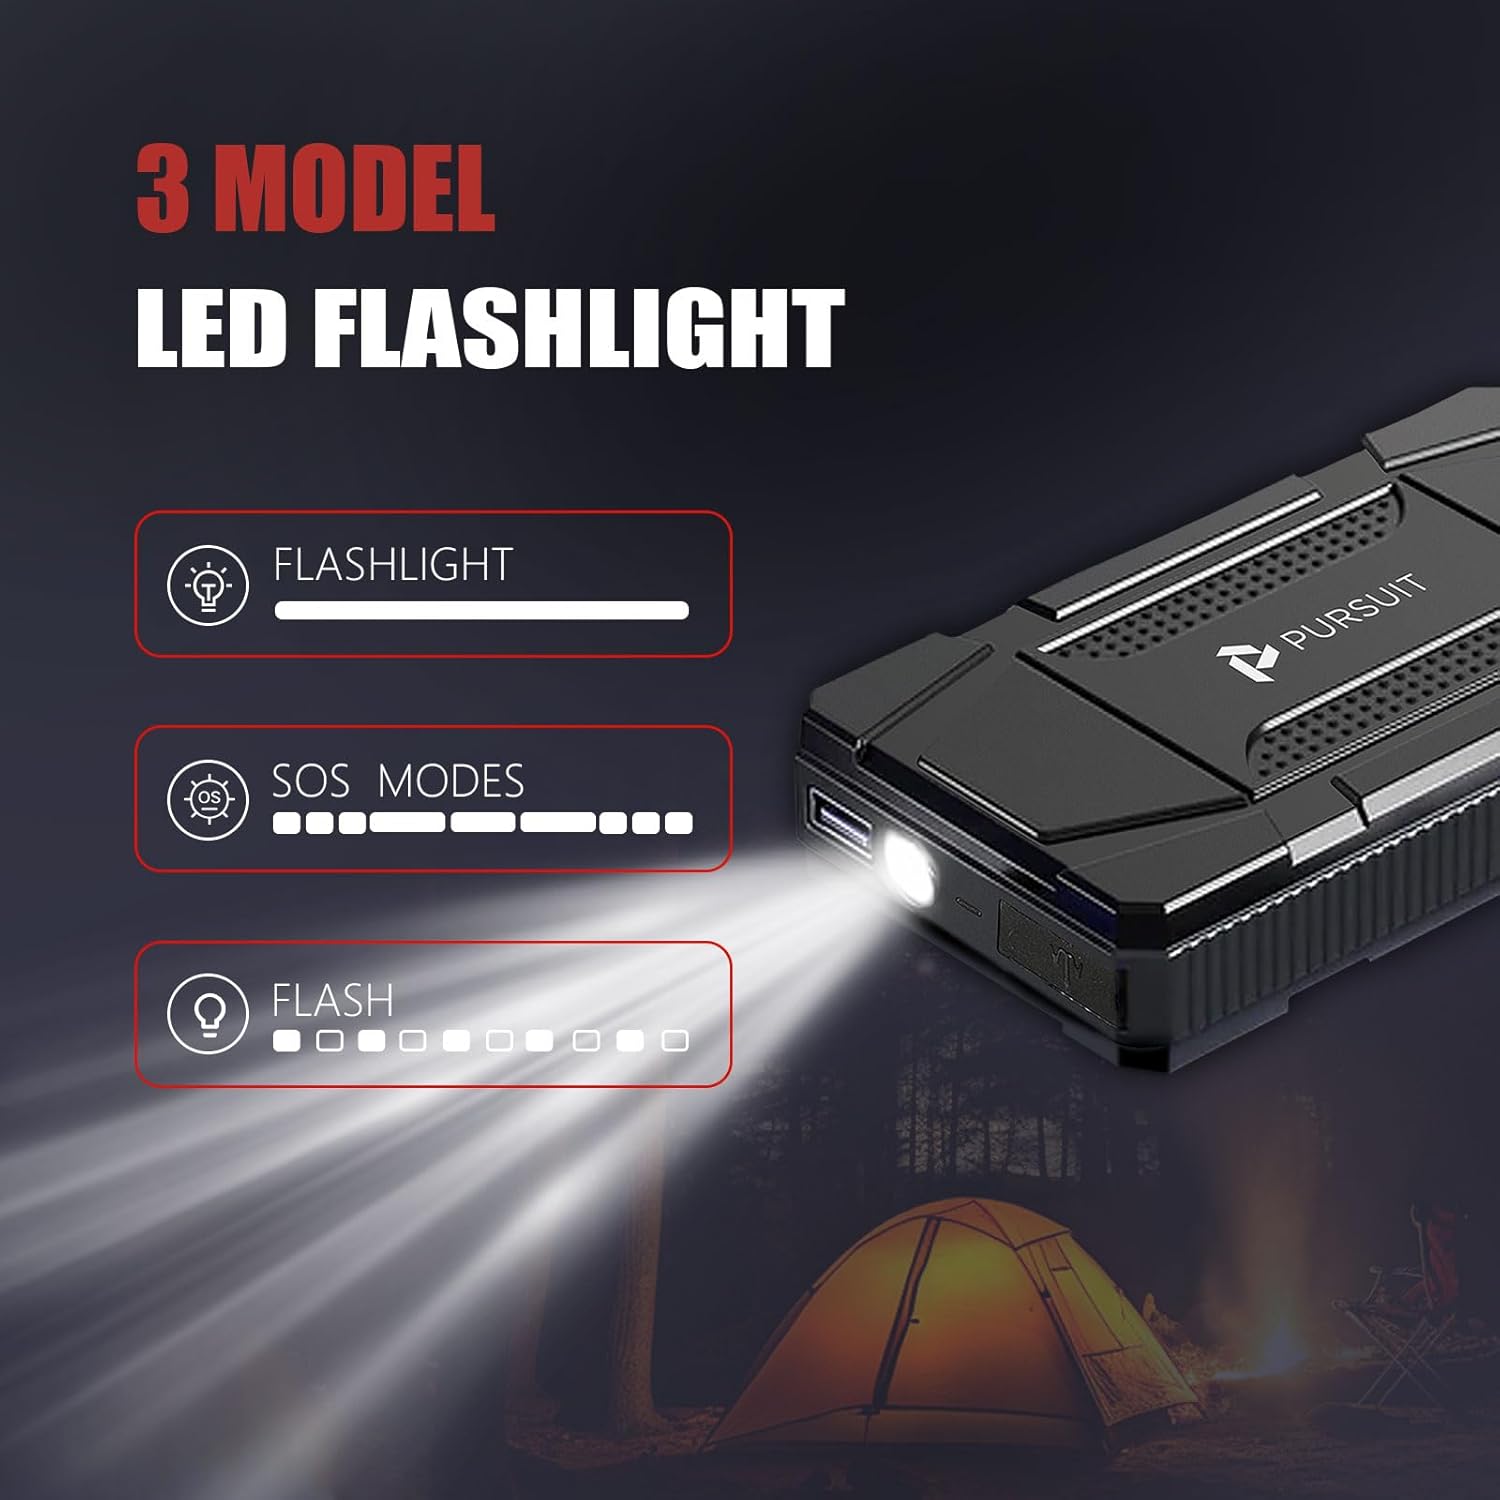
Image 6.3: The LED flashlight demonstrating its three operational modes.
7. Maintenance
- Store the jump starter in a cool, dry place away from direct sunlight.
- Recharge the unit every 3-6 months, even if not in use, to maintain battery health.
- Clean the exterior with a soft, damp cloth. Do not use harsh chemicals or abrasives.
- Ensure the ports are free from dust and debris.
8. Troubleshooting
- Unit not turning on: Ensure the unit is charged. If not, recharge it fully.
- Vehicle not starting: Check that the booster clamps are securely connected to the correct battery terminals (red to positive, black to negative). Ensure the jump starter has sufficient charge.
- Booster clamp indicator shows red/beeps: This indicates a reverse polarity connection. Disconnect immediately and re-connect the clamps to the correct terminals.
- Device not charging from USB port: Ensure the jump starter has sufficient power. Try a different USB cable or device.
9. Specifications
| Feature | Specification |
|---|---|
| Brand | Pursuit |
| Model Number | R33 |
| Peak Output Current | 800 Amps |
| Battery Type | Lithium Polymer |
| Engine Compatibility (Gas) | Up to 5.0 Liters |
| Engine Compatibility (Diesel) | Up to 2.0 Liters |
| Recharge Time | Approx. 3 hours (via USB 2.1A) |
| Weight | 2 Pounds |
| Water Resistance | IPX4 |
10. Warranty and Support
For warranty information and customer support, please refer to the contact details provided with your purchase or visit the official Pursuit website. Keep your purchase receipt as proof of purchase.


