
1. Product Overview
The SLAclite 1x4FT LED Flat Panel Light is designed for various indoor applications, offering adjustable brightness and color temperature. This fixture provides efficient and uniform illumination, suitable for offices, garages, kitchens, and other commercial or residential spaces. Key features include selectable wattage (24W/30W/40W), 5 CCT options (3000K/3800K/4500K/5200K/6000K), and smooth 10-100% Triac dimming.

This LED panel light is engineered for energy efficiency, providing up to 5200 lumens of brightness while consuming significantly less power than traditional lighting. Its slim profile and flicker-free design contribute to a comfortable and productive environment.
2. Important Safety Information
Please read all instructions carefully before installation and operation. Failure to follow these instructions may result in electric shock, fire, or other hazards.
- Electrical Safety: Always turn off power at the circuit breaker before installing, servicing, or cleaning the fixture. Ensure proper grounding to avoid electrical shock.
- Qualified Electrician: Installation should be performed by a qualified electrician in accordance with all local and national electrical codes.
- Voltage: This fixture is designed for 120V/60Hz electrical systems. Do not connect to any other voltage.
- Mounting: Ensure the mounting surface can support the weight of the fixture. Use appropriate hardware for the ceiling type (cement, wood, drywall).
- Indoor Use Only: This product is rated for indoor use only. Do not expose to moisture or outdoor elements.
- Heat: Do not cover the fixture with insulating material. Ensure adequate airflow around the fixture.
- Damage: Do not operate the fixture if it is damaged. Contact customer support for assistance.
3. What's in the Box
Verify that all components are present before beginning installation:
- 1x4 LED Flat Panel Lights (2 units)
- Mounting Plate
- Mounting Screw Kit (includes wire nuts, fastening clips, expansion tubes, M4x25MM screws, M4x30MM screws, M4x60MM screws)

4. Specifications
| Feature | Specification |
|---|---|
| Model Number | B0FDF9BFYD |
| Dimensions (L x W x H) | 46.85" x 11.93" x 1.3" (1190mm x 303mm x 33mm) |
| Wattage | Selectable: 24W / 30W / 40W |
| Brightness | Up to 5200 Lumens (at 40W) |
| Color Temperature (CCT) | Selectable: 3000K, 3800K, 4500K, 5200K, 6000K |
| Dimming | 10-100% Smooth Triac Dimming |
| Voltage | 120V / 60Hz |
| Material | Aluminum, Acrylic Shade |
| Mounting Type | Surface Mount, Suspended Mount |
| Certifications | ETL Certified |
| Lifespan | 50,000 hours |
| CRI | 85+ |
5. Setup and Installation
Before installation, ensure the power is turned off at the circuit breaker. This fixture supports Surface Mount and Suspended Mount installations. Recessed installation is not supported.

5.1. Pre-Installation
- Turn off Power: Locate the circuit breaker controlling the light fixture's power supply and turn it off. Verify power is off using a voltage tester.
- Unpack: Carefully remove the fixture and all components from the packaging. Inspect for any damage.
- Select Settings: Before mounting, adjust the CCT (Color Correlated Temperature) and Wattage dip switches located on the side of the fixture to your desired settings. These are typically small switches that can be toggled with a finger or small tool.
5.2. Surface Mount Installation
- Attach Mounting Plate: Secure the mounting plate to the ceiling using the appropriate screws and expansion tubes from the kit. Ensure the plate is firmly attached and level.
- Wiring: Connect the fixture's wires to the building's electrical wires (Black to Black, White to White, Ground to Ground) using the provided wire nuts. Ensure all connections are secure.
- Mount Fixture: Carefully align the fixture with the mounting plate and secure it in place. Some models may slide into grooves or attach with additional screws.
5.3. Suspended Installation
For suspended installation, additional suspension kits (not included) are typically required. Follow the instructions provided with your suspension kit in conjunction with these steps.
- Install Suspension Kit: Attach the suspension cables or rods to the ceiling and to the fixture's designated suspension points according to the suspension kit's instructions.
- Adjust Height: Adjust the suspension cables to achieve the desired hanging height and ensure the fixture is level.
- Wiring: Connect the fixture's wires to the building's electrical wires (Black to Black, White to White, Ground to Ground) using the provided wire nuts. Ensure all connections are secure.
6. Operating Instructions
6.1. Color Temperature (CCT) Selection
The fixture offers 5 selectable color temperatures. Adjust the CCT dip switch on the side of the fixture to choose your preferred light color before final installation or if you need to change it later.
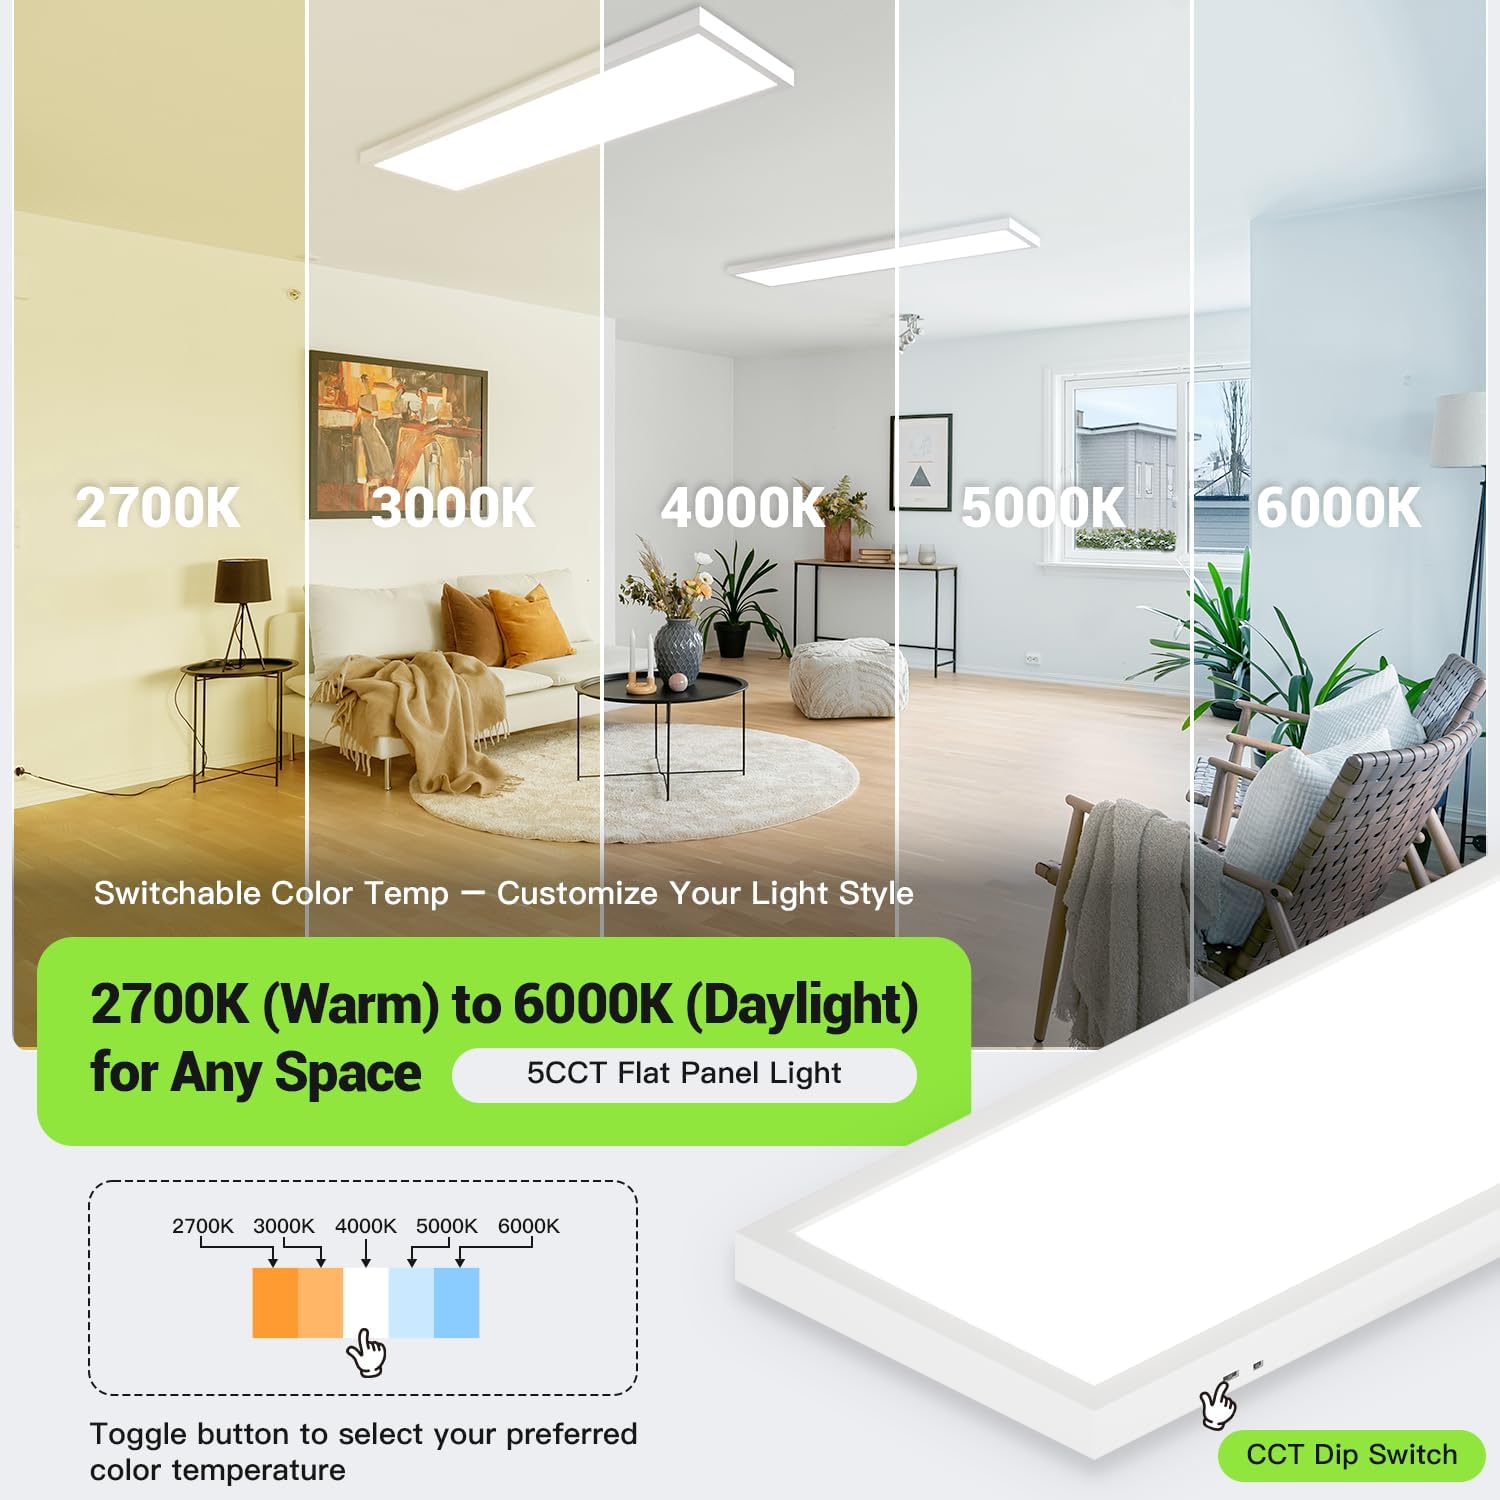
- 3000K: Warm Yellow Light
- 3800K: Neutral Warm Light
- 4500K: Neutral White Light
- 5200K: Cool White Light with a Natural Tendency
- 6000K: Cool White Light
6.2. Wattage Selection
The fixture allows you to select between three wattage outputs to control brightness and energy consumption. Adjust the Power Dip Switch on the side of the fixture to your desired wattage.

- 24W: Lower brightness, maximum energy saving.
- 30W: Medium brightness.
- 40W: Highest brightness, maximum light output.
6.3. Dimming Function
This fixture supports 10-100% smooth Triac dimming. To utilize this feature, ensure you have a compatible Triac dimmer switch installed in your electrical system.
Adjust the dimmer switch to achieve your desired light intensity. The fixture is designed for flicker-free and noiseless operation across the dimming range.
7. Maintenance
The SLAclite LED Flat Panel Light requires minimal maintenance.
- Cleaning: Ensure the power is off before cleaning. Use a soft, dry, or slightly damp cloth to wipe the surface of the fixture. Do not use abrasive cleaners, solvents, or harsh chemicals, as these can damage the finish or electrical components.
- Inspection: Periodically inspect the fixture for any signs of damage, loose connections, or wear. If any issues are found, turn off the power and contact customer support.
- No User-Serviceable Parts: There are no user-serviceable parts inside the fixture. Do not attempt to open or repair the unit yourself.
8. Troubleshooting
If you encounter issues with your LED Flat Panel Light, refer to the following common problems and solutions:
| Problem | Possible Cause | Solution |
|---|---|---|
| Light does not turn on | No power supply Loose wiring connection Faulty switch or circuit breaker | Check if the circuit breaker is on. Ensure all wiring connections are secure. Test the switch and circuit breaker. |
| Light flickers or dims unexpectedly | Incompatible dimmer switch Loose wiring Voltage fluctuations | Ensure a compatible Triac dimmer is used. Check wiring connections. Consult an electrician for voltage issues. |
| Incorrect color temperature or brightness | CCT or Wattage dip switches set incorrectly | Turn off power, then adjust the CCT and Wattage dip switches to your desired settings. |
| Buzzing noise | Incompatible dimmer switch Loose wiring | Replace with a compatible Triac dimmer. Check and secure all wiring connections. |
If the problem persists after attempting these solutions, please contact SLAclite customer support.
9. Warranty and Support
9.1. Manufacturer's Warranty
This SLAclite LED Flat Panel Light comes with a 3-year manufacturer's warranty from the date of purchase. This warranty covers defects in materials and workmanship under normal use. It does not cover damage caused by improper installation, misuse, accidents, or unauthorized modifications.
9.2. Extended Protection Plans
Extended protection plans are available for purchase separately:
- 3-Year Protection Plan: Extends coverage for an additional 36 months.
- 4-Year Protection Plan: Extends coverage for an additional 48 months.
- Complete Protect: A monthly subscription plan covering eligible past and future purchases.
For details on these plans, please refer to the retailer's website or contact their customer service.
9.3. Customer Support
For technical assistance, warranty claims, or any questions regarding your SLAclite LED Flat Panel Light, please contact SLAclite customer support. Have your model number (B0FDF9BFYD) and purchase date ready when contacting support.
Contact Information: Please refer to the contact details provided on your purchase receipt or the official SLAclite website.