1. Introduction
Thank you for choosing the DCA 20V Brushless Hammer Drill, Model ADJZ2055i. This manual provides essential information for the safe and efficient operation, maintenance, and troubleshooting of your new tool. Please read these instructions carefully before use and keep them for future reference. Proper use and care will ensure long-lasting performance and safety.
2. General Safety Instructions
Always follow basic safety precautions when using power tools to reduce the risk of fire, electric shock, and personal injury.
- Work Area Safety: Keep your work area clean and well-lit. Cluttered or dark areas invite accidents. Do not operate power tools in explosive atmospheres, such as in the presence of flammable liquids, gases, or dust.
- Electrical Safety: Avoid body contact with earthed or grounded surfaces such as pipes, radiators, ranges, and refrigerators. Do not expose power tools to rain or wet conditions.
- Personal Safety: Always wear eye protection. Use safety glasses, a dust mask, non-skid safety shoes, a hard hat, or hearing protection as appropriate for the conditions. Dress properly; avoid loose clothing or jewelry. Keep hair, clothing, and gloves away from moving parts.
- Tool Use and Care: Do not force the power tool. Use the correct power tool for your application. Disconnect the plug from the power source and/or the battery pack from the power tool before making any adjustments, changing accessories, or storing power tools.
- Battery Tool Use and Care: Recharge only with the charger specified by the manufacturer. Use power tools only with specifically designated battery packs.
3. Package Contents
Verify that all items listed below are included in your package. If any items are missing or damaged, please contact your retailer.
- 1 x DCA 20V Brushless Hammer Drill
- 2 x 2.0Ah Li-ion Batteries
- 1 x Battery Charger
- 1 x Robust Carrying Case
- 9 x Drill Bits (various sizes for masonry, wood, metal)
- 19 x Screwdriver Inserts
- 1 x Extension Rod
- 1 x Flexible Shaft
- 1 x Bit Holder
- 1 x Belt Hook

Image: The DCA 20V Brushless Hammer Drill with its complete set of accessories, including batteries, charger, various drill bits, screwdriver inserts, and a carrying case.
4. Product Overview
Familiarize yourself with the main components of your DCA 20V Brushless Hammer Drill.
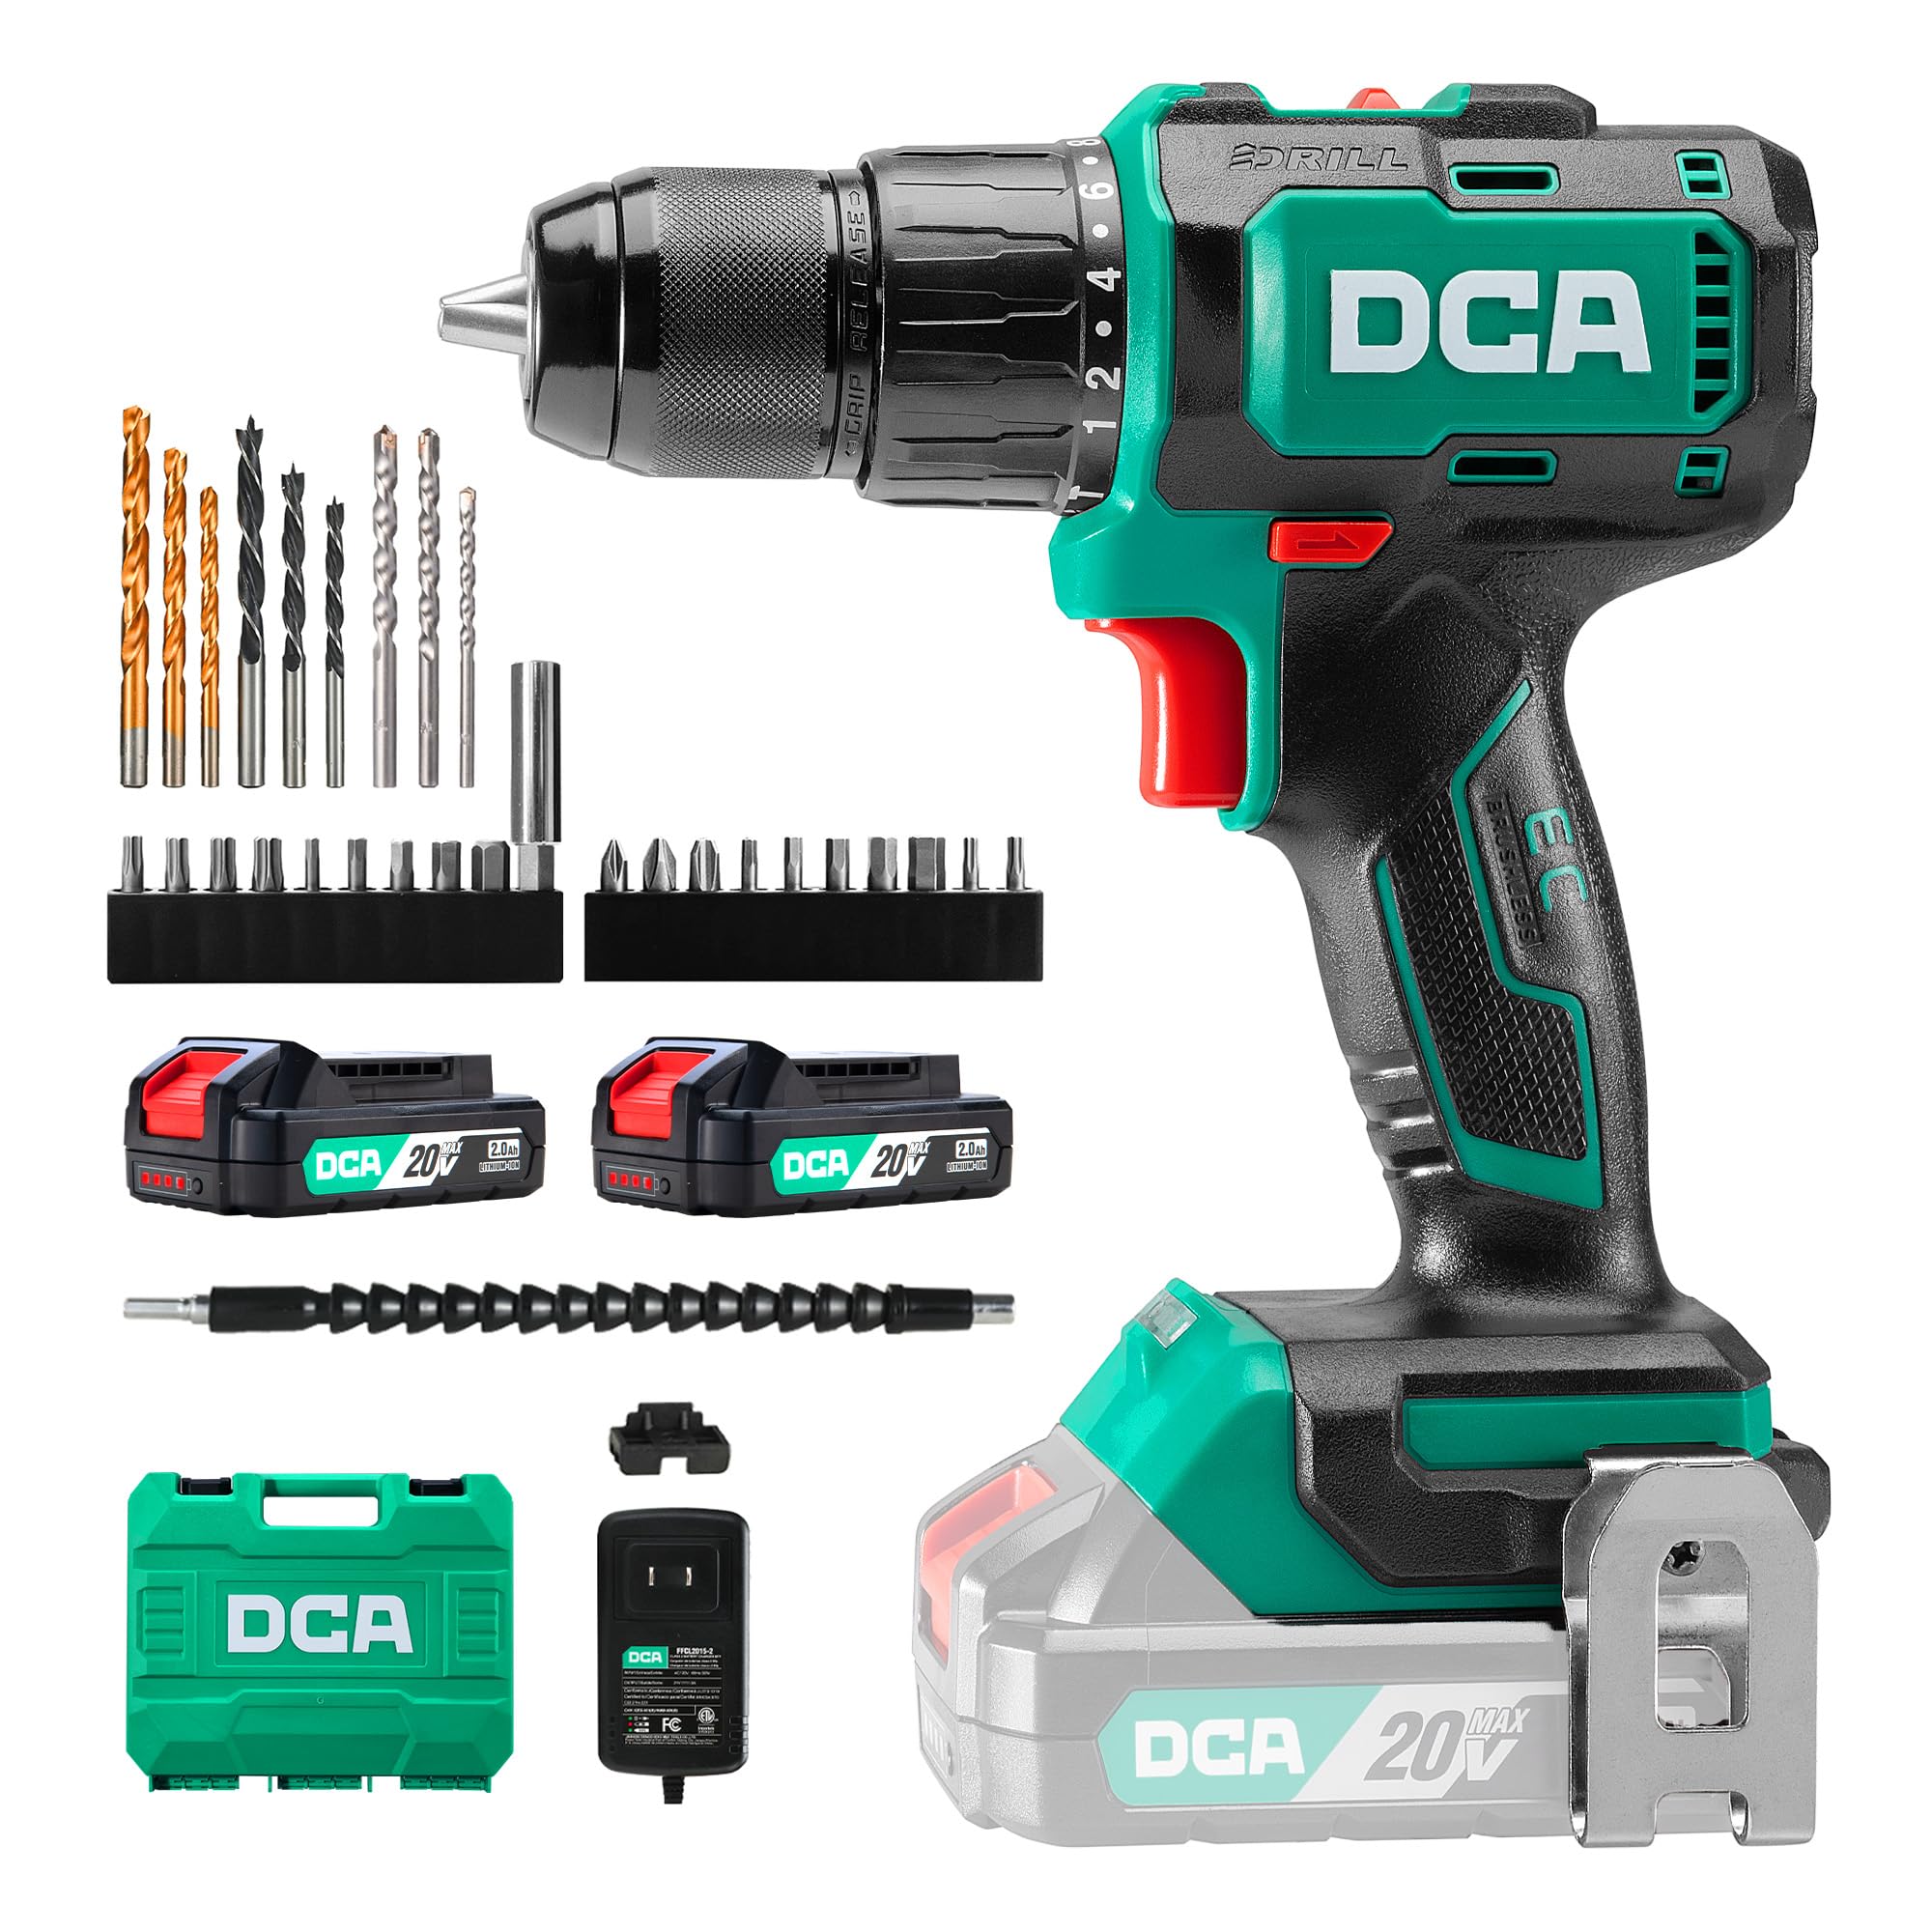
Image: Main view of the DCA 20V Brushless Hammer Drill, highlighting its compact design and ergonomic grip.
Key Features:
- Brushless Motor: Delivers up to 55Nm of torque for demanding drilling and screwdriving tasks, ensuring longer runtime and spark-free operation.
- Hammer Function: Provides up to 27,000 impacts per minute for efficient drilling in masonry and brick.
- 2-Speed Gearbox: Offers variable speed control (0–450 / 0–1800 RPM) for precision in various applications.
- 18+1+1 Torque Settings: Allows precise torque adjustment for screwdriving, drilling, and hammer drilling modes.
- 13mm All-Metal Chuck: Ensures robust and stable bit retention, with drilling capacity up to 35mm in wood and 13mm in steel or masonry.
- Compact and Ergonomic Design: Weighs only 1.3kg, features a rubberized grip, and an integrated LED light for comfortable use in tight or dimly lit spaces.
5. Setup
5.1 Charging the Battery
Before first use, fully charge the battery. The charger is designed for the included 2.0Ah Li-ion batteries.
- Connect the charger to a standard power outlet.
- Slide the battery pack onto the charger until it clicks into place.
- The charging indicator light on the battery will show its status (Red = Charging, Green = Fully Charged).
- Once fully charged, disconnect the battery from the charger and unplug the charger from the outlet.

Image: A DCA 20V Li-ion battery connected to its charger, illustrating the charging process and indicator lights.
5.2 Installing and Removing the Battery
- To Install: Align the battery pack with the base of the drill handle and slide it in until it locks securely.
- To Remove: Press the battery release button (usually located on the front or sides of the battery) and slide the battery pack out.
5.3 Installing and Removing Drill Bits/Screwdriver Inserts
The 13mm all-metal chuck allows for quick and secure bit changes.
- To Open Chuck: Rotate the chuck counter-clockwise until the jaws are wide enough to insert the bit.
- To Insert Bit: Insert the desired drill bit or screwdriver insert into the chuck jaws. Ensure it is seated as far as possible.
- To Close Chuck: Rotate the chuck clockwise until the bit is firmly gripped. For best results, give it an extra twist to ensure it's fully tightened.
- To Remove Bit: Rotate the chuck counter-clockwise to loosen the jaws and pull the bit out.

Image: A sequence of three images demonstrating the quick-release chuck operation for inserting and securing drill bits.
6. Operating Instructions
6.1 Powering On/Off and Variable Speed Trigger
The drill is activated by pressing the variable speed trigger. The speed of the drill is controlled by how far you press the trigger.
- To Turn On: Press the trigger switch.
- To Turn Off: Release the trigger switch.
- Variable Speed: Pressing the trigger lightly results in lower speed; pressing it fully results in maximum speed.

Image: A user operating the drill, with an inset highlighting the variable speed trigger and its function.
6.2 Speed Selection
The drill features a 2-speed gearbox for optimal performance across different materials and tasks.
- Speed 1 (Low Speed, 0-450 RPM): Ideal for screwdriving and drilling large diameter holes in wood or soft materials where high torque is required.
- Speed 2 (High Speed, 0-1800 RPM): Suitable for fast drilling in wood, metal, and for hammer drilling in masonry.
To change speed, use the speed selector switch located on top of the drill. Ensure the drill is stopped before changing speeds.
6.3 Torque and Mode Selection
The torque collar allows you to adjust the clutch setting for screwdriving, or select drilling or hammer drilling modes.
- Torque Settings (1-18): For screwdriving, select a torque setting. The clutch will disengage once the set torque is reached, preventing overtightening or stripping screws. Start with a lower setting and increase as needed.
- Drill Mode (Drill Icon): For drilling into wood, metal, and plastics. The clutch is bypassed, providing maximum torque.
- Hammer Drill Mode (Hammer Icon): For drilling into masonry, brick, and concrete. This mode combines rotation with a hammering action.

Image: The drill operating in standard drilling mode, suitable for wood and metal.

Image: The drill configured for screwdriving tasks, demonstrating precise control.

Image: The drill being used in hammer mode for efficient drilling into a brick wall.
6.4 Forward/Reverse Rotation
The forward/reverse selector switch is located above the trigger. Push it to the left for forward rotation (drilling/screwing in) and to the right for reverse rotation (removing screws/bits).
6.5 LED Work Light
The integrated LED light illuminates the work area when the trigger is pressed, improving visibility in dimly lit conditions.

Image: The drill's LED work light effectively illuminating the drilling point on a wooden surface.
6.6 Using the Flexible Shaft
The included flexible shaft is designed to extend your reach into tight or awkward spaces, allowing you to drive screws or drill in areas inaccessible to the main drill body.
- Insert the flexible shaft into the drill chuck as you would a regular bit.
- Insert the desired screwdriver insert or small drill bit into the end of the flexible shaft.
- Use the drill at a lower speed setting for better control when using the flexible shaft.

Image: A user utilizing the flexible shaft attachment to drive a screw in a confined space under a table.
7. Maintenance
Regular maintenance ensures the longevity and optimal performance of your tool.
- Cleaning: Keep the ventilation slots clean to prevent overheating. Use a soft, damp cloth to clean the tool casing. Do not use harsh chemicals or abrasive cleaners.
- Chuck Maintenance: Periodically clean the chuck jaws to ensure proper gripping.
- Battery Care: Store batteries in a cool, dry place away from direct sunlight. Do not store fully discharged batteries for extended periods. Recharge them periodically if not in use.
- Storage: Store the drill and accessories in the provided carrying case in a dry, secure location out of reach of children.
8. Troubleshooting
If you encounter issues with your drill, refer to the following common problems and solutions.
| Problem | Possible Cause | Solution |
|---|---|---|
| Drill does not start | Battery not charged or improperly installed. | Ensure battery is fully charged and correctly inserted. |
| Reduced power or performance | Low battery charge; incorrect speed/torque setting for task. | Recharge battery. Adjust speed or torque setting. |
| Bit slips in chuck | Chuck not tightened sufficiently; dirty chuck jaws. | Retighten chuck firmly. Clean chuck jaws. |
| Overheating | Blocked ventilation slots; continuous heavy use. | Clean ventilation slots. Allow tool to cool down. |
If the problem persists after attempting these solutions, please contact DCA customer support.
9. Specifications
| Feature | Specification |
|---|---|
| Model Number | ADJZ2055i |
| Brand | DCA |
| Power Source | Battery Powered |
| Voltage | 20 Volts |
| Max Torque | 55 Newton Meters (Nm) |
| No-Load Speed (Speed 1) | 0-450 RPM |
| No-Load Speed (Speed 2) | 0-1800 RPM |
| Impact Rate | Up to 27,000 IPM |
| Chuck Size | 13 Millimeters (All-Metal) |
| Torque Settings | 18+1+1 (Screwdriving, Drilling, Hammer Drilling) |
| Battery Capacity | 2000 Milliamper-hour (mAh) / 2.0Ah |
| Max Drilling Capacity (Wood) | 35 Millimeters |
| Max Drilling Capacity (Steel) | 13 Millimeters |
| Max Drilling Capacity (Masonry) | 13 Millimeters |
| Weight (Item) | 3.6 Kilograms (including accessories and case) |
| Dimensions (L x W x H) | 33L x 27l x 10H cm |
| Special Features | Adjustable Torque, Quick-Release Chuck, Brushless Motor, Cordless, LED Work Light, Ergonomic Grip |
10. Warranty and Support
DCA products are manufactured to high-quality standards. For warranty information, technical support, or service inquiries, please refer to the documentation included with your purchase or contact your retailer. Keep your proof of purchase for any warranty claims.


