
1. Introduction
Thank you for choosing the MAXDONE Trail Camera. This manual provides detailed instructions for setting up, operating, and maintaining your camera. Please read this manual thoroughly before use to ensure optimal performance and longevity of your device. This camera is designed for wildlife monitoring, outdoor scouting, and home security applications, featuring 4K video, 64MP photos, solar charging, and app control.
2. Package Contents
Verify that all items listed below are included in your package:
- MAXDONE Trail Camera (Model CHD527)
- Detachable Solar Panel
- USB Type-C Charging Cable
- Mounting Strap
- Threaded Tripod
- 32GB Micro SD Card
- Screw Accessories
- Instruction Manual (this document)

Image: Contents of the MAXDONE Trail Camera package, including the camera, solar panel, cables, mounting accessories, SD card, and manual.
3. Product Overview
The MAXDONE Trail Camera is equipped with advanced features for reliable outdoor monitoring:
- High Resolution: Captures 4K Ultra HD videos and 64MP still images.
- Solar Power: Features a detachable solar panel and a 6000mAh rechargeable lithium battery for extended operation.
- Night Vision: Infrared technology provides clear footage up to 65 feet in low-light conditions without disturbing wildlife.
- Fast Trigger Speed: Responds to motion in 0.1 seconds.
- Wide-Angle Detection: 130° detection angle for comprehensive coverage.
- App Control: Connects via WiFi and Bluetooth to the 'TrailCamGO' app for remote settings adjustment and footage download.
- Durable Design: IP66 waterproof rating ensures reliable performance in various weather conditions.

Image: Front view of the MAXDONE Trail Camera with its detachable solar panel, a micro SD card, and a USB-C charging cable, alongside a smartphone displaying the camera's app interface.
4. Setup
4.1 Battery and SD Card Installation
- Charge the Battery: The camera is equipped with a 6000mAh rechargeable lithium battery. Before first use, fully charge the camera using the provided USB Type-C cable connected to a power source, or by exposing the solar panel to direct sunlight.
- Insert SD Card: Open the camera's protective cover. Locate the Micro SD card slot. Insert the included 32GB Micro SD card (or another compatible card up to 256GB, Class 10 or higher recommended) with the gold contacts facing the correct direction until it clicks into place.
- Close Cover: Ensure the protective cover is securely closed to maintain the IP66 waterproof rating.
4.2 App Download and Initial Connection
- Download App: Search for 'TrailCamGO' in your smartphone's app store (iOS or Android) and install it.
- Power On Camera: Turn on the camera using the power switch.
- Connect via App: Open the 'TrailCamGO' app. Follow the in-app instructions to connect to your camera via WiFi and Bluetooth. The camera creates its own hotspot for connection. The maximum connection range is 55 feet, with a recommended distance of within 10 feet for stable connection.

Image: A smartphone displaying the 'TrailCamGO' app interface, showing a detection area customization screen with a leopard image, illustrating the camera's app control capabilities.
5. Operating Instructions
5.1 Basic Operation
- Power On/Off: Use the physical power switch on the camera to turn it on or off.
- Mode Selection: The camera supports various shooting modes, configurable via the 'TrailCamGO' app.
5.2 Shooting Modes
Configure these modes through the 'TrailCamGO' app:
- Motion Detection: Captures photos or videos when motion is detected. Features a 0.1-second trigger speed.
- Timed Capture: Takes photos or videos at set intervals, regardless of motion.
- Time-Lapse Photography: Captures a series of images over a long period to create a time-lapse video.
- 5-Shot Burst Mode: Captures multiple photos in quick succession when triggered.

Image: Diagram illustrating the three primary shooting modes: Motion Detection (triggered by movement), Timed Capture (scheduled intervals), and Time-Lapse Photography (sequential images over time).
5.3 Customizing Settings via App
The 'TrailCamGO' app allows for comprehensive customization:
- Detection Zones: Customize specific areas within the camera's field of view to reduce false triggers.
- Video Length & Resolution: Adjust video duration and quality (4K, 2K, 1080P, 720P).
- Photo Resolution: Select desired photo quality (up to 64MP).
- Audio Recording: Enable or disable audio capture for videos.
- Timestamps: Add customizable timestamps to images and videos.
- Motion Sensitivity: Adjust the sensitivity of the motion sensor.
- Operating Hours: Set specific times for the camera to be active.
5.4 Viewing and Downloading Footage
You can access your captured media through three methods:
- Via 'TrailCamGO' App: Connect your phone to the camera's WiFi/Bluetooth hotspot. Browse the gallery and download photos/videos directly to your phone without removing the SD card.
- USB Connection: Connect the camera to a computer using the provided USB Type-C cable. The camera will appear as a removable drive, allowing you to transfer files.
- SD Card Reader: Remove the Micro SD card from the camera and insert it into a compatible card reader connected to a computer or other device.

Image: Diagram illustrating three methods for downloading photos and videos from the trail camera: directly to a phone via WiFi/Bluetooth, to a computer via USB cable, or by using an SD card reader.
6. Charging and Battery Management
The MAXDONE Trail Camera is designed for extended operation with its 6000mAh rechargeable lithium battery and versatile charging options:
- Solar Charging: The detachable solar panel efficiently charges the internal battery when exposed to sunlight. Adjust the panel's angle to maximize sun exposure, especially considering seasonal changes.
- Type-C Charging: Use the provided USB Type-C cable to charge the camera from a wall adapter, power bank, or computer.
- Battery Power: The high-capacity internal battery provides long-term continuous use, reducing the need for frequent battery replacements.
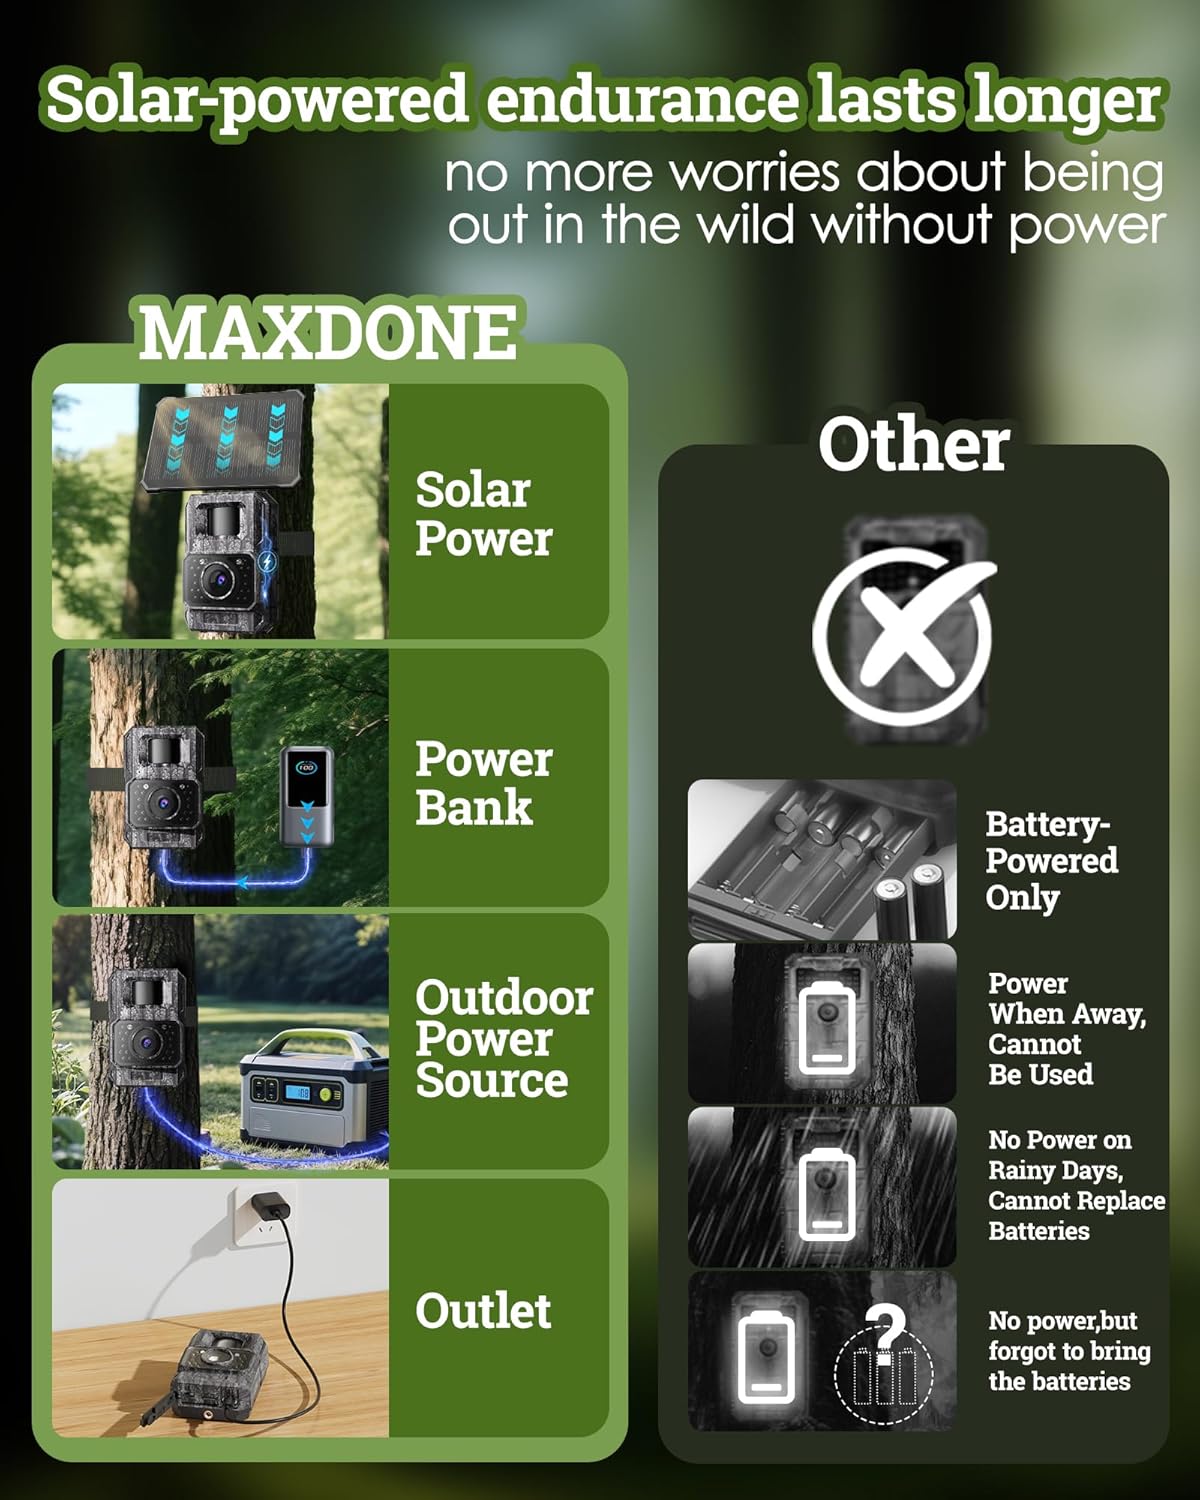
Image: Comparison of MAXDONE's solar-powered endurance with traditional battery-only cameras, showing MAXDONE charging via solar, power bank, outdoor power source, and outlet.
7. Mounting
Proper mounting ensures optimal camera performance and solar charging efficiency.
- Choose Location: Select a location that provides a clear view of the desired monitoring area and allows the solar panel to receive ample direct sunlight throughout the day.
- Attach Camera: Use the included mounting strap to secure the camera to a tree or post. Alternatively, use the threaded tripod for flexible positioning.
- Adjust Solar Panel: The solar panel is detachable and adjustable. Position it to face the sun directly, minimizing any potential blockage from foliage or structures.
- Test Coverage: After mounting, use the 'TrailCamGO' app to check the camera's field of view and adjust detection zones as needed.

Image: The MAXDONE Trail Camera mounted on a tree with its adjustable solar panel positioned to receive sufficient sunlight. Examples show mounting on eaves, trees, and walls, emphasizing sun exposure.
8. Maintenance
Regular maintenance helps ensure the longevity and optimal performance of your trail camera.
- Clean Lens and Solar Panel: Periodically wipe the camera lens and solar panel with a soft, clean cloth to remove dirt, dust, or debris that could affect image quality or charging efficiency.
- Check Seals: Ensure all rubber seals and the protective cover are properly closed and free from damage to maintain the IP66 waterproof rating.
- Monitor Battery: Check the battery level regularly via the app, especially during periods of low sunlight or high activity.
- SD Card Management: Format the SD card periodically to prevent data corruption and ensure sufficient storage space. Back up important footage before formatting.

Image: The MAXDONE Trail Camera mounted on a tree in a rainy environment, highlighting its IP66 waterproof rating and silicone plug for port protection. The image also indicates an available temperature range of -4°F to 140°F.
9. Troubleshooting
If you encounter issues with your MAXDONE Trail Camera, refer to the following common problems and solutions:
| Problem | Possible Cause | Solution |
|---|---|---|
| Camera not powering on | Low battery; incorrect battery installation | Charge the battery fully; ensure battery is correctly inserted. |
| Poor image/video quality | Dirty lens; low light conditions; incorrect settings | Clean the lens; adjust camera placement for better light; check app settings for resolution. |
| App connection issues | Too far from camera; camera WiFi/Bluetooth off; app not updated | Move closer to the camera (within 10ft recommended); ensure camera is on; update 'TrailCamGO' app. |
| No motion detection | PIR sensor blocked; sensitivity too low; detection zone not set | Clear sensor area; increase motion sensitivity in app; configure detection zones. |
| SD card error | Card full; corrupted; incompatible | Format SD card (backup data first); try a different compatible SD card. |
If the problem persists, please contact MAXDONE customer support for further assistance.
10. Specifications
Detailed technical specifications for the MAXDONE Trail Camera Model CHD527:
| Feature | Specification |
|---|---|
| Model Name | CHD527 |
| Maximum Webcam Image Resolution | 64 MP |
| Video Capture Resolution | 4K |
| Video Capture Format | MP4 (H.264 encoding) |
| Connectivity Technology | Wi-Fi, Bluetooth |
| Control Method | App (TrailCamGO) |
| Power Source | Battery Powered (6000mAh rechargeable lithium battery), Solar Charging, Type-C Charging |
| Flash Memory Supported Size Maximum | 256 GB (32GB included) |
| International Protection Rating | IP66 (Waterproof) |
| Low Light Technology | Night Color (Infrared Night Vision up to 65FT) |
| Alert Type | Motion Activated |
| Trigger Speed | 0.1 seconds |
| Wide Angle | 130° |
| Item Dimensions L x W x H | 3.94 x 1.7 x 2.64 inches |
| Item Weight | 1.12 pounds |
| Operating Temperature Range | -4°F to 140°F |
11. Warranty and Support
The MAXDONE Trail Camera Model CHD527 comes with a 1-Year Limited Warranty from the date of purchase. This warranty covers manufacturing defects and workmanship under normal use.
For warranty claims, technical support, or any questions regarding your product, please contact MAXDONE customer service through the retailer's platform or visit the official MAXDONE website for contact information. Please have your purchase receipt and product model number (CHD527) ready when contacting support.