1. Introduction
Thank you for choosing the ECHOMUSSY Wireless Microphones Bundle YA-06 & YA-07. This system provides a high-quality, low-latency audio experience with advanced connection technology and extended battery life. This manual will guide you through the setup, operation, and maintenance of your new wireless microphone system to ensure optimal performance.
2. Package Contents
Please verify that all items are present in your package:
- 2 x ECHOMUSSY Wireless Microphones (YA-06 & YA-07)
- 1 x Wireless Receiver
- 1 x USB-C Charging Cable (for both microphones and receiver)
- 1 x User Manual (this document)
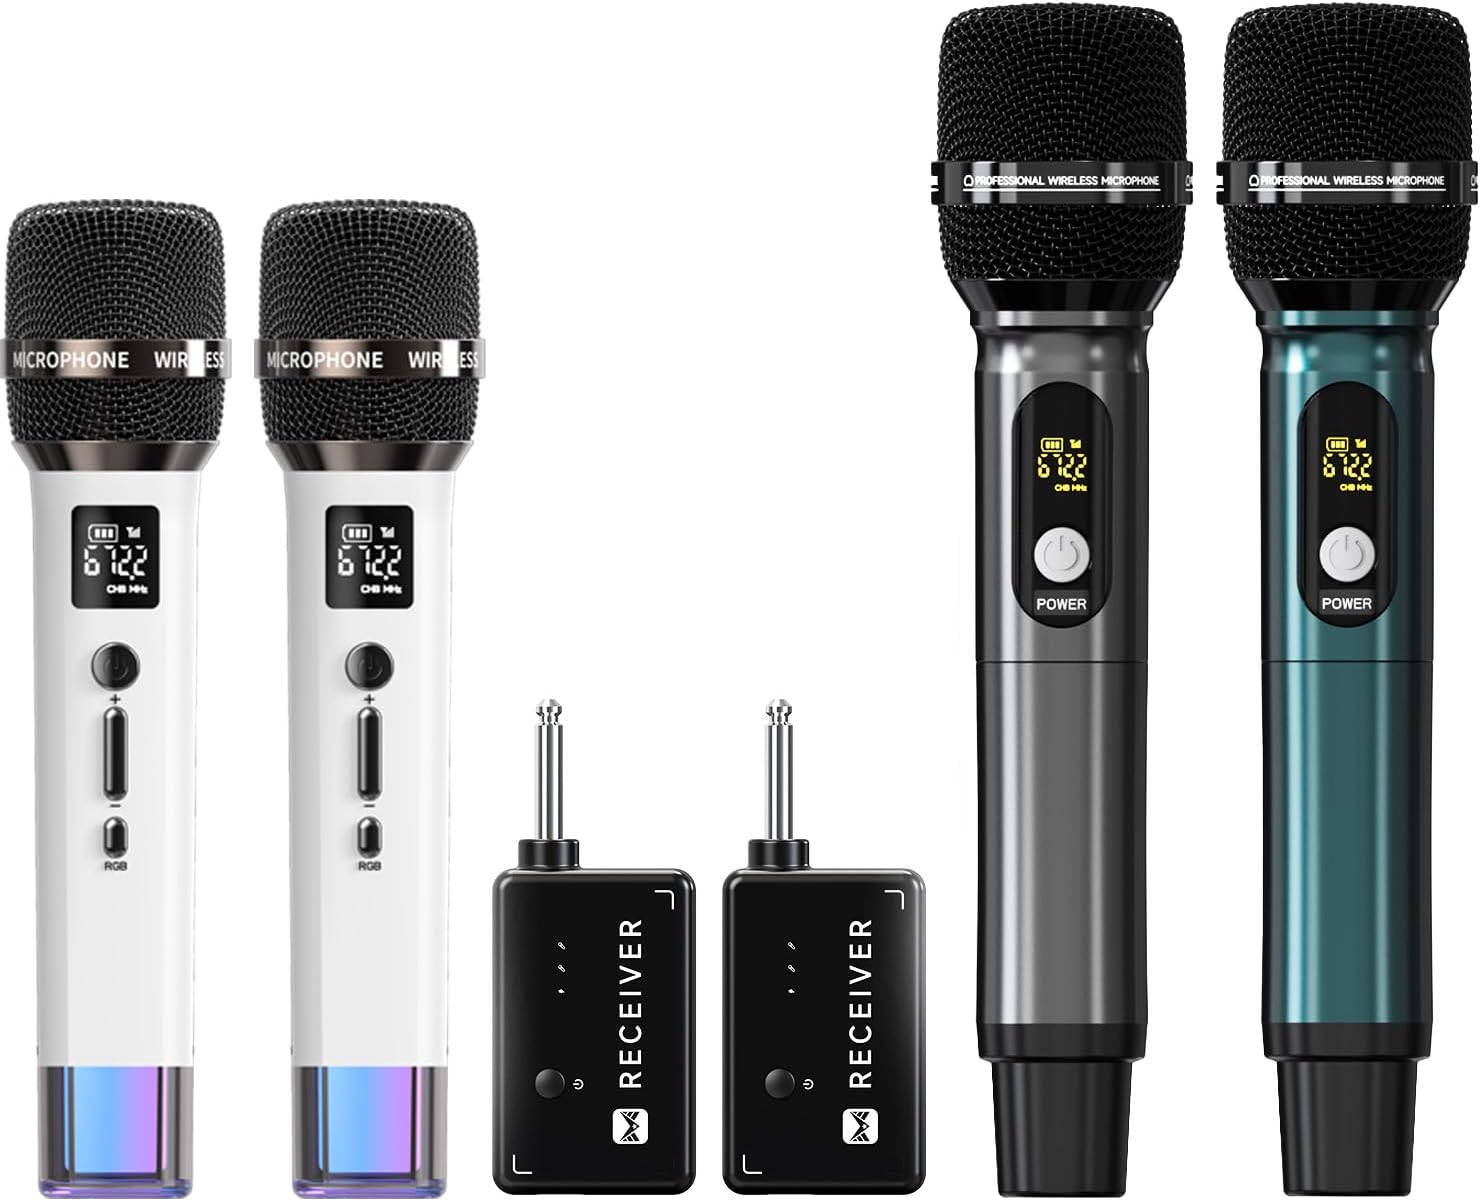
Image: Contents of the ECHOMUSSY Wireless Microphones Bundle, showing two microphones and two receivers.
3. Product Overview
3.1 Microphone Features
- Cardioid Polar Pattern: Captures sound primarily from the front, reducing background noise and feedback.
- Gradient RGB Symphony Lights: Customizable lighting modes for visual aesthetics.
- Integrated Controls: Volume adjustment and RGB lighting mode switch.
- USB-C Charging Port: Convenient and fast charging.
- Long Endurance: Up to 40 hours of operation on a full charge.

Image: Detailed view highlighting the cardioid pickup pattern and key features of the microphone.

Image: Controls and charging port on the microphone, emphasizing its long battery life.
3.2 Receiver Features
- 6.35mm (1/4 inch) Audio Jack: Standard connection for audio equipment.
- USB-C Charging Port: For recharging the internal battery.
- One-to-One Chip Connection: Ensures stable and fast signal reception with minimal latency.

Image: Visual representation of the microphone and receiver's low-latency, one-to-one connection technology.
4. Setup Instructions
4.1 Initial Charging
- Before first use, fully charge both microphones and the receiver.
- Connect the provided USB-C charging cable to the charging port on each microphone and the receiver.
- Connect the other end of the cable to a standard USB power adapter (not included).
- Charging typically takes 3-4 hours for a full charge. The battery indicator on the microphone display will show charging status.
4.2 Connecting to Audio Equipment
- Ensure your audio equipment (e.g., speaker, PA system, mixer) is powered off.
- Insert the receiver's 6.35mm (1/4 inch) audio jack into the microphone input port of your audio equipment.
- Power on your audio equipment.
- Power on the wireless microphones by pressing and holding the power button. The microphones and receiver will automatically pair.
- Compatibility Note: This system is compatible with devices featuring a microphone input, such as speakers, singing machines, audio amplifiers, PA systems, mixers, and voice amplifiers. It is not compatible with laptops, iPads, or mobile phones.

Image: Setup example showing the microphone and receiver connected to a speaker, demonstrating the wireless range.
5. Operating Instructions
5.1 Power On/Off
- To Power On: Press and hold the power button on the microphone until the display illuminates.
- To Power Off: Press and hold the power button on the microphone until the display turns off.
- The receiver powers on automatically when plugged into a powered device and powers off when unplugged.
5.2 Volume Adjustment
- Use the '+' and '-' buttons on the microphone to adjust the microphone's output volume.
- Further volume adjustments can be made on your connected audio equipment.
5.3 RGB Lighting Control
- Press the 'RGB' button on the microphone to cycle through the 7 available lighting modes.
- The lights will cycle through various gradient colors.

Image: Microphones displaying their dynamic RGB lighting effects.
6. Charging
Both the wireless microphones and the receiver are equipped with rechargeable batteries and USB-C charging ports.
- Microphone Battery Life: Up to 40 hours of continuous use on a full charge.
- Charging Time: Approximately 3-4 hours for a full charge for both microphones and receiver.
- Use the provided USB-C cable for charging. Connect to any standard USB power source (e.g., wall adapter, power bank, computer USB port).
- The microphone display will indicate the battery level.
7. Troubleshooting
- No Sound:
- Ensure both microphones and the receiver are fully charged and powered on.
- Verify the receiver is securely plugged into the microphone input of your audio equipment.
- Check the volume levels on both the microphone and your audio equipment.
- Confirm your audio equipment is compatible (not a laptop, iPad, or phone).
- Interference/Poor Sound Quality:
- Ensure the microphone and receiver are within the 200 ft (60m) operating range.
- Minimize obstacles between the microphone and receiver.
- Move away from other wireless devices that might cause interference.
- Microphone Not Pairing:
- The system features automatic pairing. Ensure both devices are powered on.
- Power cycle both the microphone and receiver (turn off, then turn on again).
8. Specifications
| Feature | Specification |
|---|---|
| Model | YA-06 & YA-07 |
| Polar Pattern | Cardioid |
| Wireless Technology | One-to-One Chip Connection |
| Operating Range | Up to 200 ft (60m) |
| Latency | 9ms |
| Microphone Battery Capacity | 1200mAh (Rechargeable) |
| Battery Duration | Up to 40 hours |
| Charging Time | 3-4 hours (USB-C) |
| Compatibility | Mic input Speaker, Singing Machine, Audio Amplifier, PA System, Mixer, Voice Amplifier. Not compatible with: Laptop, iPad, Phone. |
9. Safety Information
- Do not expose the device to extreme temperatures, humidity, or direct sunlight.
- Avoid dropping or subjecting the device to strong impacts.
- Do not attempt to disassemble or modify the device. This will void the warranty.
- Keep out of reach of children.
- Use only the provided charging cable or a certified USB-C cable for charging.
10. Warranty and Support
ECHOMUSSY products are designed for reliability and performance. For specific warranty details and customer support, please refer to the warranty card included with your purchase or visit the official ECHOMUSSY website. If you encounter any issues not covered in this manual, please contact our customer service team for assistance.