1. Introduction
Thank you for choosing the ONBRILL Shoe Cabinet with Cross Molding Doors. This manual provides essential information for the proper assembly, operation, and maintenance of your new shoe storage cabinet. Please read these instructions carefully before beginning assembly and retain them for future reference.
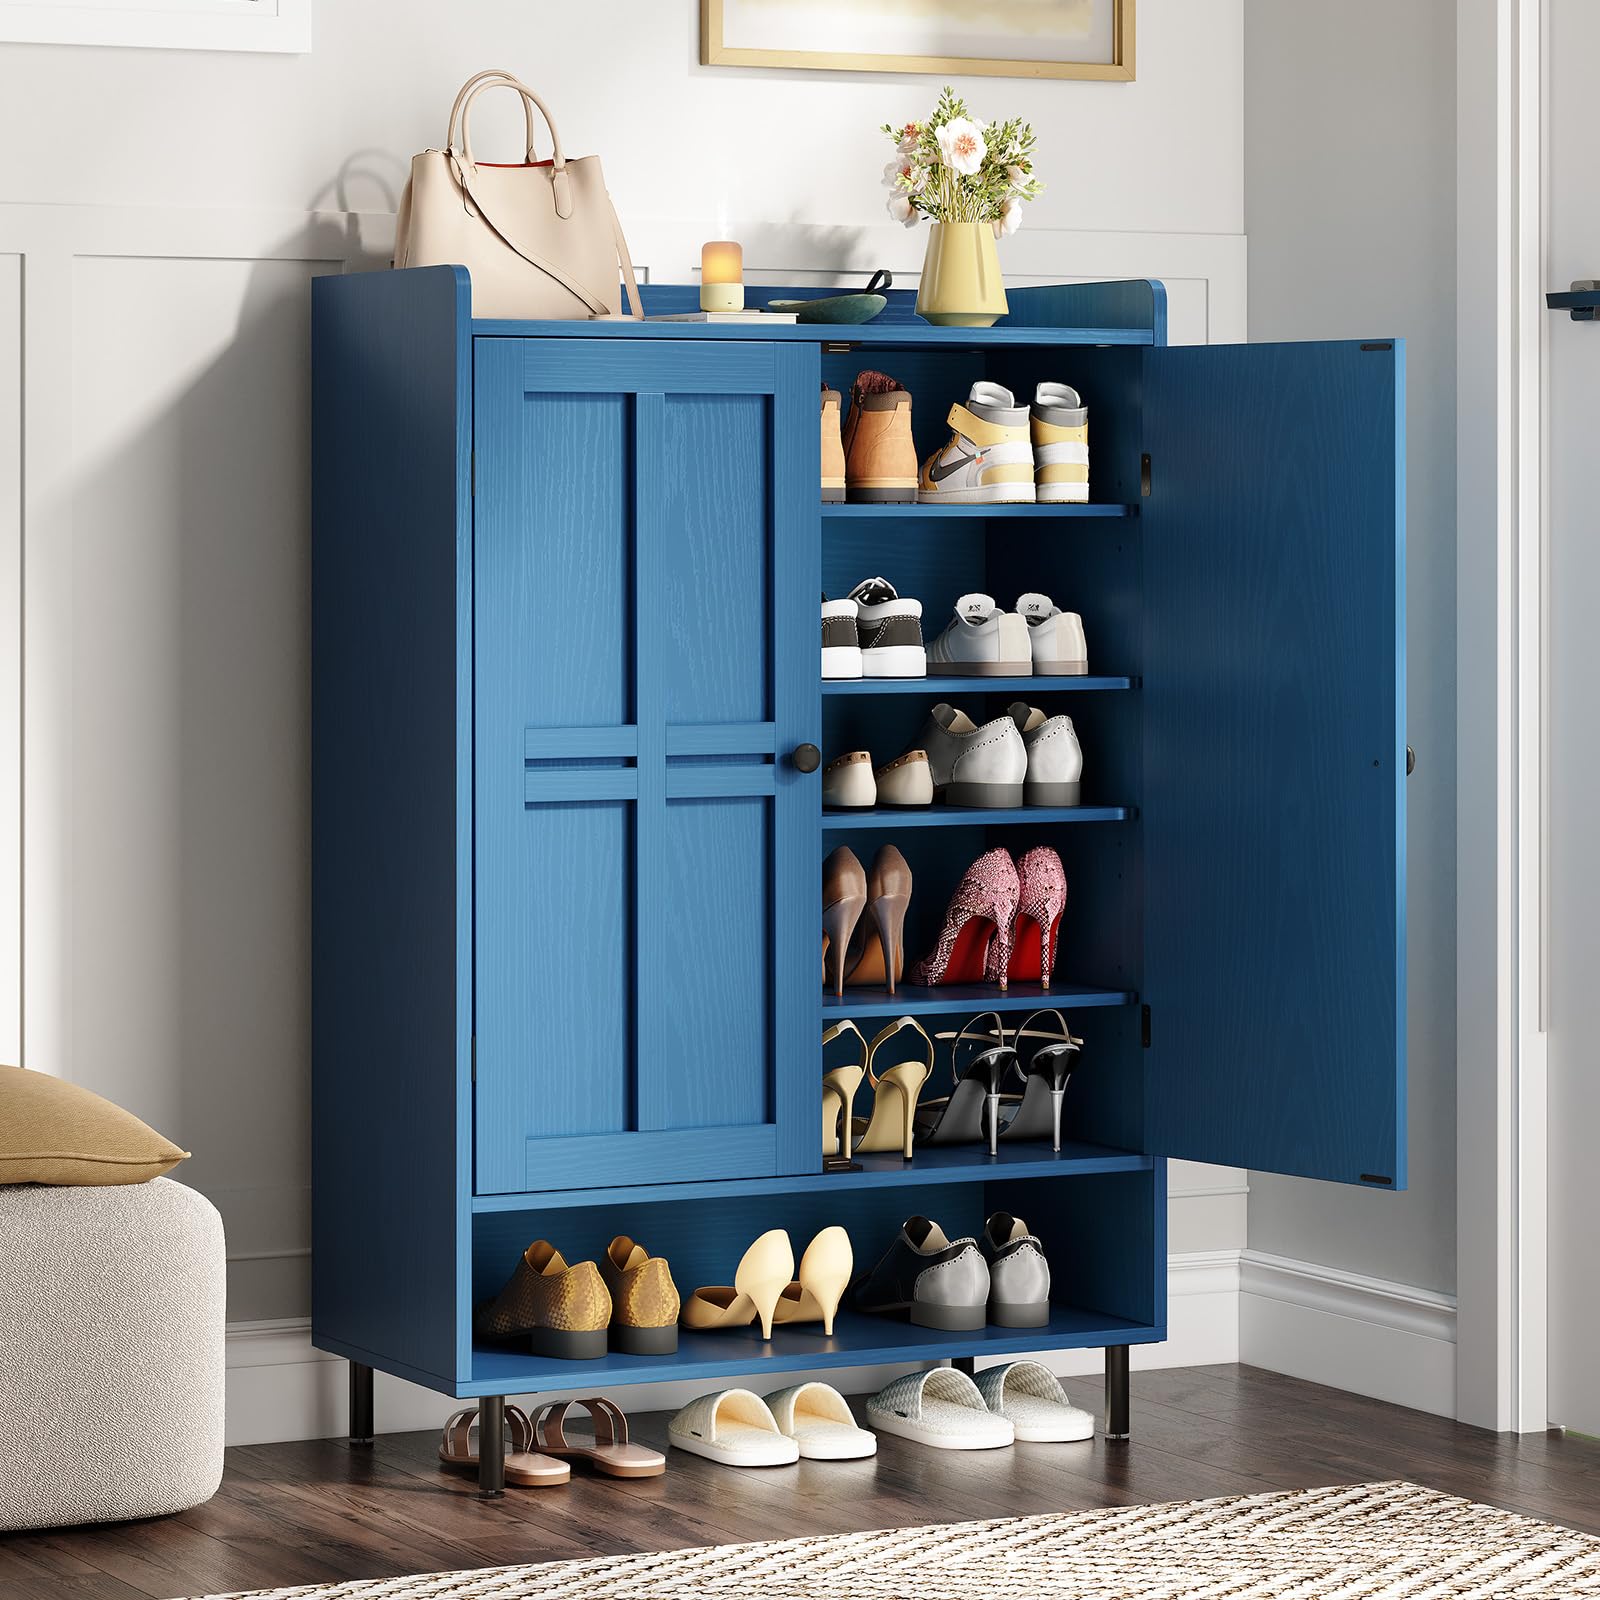
Figure 1: ONBRILL Shoe Cabinet, Blue.
2. Safety Information
To ensure safe use and prevent damage, please observe the following safety guidelines:
- Always follow assembly instructions carefully.
- Use appropriate safety gear when handling heavy or sharp objects during assembly.
- Do not exceed the weight capacity of the cabinet (Maximum 68 Pounds).
- Be cautious of pinch points when adjusting metal legs or opening/closing doors.
- Inspect the cabinet for any damage before and after assembly.
- For added stability and safety, especially in households with children, it is recommended to secure the cabinet to a wall using anti-tipping hardware (if provided).
3. Product Features
- Large Capacity: This 6-tier shoe cabinet offers ample storage for 18-24 pairs of shoes, helping to organize your entryway or living space.
- Adjustable Shelves: Features 3 adjustable shelves, allowing customization of shelf height to accommodate various shoe types, including boots and high heels.
- Cross Molding Doors: The cabinet is equipped with two doors featuring a unique criss-cross design and classic round black knobs, blending modern and farmhouse aesthetics.
- Sturdy Construction: Constructed from durable engineered wood with metal legs, ensuring stability and longevity. Adjustable feet protect floors from scratches.
- Open Shelf: Includes an open shelf for quick access to frequently used shoes or for decorative items.

Figure 2: Interior view showcasing adjustable shelves and storage capacity.
4. Specifications
| Attribute | Detail |
|---|---|
| Brand | ONBRILL |
| Model Number | SC-001 |
| Color | Blue |
| Material | Engineered Wood, Metal |
| Product Dimensions (D x W x H) | 14"D x 29.5"W x 45.3"H |
| Item Weight | 70 Pounds |
| Weight Capacity Maximum | 68 Pounds |
| Number of Shelves | 6 (3 adjustable) |
| Number of Doors | 2 |
| Installation Type | Freestanding |
| Required Assembly | Yes |
5. Setup & Assembly
The ONBRILL Shoe Cabinet requires assembly. Please ensure all parts are present and undamaged before beginning. Instructions are included in English with clearly numbered parts and easy-to-follow diagrams.
- Unpack all components and lay them out on a clean, soft surface to prevent scratches.
- Identify each part using the provided labels and diagrams in the assembly manual.
- Follow the step-by-step instructions carefully. It is recommended that 2-3 people assemble the cabinet together to speed up the process and ensure proper alignment.
- Ensure all screws and fasteners are tightened securely, but do not overtighten to avoid damaging the wood.
- Once assembled, adjust the metal feet to ensure the cabinet is level and stable on your floor.

Figure 3: Product dimensions and internal shelf adjustability.
6. Operation
Using your ONBRILL Shoe Cabinet is straightforward:
- Storing Shoes: Open the cross molding doors to access the internal shelves. Place shoes neatly on the shelves. The open bottom shelf is ideal for frequently used shoes or slippers.
- Adjusting Shelves: The three adjustable shelves can be repositioned to accommodate different shoe heights. Simply remove the shelf, adjust the support pegs to the desired height, and reinsert the shelf. This feature is particularly useful for boots or high heels.
- Top Surface: The top surface can be used for decorative items, keys, wallets, or other small essentials. The protective anti-drop panel helps prevent items from falling off the back.

Figure 4: Cabinet interior with various shoe types, demonstrating adjustable shelf use.
7. Maintenance
To keep your shoe cabinet in optimal condition:
- Cleaning: Wipe surfaces with a soft, damp cloth. Avoid harsh chemicals or abrasive cleaners that could damage the finish.
- Dusting: Regularly dust the cabinet to prevent buildup.
- Inspection: Periodically check all fasteners and connections to ensure they remain tight. Retighten if necessary.
- Avoid Moisture: Keep the cabinet away from excessive moisture or direct sunlight to prevent warping or fading.
8. Troubleshooting
If you encounter any issues with your ONBRILL Shoe Cabinet, consider the following:
- Wobbly Cabinet: Ensure the cabinet is placed on a level surface. Adjust the metal feet at the bottom until the cabinet is stable. Check that all assembly screws are tightened.
- Doors Not Aligning: During assembly, ensure the hinges are correctly installed and adjusted. Minor adjustments can often be made by slightly loosening and re-tightening hinge screws.
- Difficulty with Assembly: Review the assembly instructions carefully. Ensure all parts are oriented correctly. If issues persist, contact customer support.
9. Customer Support
For any questions, concerns, or assistance with your ONBRILL Shoe Cabinet, please do not hesitate to contact our customer service team. We are committed to resolving any issues within 24 hours.
Please refer to your purchase documentation for specific contact details or visit the official ONBRILL store on Amazon: ONBRILL Store.


