LIFEMOI R-6-8-10
LIFEMOI 10W/5V Solar Panel Charger Instruction Manual
Model: R-6-8-10
Product Overview
The LIFEMOI 10W/5V Solar Panel Charger is designed to provide continuous power to compatible security cameras, ensuring uninterrupted operation. Featuring high-efficiency monocrystalline silicon and a durable IP65 waterproof design, this solar panel is built for reliable outdoor performance.
It includes both DC3.5 * 1.35 and USB-C connectors, offering broad compatibility with various battery-powered cameras.
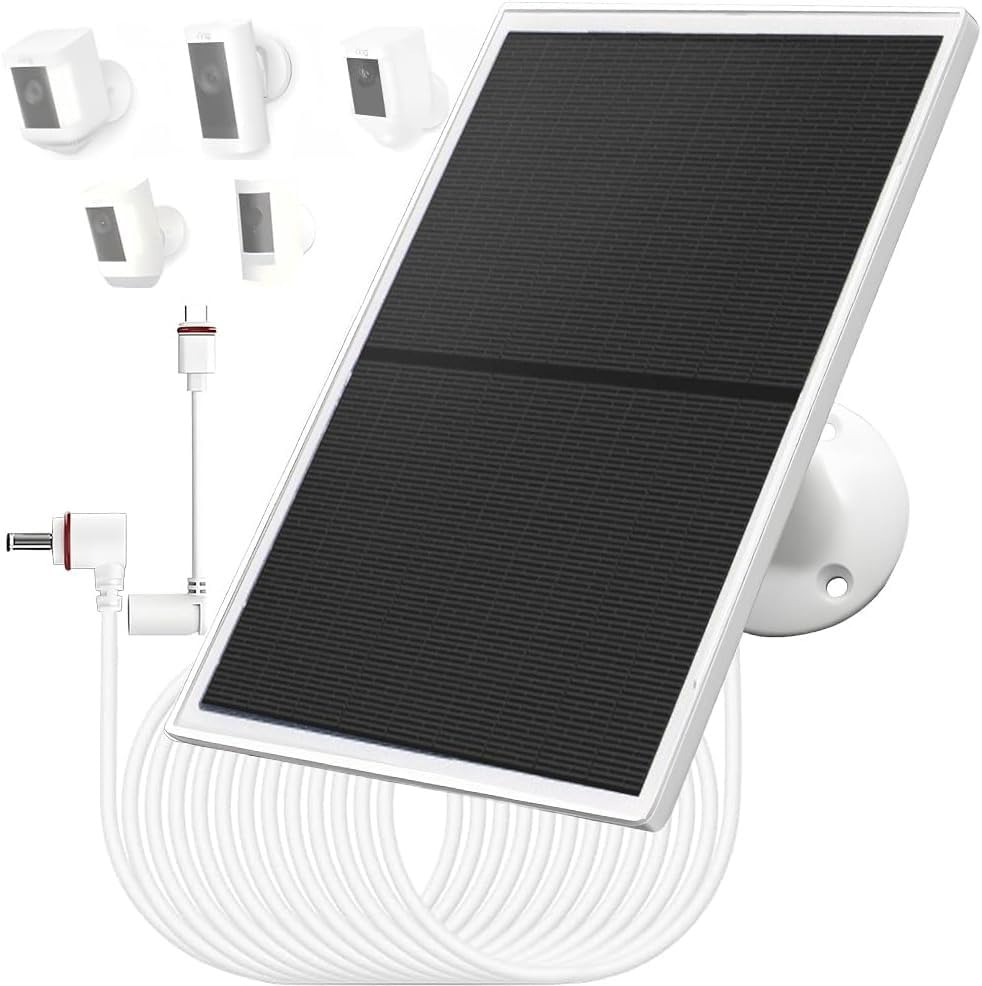
The LIFEMOI 10W/5V Solar Panel Charger, designed for outdoor security cameras.
Package Contents
Please verify that all items are present in the package:
- 1x Solar Panel
- 1x 3m (9.8ft) DC Cable
- 1x Type-C Charging Cable
- 1x 360° Adjustable Bracket
- 3x Screws
- 3x Wall Anchors
- 1x Instruction Manual
This video provides an unboxing and overview of the LIFEMOI solar panel charger and its included accessories, demonstrating how to attach the mounting bracket and connect the cables.
Compatibility
This solar panel charger is compatible with various battery-powered security cameras that utilize either a Type-C or DC (3.5x1.35) charging port. Specifically, it supports:
- Ring Spotlight Cam Battery
- Ring Stick Up Cam Battery
- Ring Stick Up Cam Pro Battery
- Ring Spotlight Cam Plus Battery
- Ring Spotlight Cam Pro Battery
- Reolink Argus Pro
- Other brands with built-in rechargeable batteries suitable for Type-C or DC (3.5x1.35) charging ports.
Note: This solar panel is NOT compatible with "plug-in" or "wired" versions of cameras. It is designed exclusively for cameras with built-in rechargeable batteries.
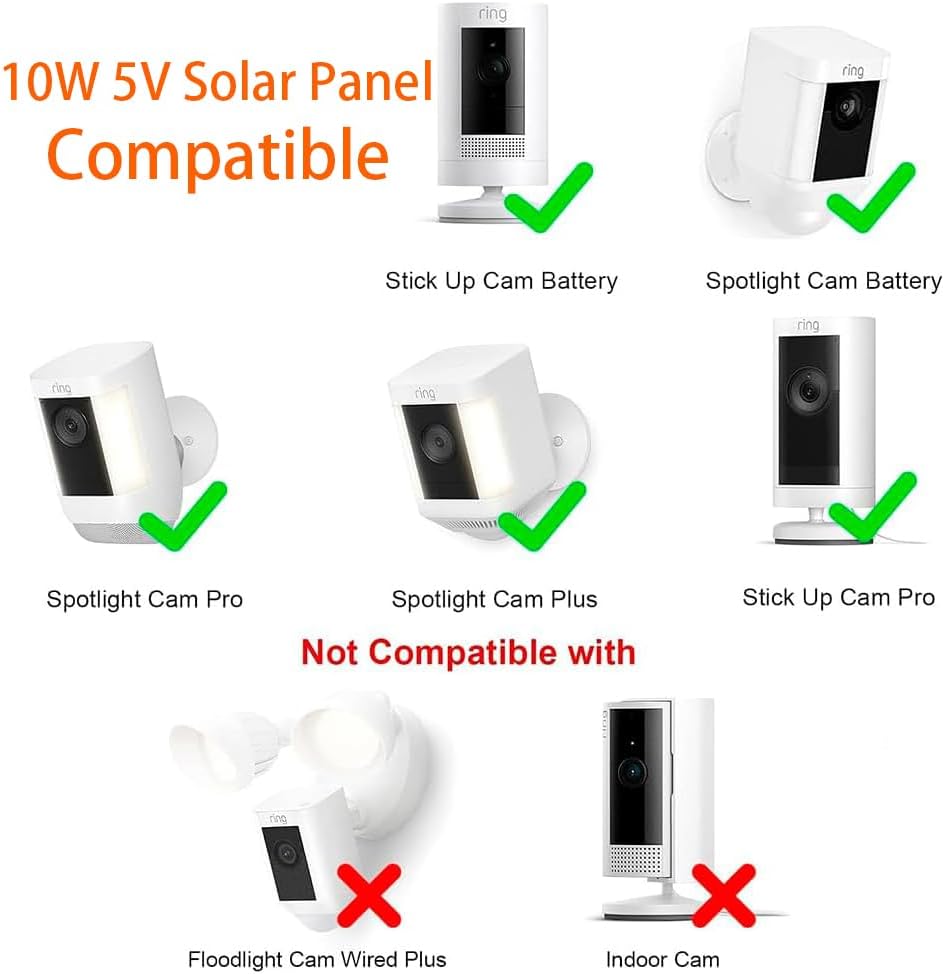
This image illustrates the compatibility of the solar panel with various Ring camera models, highlighting which models are supported and which are not.
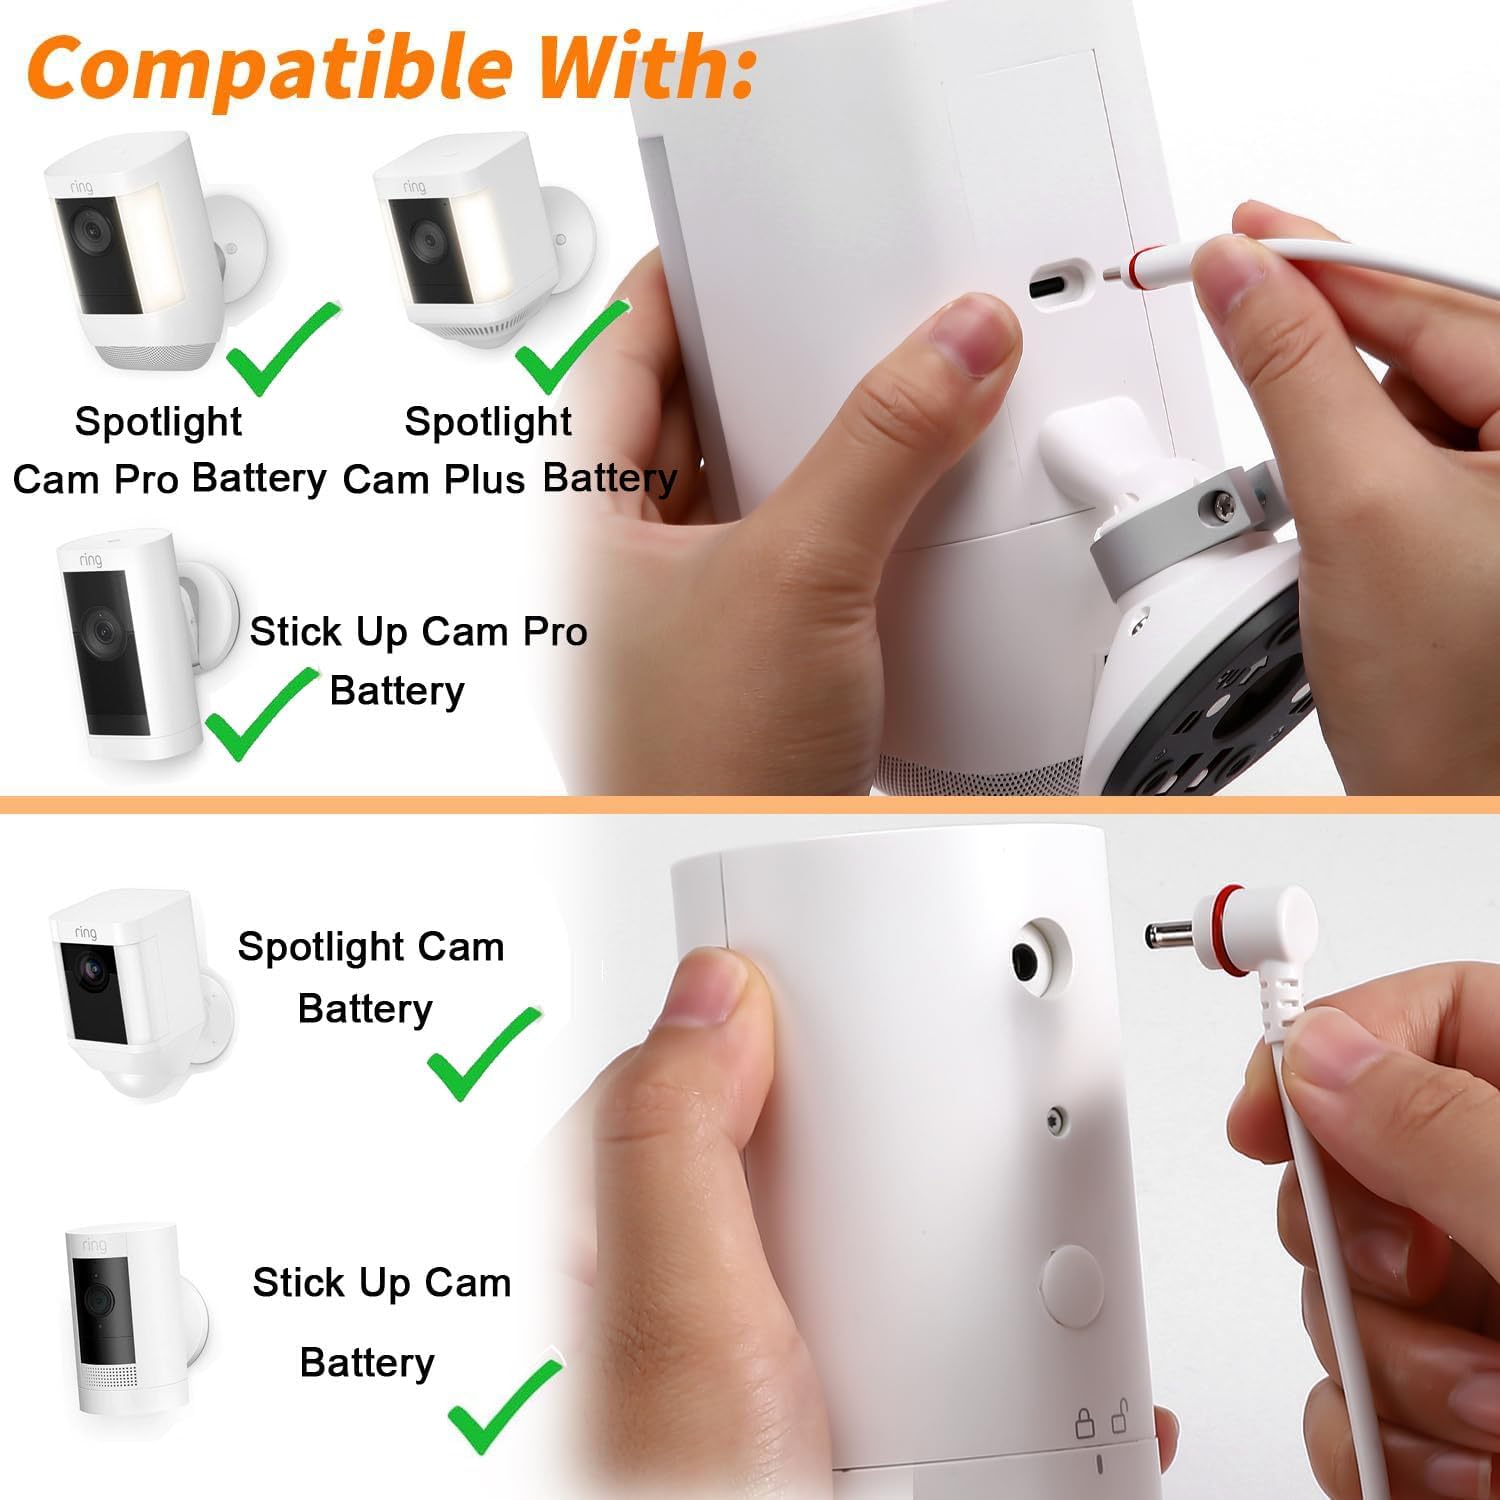
This image shows how to connect the solar panel's USB-C and DC 3.5x1.35 connectors to compatible camera charging ports.
Setup and Installation
Follow these steps to install your solar panel for optimal performance:
- Assemble the Bracket: Attach the 360° adjustable bracket to the back of the solar panel. Ensure it is securely fastened. The bracket allows for flexible tilting (90 degrees) and rotation (360 degrees) to achieve the best sunlight exposure.
- Choose an Installation Location: Select a location that receives direct sunlight for the majority of the day. Avoid areas with shade from trees, buildings, or other obstructions. Optimal placement is crucial for efficient charging.
- Mount the Bracket: Use the provided screws and wall anchors to securely mount the bracket to a wall or other stable surface.
- Adjust the Panel: Position the solar panel to face the sun directly. Adjust the tilt and rotation of the bracket to maximize sunlight exposure throughout the day.
- Connect to Camera: Connect the appropriate charging cable (DC3.5 * 1.35 or USB-C) from the solar panel to your compatible camera's charging port. Ensure a snug connection.
Important: For normal power supply, place the solar panel where it can receive sufficient sunlight. In cloudy or rainy conditions, or with insufficient sunlight, the output voltage may be low, affecting charging capability.

This image demonstrates the adjustable bracket, allowing for optimal positioning of the solar panel to capture maximum sunlight.

An example of the solar panel installed and connected to a Ring camera for continuous charging.
Operation
Once installed and connected, the solar panel will automatically begin charging your camera's battery when exposed to sunlight. The high-efficiency monocrystalline silicon and PET material ensure an energy conversion rate of up to 23%, allowing for rapid charging.
- Automatic Charging: The panel charges the camera's battery whenever sufficient sunlight is available.
- Fast Charging: The 10W output charges up to 60% faster than 5W solar panels, even on partially cloudy days.
- Continuous Power: Designed to keep your camera's battery topped up, reducing the need for manual recharging.

This graphic highlights the key operational features of the 10W solar panel, including its efficiency and protective design.

This image illustrates the solar panel actively charging a camera, emphasizing its energy conversion efficiency.
Maintenance
The LIFEMOI solar panel is designed for minimal maintenance due to its durable construction and IP65 dustproof and waterproof rating. However, periodic checks can ensure optimal performance:
- Clean the Panel Surface: Regularly wipe the surface of the solar panel with a soft, damp cloth to remove dust, dirt, leaves, or other debris that may accumulate and reduce efficiency. Avoid abrasive cleaners.
- Check Connections: Periodically inspect the charging cable and connectors for any signs of wear, damage, or loose connections. Ensure the waterproof rings on the Type-C adapter are intact.
- Monitor Sunlight Exposure: Ensure that no new obstructions (e.g., growing trees, new structures) are blocking sunlight from reaching the panel. Re-adjust the panel's position if necessary.
The panel is built to withstand extreme weather conditions, with an operating temperature range of -20.5°C to 48.5°C (-5°F to 120°F).

This image highlights the IP65 waterproof design, showing the solar panel functioning reliably even during heavy rainfall.

The solar panel is designed to operate effectively in various weather conditions, including snow, as shown in this image.
Troubleshooting
| Problem | Possible Cause | Solution |
|---|---|---|
| Camera battery not charging. |
|
|
| Panel appears damaged after installation. |
|
|
| Cable connection is not secure. |
|
|
Specifications
| Feature | Detail |
|---|---|
| Brand | LIFEMOI |
| Model Number | R-6-8-10 |
| Material | ABS |
| Product Dimensions (L x W x H) | 8"L x 6.8"W x 1"H |
| Item Weight | 450 Grams |
| Efficiency | High Efficiency (up to 23% energy conversion) |
| Amperage Capacity | 2 Amps |
| Maximum Voltage | 5.1 Volts |
| Maximum Power | 10 Watts |
| Special Features | Flexible, Portable, IP65 Dustproof and Waterproof |
| Connector Type | DC3.5*1.35, USB-C |
| Charging Cable Length | 9.8ft (3m) |
| Operating Temperature | -20.5°C to 48.5°C (-5°F to 120°F) |
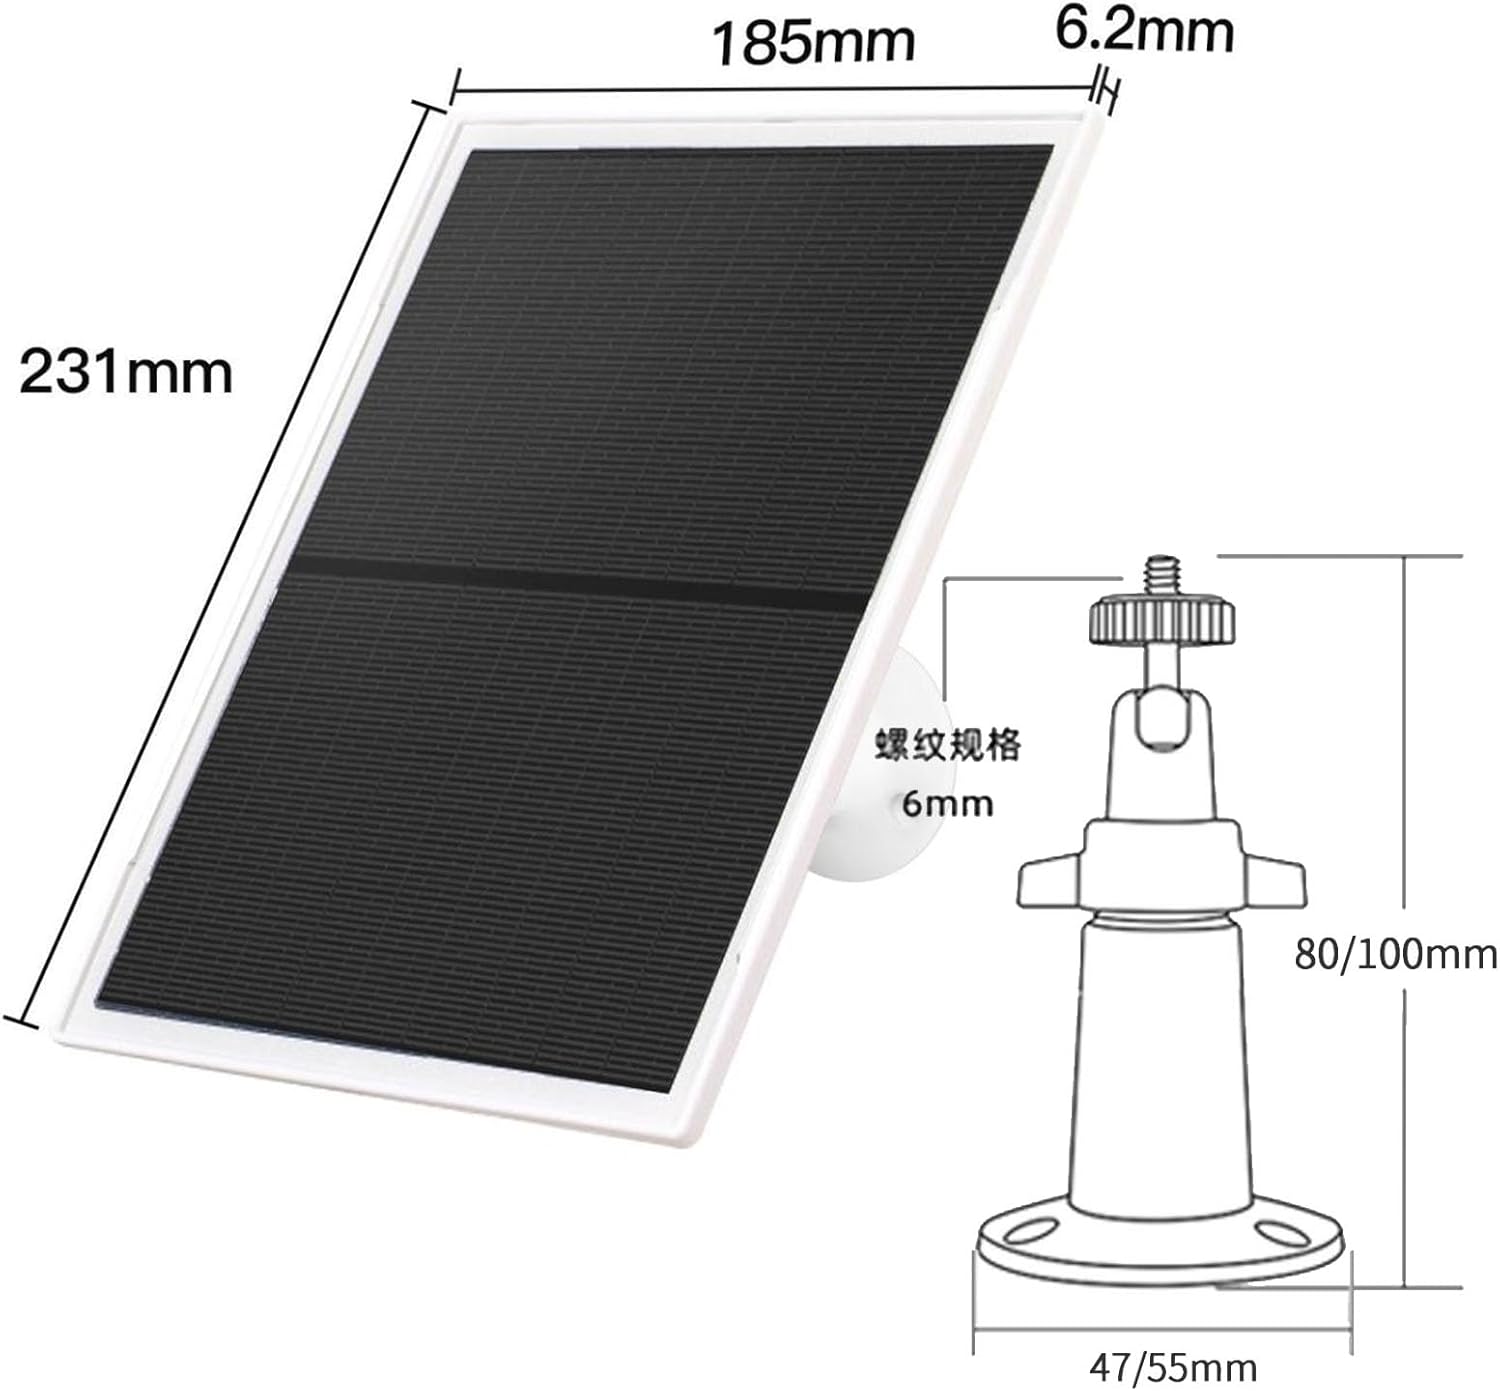
Detailed dimensions of the solar panel and its mounting bracket.
Warranty and Support
LIFEMOI offers a free maintenance service for 12 months from the date of purchase. Our products are certified with FCC, CE, and RoHS, ensuring high quality.
For any pre-sales or after-sales inquiries, please contact our customer service team. We provide 7x24 email service and are dedicated to assisting you with any issues.

LIFEMOI brand logo.

LIFEMOI provides round-the-clock customer service.