Introduction
Welcome to the elecci K200 Max Drone user manual. This document provides essential information for setting up, operating, and maintaining your drone to ensure a safe and enjoyable flight experience. The K200 Max is equipped with a 720P HD camera, brushless motors for enhanced performance, and an innovative 4.8-inch screen controller. Key features include Optical Flow Localization for stable hovering, Active Obstacle Avoidance, and simplified One Key Take Off/Landing functionality.

Figure 1: Brushless Motor for enhanced performance and durability.
What's in the Box
- elecci K200 Max Drone
- 4.8-Inch Screen Controller
- 2 Lithium Ion Batteries
- SD Card
- Charging Cable
- Small Screwdriver
- Spare Propellers
- Black Outdoor Carrying Case
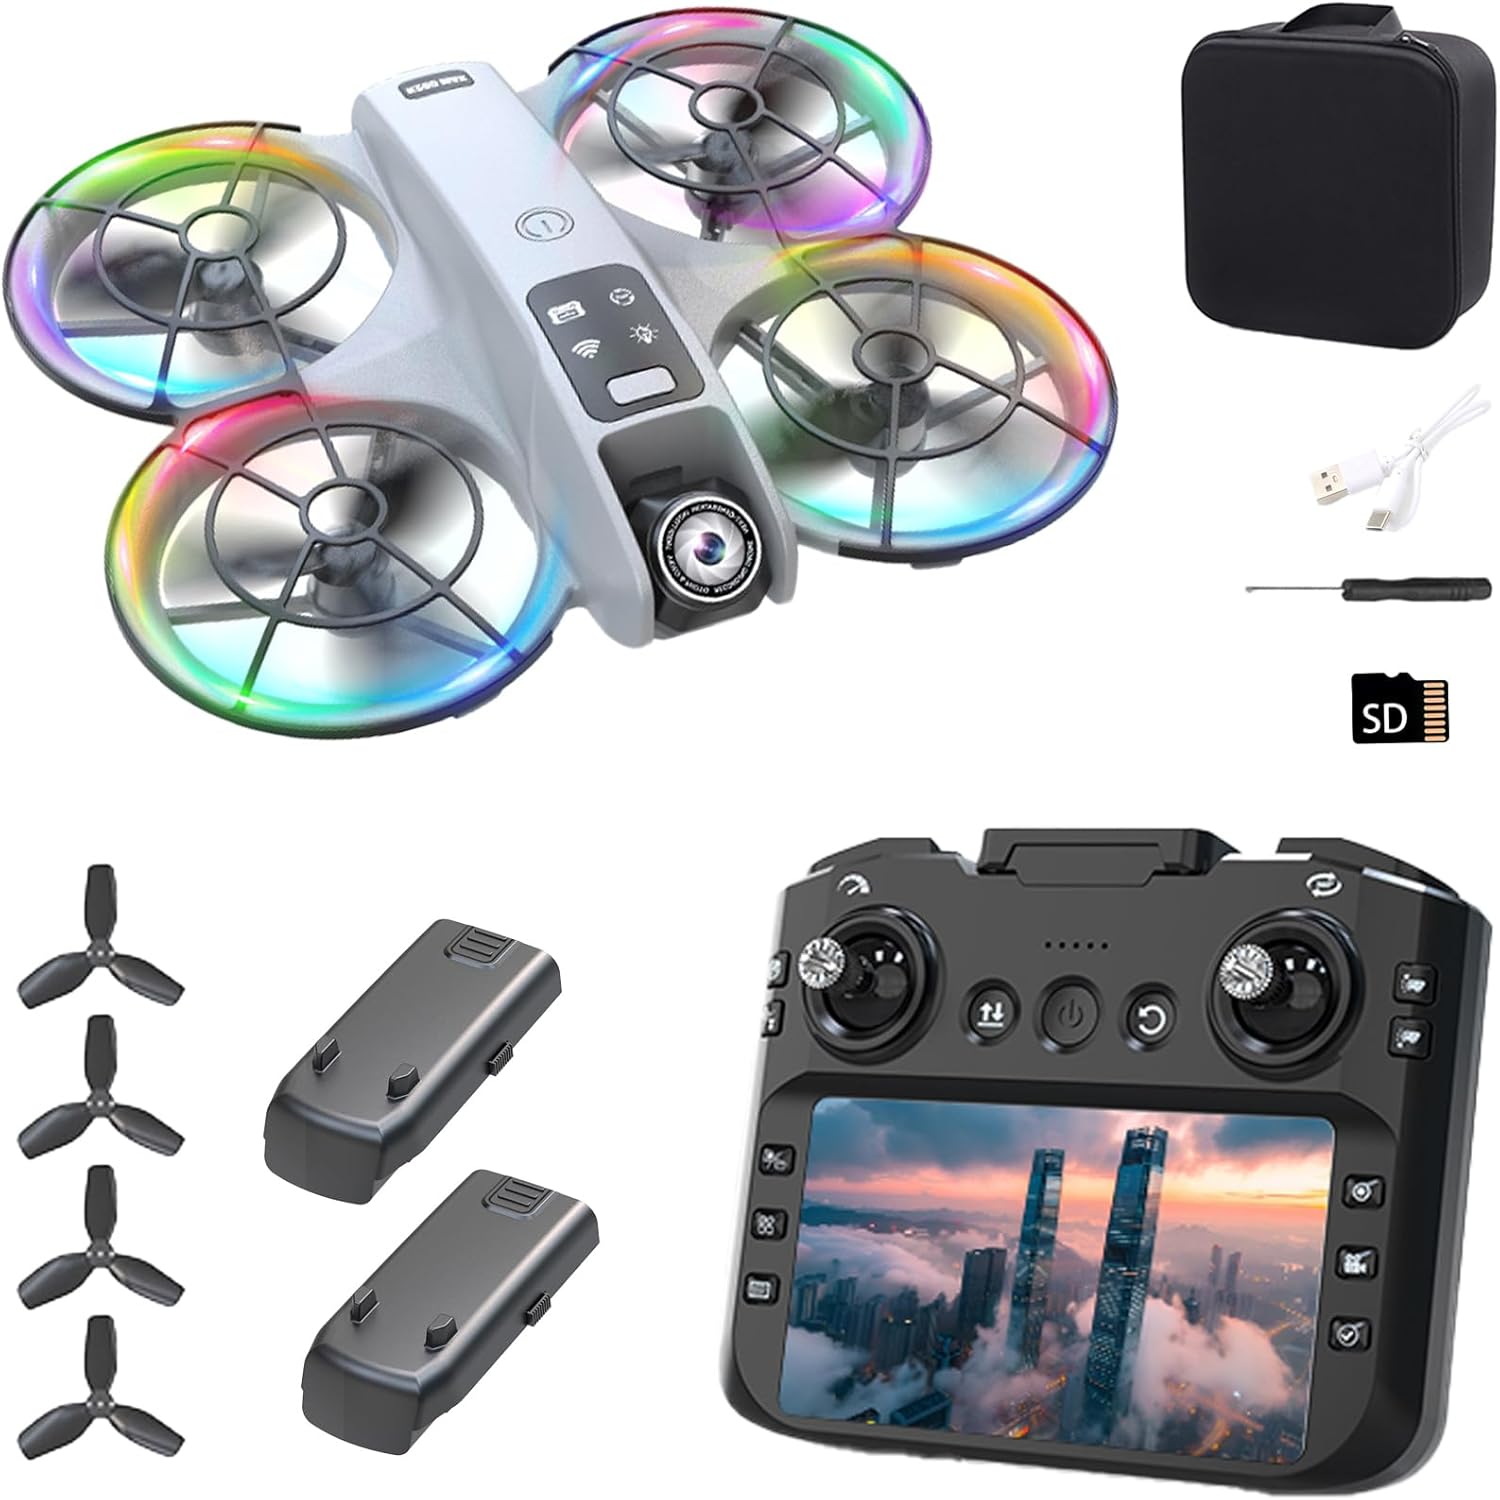
Figure 2: All components included in the elecci K200 Max Drone package.
Setup
1. Unfolding the Drone
Gently unfold the drone's four arms until they click and lock into their extended position. Ensure all propellers are free from obstruction.

Figure 3: Drone with arms unfolded.
2. Battery Installation and Charging
Insert a fully charged modular battery into the designated slot at the rear of the drone until it is securely in place. To charge the battery, remove it from the drone and connect it to the provided USB-C charging cable. The controller also charges via USB-C.

Figure 4: Drone with modular battery and screen controller.
3. Controller Setup
Attach the removable joysticks to the controller. Ensure the controller is adequately charged. The integrated 4.8-inch screen will display the live video feed from the drone's camera.

Figure 5: elecci K200 Max Screen Controller Layout.
4. Pairing and Calibration
Power on the drone by pressing and holding the power button. Then, power on the controller. The drone and controller will automatically attempt to pair. Once paired, place the drone on a flat, level surface and perform gyroscope calibration by moving both joysticks to the bottom-right corner simultaneously until the drone's lights stop blinking rapidly.
Video 1: This video demonstrates the initial setup process, including unfolding the drone, installing the modular battery, and preparing the screen controller for flight. It also shows the one-key takeoff and landing feature.
Operating the Drone
1. Basic Flight
After successful pairing and calibration, press the One Key Take Off button on the controller to launch the drone. Use the left joystick for throttle (up/down) and turning (left/right). Use the right joystick for forward/backward and left/right strafing movements. To land, press the One Key Landing button.
2. Advanced Features
The K200 Max features Optical Flow Localization for stable hovering, maintaining its position even without GPS. Active Obstacle Avoidance helps prevent collisions by detecting nearby objects. Headless Mode simplifies control by allowing the drone to move relative to the pilot's orientation, regardless of the drone's front direction. Utilize the multi-gear speed switching for different flight experiences, from beginner-friendly to advanced.
3. Camera Functions
The drone's 720p HD camera can capture high-quality photos and videos. Use the dedicated buttons on the controller to initiate one-click recording or photo capture. The camera's angle is 180-degree electrically adjustable, allowing for diverse aerial perspectives.
Video 2: This video demonstrates various operating features including stable hovering, multi-gear speed switching, 360-degree stunt rolls, and one-click photo/video recording.

Figure 6: 180-degree electrically adjustable camera.
Maintenance
1. Battery Care
Always use the provided charging cable. Do not overcharge the batteries. Store batteries in a cool, dry place when not in use. Avoid exposing batteries to extreme temperatures.
2. Propeller Replacement
If propellers are damaged, use the included screwdriver to carefully remove them and replace with spare parts. Ensure correct orientation of the new propellers (indicated by markings on the propellers and drone arms).
3. Cleaning
Wipe the drone and controller with a soft, dry cloth. Avoid using water or harsh chemicals, as these can damage electronic components.
Troubleshooting
1. Drone Not Responding
Ensure both the drone and controller are fully charged and properly paired. Recalibrate the gyroscope by placing the drone on a flat surface and moving both joysticks to the bottom-right corner simultaneously.
2. Unstable Flight
Perform gyroscope calibration. Check for any damaged or bent propellers and replace them if necessary. Ensure you are flying in calm weather conditions, as strong winds can affect stability.
3. No Camera Feed
Verify that the drone and controller are connected and the controller screen is active. Check if the SD card is correctly inserted and formatted. Ensure sufficient battery on both devices for camera operation.
Specifications
| Feature | Detail |
|---|---|
| Brand | elecci |
| Model Name | K200 Max |
| Manufacturer Part Number | E88 |
| Special Features | 360 Degree Flip, Auto Follow, One Button Return, One Key Rotation, Optical Flow Positioning, Active Obstacle Avoidance |
| Color | Gray |
| Video Capture Resolution | 720p |
| Connectivity Technology | Bluetooth, Wi-Fi |
| Included Components | Battery, Camera, Handbag, SD Card, Screen Controller |
| Item Weight | 6.4 ounces (0.4 Pounds) |
| Video Capture Format | MP4 |
| Control Type | Remote Control |
| Material | Composite |
| Battery Cell Composition | Lithium Ion |
| Batteries Included | Yes (2 Lithium Ion batteries required, included) |
| Product Dimensions | 3.2"L x 1.9"W x 5"H |
| UPC | 762849282497 |
Warranty and Support
For detailed warranty information and technical support, please refer to the documentation included in your product packaging. You may also contact elecci customer service directly through their official website or the contact information provided in the manual for assistance with any product-related inquiries or issues.