1. Introduction
Thank you for choosing the DSP KA3125 Espresso Machine. This appliance is designed to provide you with high-quality espresso and coffee beverages at home. It features a powerful 20-bar pump, an integrated coffee grinder with 20 grind settings, and a steam wand for milk frothing. Please read this manual carefully before operating the machine to ensure safe and efficient use. Keep this manual for future reference.
2. Safety Instructions
- Always ensure the machine is connected to a grounded power outlet with the correct voltage (220-240V ~ 50/60Hz).
- Do not immerse the machine, power cord, or plug in water or any other liquid.
- Keep hands and utensils away from moving parts during operation, especially the grinder.
- Exercise extreme caution when using the steam wand, as hot steam can cause burns.
- Unplug the machine from the power outlet before cleaning or when not in use.
- Do not operate the machine if the power cord or plug is damaged, or if the machine malfunctions or has been damaged in any way.
- This appliance is for household use only. Do not use outdoors.
- Children should be supervised to ensure they do not play with the appliance.
3. Product Components
Familiarize yourself with the parts of your DSP KA3125 Espresso Machine:
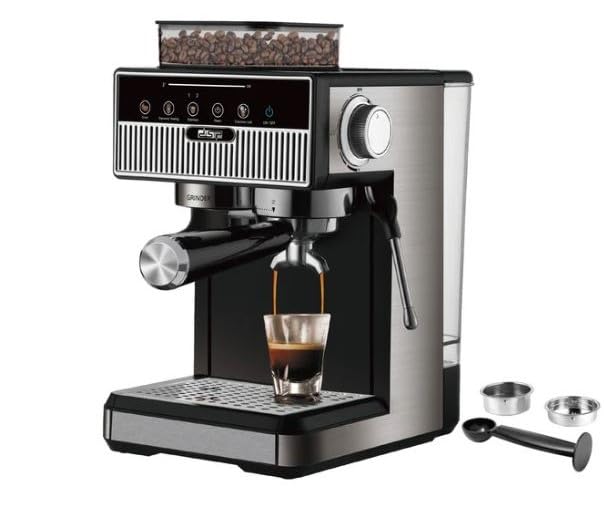
Figure 1: Front view of the DSP KA3125 Espresso Machine, showing the control panel, portafilter, and drip tray.
- Water Tank: Removable 1.7L capacity tank for fresh water.
- Bean Hopper: Container for whole coffee beans, feeding the integrated grinder.
- Control Panel: Touch screen interface for selecting functions and adjusting settings.
- Grind Adjustment Dial: Allows selection of 20 different grind settings.
- Portafilter (51mm): Die-cast aluminum holder for ground coffee.
- Single/Double Shot Filters (SUS304): Stainless steel filters for single or double espresso.
- Steam Wand: For frothing milk for lattes and cappuccinos.
- Drip Tray: Removable tray to collect excess liquids.
- Measuring Spoon: For accurate coffee dosing.
- Powder Holder: Aluminum accessory for ground coffee.
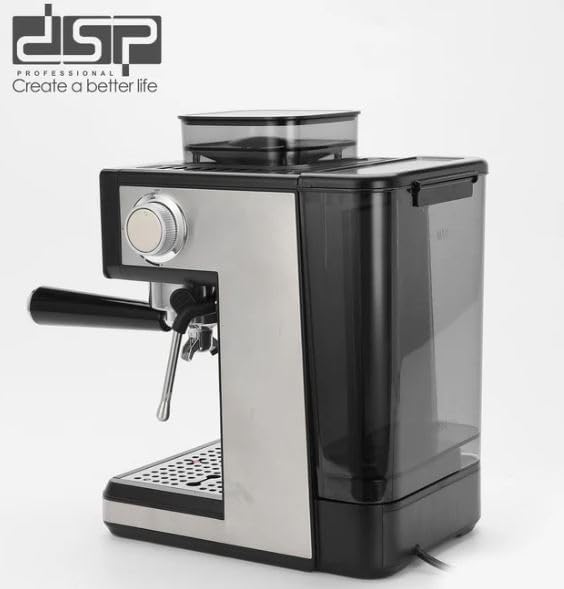
Figure 2: Side view of the DSP KA3125 Espresso Machine, highlighting the water tank and bean hopper.
4. Setup
Follow these steps to set up your espresso machine for the first time:
- Unpack: Carefully remove all packaging materials and ensure all components are present.
- Initial Cleaning: Wash the water tank, portafilter, filter baskets, measuring spoon, and drip tray with warm soapy water. Rinse thoroughly and dry. Wipe the exterior of the machine with a damp cloth.
- Fill Water Tank: Remove the water tank, fill it with fresh, cold water up to the MAX line, and place it back securely.
- Add Coffee Beans: Open the lid of the bean hopper and fill it with fresh, whole coffee beans. Close the lid.
- First Use Cycle: Before making coffee, run a cycle without coffee to prime the system. Place a cup under the portafilter and steam wand. Turn on the machine. Once heated, press the espresso button to dispense hot water. Repeat for the steam wand. This cleans the internal components and removes any manufacturing residue.
5. Operating Instructions
5.1 Making Espresso
- Select Filter: Choose the single or double shot filter and place it into the portafilter.
- Adjust Grind Setting: Use the grind adjustment dial to select your desired grind fineness (20 settings available). A finer grind is generally better for espresso.
- Grind Coffee: Place the portafilter under the grinder outlet. Select single or double grind on the touch screen. The machine will grind the appropriate amount of coffee directly into the portafilter.
- Tamp Coffee: Use a tamper (not included, but recommended) to press the ground coffee firmly and evenly into the portafilter.
- Attach Portafilter: Securely attach the portafilter to the brewing head by inserting it and twisting it to the right until it locks.
- Place Cup: Position your espresso cup(s) on the drip tray directly under the portafilter spouts.
- Brew Espresso: Select the single or double espresso option on the touch screen. The machine will begin brewing.
- Enjoy: Once brewing is complete, remove your cup(s) and enjoy your fresh espresso.
5.2 Using the Steam Wand for Milk Frothing
- Prepare Milk: Fill a stainless steel frothing pitcher with cold milk (dairy or non-dairy) to just below the spout.
- Activate Steam: Press the steam button on the control panel. Wait for the machine to reach steaming temperature (indicator light will illuminate or stop flashing).
- Purge Steam Wand: Briefly open the steam knob to release any condensed water from the wand into the drip tray. Close the knob.
- Froth Milk: Immerse the tip of the steam wand just below the surface of the milk. Open the steam knob fully. Angle the pitcher to create a swirling motion. Move the pitcher up and down slightly to incorporate air and create foam.
- Monitor Temperature: Continue frothing until the milk reaches your desired temperature and texture. The pitcher will become hot to the touch.
- Stop Steaming: Close the steam knob and remove the pitcher.
- Clean Steam Wand: Immediately wipe the steam wand with a damp cloth to remove any milk residue. Briefly open the steam knob again to purge any milk from inside the wand.
6. Maintenance and Cleaning
Regular cleaning ensures optimal performance and extends the life of your machine.
- Daily Cleaning:
- Empty and rinse the drip tray after each use.
- Remove the portafilter and discard used coffee grounds. Rinse the portafilter and filter basket under running water.
- Wipe down the exterior of the machine with a soft, damp cloth.
- Clean the steam wand immediately after each use as described in section 5.2.
- Water Tank Cleaning: Clean the water tank weekly with mild detergent and rinse thoroughly.
- Grinder Cleaning: Periodically clean the bean hopper and grinder burrs. Refer to the specific instructions in the full manual for detailed grinder cleaning procedures. Ensure the machine is unplugged before cleaning the grinder.
- Descaling: Depending on water hardness and usage, descale the machine every 2-3 months. Use a commercial descaling solution specifically designed for espresso machines. Follow the descaling solution manufacturer's instructions carefully.
7. Troubleshooting
Refer to the table below for common issues and their solutions.
| Problem | Possible Cause | Solution |
|---|---|---|
| No coffee dispenses | Water tank empty; Clogged filter; Machine not primed. | Fill water tank; Clean filter; Run a water-only cycle. |
| Weak or watery coffee | Grind too coarse; Insufficient coffee; Tamping too light. | Adjust grind finer; Use more coffee; Tamp more firmly. |
| No steam from wand | Steam wand clogged; Not at steaming temperature. | Clean steam wand; Wait for temperature indicator. |
| Machine leaks | Portafilter not properly attached; Drip tray full; Seal issues. | Re-attach portafilter; Empty drip tray; Contact support if seals are damaged. |
8. Specifications
Key technical specifications for the DSP KA3125 Espresso Machine:
| Feature | Detail |
|---|---|
| Model Number | KA3125 |
| Rated Voltage | 220-240V ~ 50/60Hz |
| Rated Power | 1350W |
| Water Tank Capacity | 1.7 Liters |
| Pump Pressure | 20 Bar |
| Body Material | ABS Plastic |
| Portafilter Size | 51mm Die-cast Aluminum |
| Grind Settings | 20 |
| Heating System | Thermoblock |
| Safety Features | Overheat and Overpressure Protection |
| Control Interface | Touch Screen / Buttons |
| Coffee Input Type | Ground Coffee, Whole Beans |
| Filter Type | Capsules and Ground Coffee (SUS304) |
| Item Weight | 800 grams |
| Color | Black |
| Manufacturer | DSP |
| Country of Origin | Turkey |
9. Warranty and Support
Your DSP KA3125 Espresso Machine is covered by a manufacturer's warranty. Please refer to the warranty card included in your product packaging for specific terms and conditions, including warranty duration and coverage details. For technical support, service, or to inquire about replacement parts, please contact the retailer where you purchased the product or visit the official DSP website for customer service information.