1. Introduction
Thank you for choosing the Fudajo Fully Automatic 36-Egg Incubator. This device is designed to provide an efficient and reliable solution for hatching various types of eggs, including chicken, duck, quail, and pigeon eggs. It features automatic egg turning, precise temperature and humidity control, and dual power options to ensure optimal conditions for embryo development. Please read this manual thoroughly before operation to ensure proper use and successful hatching.
2. Safety Instructions
- Always connect the incubator to a grounded power outlet.
- Do not immerse the incubator or its electrical components in water or other liquids.
- Keep the incubator away from children and pets.
- Ensure proper ventilation around the incubator to prevent overheating.
- Unplug the incubator from the power source before cleaning or performing any maintenance.
- Do not operate the incubator if the power cord or plug is damaged.
- Use only the provided power adapter and battery cable.
3. Package Contents
Verify that all items are present in the package:
- Fudajo Fully Automatic 36-Egg Incubator
- 3 x Water Bottles with Screw Caps
- AC Power Cable (1.5 meters)
- Battery Connection Cable (for emergency power)
- Incubation Grid (for hatching phase)
- User Manual
4. Product Features
- Fully Automatic Operation: Capacity for 36 eggs with an automatic rotation system ensuring uniform embryonic development.
- Adjustable Temperature and Humidity: Precise controls and a clear display allow for easy monitoring and adjustment to maintain optimal breeding conditions.
- Convenient Water Bottles: Three screw-cap water bottles can be directly connected to the incubator to maintain constant humidity, preventing egg dehydration.
- Robust and Energy-Efficient: Constructed from durable polypropylene (PP) with compact dimensions (39.5 x 42 x 16.5 cm) and a power consumption of 45W.
- Emergency Power Supply: Equipped with a battery cable for continued operation during power outages, ensuring uninterrupted incubation.
- Integrated Candler: Allows for easy monitoring of embryo development without disturbing the eggs.

Image: The incubator's control panel displaying current temperature and humidity levels for easy monitoring.

Image: Close-up of the automatic egg turning mechanism, designed to prevent embryos from sticking to the eggshell.

Image: The integrated candler in use, providing an easy way to observe the embryo's development inside the egg.
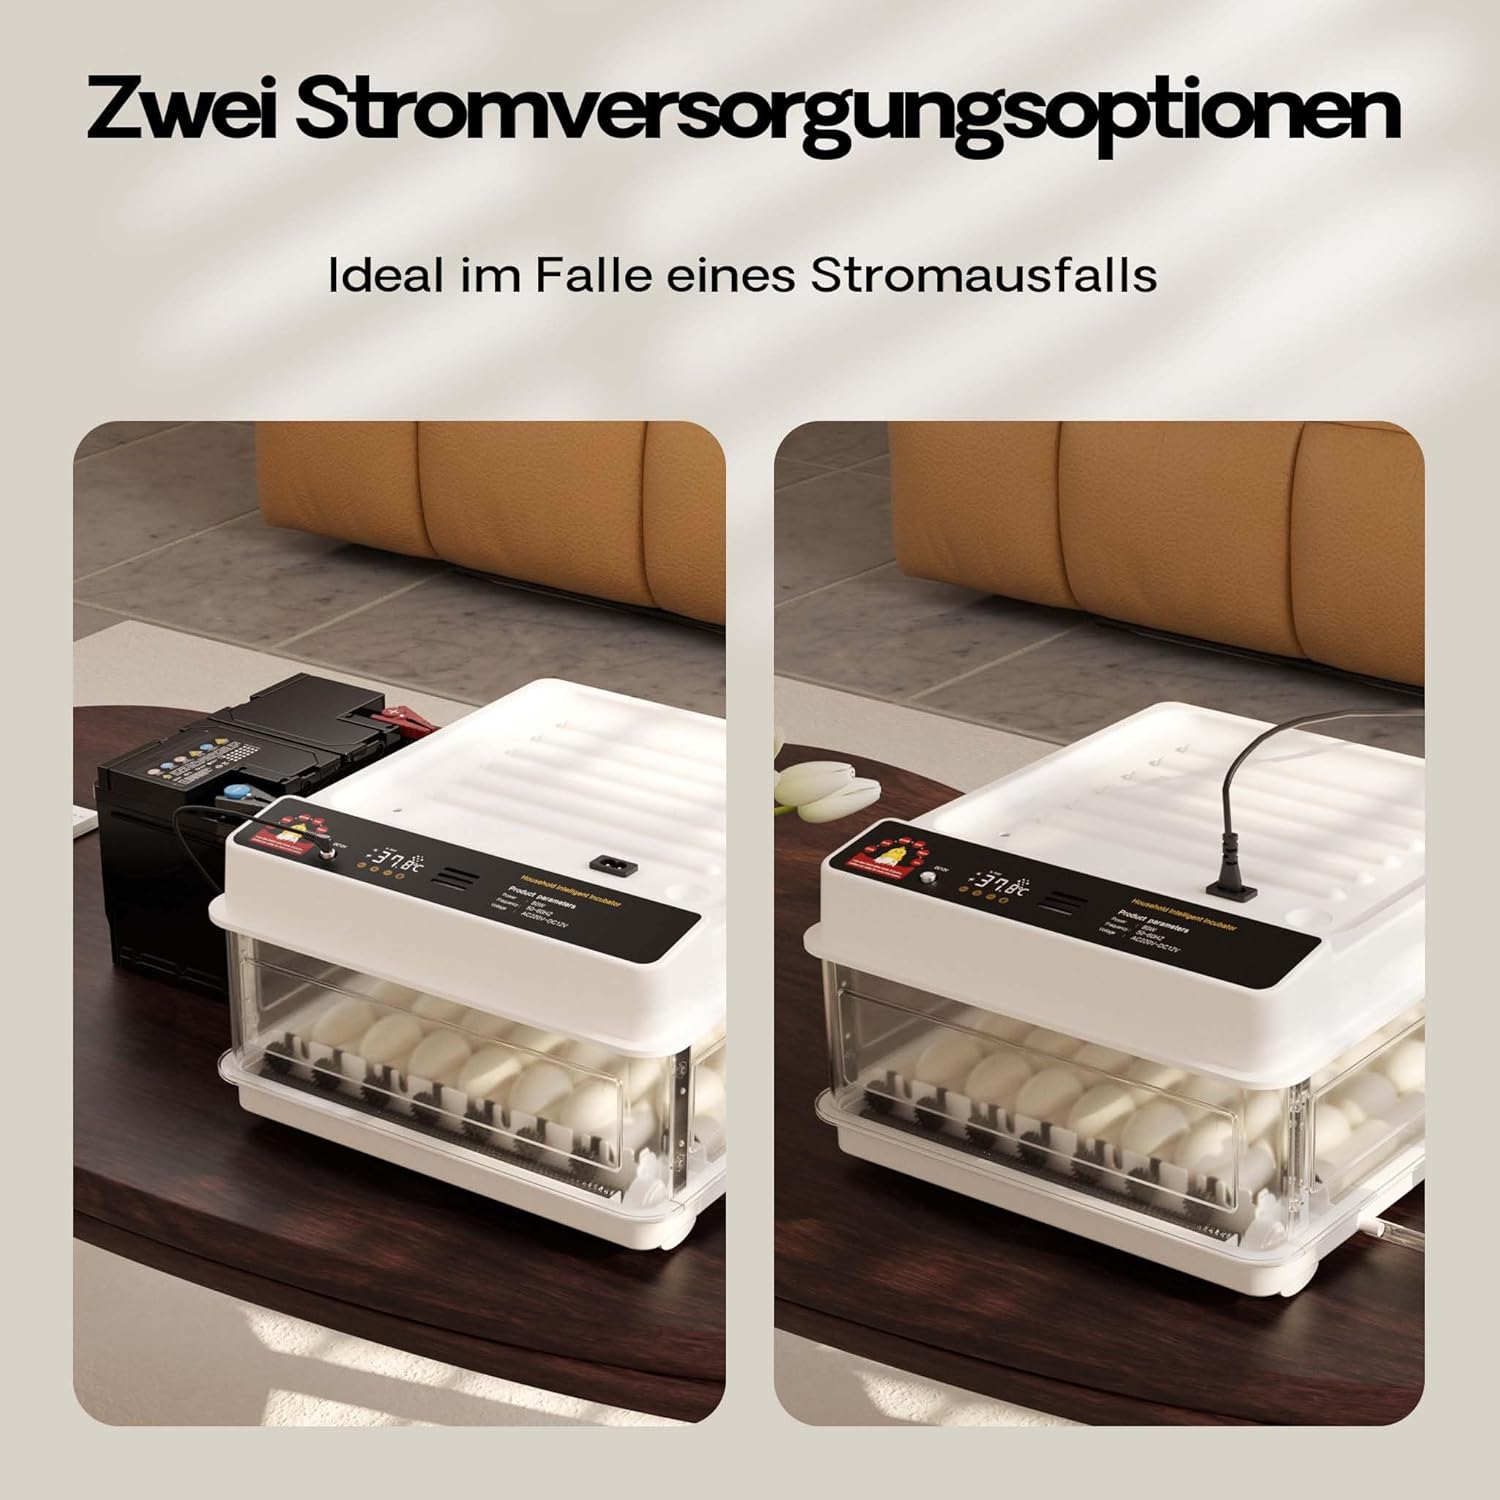
Image: Illustration of the two power supply options: standard AC power and an emergency battery connection for uninterrupted operation.

Image: The incubator is suitable for various egg types, including quail, duck, goose, and chicken eggs, shown alongside the unit.
5. Setup
5.1 Unpacking and Placement
- Carefully remove all components from the packaging.
- Place the incubator on a stable, level surface, away from direct sunlight, drafts, or extreme temperature fluctuations.
- Ensure there is adequate space around the incubator for ventilation.
5.2 Connecting Water Bottles
- Fill the three provided water bottles with distilled or demineralized water.
- Screw the caps tightly onto the bottles.
- Insert the water bottles into the designated ports on the side of the incubator. Ensure they are securely seated to prevent leaks and maintain humidity.
5.3 Power Connection
- Standard AC Power: Connect the AC power cable to the incubator's power input and then plug it into a standard grounded electrical outlet.
- Emergency Battery Power: In case of a power outage, connect the battery connection cable to the incubator's power input and the other end to a 12V car battery (not included). This provides backup power.
6. Operating Instructions
6.1 Pre-Incubation Checks
- Power on the incubator and allow it to run for at least 2-3 hours to stabilize the internal temperature and humidity.
- Familiarize yourself with the control panel and display.
- Ensure water bottles are filled and properly connected.
6.2 Setting Temperature and Humidity
Refer to the specific requirements for the type of eggs you are incubating. Typical settings are:
- Chicken Eggs: Temperature 37.5°C (99.5°F), Humidity 50-60% (days 1-18), 65-75% (days 19-21).
- Use the control buttons on the display panel to adjust the desired temperature and humidity levels. The incubator will automatically maintain these settings.
6.3 Placing Eggs
- Carefully place the fertilized eggs into the egg rollers. Ensure they are seated correctly.
- Close the incubator lid securely.
- The automatic egg turning system will begin rotating the eggs periodically.
6.4 Monitoring and Candling
- Regularly check the display for temperature and humidity readings.
- Refill water bottles as needed to maintain humidity.
- Use the integrated candler to periodically check embryo development. This is typically done around day 7 and day 14 for chicken eggs.
6.5 Hatching Phase
- Approximately 3 days before the expected hatch date (e.g., day 18 for chicken eggs), remove the egg rollers.
- Place the provided incubation grid at the bottom of the incubator.
- Carefully place the eggs onto the grid.
- Increase humidity to the recommended level for hatching (e.g., 65-75% for chicken eggs).
- Do not open the incubator during hatching unless absolutely necessary, as this can cause a drop in humidity and temperature, harming the chicks.
7. Maintenance
7.1 Cleaning
- After each hatch, unplug the incubator and allow it to cool down.
- Remove all egg debris and clean the interior surfaces with a mild disinfectant solution.
- Wipe down the egg rollers and incubation grid.
- Ensure all parts are completely dry before reassembling or storing.
7.2 Storage
Store the incubator in a clean, dry place, away from direct sunlight and extreme temperatures, when not in use.
8. Troubleshooting
- Temperature Fluctuations: Ensure the incubator lid is securely closed. Check room temperature stability. Avoid placing near windows or vents.
- Low Humidity: Verify water bottles are filled and properly connected. Add more water if necessary. Ensure the incubator is not in a very dry environment.
- Eggs Not Turning: Check if the automatic turning function is enabled. Ensure eggs are correctly seated in the rollers. If the issue persists, contact support.
- No Power: Check the power cable connection and the electrical outlet. If using battery power, ensure the battery is charged and connected correctly.
9. Specifications

Image: A technical diagram illustrating the product dimensions (Length: 375mm, Width: 400mm, Height: 215mm) and maximum capacity of 36 eggs.
| Specification | Value |
|---|---|
| Model Number | 65586 |
| Capacity | 36 Eggs |
| Power | 45 W |
| Product Dimensions (L x W x H) | 39.5 x 42 x 16.5 cm (15.55 x 16.54 x 6.5 inches) |
| Item Weight | 2.14 kg (4.72 lbs) |
| Material | Polypropylene (PP) |
| Power Cable Length | 1.5 meters |
10. Warranty and Support
For warranty information or technical support, please refer to the documentation provided with your purchase or contact Fudajo customer service through the retailer where the product was purchased. Please have your model number (65586) and purchase date available when contacting support.


