1. Safety Information
The ACMER S1 Laser Engraver is a Class 4 laser product. Improper use can result in serious injury. Please read and understand all safety instructions before operation.
- Eye Protection: Always wear the provided protective goggles when operating the laser engraver. Direct exposure to the laser beam can cause permanent eye damage.
- Skin Protection: Avoid direct exposure of skin to the laser beam.
- Fire Hazard: Laser engraving and cutting can generate heat and sparks, potentially causing fires. Do not leave the machine unattended during operation. Ensure adequate ventilation. Keep flammable materials away from the working area.
- Ventilation: Operate the machine in a well-ventilated area to dissipate fumes and smoke produced during engraving.
- Material Compatibility: Do not engrave or cut unknown materials. Some materials can produce toxic fumes or catch fire easily. Avoid materials containing PVC, vinyl, or other chlorine-containing plastics.
- Children and Pets: Keep children and pets away from the laser engraver during operation.
- Power Supply: Use only the specified power adapter. Disconnect power before performing any maintenance or adjustments.

Image: The ACMER S1 Laser Engraver showing its stable structure, power ports, and the included protective goggles for eye safety.
2. Product Overview
The ACMER S1 is a compact and portable laser engraver designed for beginners, offering both engraving and cutting capabilities on a wide range of materials. It features an ultra-fine laser spot for detailed work and high-speed operation.
Key Features:
- Engraving & Cutting: Capable of engraving over 100 materials and performing certain cutting tasks.
- Precision: Ultra-fine 0.04 x 0.04mm laser spot for highly detailed and realistic engravings.
- Speed: Engraving speeds up to 10000mm/min.
- Engraving Area: 5.1 x 5.1 inches (130mm x 130mm).
- Portability: Compact and lightweight design for easy transport and use in various locations.
- Software Compatibility: Supports professional carving software such as LightBurn (Windows, macOS, Linux) and LaserGRBL (Windows).
- Beginner-Friendly: Minimal assembly required, with detailed manuals and videos available for guidance.

Image: The ACMER S1 Laser Engraver showcasing its compact design and examples of engraved items on different materials.

Image: A visual representation of the ACMER S1's balanced engraving and cutting capabilities across different materials, including maximum cutting depths for wood and acrylic at various laser powers.
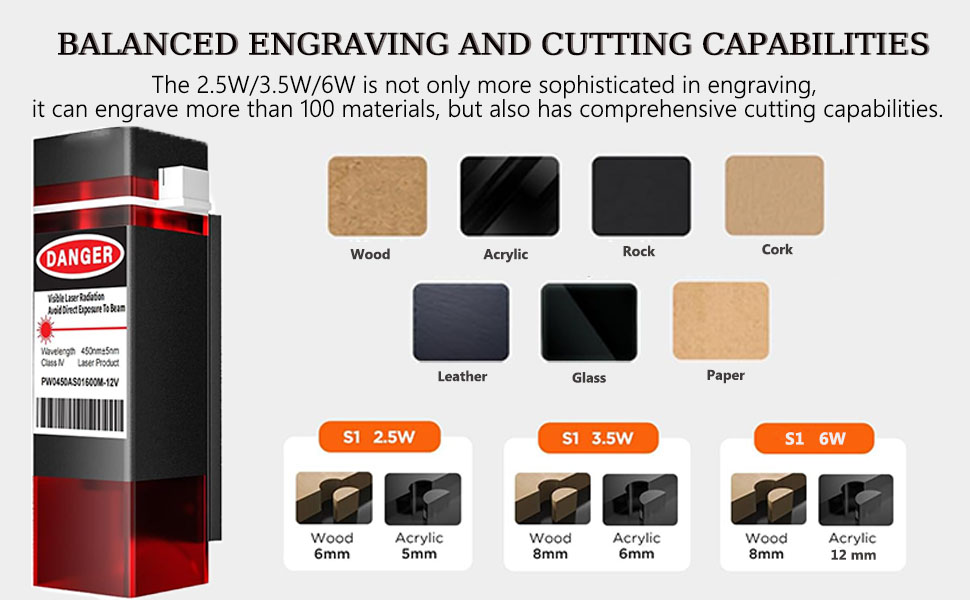
Image: This diagram further details the engraving and cutting capabilities of the S1, highlighting its versatility with over 100 materials and specific cutting depths for wood and acrylic based on laser power (2.5W, 3.5W, 6W).
3. Setup
The ACMER S1 Laser Engraver is designed for quick and easy setup, requiring minimal installation.
Initial Setup Steps:
- Unpacking: Carefully remove all components from the packaging.
- Placement: Place the engraver on a stable, level, and heat-resistant surface in a well-ventilated area.
- Power Connection: Connect the power adapter to the engraver's 'POWER' port and then to a suitable power outlet.
- Computer Connection: Connect the engraver to your computer using the provided USB Type-C cable.
- Software Installation: Install the appropriate engraving software (LightBurn or LaserGRBL) on your computer. Refer to the software's documentation for detailed installation instructions.
- Safety Goggles: Put on the protective goggles before powering on the device.
- Power On: Press the 'ON/OFF' button to power on the engraver.
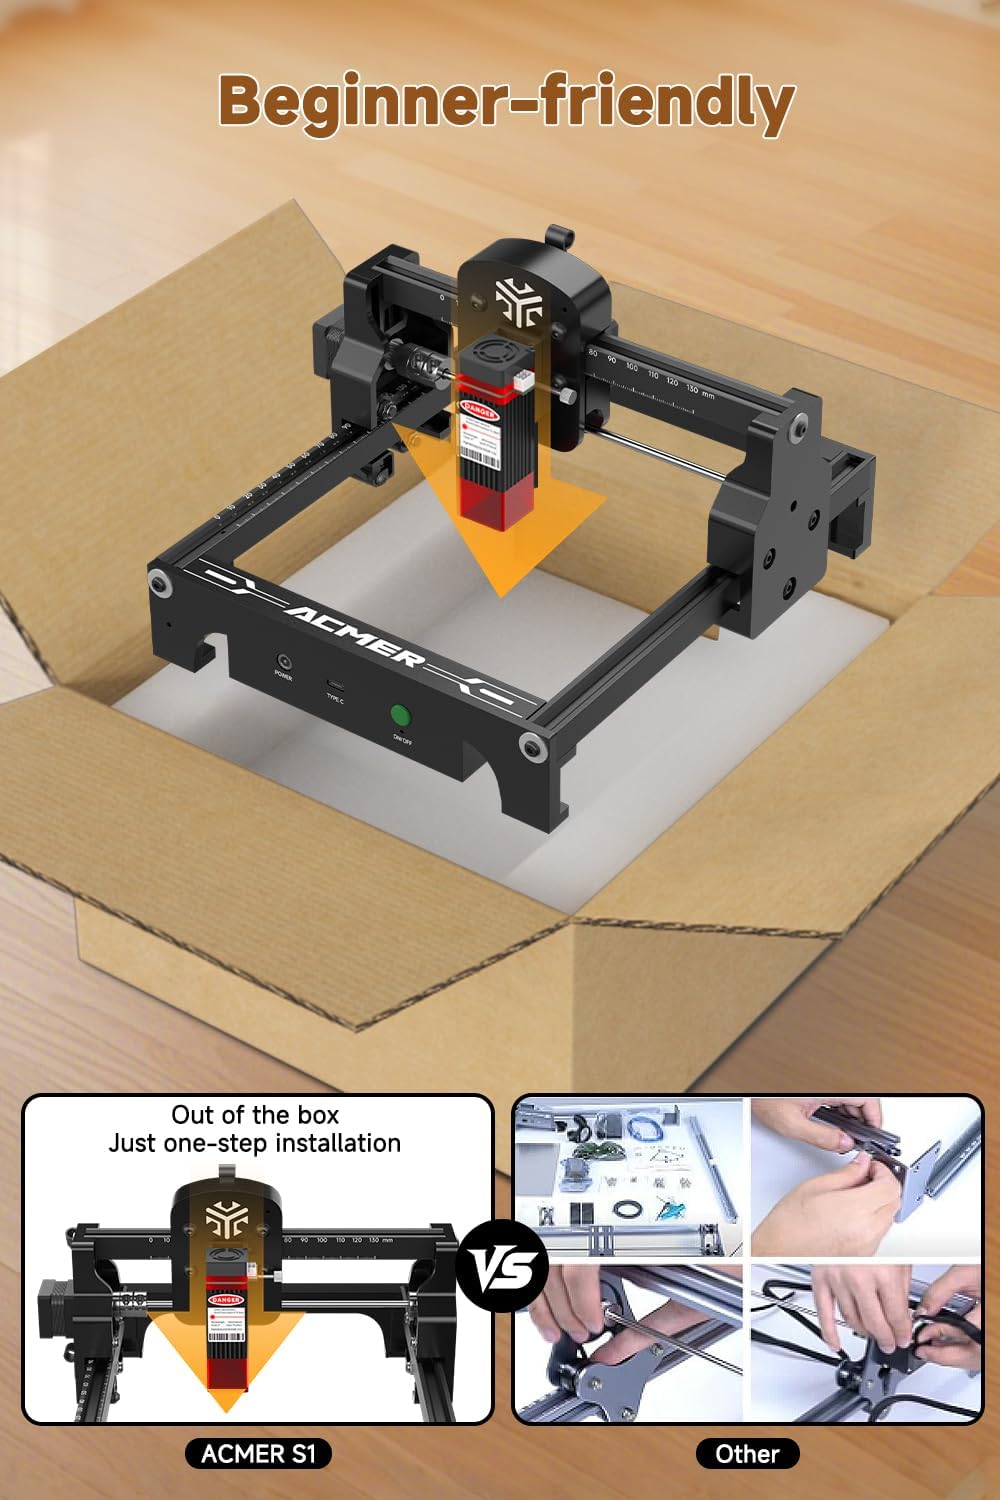
Image: The ACMER S1 Laser Engraver shown in its packaging, emphasizing its 'Out of the box, Just one-step installation' feature, contrasting with more complex assembly processes of other machines.
4. Operating Instructions
Follow these steps to operate your ACMER S1 Laser Engraver for precise and efficient results.
Basic Operation:
- Prepare Material: Place the material to be engraved or cut on the working surface. Ensure it is flat and securely positioned. The engraver features a convenient frame scale design for accurate material placement.
- Software Configuration: Open your chosen engraving software (LightBurn or LaserGRBL). Load your design file (JPG, SVG, PNG, BMP, G-code, CAD, AI, CDR, DWG, etc.).
- Focus Adjustment: Adjust the laser focus according to your material and desired engraving depth. Refer to the software or product guidelines for specific focus settings.
- Parameter Settings: Set the engraving/cutting parameters (speed, power, passes) within the software. Recommended parameters for common materials are available in the software or product documentation.
- Positioning: Use the software's positioning features to align your design with the material. The limit switches facilitate precise return to the original position.
- Start Engraving/Cutting: Initiate the engraving or cutting process from the software. Monitor the operation closely.
- Completion: Once the process is complete, wait for the laser to stop and the machine to cool down before removing the engraved material.
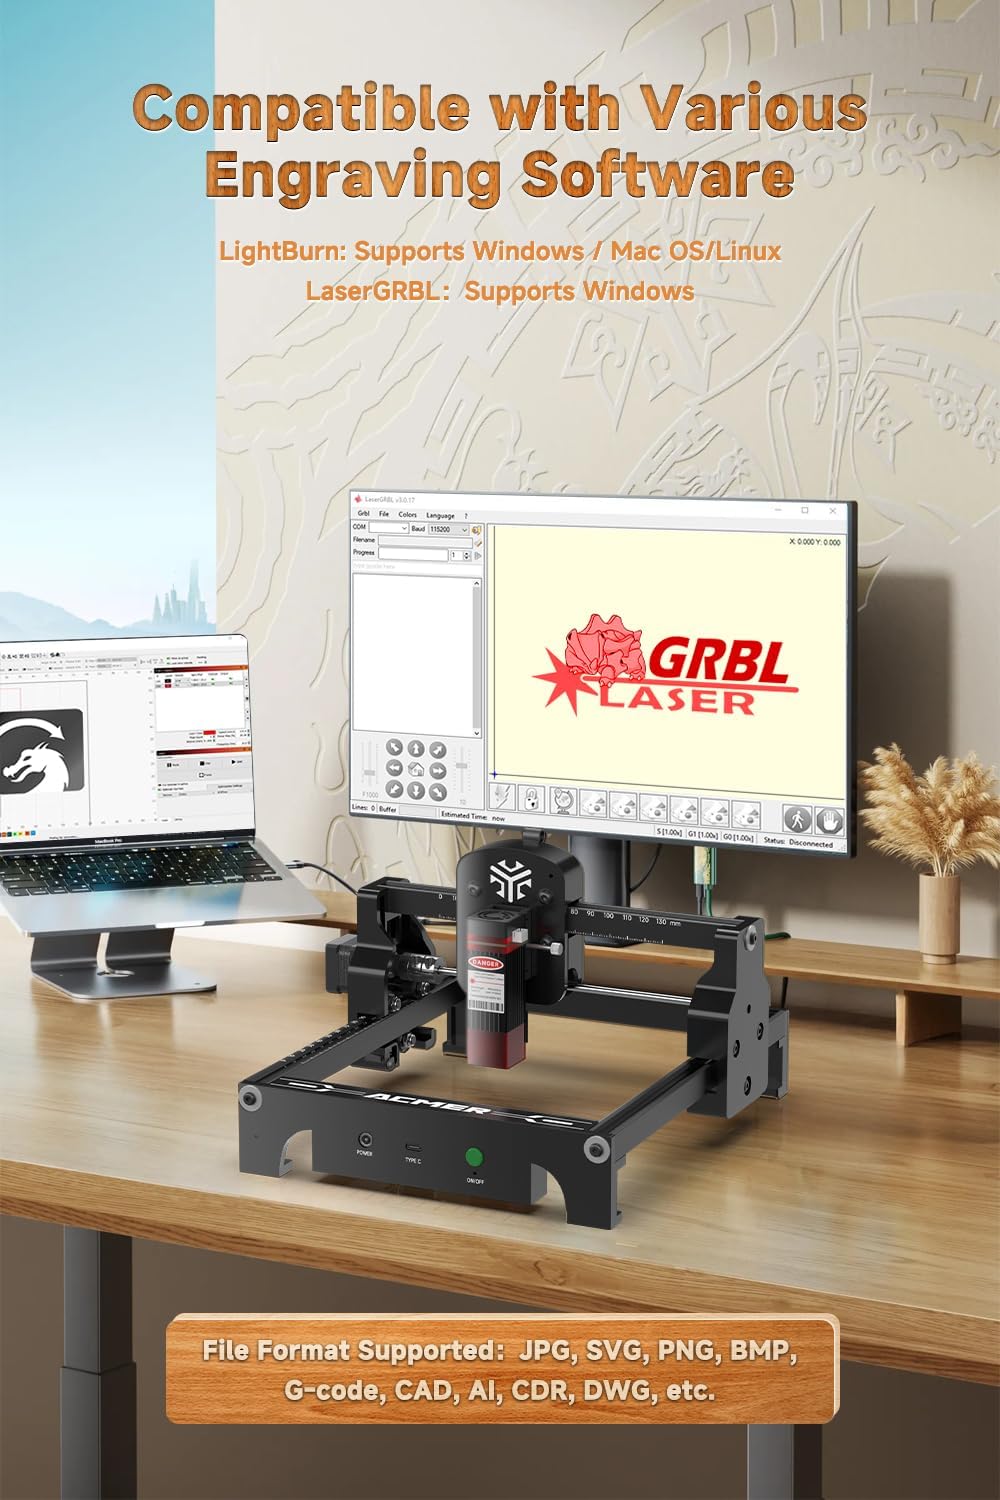
Image: The ACMER S1 Laser Engraver shown in a workspace, illustrating its compatibility with LightBurn and LaserGRBL software, and listing supported file formats.
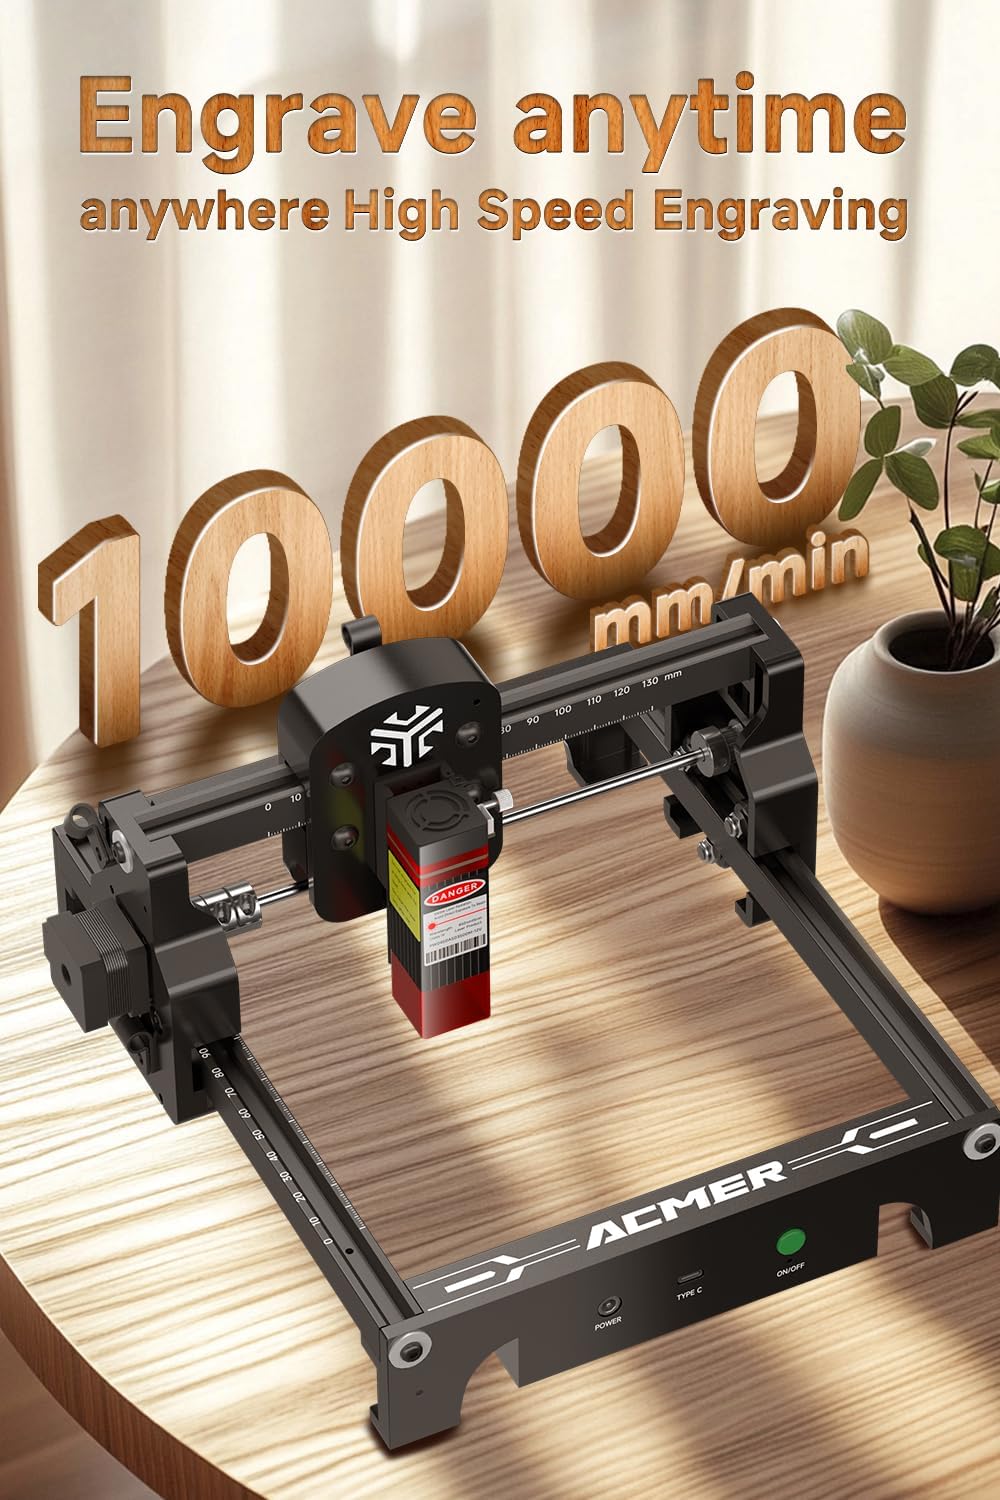
Image: The ACMER S1 Laser Engraver operating on a wooden surface, highlighting its capability for high-speed engraving at 10000mm/min.
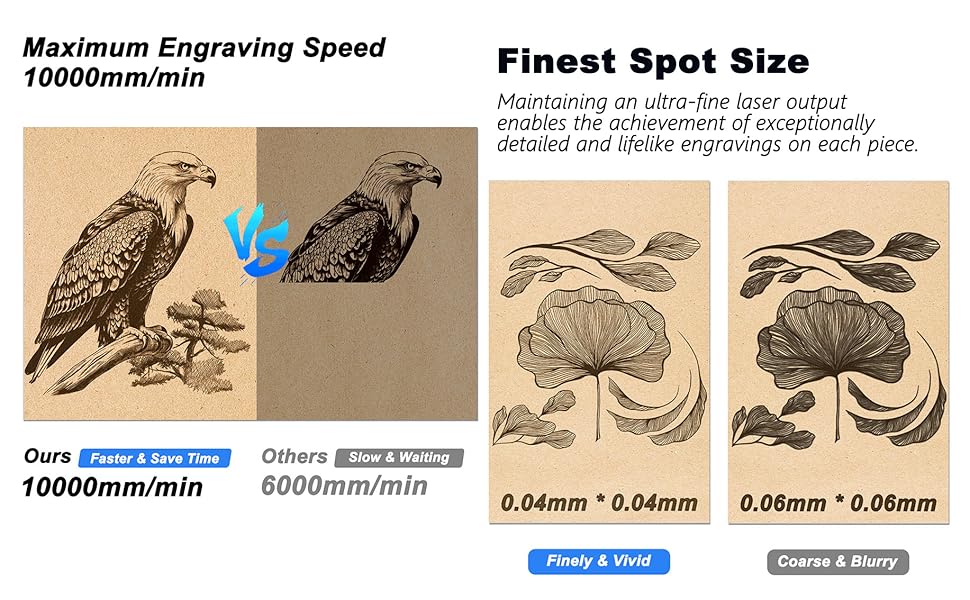
Image: A comparison graphic demonstrating the ACMER S1's maximum engraving speed of 10000mm/min and its finest spot size of 0.04x0.04mm, resulting in finely vivid engravings.

Image: This image illustrates the finest laser spot size of the ACMER S1 (0.04x0.04mm) compared to others (0.06x0.06mm), demonstrating the S1's ability to produce exceptionally detailed and lifelike engravings.
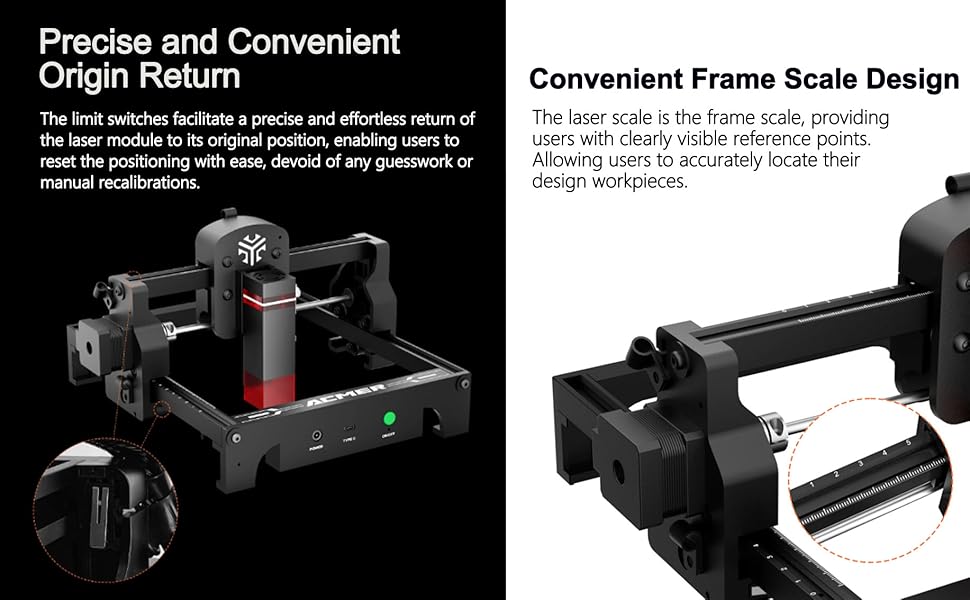
Image: A visual explanation of the ACMER S1's precise and convenient origin return feature using limit switches, and its convenient frame scale design for accurate workpiece location.
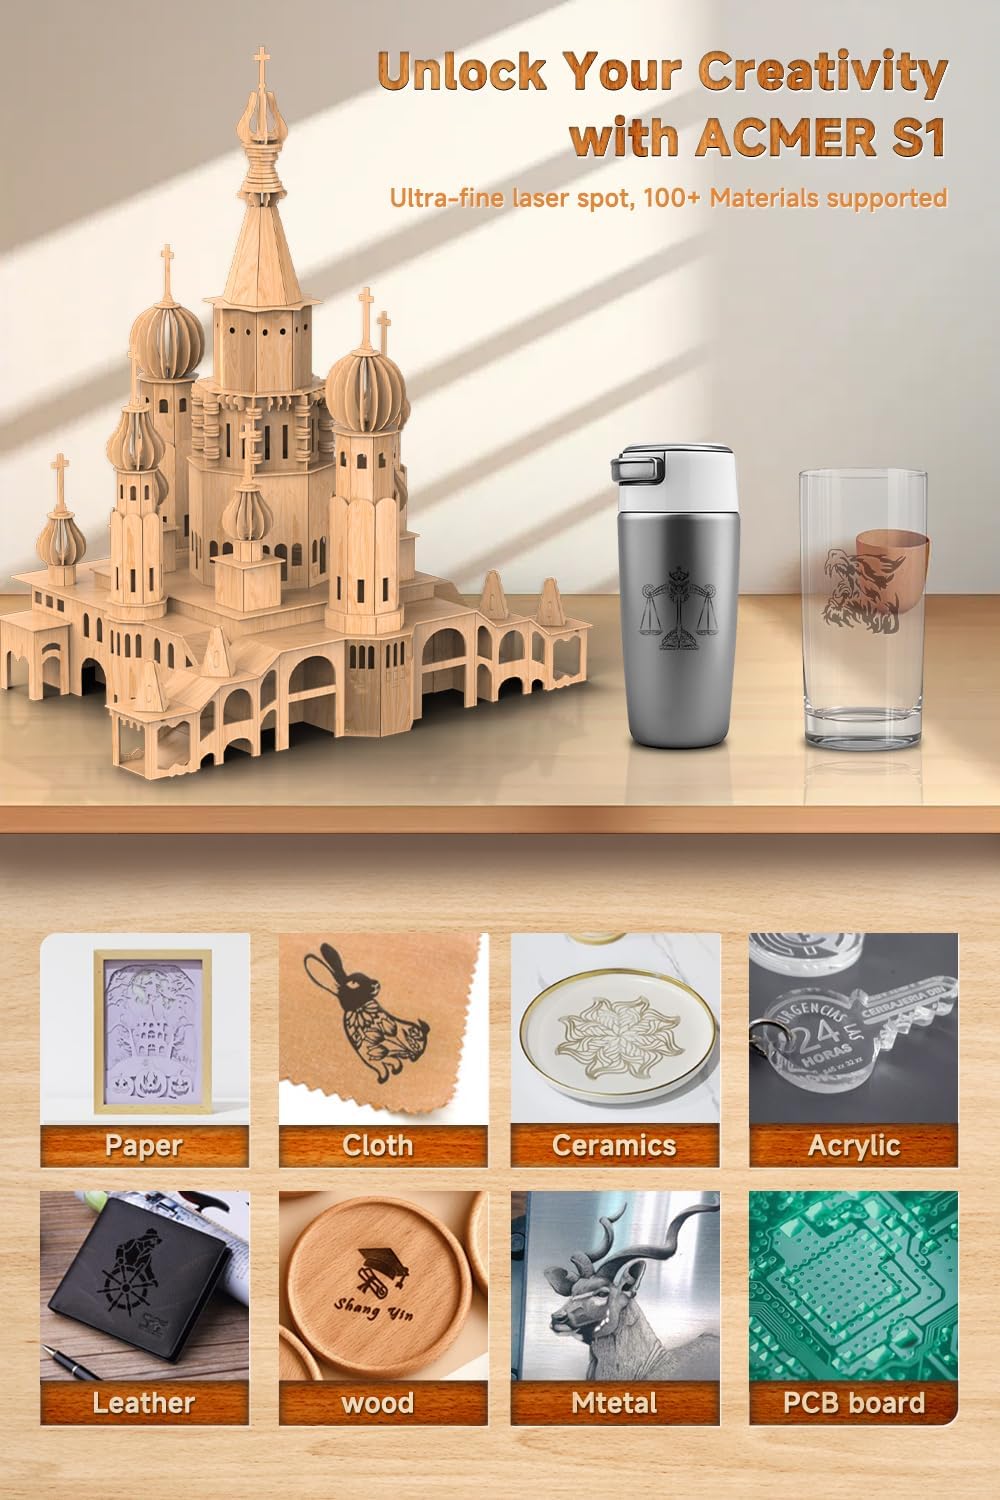
Image: A display of various materials such as paper, cloth, ceramics, acrylic, leather, wood, metal, and PCB board, all successfully engraved by the ACMER S1, demonstrating its versatility.
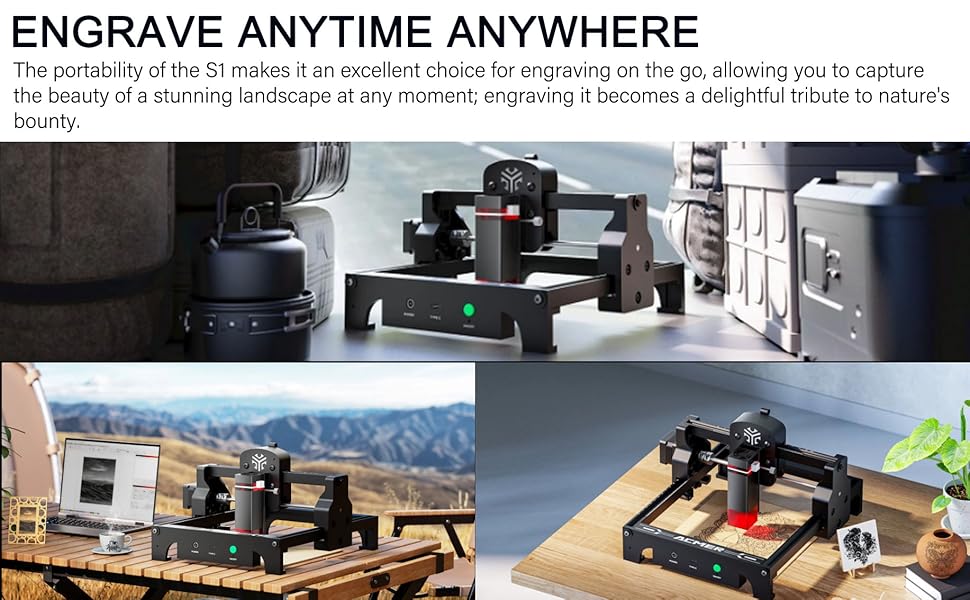
Image: The ACMER S1 Laser Engraver depicted in different outdoor environments, illustrating its portability and suitability for engraving on the go.
Video: This video demonstrates the ACMER S1 Portable Laser Engraver in operation, showing it engraving a grid pattern on a piece of wood. It highlights the machine's precision and ease of use for beginners.
Video: This video provides a quick overview of the ACMER S1 Laser Engraver, showcasing its compact design and various engraving applications on materials like slate, cork, and leather, demonstrating its versatility for beginners.
5. Maintenance
Regular maintenance ensures the longevity and optimal performance of your ACMER S1 Laser Engraver.
- Cleaning: Regularly clean the laser lens and the working area to prevent debris buildup, which can affect laser performance and accuracy. Use a soft, lint-free cloth and appropriate cleaning solutions if necessary.
- Lubrication: Periodically check and lubricate the moving parts, such as the guide rails, to ensure smooth operation.
- Firmware Updates: Check the manufacturer's website for any available firmware updates to ensure your device has the latest features and bug fixes.
- Storage: When not in use, store the engraver in a clean, dry environment, away from direct sunlight and extreme temperatures.
6. Troubleshooting
This section addresses common issues you might encounter with your ACMER S1 Laser Engraver.
| Problem | Possible Cause | Solution |
|---|---|---|
| Laser not firing or weak output | Incorrect focus, dirty lens, low power setting, loose connection. | Adjust focus, clean the laser lens, increase power setting in software, check all cable connections. |
| Machine not connecting to computer | Faulty USB cable, incorrect driver, software issue. | Try a different USB cable, ensure correct drivers are installed, restart software and computer. |
| Engraving is inaccurate or distorted | Material not secured, loose belts, incorrect positioning, machine vibration. | Secure material, check and tighten belts, re-position design, ensure stable work surface. |
| Excessive smoke or burning | Too high power, too slow speed, improper material. | Reduce laser power, increase engraving speed, ensure material is suitable for laser engraving. |
7. Specifications
- Brand: ACMER
- Model: S1
- Laser Output Power: 2500mW (also available in 3500mW/6000mW variants)
- Laser Class: Class 4
- Material: Plastic (frame)
- Color: Black
- Product Dimensions: 5.1"L x 5.1"W (Engraving Area)
- Operation Mode: Automatic
- Item Weight: 4 pounds
- Laser Spot Size: 0.04 x 0.04mm
- Max Engraving Speed: 10000mm/min
- Compatible Software: LightBurn, LaserGRBL
- Supported File Formats: JPG, SVG, PNG, BMP, G-code, CAD, AI, CDR, DWG, etc.
8. Warranty and Support
ACMER is committed to providing excellent customer service and support for your S1 Laser Engraver.
- After-sale Service: If you encounter any problems during the usage process, please contact ACMER customer support. They are dedicated to providing satisfactory solutions.
- Contact Information: Refer to the product packaging or the official ACMER website for the most up-to-date contact details for customer support.


