Kidsneed KN70V2
Kidsneed Baby Car Camera System User Manual
Model: KN70V2
1. Introduction
The Kidsneed Baby Car Camera System (Model KN70V2) is designed to provide parents with a clear and continuous view of their child in the rear seat while driving. This system enhances safety by eliminating the need to turn around, allowing drivers to focus on the road. Featuring a 7-inch HD 1080P display and a 360-degree rotatable camera, it offers comprehensive monitoring capabilities for infants, toddlers, or even pets in the back of your vehicle.

Figure 1: Kidsneed Baby Car Camera System components, including the 7-inch monitor and the rear-facing camera.
2. Product Features
The Kidsneed Baby Car Camera System is equipped with several features to ensure optimal monitoring and ease of use:
- 7-Inch AHD 1080P Display: Provides sharp and crystal-clear images of your child.
- 360° Rotatable Camera: Allows for optimal viewing angles, adaptable to various car seat positions.
- Baby Safe Night Vision (940nm): Automatically activates in low light, offering clear visibility without harsh glaring lights that could disturb your child.
- Mirror Setting: Intelligent adjustments to match external environment for natural viewing.
- Easy Plug and Play Setup: Designed for quick and straightforward installation.
- Sturdy Suction Cup Mount: Ensures secure placement on dashboard or windshield, minimizing vibration.
- Dual Camera Support: Capable of monitoring two children simultaneously with split-screen view.
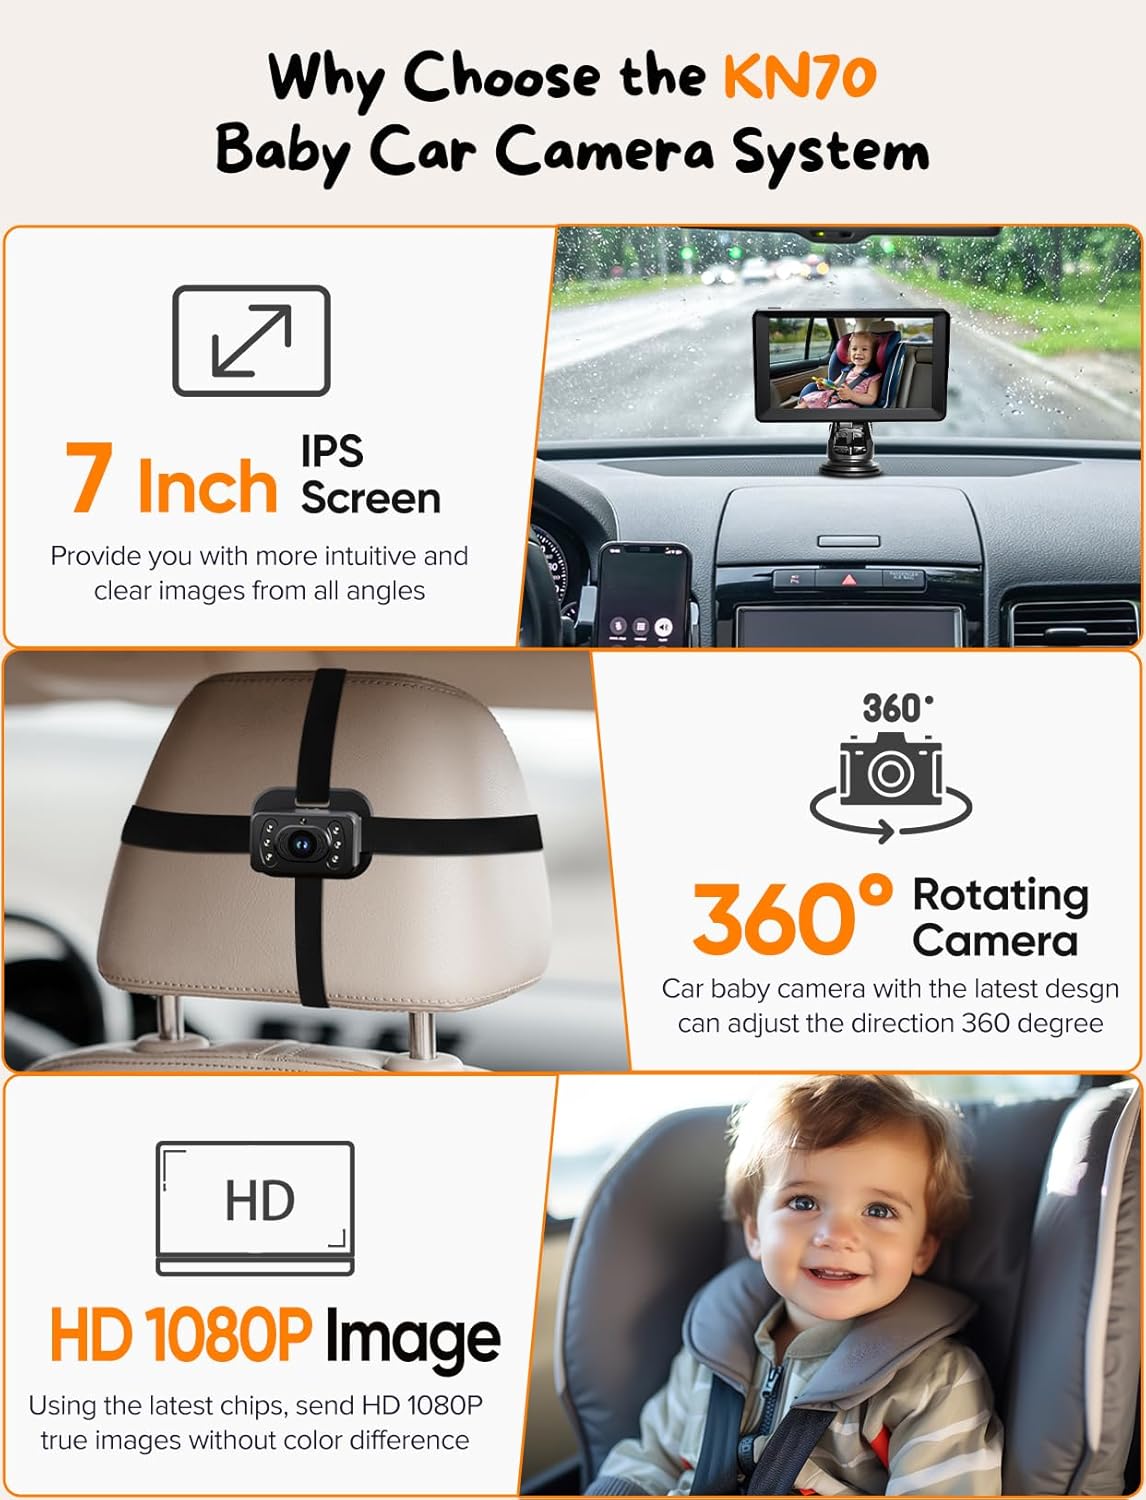
Figure 2: Overview of key product features including 7-inch IPS screen, 360-degree rotating camera, and HD 1080P image quality.

Figure 3: Visual comparison highlighting the superior clarity and size of the 7-inch 1080P IPS display.
3. Package Contents
Please ensure all items are present in the package:
- 7-inch HD 1080P Monitor
- Baby Car Camera(s)
- Camera Mounting Straps (Velcro)
- Suction Cup Mount for Monitor
- Power Cable (Cigarette Lighter Adapter)
- USB Power Cable
- User Manual (this document)
4. Setup and Installation
Follow these steps for quick and easy installation:
- Install the Camera: Secure the baby car camera to the rear headrest using the provided strong Velcro straps. Ensure the camera has a clear view of your child.
- Adjust the Camera: Rotate the camera 360 degrees to achieve the optimal viewing position.
- Connect the Cable: Connect the camera cable to the monitor. Ensure the triangular slots align for proper connection.
- Mount the Monitor: Attach the monitor to your dashboard or windshield using the sturdy suction cup mount. Press firmly to ensure it is secure.
- Power the System: Plug the power cable into your car's cigarette lighter socket or use the USB power cable for alternative power sources.
- Turn on the Display: Once powered, the display should automatically turn on, showing the camera feed.
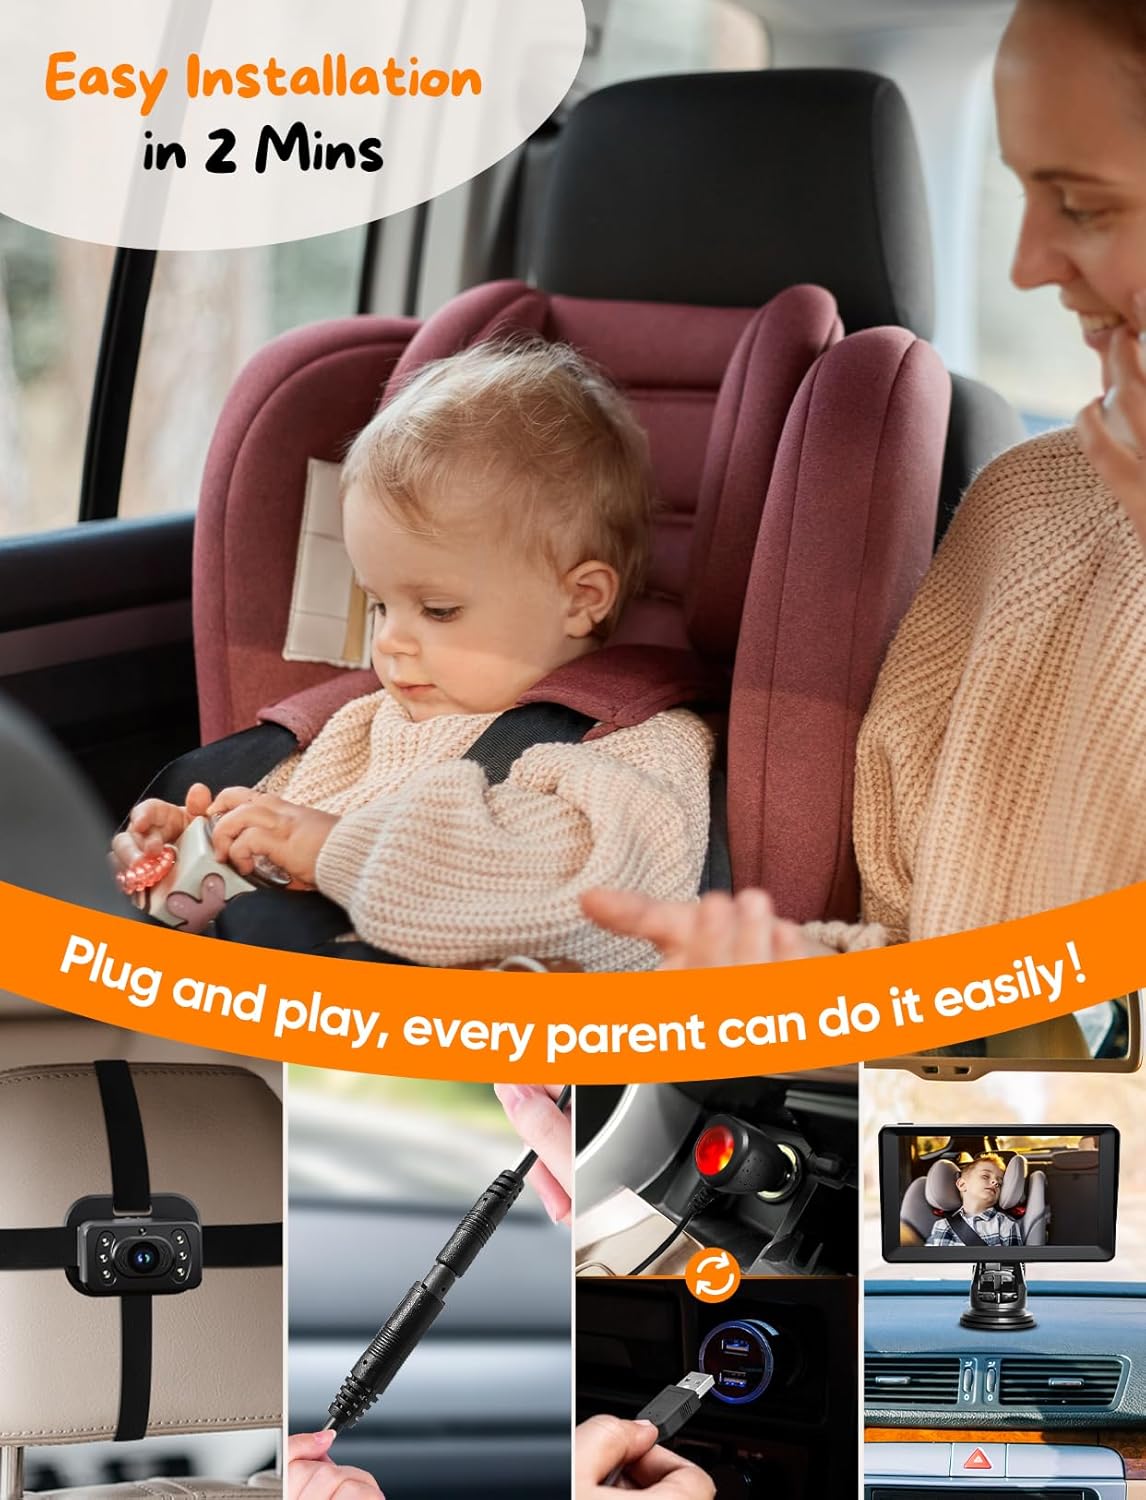
Figure 4: Visual guide demonstrating the simple 2-minute installation process.

Figure 5: Six-step installation process, from camera placement to turning on the display.

Figure 6: Proper alignment of triangular slots for connecting the camera cable to the monitor cable.
4.1. Wiring Diagram
The system is designed for flexible installation, accommodating various car seat positions and vehicle types.
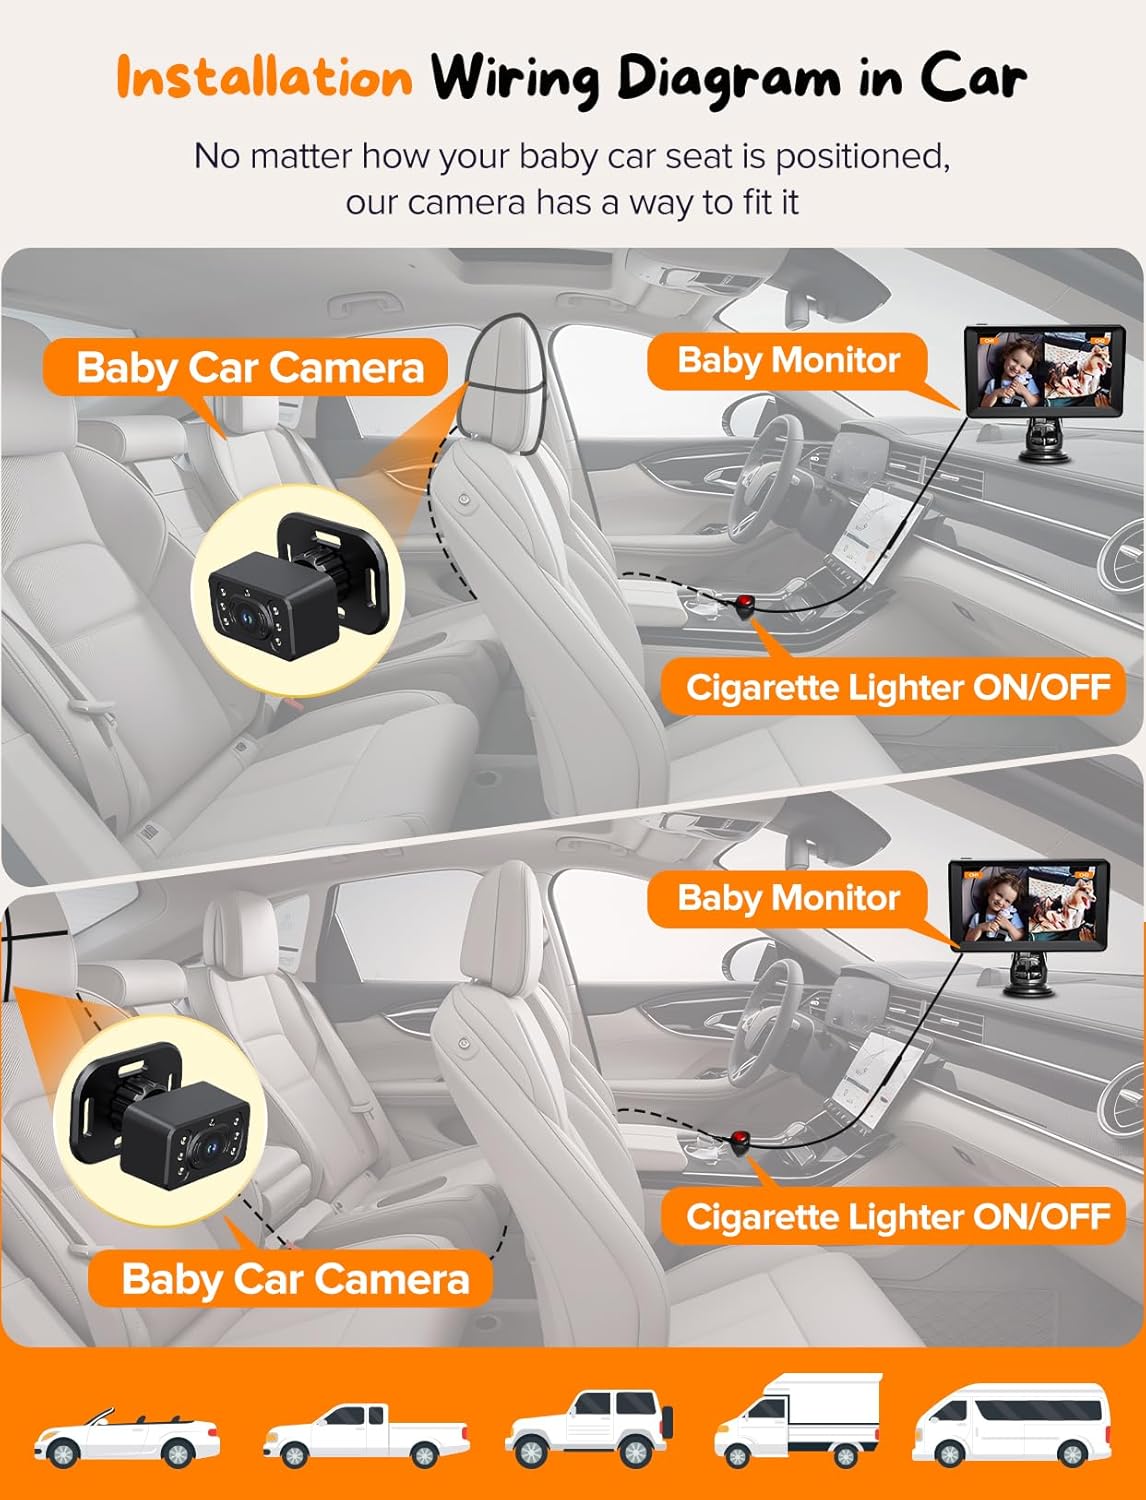
Figure 7: Illustrates how the baby car camera and monitor connect to the car's power source, suitable for various vehicle types.
4.2. Mounting Options
The monitor can be securely mounted in two primary ways:
- On Dashboard: Using the suction cup mount directly on the dashboard.
- On Windshield: Using the suction cup mount on the car's windshield.
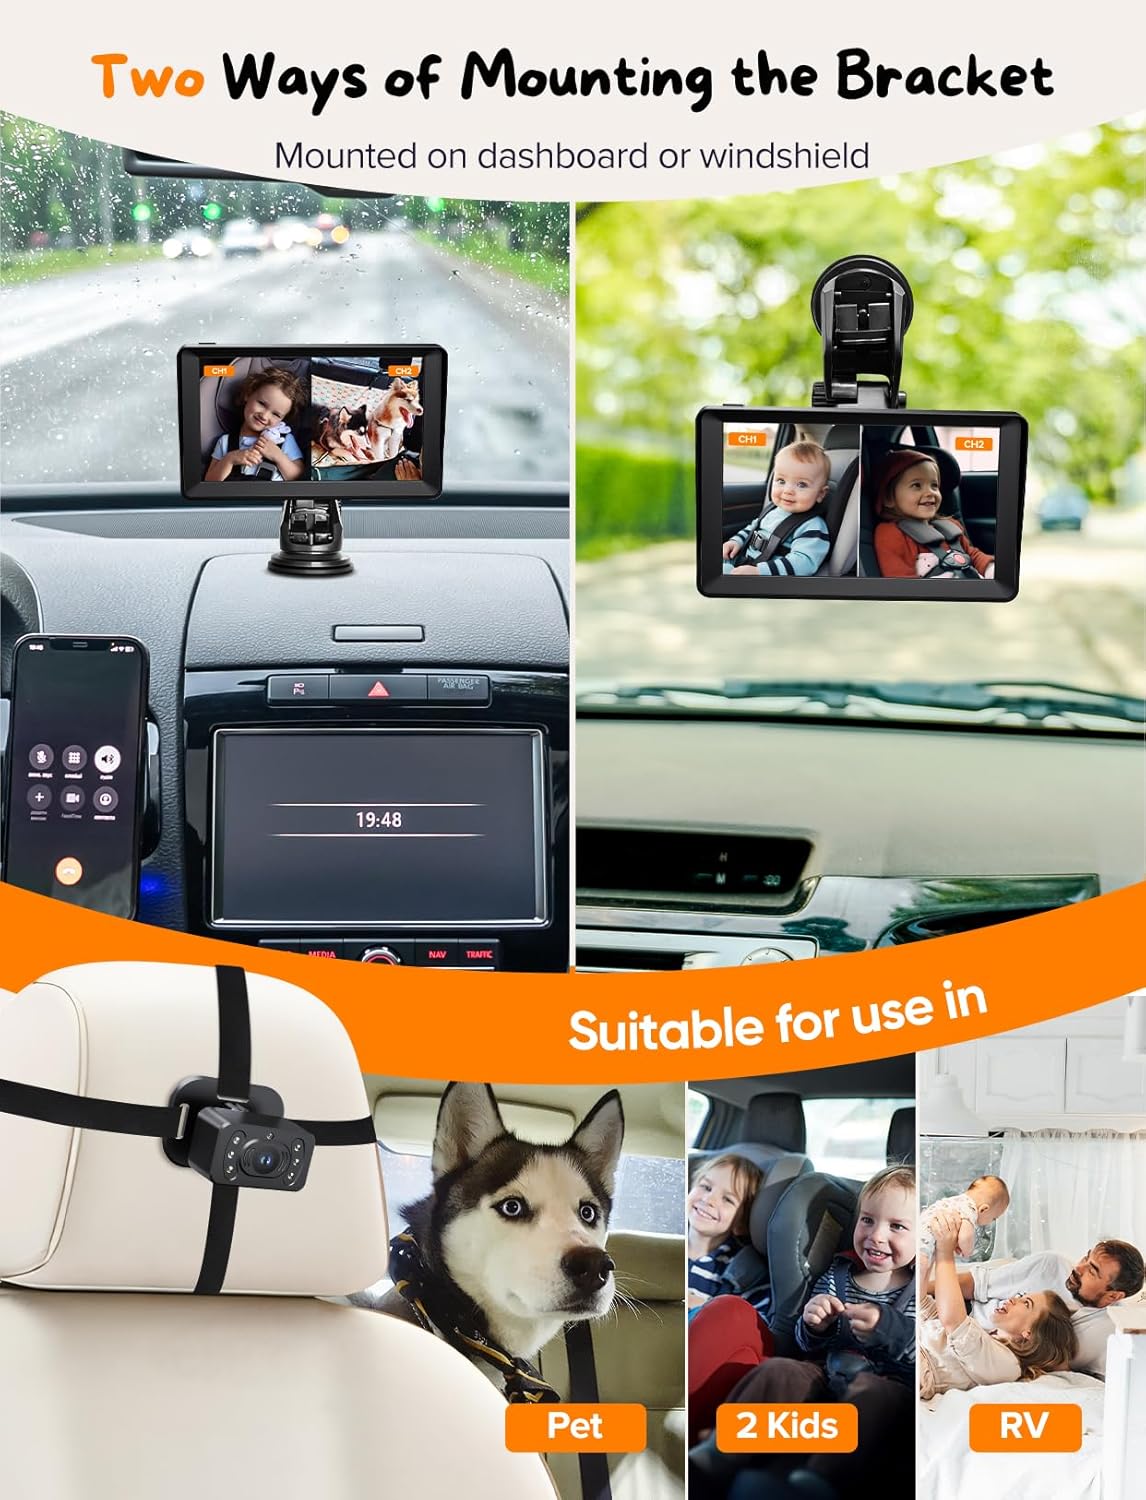
Figure 8: Examples of the monitor mounted on the dashboard and windshield, demonstrating flexibility.

Figure 9: Depicts the two main mounting options for the monitor, highlighting the 360-degree rotation capability of the bracket.
5. Operating Instructions
Once installed and powered, the Kidsneed Baby Car Camera System operates automatically. The monitor will display the camera feed.
- Power On/Off: The system typically powers on automatically when the car's ignition is turned on (if connected to the cigarette lighter). Disconnect the power cable to turn off.
- Adjusting View: Physically rotate the camera on the headrest to adjust the viewing angle as needed.
- Night Vision: The 940nm night vision feature activates automatically in low-light conditions, providing a clear, non-intrusive view of your child without visible red lights.
- Mirror Setting: The display includes a mirror setting for intelligent adjustments to match the external environment, providing a more natural and comfortable viewing experience.
- Split Screen (for dual camera models): If using two cameras, the monitor can display both feeds simultaneously in a split-screen view. Refer to the on-screen menu for options to switch between single and split-screen views.

Figure 10: Demonstration of the 940nm IR night vision, which provides clear images without harsh, visible lights.

Figure 11: Illustrates the effectiveness of the new upgraded 940nm night vision in a dark car interior.

Figure 12: Demonstrates the wide 150-degree viewing angle, capable of monitoring two children simultaneously.
6. Maintenance
To ensure the longevity and optimal performance of your Kidsneed Baby Car Camera System, follow these maintenance guidelines:
- Cleaning: Use a soft, dry cloth to clean the monitor screen and camera lens. Do not use abrasive cleaners or solvents.
- Cable Care: Avoid bending or crimping the cables excessively. Ensure they are not pinched by car doors or seats.
- Storage: If storing the system for an extended period, disconnect it from power and store it in a cool, dry place away from direct sunlight.
- Temperature: Avoid exposing the system to extreme temperatures, both hot and cold, as this can affect performance and lifespan.
7. Troubleshooting
If you encounter issues with your Kidsneed Baby Car Camera System, refer to the following common problems and solutions:
| Problem | Possible Cause | Solution |
|---|---|---|
| No image on screen |
|
|
| Image is blurry or unclear |
|
|
| Monitor keeps falling off dashboard/windshield |
|
|
| Night vision not working |
|
|
8. Specifications
| Feature | Detail |
|---|---|
| Model Number | KN70V2 |
| Display Size | 7 inches |
| Display Resolution | 1080P AHD |
| Night Vision | 940nm IR (Invisible Infrared) |
| Camera Rotation | 360 degrees |
| Power Source | Cigarette Lighter / USB |
| Package Dimensions | 7.5 x 4.75 x 4.75 inches |
| Item Weight | 1.6 pounds |
| Manufacturer | Kidsneed |
9. Warranty and Support
Kidsneed products are manufactured with quality and reliability in mind. For specific warranty information and customer support, please refer to the warranty card included in your product packaging or visit the official Kidsneed website. Keep your purchase receipt as proof of purchase for any warranty claims.
For technical assistance or inquiries, please contact Kidsneed customer service through the contact information provided on their official website or product packaging.
Related Documents - KN70V2
 |
Kidsneed SM935C Baby Monitor User Manual User manual for the Kidsneed SM935C Digital Wireless Video Baby Monitor with a 3.5-inch color screen. Covers setup, operation, safety guidelines, technical specifications, and troubleshooting for optimal use. |
 |
Kidsneed SM530 5" HD Screen Video Baby Monitor User Manual Comprehensive user manual for the Kidsneed SM530 5" HD Screen Video Baby Monitor, covering setup, features, troubleshooting, and safety instructions. |
 |
Kidsneed SM935A Video Baby Monitor: Features, Setup, and FAQs Comprehensive guide to the Kidsneed SM935A Video Baby Monitor, covering specifications, setup instructions, and frequently asked questions for remote pan-tilt-zoom camera and audio monitoring. |
 |
Kidsneed SM530 Video Baby Monitor User Manual User manual for the Kidsneed SM530 Video Baby Monitor with a 5" LCD 720P screen. Includes setup, operation, functions, specifications, and troubleshooting. |
 |
Kidsneed SM530 Video Baby Monitor User Manual User manual for the Kidsneed SM530 Video Baby Monitor with a 5" LCD 720P screen. Includes setup, operation, troubleshooting, and specifications for the baby monitor and camera. |
 |
Kidsneed Baby Monitor Lifetime Warranty and Support Information regarding the active lifetime warranty and customer service for Kidsneed Baby Monitors. Contact support@kidsneed.top for assistance or to activate your warranty. |
Ask a question about this manual
Ask about setup, troubleshooting, compatibility, parts, safety, or missing instructions. Manuals+ will review the question and use this page’s manual context to help answer it.