1. Introduction
Thank you for choosing the BENLYDESIGN GL570 Digital Watch. This manual provides essential information for the proper setup, operation, and maintenance of your new timepiece. Please read these instructions carefully to ensure optimal performance and longevity of your watch.
2. Product Overview
The BENLYDESIGN GL570 is a digital wristwatch featuring a unique design and a stainless steel band. It includes standard digital watch functions such as time display, date, and a backlight.
Watch Components
- Display: Digital screen for time, date, and other functions.
- Buttons: Typically located on the side for mode selection and setting adjustments. (Specific button functions are detailed in the 'Operating Instructions' section).
- Crown/Setting Knob: Used for specific adjustments, if applicable.
- Stainless Steel Band: Durable and adjustable for a comfortable fit.
- Case Back: Contains model information and water resistance rating.
Visual Reference

Figure 2.1: Front view of the BENLYDESIGN GL570 Digital Watch. This image shows the watch face with its distinctive wavy case and integrated band, highlighting the digital display and the 'SPORT', 'SECONDS DISPLAY', and 'SET' markings around the bezel.
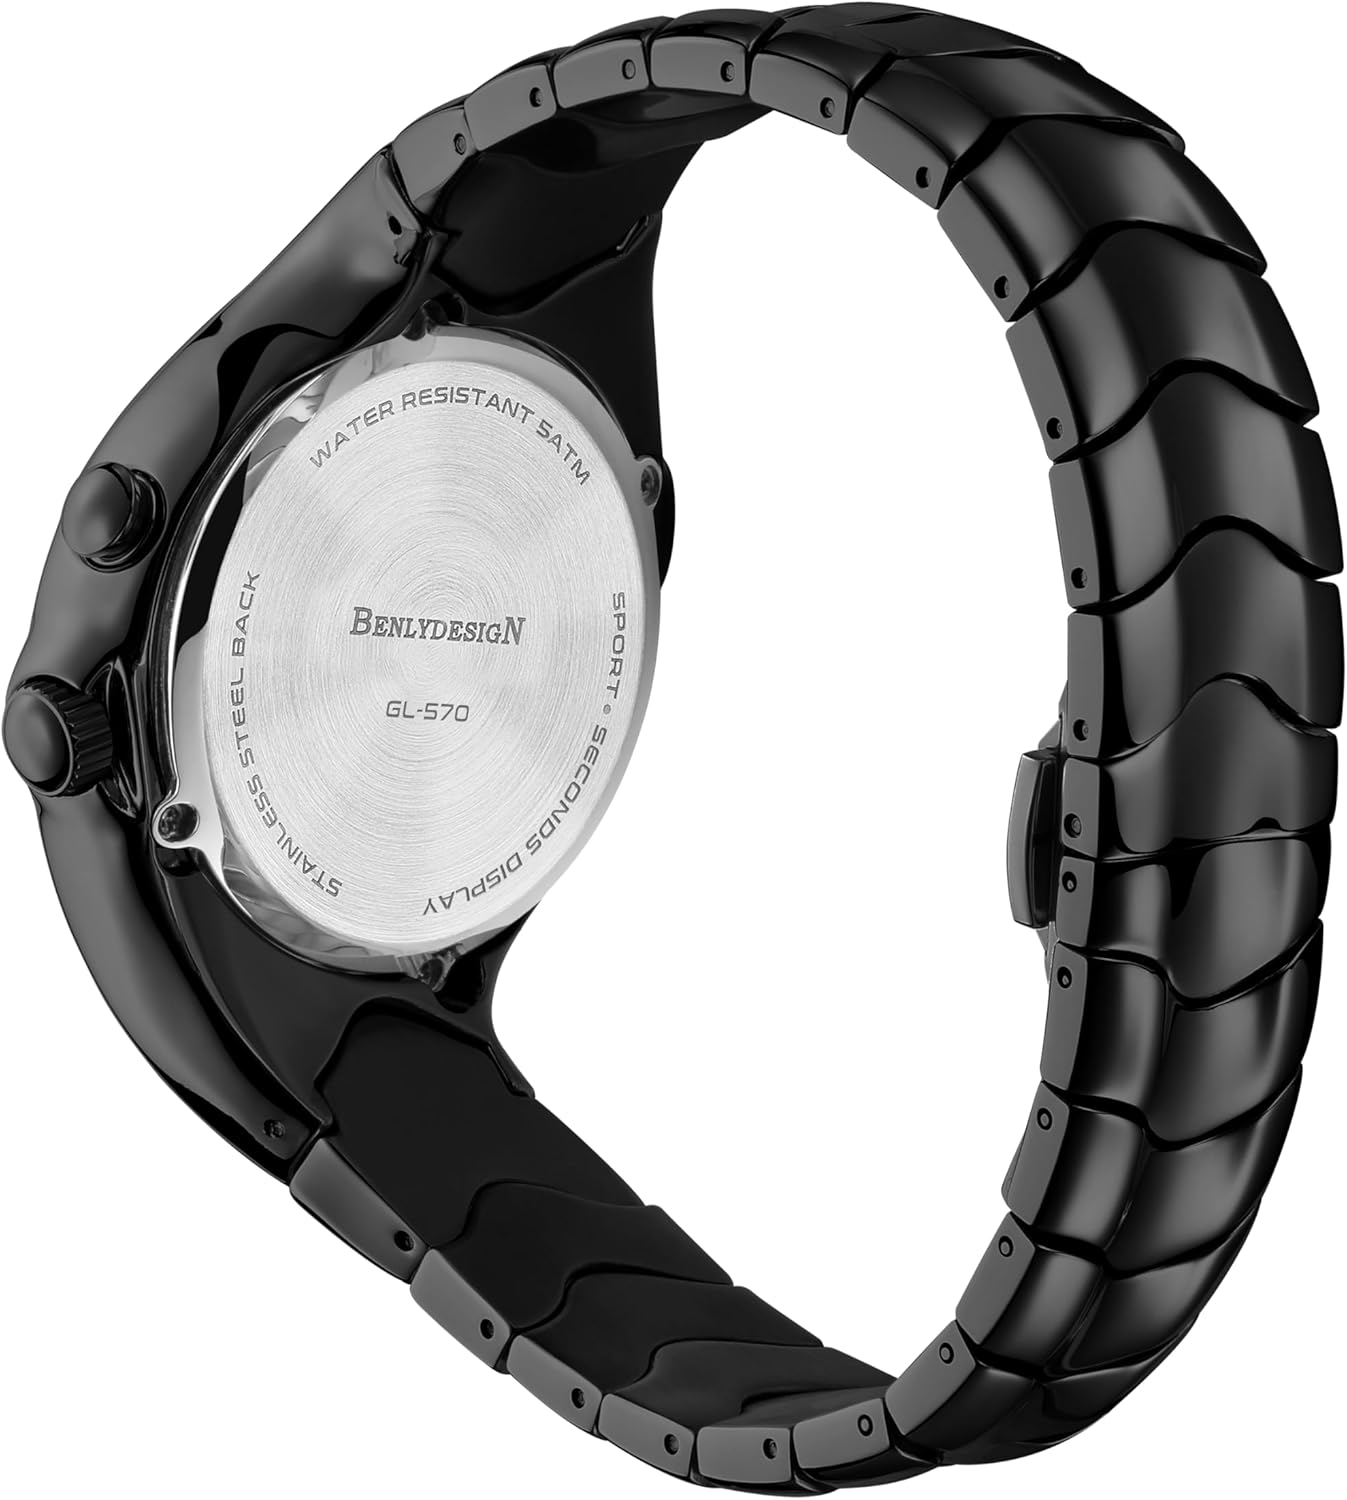
Figure 2.2: Side view of the BENLYDESIGN GL570 Digital Watch. This image provides a profile view, illustrating the watch's thickness, the two control buttons on the right side, and the continuous flow of the wavy band.

Figure 2.3: Back view of the BENLYDESIGN GL570 Digital Watch. The stainless steel case back is visible, engraved with 'WATER RESISTANT 5ATM', 'BENLYDESIGN', 'GL-570', and 'STAINLESS STEEL BACK'.
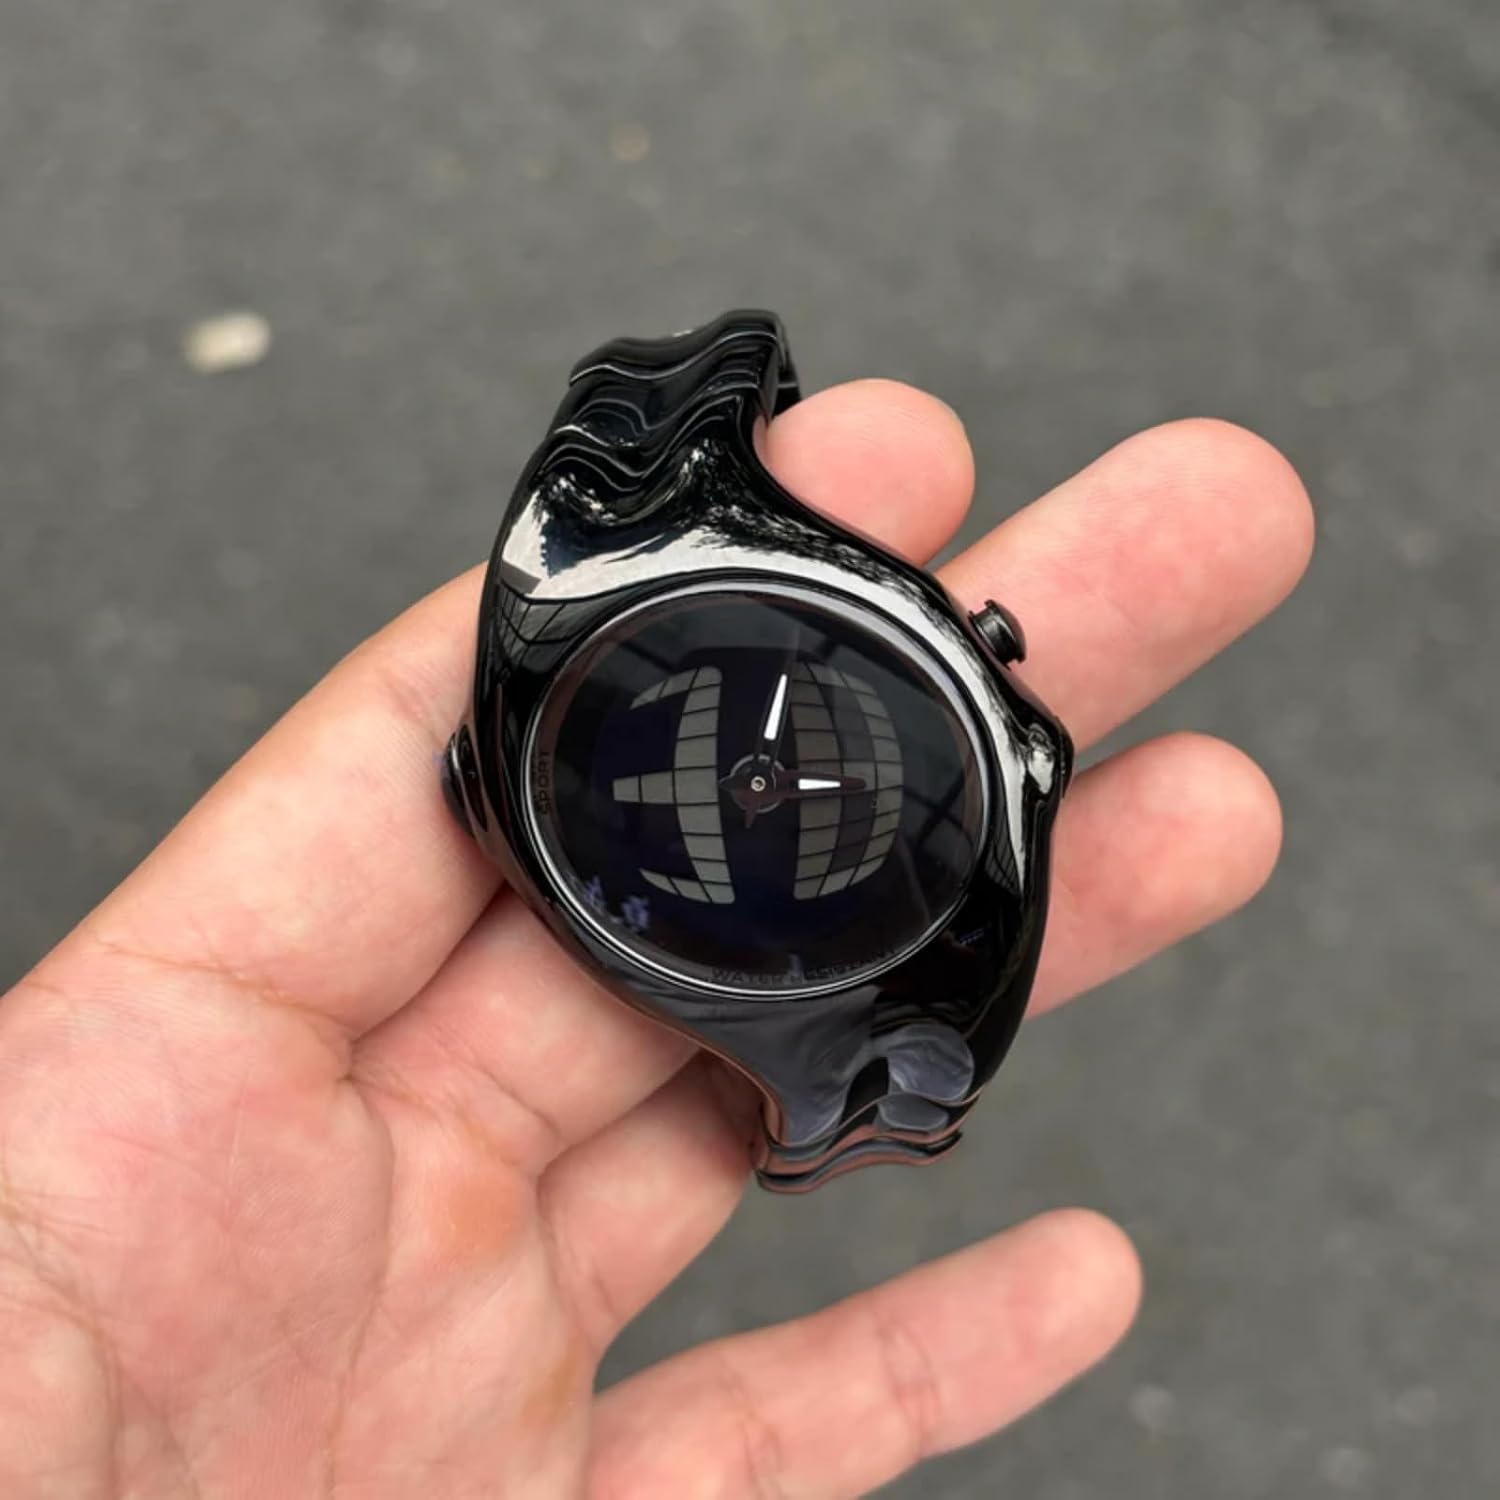
Figure 2.4: The BENLYDESIGN GL570 Digital Watch held in a hand. This perspective helps to visualize the watch's dimensions and how it sits in the palm, emphasizing its unique form factor.
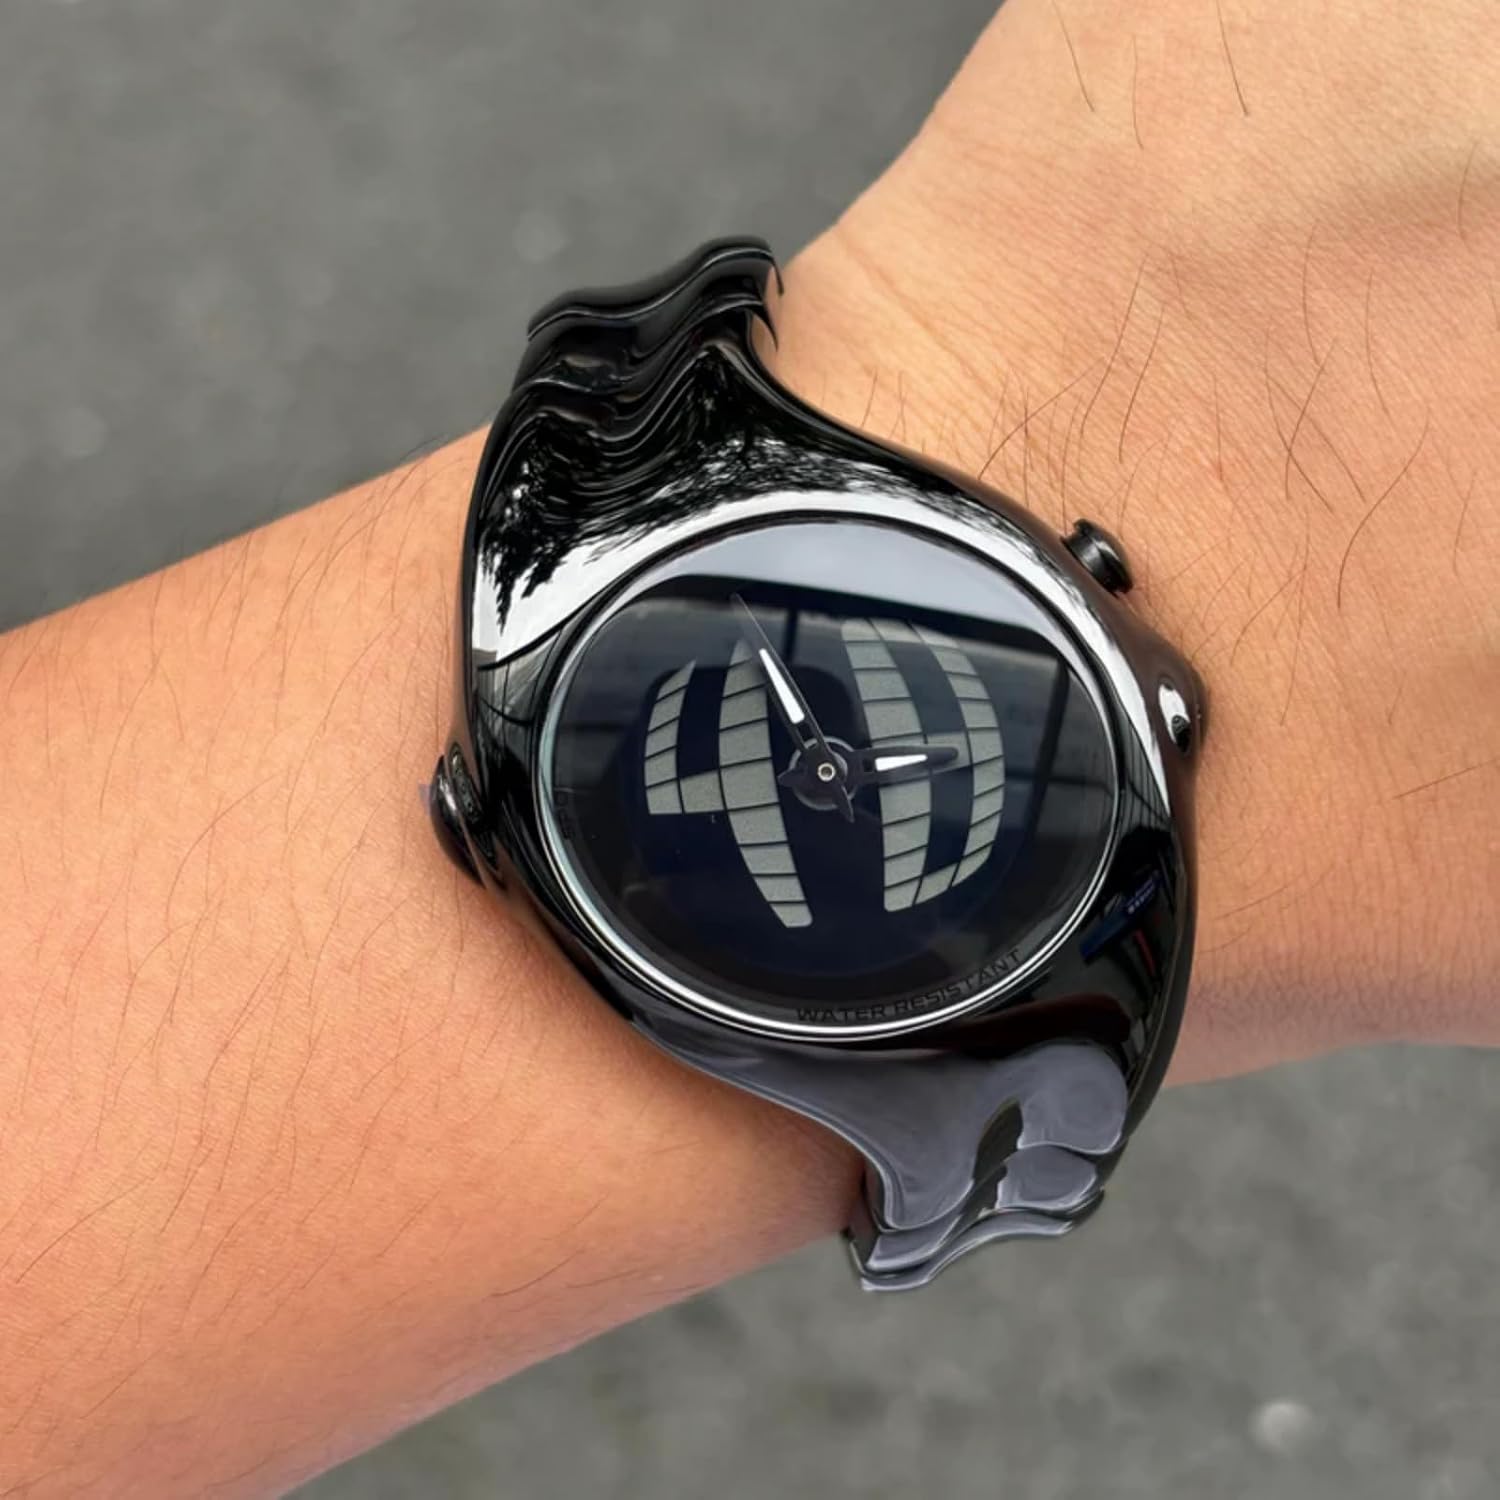
Figure 2.5: The BENLYDESIGN GL570 Digital Watch worn on a wrist. This image demonstrates how the watch conforms to the wrist, showcasing its aesthetic appeal when worn.

Figure 2.6: Angled view of the BENLYDESIGN GL570 Digital Watch. This shot provides a dynamic perspective of the watch, revealing the intricate details of the wavy band and the clasp mechanism.
Product Video
Video 2.1: An 11-second video showcasing the BENLYDESIGN GL570 Digital Watch. The video demonstrates the watch being unboxed, handled, and worn on a wrist, providing a dynamic view of its design and features.
3. Setup
3.1 Initial Power On
Your watch comes with a pre-installed C battery. If the display is not active, press any button to activate it. The watch should power on automatically.
3.2 Setting Time and Date
To set the time and date:
- Press the MODE button (usually bottom-left) repeatedly until the time setting mode is displayed (e.g., flashing hours).
- Press the SET button (usually top-right) to select the digit you wish to adjust (hours, minutes, year, month, day).
- Use the ADJUST button (usually bottom-right) to increase the value. Hold the button to rapidly advance.
- Repeat steps 2 and 3 for all time and date parameters.
- Once all settings are correct, press the MODE button to exit the setting mode and return to the normal time display.
3.3 Adjusting the Watch Band
The stainless steel band can be adjusted by removing links to achieve a comfortable fit. A link removal tool is typically included with the watch.
- Identify the pins on the side of the watch band links. Arrows on the inside of the band usually indicate the direction to push the pins out.
- Place the band in the link removal tool, aligning the pin with the tool's pusher.
- Carefully push the pin out. You may need to apply firm pressure.
- Remove the desired number of links. Ensure an even number of links are removed from each side of the clasp for balanced wear.
- Reconnect the band by inserting the pins back into the links in the opposite direction of removal. Ensure the pins are fully seated.
Note: Band link removal can be challenging. If you encounter difficulty, it is recommended to seek assistance from a professional watch repair service to avoid damaging the band.
4. Operating Instructions
4.1 Basic Time Display
In normal mode, the watch displays the current time (hours, minutes, seconds). The display can be toggled between 12-hour and 24-hour format during the time setting process.
4.2 Mode Switching
Press the MODE button to cycle through different functions:
- Time Display: Shows current time.
- Date Display: Shows month and day.
- Alarm: Allows setting and activating an alarm.
- Stopwatch: For measuring elapsed time.
4.3 Using the Backlight
To illuminate the display in low-light conditions, press the designated LIGHT button (often the top-left button, or a specific press of another button). The backlight will typically remain on for a few seconds.
4.4 Water Resistance
This watch is rated as 3ATM water-resistant. This means it is suitable for daily use and can withstand splashes, rain, and brief immersion in water. It is not suitable for showering, swimming, diving, or any activities involving prolonged water exposure or high-pressure water. Avoid pressing buttons while the watch is wet to prevent water ingress.
5. Maintenance
5.1 Cleaning Your Watch
To maintain the appearance of your watch:
- Wipe the watch case and band regularly with a soft, dry cloth.
- For stubborn dirt, a slightly damp cloth can be used, followed by immediate drying.
- Avoid using chemical cleaners, solvents, or abrasive materials, as these can damage the finish.
5.2 Battery Replacement
The watch is powered by one C battery. When the display becomes dim or stops functioning, the battery may need replacement. Battery replacement should ideally be performed by a qualified watch technician to ensure proper sealing and maintain water resistance.
Note: Improper battery replacement can compromise the watch's water resistance and may void the warranty.
6. Troubleshooting
6.1 Display is Blank or Dim
- Check Battery: The battery may be depleted. Refer to section 5.2 for battery replacement.
- Activation: Press any button to ensure the watch is not in a power-saving mode.
6.2 Incorrect Time/Date
- Reset Time: Follow the instructions in section 3.2 to reset the time and date.
6.3 Buttons Unresponsive
- Restart: If possible, remove and reinsert the battery (consult a professional).
- Moisture: Ensure the watch is completely dry if it has been exposed to water.
6.4 Pedometer Functionality
Please note that despite some visual indications or previous product descriptions, the BENLYDESIGN GL570 model does not include a pedometer function. Any markings or mentions of 'pedometer' on the watch or in external materials are inaccurate for this specific model.
7. Specifications
| Item Model Number | GL570 |
| Manufacturer | BENLYDESIGN |
| Power Source | 1 C battery (included) |
| Water Resistance | 3 ATM (Splash/Rain Resistant) |
| Clasp Type | Buckle |
| Case Material | Stainless Steel (inferred from product description) |
| Band Material | Stainless Steel |
| Display Type | Digital |
8. Warranty and Support
8.1 Warranty Information
BENLYDESIGN offers a 1-year after-sales service for this product, covering manufacturing defects from the date of purchase. This warranty does not cover damage caused by misuse, accidents, unauthorized repairs, or normal wear and tear.
8.2 Return Policy
A 30-day return policy is available for eligible purchases. Please refer to your retailer's specific return guidelines for details.
8.3 Customer Support
For any questions, concerns, or support needs regarding your BENLYDESIGN GL570 Digital Watch, please contact BENLYDESIGN customer service through the retailer's platform or the official BENLYDESIGN website.