OPRKQEE V109
OPRKQEE V109 6K Camcorder User Manual
Model: V109 | Brand: OPRKQEE
Introduction
This manual provides detailed instructions for the operation and maintenance of your OPRKQEE V109 6K Camcorder. Please read this manual thoroughly before using the device to ensure proper functionality and to maximize your recording experience. Keep this manual for future reference.
What's in the Box
Upon opening the package, verify that all the following items are included:
- 1x OPRKQEE V109 6K Camcorder
- 1x 64GB SD Card
- 1x 4500mAh Lithium Battery
- 1x Charger
- 1x Lens Hood
- 1x 2.4G Remote Control
- 1x External Microphone
- 1x USB Cable (Type-C)
- 1x User Manual
- 1x DV Bag (Velvet)
- 1x Handheld Stabilizer
- 1x Cleaning Cloth

Image: All components included in the OPRKQEE V109 6K Camcorder package, including the camcorder, external microphone, 64GB SD card, lens hood, Type-C data cable, 4500mAh battery, cleaning cloth, velvet DV bag, user manual, handheld stabilizer, and 2.4G remote control.
Product Overview
The OPRKQEE V109 is a versatile 6K camcorder designed for high-quality video recording and photography. It features a 4.0-inch touch screen, 18X digital zoom, and various advanced functions.
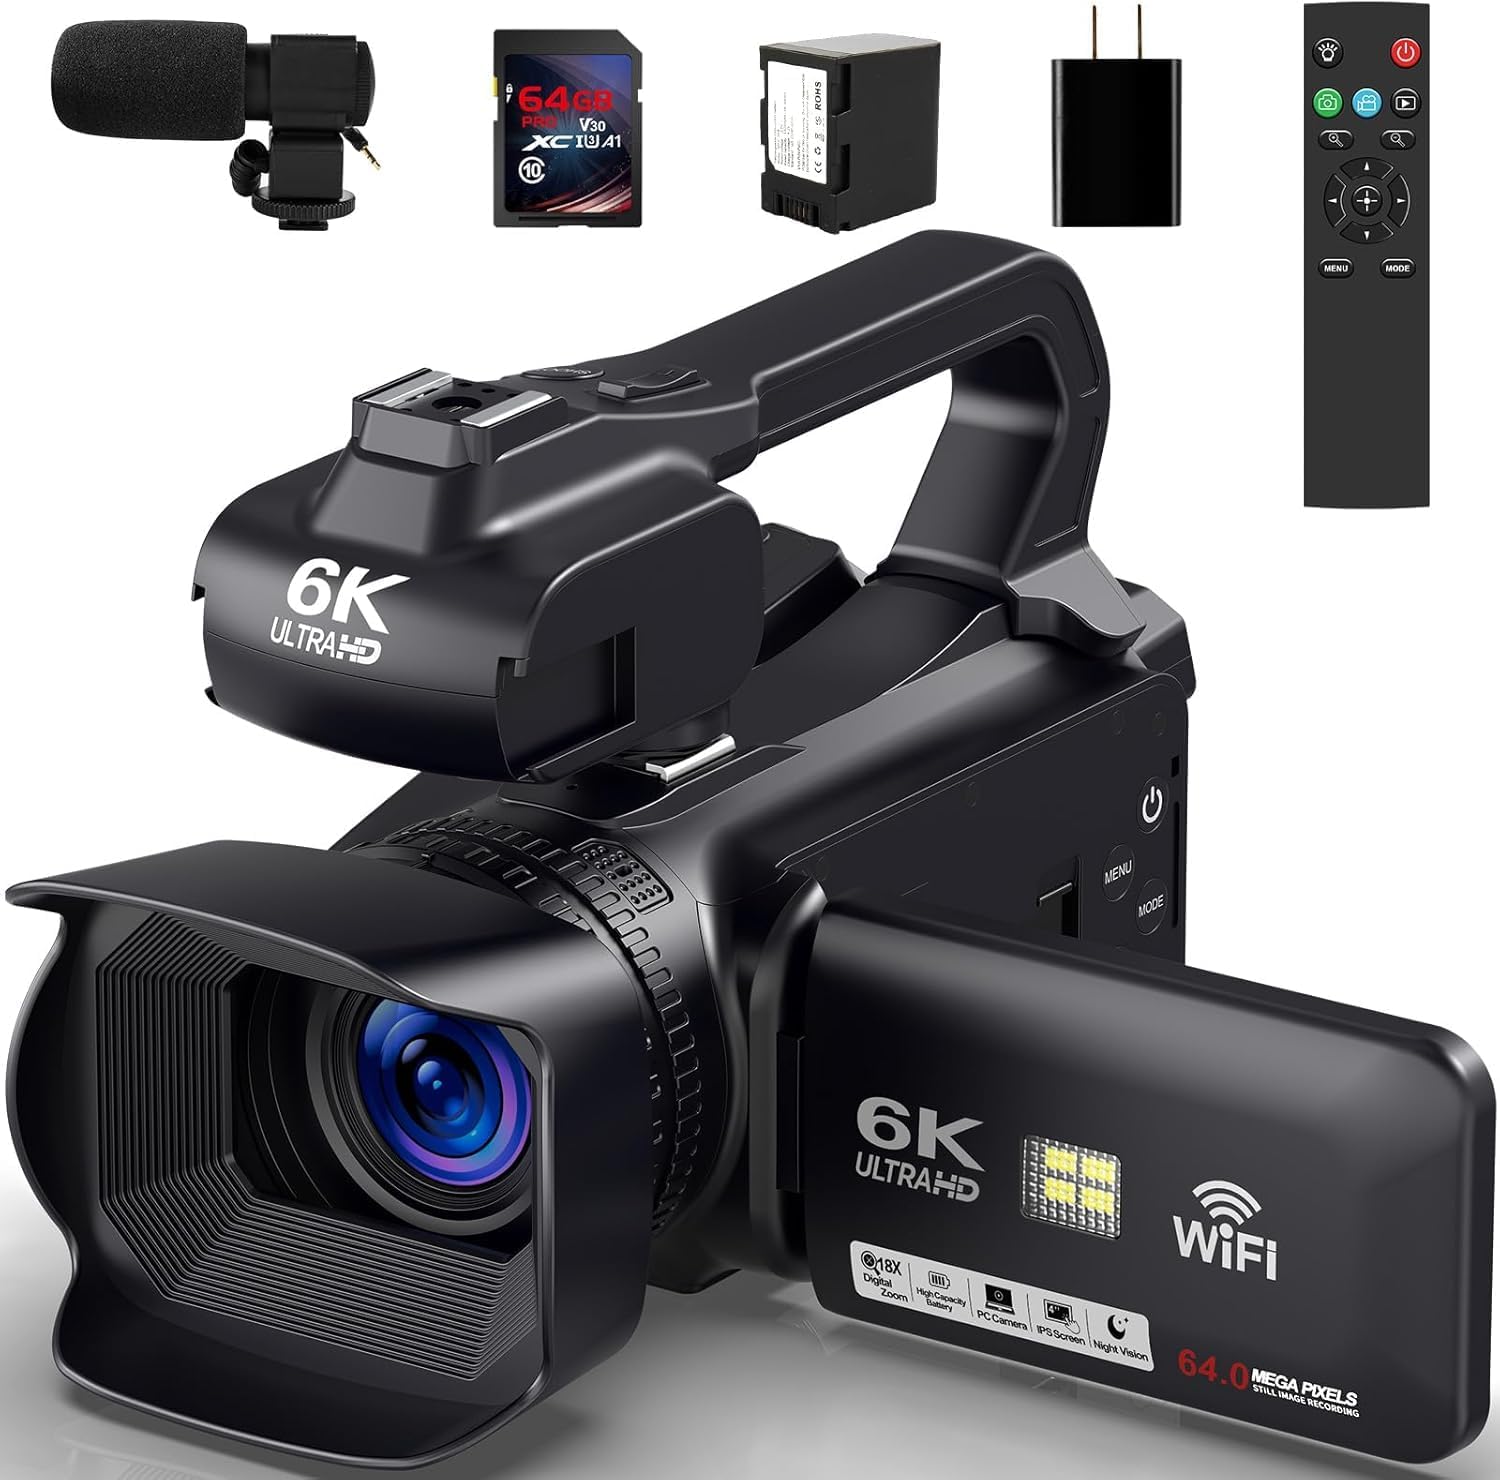
Image: The OPRKQEE V109 6K Camcorder shown with its external microphone, 64GB SD card, battery, charger, and remote control. The camcorder features a lens hood and a flip-out screen.
Key Features:
- 6K UHD Video Recording: Supports 5760x3240p at 30FPS and 4K at 60FPS.
- 64MP Photo Capture: High-resolution still images.
- 18X Digital Zoom: Magnify subjects for detailed shots.
- 4.0 Inch Ultra HD Touch Screen: Intuitive control and playback.
- WiFi Functionality: Control via smartphone app for shooting, settings, live preview, and playback.
- IR Night Vision: Capture clear images in low-light conditions.
- 2.4G Remote Control: Wireless control up to 20 meters, 360-degree angle.
- 4500mAh Battery: Extended recording time, supports recording while charging.
- External Microphone: For enhanced audio quality.
- Handheld Stabilizer: Reduces camera shake for smoother footage.
Setup
1. Battery Installation and Charging
- Locate the battery compartment on the camcorder.
- Insert the 4500mAh battery, ensuring correct polarity.
- Close the battery compartment cover securely.
- Connect the camcorder to the charger using the provided USB Type-C cable. The battery indicator will show charging status. Fully charge the battery before first use (approximately 4.5 hours for 6K recording).
2. SD Card Installation
- Open the SD card slot cover.
- Insert the 64GB SD card with the metal contacts facing the correct direction until it clicks into place.
- Close the SD card slot cover. The camcorder supports up to 256GB SD cards.
3. External Microphone Attachment
- Mount the external microphone onto the hot shoe on top of the camcorder.
- Connect the microphone cable to the MIC port on the camcorder. The MIC port is located under a cover next to the wrist strap.
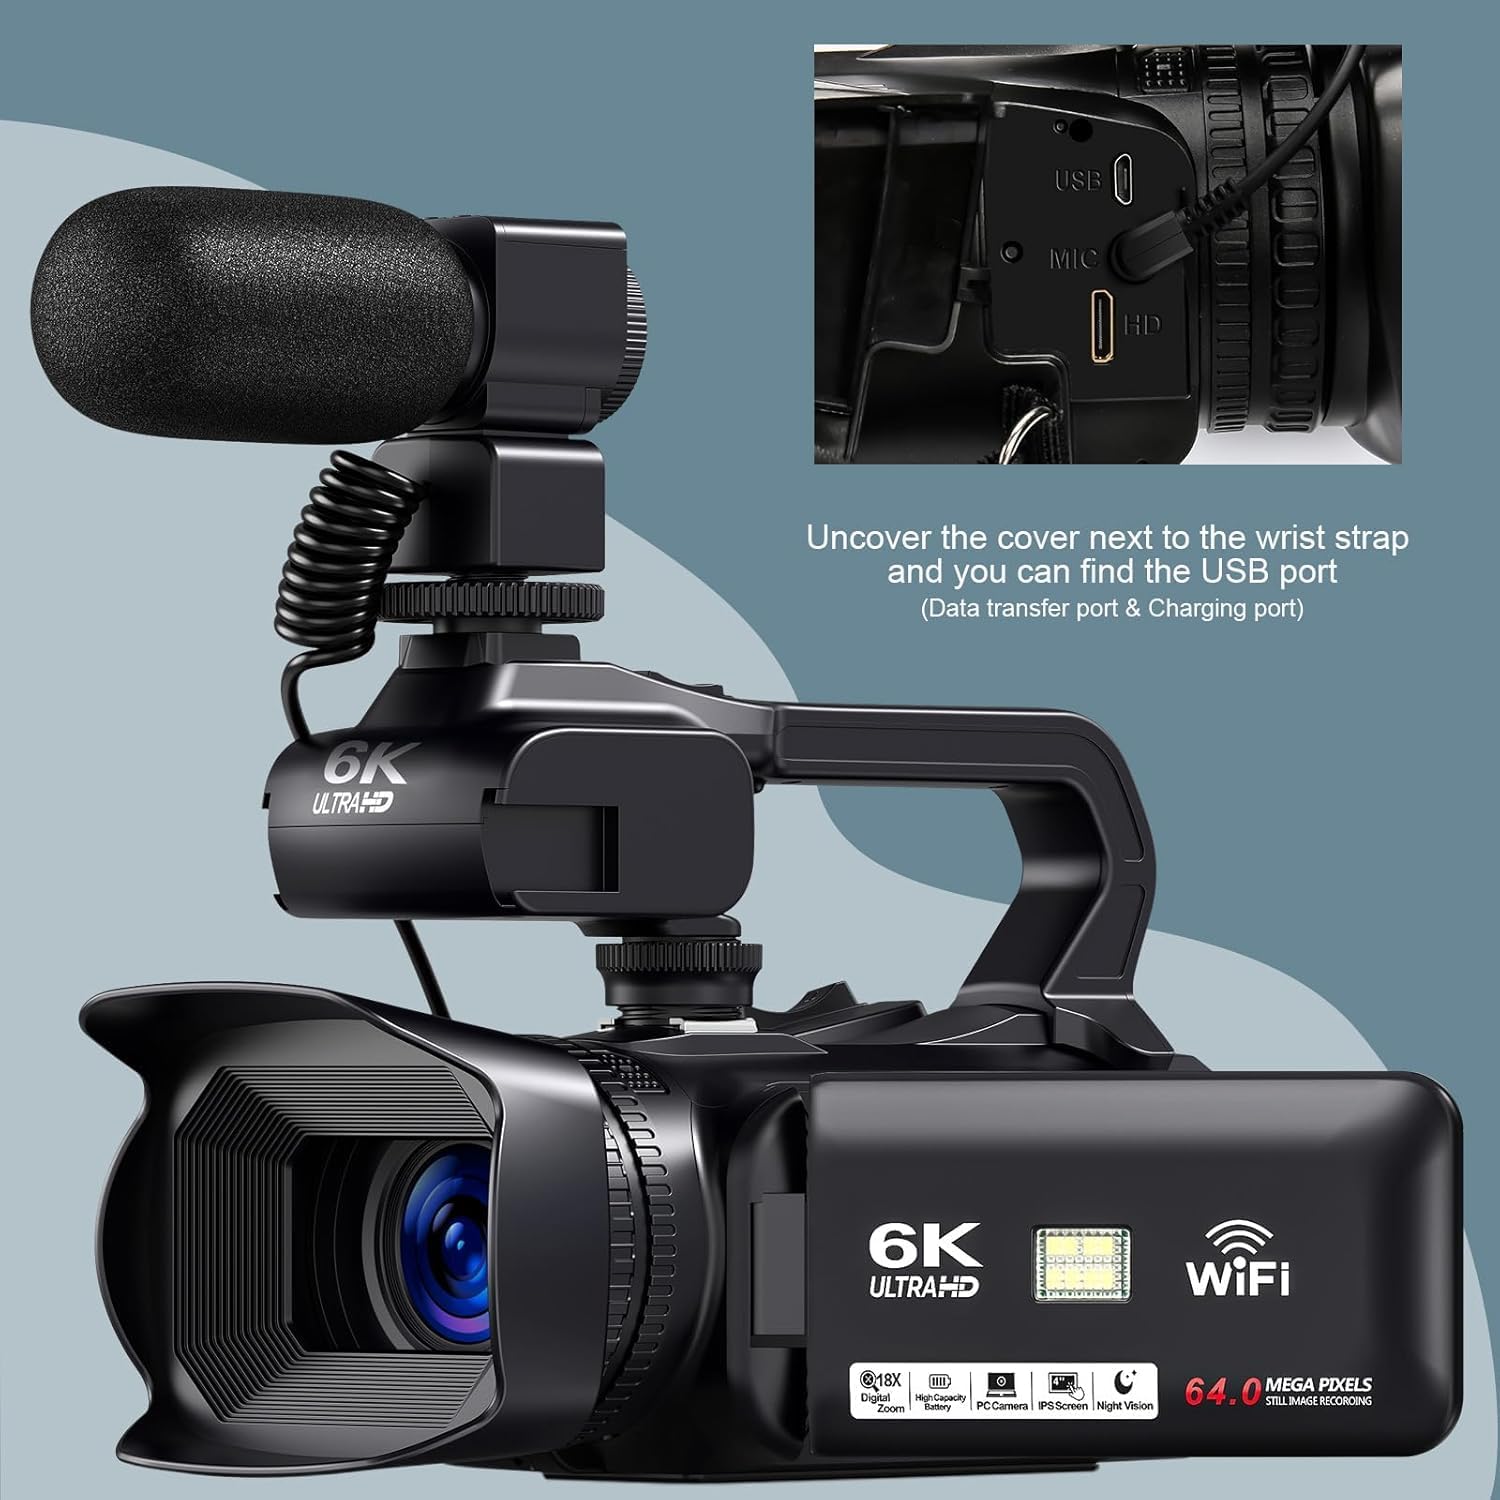
Image: A detailed view of the camcorder's side, indicating the location of the USB (data transfer and charging) and MIC ports, which are found by uncovering a flap near the wrist strap.
4. Handheld Stabilizer Assembly
Attach the handheld stabilizer to the bottom tripod mount of the camcorder for improved stability during recording.
Operating Instructions
1. Power On/Off
- To power on, press and hold the Power button.
- To power off, press and hold the Power button again.
2. Recording Videos
- Ensure the camcorder is in video mode.
- Press the Record button to start recording.
- Press the Record button again to stop recording.
3. Taking Photos
- Switch the camcorder to photo mode.
- Press the Photo button to capture an image.
4. Digital Zoom
Use the zoom controls (usually a rocker switch) to adjust the 18X digital zoom. Zoom in to magnify subjects or zoom out for a wider view.

Image: A visual demonstration of the 18X digital zoom capability, showing a lighthouse at 4X, 8X, and 18X magnification, alongside full 6K and 4K resolution images.
5. IR Night Vision and Fill Light
- Activate IR Night Vision mode to record in low-light or dark environments.
- The built-in LED fill light can be used to illuminate subjects in dim conditions.

Image: Demonstrates the effect of the IR Night Vision and fill light features. Top row shows a person with fill light off and on. Bottom row shows a bridge scene with IR Night Vision off (dark) and on (illuminated).
6. WiFi Connection and App Control
- Turn on the WiFi function on the camcorder.
- Download the "Hello Cam" app on your smartphone. You can scan the QR code displayed on the camcorder's screen or visit http://qr24.cn/EqyM2h.
- Connect your smartphone to the camcorder's WiFi network (SSID and password will be displayed on the camcorder screen).
- Once connected, use the app to control shooting, adjust settings, view live previews, and playback recordings.

Image: Illustrates the WiFi connection process, showing a smartphone displaying the "Hello Cam" app interface with a live view from the camcorder, and the camcorder's screen displaying WiFi information and a QR code for app download.
7. 2.4G Remote Control
The included 2.4G remote control allows for wireless operation of the camcorder from up to 20 meters away, with 360-degree functionality. Refer to the remote control's specific buttons for functions like record, photo, zoom, and menu navigation.

Image: Shows the camcorder with its 4.0-inch touch screen rotated 270 degrees, and a hand holding the 2.4G remote control, demonstrating wireless operation against a scenic background.
8. 4.0 Inch Touch Screen
The 4.0-inch Ultra HD touch screen provides an intuitive interface for navigating menus, adjusting settings, and reviewing footage. It can rotate 270 degrees for flexible viewing angles.
Advanced Features
The OPRKQEE V109 camcorder includes several advanced functions to enhance your creative possibilities:
- Slow Motion: Record videos at a higher frame rate and play them back slowly for dramatic effect.
- Time-Lapse: Capture a series of images over an extended period and combine them into a sped-up video.
- Webcam Function: Connect the camcorder to a computer via USB to use it as a high-quality webcam.
- Self-Timer: Set a delay before taking a photo, allowing you to be in the shot.
- Timed Photo: Capture photos at set intervals.
- Continuous Photo: Take multiple photos in quick succession.
- Silent Video: Record video without audio.
- LED Fill Light: Provides additional illumination for photos and videos in dim conditions.
- Recording While Charging: Allows continuous operation by powering the camcorder via an external power source while recording.

Image: A visual representation of the camcorder's multi-function capabilities, including Photo, Video, Slow Motion, Loop Recording, Timed Photography, Continuous Photography, Selfie, and Time-Lapse, each with an illustrative icon.
Maintenance
- Cleaning: Use the provided cleaning cloth to gently wipe the lens and screen. For stubborn smudges, use a lens cleaning solution specifically designed for optical surfaces. Do not use abrasive cleaners.
- Storage: When not in use, store the camcorder in the velvet DV bag in a cool, dry place away from direct sunlight and extreme temperatures.
- Battery Care: To prolong battery life, avoid fully discharging the battery frequently. If storing for an extended period, charge the battery to about 50% and remove it from the camcorder.
- SD Card: Regularly back up your data from the SD card to a computer or external storage device. Format the SD card periodically within the camcorder's settings to maintain optimal performance.
Troubleshooting
| Problem | Possible Cause | Solution |
|---|---|---|
| Camcorder does not power on. | Battery is depleted or incorrectly inserted. | Ensure the battery is fully charged and correctly inserted. |
| Cannot record video/take photos. | SD card is full, not inserted, or corrupted. | Check SD card insertion. Delete unnecessary files or format the card (after backing up data). Replace if corrupted. |
| Poor audio quality. | External microphone not connected properly or internal microphone obstructed. | Ensure external microphone is securely connected. Check microphone settings. |
| WiFi connection issues. | Incorrect WiFi password or app not installed. | Verify WiFi password. Ensure "Hello Cam" app is installed and updated. Restart camcorder and smartphone. |
| Remote control not working. | Remote battery depleted or obstruction. | Replace remote control battery. Ensure no obstructions between remote and camcorder. |
If you encounter issues not listed here, please refer to the "Warranty and Support" section for assistance.
Specifications
| Feature | Detail |
|---|---|
| Brand | OPRKQEE |
| Model Number | V109 |
| Video Capture Resolution | 6K (5760x3240p/30FPS), 4K (3840x2160p/60FPS) |
| Photo Resolution | 64 Megapixels |
| Digital Zoom | 18X |
| Screen Size | 4.0 Inches (Touch Screen, 270° Rotation) |
| Connectivity Technology | USB, WiFi |
| Flash Memory Type | SD (up to 256GB, 64GB included) |
| Battery Capacity | 4500mAh |
| IR Night Vision | Yes |
| Remote Control | 2.4G Wireless (20m range) |
| Special Features | Vlogging Camera, HD video, Camcorder, Digital Video Camera, Microphone, LED Fill Light, Recording while charging, Slow Motion, Time-Lapse, Webcam, Self-timer, Timed Photo, Continuous Photo, Silent Video, Handheld Stabilizer |
| Product Dimensions | 8.3 x 8.3 x 4.3 inches |
| Item Weight | 3.08 pounds |
Warranty and Support
For any questions, concerns, or technical support regarding your OPRKQEE V109 6K Camcorder, please contact customer service. You can typically find contact information by navigating to "Your orders" on the platform where you purchased the product, locating the order ID, and clicking "Contact seller." Our customer service team aims to respond within 12 hours.
Please retain your proof of purchase for warranty claims.