
AzureaFlow Industrial Sewing Machine Motor 550W
AzureaFlow Industrial Sewing Machine Motor 550W Instruction Manual
Model: Industrial Sewing Machine Motor 550W
1. Introduction
This manual provides essential information for the safe and efficient operation, installation, and maintenance of your AzureaFlow Industrial Sewing Machine Motor 550W. This servo motor is designed for industrial sewing machines, offering high efficiency, energy saving, and precise speed control.
Key Features:
- Power: AC110V, 550W, 1HP
- Speed Range: 200-6000 RPM
- Rotation: Supports Clockwise (CW) and Counter-Clockwise (CCW) operation
- Construction: Pure Copper Coils, full-metal shockproof body
- Benefits: Energy-saving, quiet operation, high load durability
- Compatibility: Universal compatibility with industrial models such as Juki DDL-8700, Juki DDL-8100, Brother, Singer, walking foot, overlock, and upholstery machines.
2. Safety Information
Always prioritize safety when installing, operating, or maintaining the motor. Failure to follow these instructions may result in injury or damage to the equipment.
- Ensure the power supply matches the motor's specifications (AC110V).
- Disconnect power before performing any installation, maintenance, or troubleshooting.
- Keep hands and loose clothing away from moving parts during operation.
- Do not operate the motor in wet or damp conditions.
- The motor features advanced over-current, voltage spike, short-circuit, and jamming protections. However, these are safeguards and should not replace careful handling.
- Ensure proper grounding of the sewing machine and motor.
3. Installation and Setup
The AzureaFlow Industrial Sewing Machine Motor is designed for straightforward installation using standard clutch motor mounting holes.
3.1 Unpacking and Inspection
Carefully remove all components from the packaging. Verify that all parts are present and undamaged. The package includes the motor, control box, power cord, mounting bolts, belt cover, and dampener.
3.2 Mounting the Motor
- Ensure the sewing machine is stable and disconnected from power.
- Align the motor with the existing motor mounting holes on your industrial sewing machine.
- Secure the motor using the provided bolts. Ensure it is firmly attached to prevent vibration during operation.
- Install the belt cover for safety, protecting against contact with the rotating belt.
- Attach the dampener if required for your specific machine setup to reduce vibration.
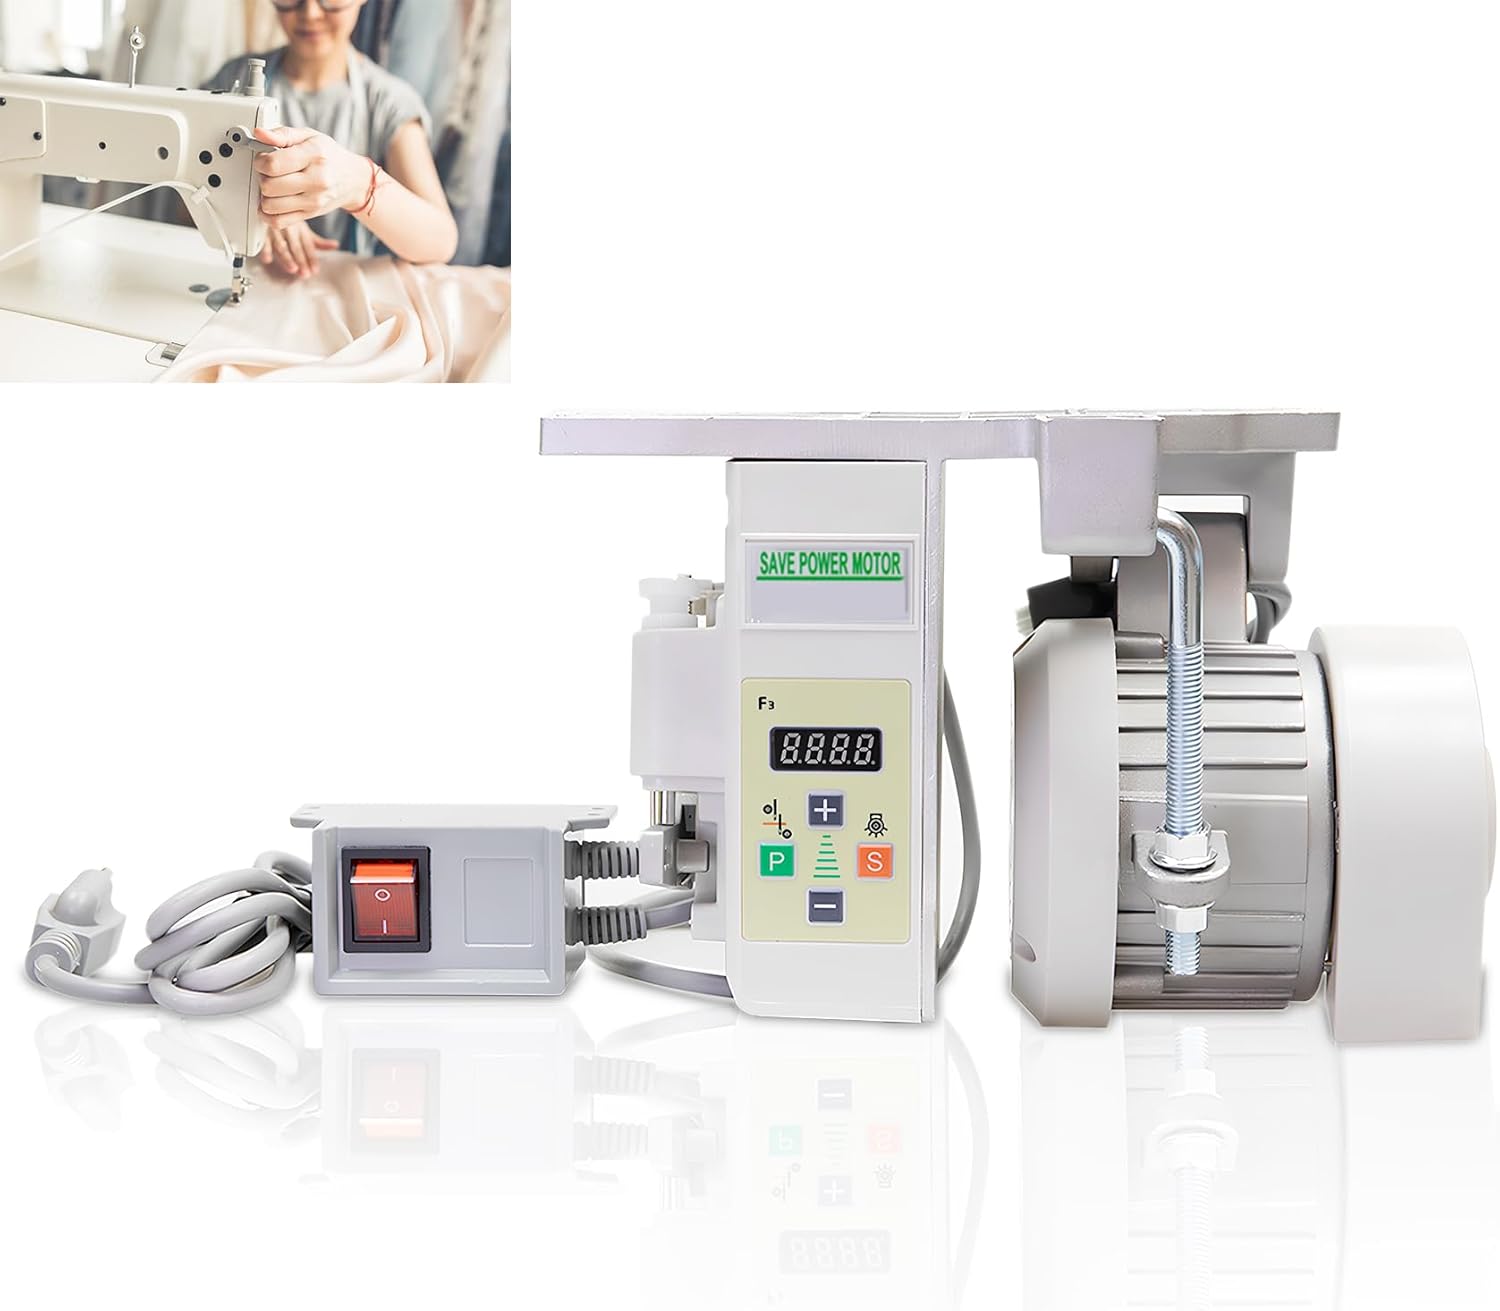
Figure 1: Main components of the AzureaFlow 550W Industrial Sewing Machine Motor, including the motor unit, control box, and power switch.

Figure 2: Detailed dimensions and electrical parameters for the 550W motor, including voltage, power, frequency, torque, horsepower, and speed range.
3.3 Electrical Connection
- Connect the motor's power cord to a compatible AC110V outlet.
- Ensure all connections are secure before powering on the unit.
4. Operation
The motor features a user-friendly controller for adjusting speed and settings. Familiarize yourself with the control panel before operation.
4.1 Control Panel Overview

Figure 3: The motor's control box, featuring an independent power switch, intelligent foot control connection, and safety protection for the belt.
The control box includes a digital display and several buttons for parameter adjustment and speed control.
4.2 Basic Operation Steps
- Power On: Flip the independent power switch to the "ON" position. The digital display will illuminate.
- Speed Adjustment: In standby mode, use the "+" and "-" buttons to quickly adjust the motor speed. The display will show the current RPM setting. The speed range is 200-6000 RPM.
- Needle Light: Press the "S" button to turn the needle light on or off.
- Foot Pedal Control: The motor is activated by the foot pedal of your sewing machine. The speed will correspond to the setting on the control box.
4.3 Parameter Settings

Figure 4: Detailed explanation of button operations for speed adjustment, needle light control, and parameter settings.
To access advanced settings:
- Use the "P" and "S" keys for parameter setting and other functions.
- To enter parameter setting mode, press "P" and "+" simultaneously. The display will show "P00".
- Use "+" and "-" to switch between parameter serial numbers.
- Press "P" to show the parameter value, and "+" / "-" to modify its value.
- Press "S" to exit and return to standby mode.
- The operation box will not run when the pedal is pressed until it returns to standby mode after parameter setting.
- Refer to the full manual for a complete list of parameter details and their functions, including "needle up," "needle down," and "nostop needle" settings.
5. Maintenance
Regular maintenance ensures the longevity and optimal performance of your AzureaFlow motor.
- Cleaning: Periodically clean the motor and control box exterior with a dry, soft cloth. Ensure no dust or debris accumulates in ventilation openings.
- Inspection: Regularly inspect the power cord for any signs of damage. Check mounting bolts for tightness.
- Ventilation: Ensure the motor's ventilation areas are clear to allow for efficient heat dissipation. The motor features an aluminum heat shield and powerful cooling fan for consistent performance.
- Internal Components: The motor is engineered with pure copper windings for durability. No user-serviceable parts are inside the sealed motor unit. Do not attempt to open the motor casing.
6. Troubleshooting
This section addresses common issues you might encounter with your motor.
| Problem | Possible Cause | Solution |
|---|---|---|
| Motor does not power on. | No power supply, loose connection, faulty power switch. | Check power outlet, ensure power cord is securely plugged in, verify power switch is in "ON" position. |
| Motor runs intermittently or with reduced power. | Overload, incorrect speed setting, power fluctuation. | Reduce load on the sewing machine, check speed settings on the control panel, ensure stable power supply. |
| Motor displays "E-3" error code. | Hall sensor not properly connected. | Inspect the Hall sensor connection to the control box. Ensure it is securely plugged in. If the issue persists, contact customer support. |
| Motor does not run in reverse (if applicable). | Incorrect parameter setting for rotation direction. | Refer to the parameter settings section (Section 4.3) to adjust the rotation direction. If the motor is advertised to run CW and CCW, ensure the setting is correct. |
| Unusual noise or vibration. | Loose mounting, worn belt, foreign object. | Check motor mounting bolts for tightness. Inspect the belt for wear or damage. Ensure no foreign objects are obstructing the motor or belt. |
If you encounter an issue not listed here or if the suggested solutions do not resolve the problem, please contact AzureaFlow customer support.
7. Specifications
| Feature | Specification |
|---|---|
| Model Number | Industrial Sewing Machine Motor 550W |
| Brand | AzureaFlow |
| Power | 550W (1HP) |
| Voltage | AC110V |
| Input Frequency | 50-60 Hz |
| Speed Range | 200-6000 RPM |
| Motor Torque | 1.5N.M ~ 5N.M |
| Product Dimensions | 5.3"D x 7"W x 10"H (approx. 13.5 x 17.8 x 25.4 cm) |
| Item Weight | 8 pounds (approx. 3.6 kg) |
| Color | Silver |
| ASIN | B0FCYBYR54 |
8. Warranty and Support
AzureaFlow is committed to providing reliable products and excellent customer service.
- Customer Support: We offer 24/7 customer support to assist with any questions regarding your sewing machine servo motor.
- After-sales Response: Our comprehensive after-sales system ensures a 12-hour response to your inquiries, providing timely support.
- Maintenance Expertise: Benefit from years of maintenance expertise, ensuring reliability and trustworthiness.
For support, please refer to the contact information provided with your purchase or visit the official AzureaFlow website.
Ask a question about this manual
Ask about setup, troubleshooting, compatibility, parts, safety, or missing instructions. Manuals+ will review the question and use this page’s manual context to help answer it.