1. Introduction
This manual provides detailed instructions for the operation and maintenance of your Generic Retrowave 7-in-1 Portable Radio. This versatile device combines multiple functions including FM/AM/SW radio, Bluetooth speaker, MP3 player, LED flashlight, clock, mobile power bank, and SOS alarm, designed for daily use, entertainment, and emergency preparedness.
Key Features:
- Multi-functional Device: Integrates radio, Bluetooth speaker, MP3 player, flashlight, clock, power bank, and SOS alarm.
- Multiple Power Options: Supports USB charging, emergency hand crank, and solar charging.
- Audio Playback: Bluetooth connectivity, TF card, U disk, and AUX input for MP3 playback.
- Emergency Features: Built-in LED flashlight and SOS alarm for critical situations.
- Portable Design: Compact and lightweight for easy transport during camping, travel, or daily commuting.
2. Package Contents
Please verify that all items are present in the package:
- Generic Retrowave 7-in-1 Portable Radio
- Owner's Manual (this document)
- Power Adapter
- Quick Start Guide
3. Product Overview and Controls
Familiarize yourself with the various parts and controls of your radio.

Figure 3.1: Front view of the Retrowave 7-in-1 Portable Radio. This image displays the main orange unit with its speaker grille on the left, a central tuning dial, a digital display showing time and mode, and various control buttons for functions like Bluetooth, SW, AM, and FM.

Figure 3.2: Side view of the Retrowave 7-in-1 Portable Radio. This image highlights the right side of the radio, featuring a prominent volume knob, a power ON/OFF switch, and ports for AUX input, TF card, and USB for charging and U disk playback.
Control Layout (Refer to Figure 3.1 and 3.2):
- Speaker Grille: Audio output.
- Digital Display: Shows time, radio frequency, and current mode (BT, SW, AM, FM).
- Tuning Dial: Used to select radio frequencies.
- Mode Buttons: Select between Bluetooth, SW, AM, and FM modes.
- Volume Knob: Adjusts audio output level.
- Power ON/OFF Switch: Turns the device on or off.
- AUX Input: Connect external audio devices.
- TF Card Slot: Insert a TF (MicroSD) card for MP3 playback.
- USB Port: Connect a U disk for MP3 playback or use as a power bank output.
- DC 5V Input: For USB charging of the radio.
- LED Flashlight: Located on the side or top of the unit.
- SOS Button: Activates the emergency alarm.
- Hand Crank: For manual power generation.
- Solar Panel: For supplementary solar charging.
4. Setup
4.1 Initial Charging
Before first use, fully charge the radio using the provided USB power adapter.
- Connect the power adapter to the DC 5V input port on the radio.
- Plug the adapter into a standard wall outlet.
- The charging indicator light will illuminate. Once fully charged, the light may change color or turn off.

Figure 4.1: Various charging methods for the Retrowave 7-in-1 Portable Radio. This composite image illustrates the hand crank in use, the USB charging port, the solar panel on top, and the compartment for battery insertion.
4.2 Powering On/Off
Locate the Power ON/OFF switch on the side of the radio. Slide the switch to the 'ON' position to power on the device. Slide it to 'OFF' to power off.
5. Operating Instructions
5.1 Radio Function (FM/AM/SW)
- Power on the radio.
- Press the respective mode button (FM, AM, or SW) to select your desired band.
- Extend the telescopic antenna for better FM/SW reception. For AM, rotate the unit for optimal signal.
- Rotate the tuning dial to scan for radio stations. The frequency will be displayed on the digital screen.
- Adjust the volume knob to your preferred listening level.

Figure 5.1: Tuning the radio. A hand is shown adjusting the central tuning dial on the black radio, with the digital display visible above it.
5.2 Bluetooth Speaker Function
- Power on the radio.
- Press the 'BT' (Bluetooth) mode button. The radio will enter pairing mode, indicated by a flashing Bluetooth icon on the display.
- On your mobile device, enable Bluetooth and search for available devices.
- Select 'Retrowave Radio' (or similar name) from the list to pair.
- Once paired, you can play audio from your device through the radio's speaker.
5.3 MP3 Playback (TF Card / U Disk / AUX)
- TF Card: Insert a TF (MicroSD) card with MP3 files into the TF card slot. The radio will automatically switch to MP3 mode and begin playback.
- U Disk: Insert a USB flash drive (U disk) with MP3 files into the USB port. The radio will automatically switch to MP3 mode and begin playback.
- AUX Input: Connect an external audio device (e.g., smartphone, MP3 player) to the AUX input port using a 3.5mm audio cable. Select AUX mode on the radio.
5.4 LED Flashlight
Locate the flashlight switch or button (refer to product diagram if available). Press or slide it to turn the LED flashlight on or off. The flashlight provides approximately 6 hours of continuous operation on a full charge.
5.5 SOS Alarm
In an emergency, press and hold the 'SOS' button (if available, otherwise refer to specific button on your unit). The radio will emit a loud siren sound and flash its light to attract attention. Press the button again to deactivate the alarm.
5.6 Clock Function
The digital display shows the current time. Refer to the Quick Start Guide or specific buttons on your unit for instructions on setting the clock and alarm.
6. Emergency Functions
6.1 Emergency Power Bank
The radio can be used to charge external devices like smartphones in emergency situations.
- Connect your mobile device's USB charging cable to the USB output port on the radio.
- The radio will begin charging your device. Note that this will consume the radio's internal battery power.

Figure 6.1: Charging a smartphone using the radio's power bank function. A smartphone is shown connected to the radio via a USB cable, with the phone's screen indicating it is charging.
6.2 Hand Crank Charging
When external power sources are unavailable, the hand crank can generate power to charge the internal battery.
- Unfold the hand crank handle located on the back of the radio.
- Rotate the hand crank clockwise or counter-clockwise at a steady pace.
- Continuous cranking will generate power to charge the internal battery and can provide power for basic functions.
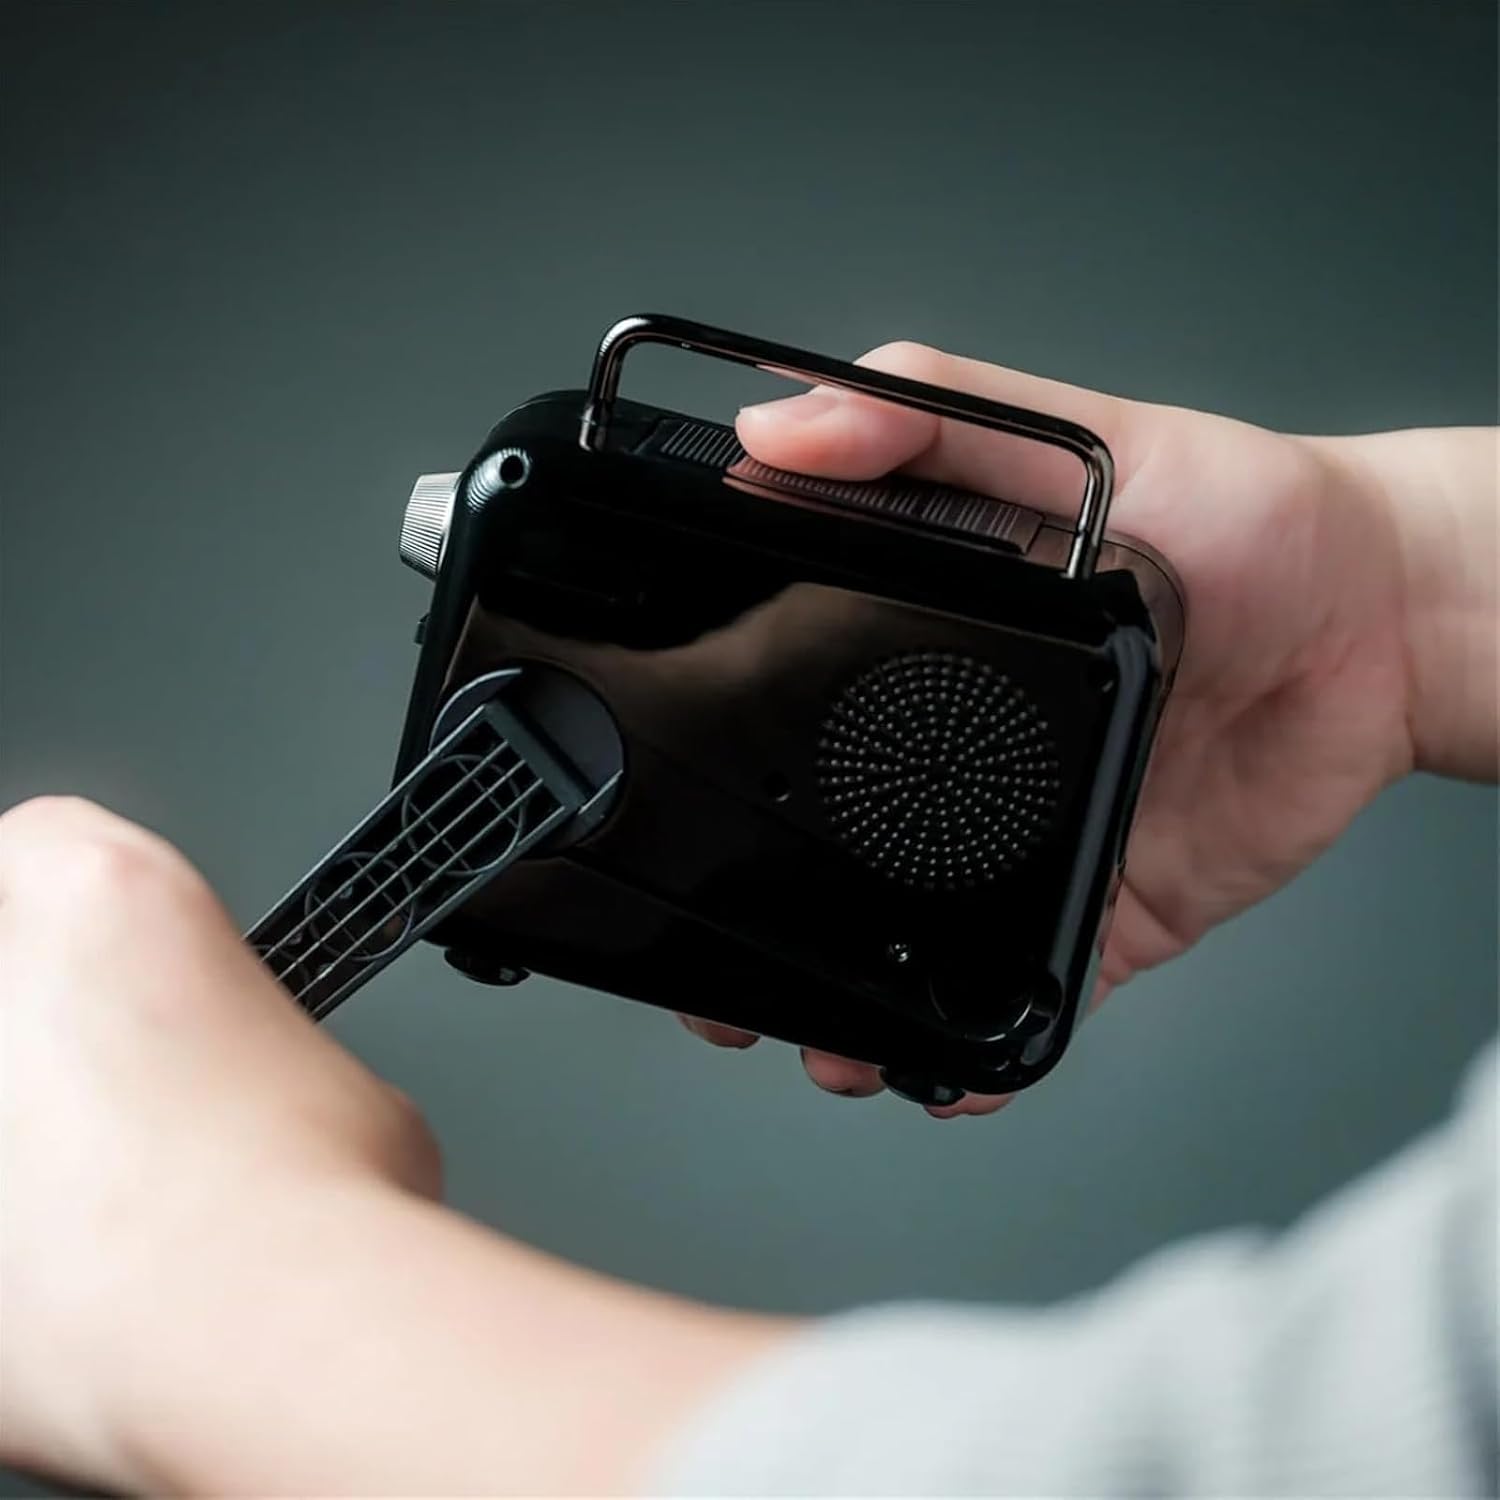
Figure 6.2: Operating the hand crank. A person's hands are shown rotating the hand crank on the rear of the radio to generate power.
6.3 Solar Charging
The integrated solar panel provides supplementary charging, primarily useful for maintaining battery levels or slow charging in direct sunlight.
- Place the radio with the solar panel facing direct sunlight.
- Solar charging is slower than USB charging and is most effective for trickle charging or extending battery life.
7. Maintenance
- Cleaning: Wipe the radio with a soft, dry cloth. Do not use abrasive cleaners or solvents.
- Storage: Store the radio in a cool, dry place away from direct sunlight and extreme temperatures.
- Battery Care: For optimal battery life, fully charge the radio at least once every three months if not in regular use. Avoid fully discharging the battery frequently.
- Water Resistance: This device is not waterproof. Avoid exposure to rain, splashes, or immersion in water.
8. Troubleshooting
- No Power: Ensure the power switch is ON. Charge the battery using USB, hand crank, or solar power.
- Poor Radio Reception: Extend the telescopic antenna fully. Rotate the radio for AM reception. Move to an open area away from interference.
- Bluetooth Not Connecting: Ensure the radio is in Bluetooth pairing mode. Check that Bluetooth is enabled on your device and it is within range. Forget previous pairings on your device and try again.
- MP3 Playback Issues: Ensure the TF card or U disk contains compatible MP3 files. Check that the card/disk is inserted correctly.
- Flashlight Not Working: Check battery level. Ensure the flashlight switch is in the ON position.
- Phone Not Charging (Power Bank): Ensure the radio has sufficient battery charge. Check the USB cable connection.
9. Specifications
| Feature | Specification |
|---|---|
| Product Dimensions | 5.04" (12.8 cm) x 2.24" (5.7cm) x 3.86" (9.8cm) |
| Item Weight | 1.28 pounds |
| Brand | Generic |
| Color | Orange (variant shown) |
| Special Features | Lightweight, Portable, Rechargeable, LED Light, SOS Alarm |
| Connectivity Technology | Bluetooth, USB, AUX |
| Power Source | Battery Powered (USB, Hand Crank, Solar Charging) |
| Radio Bands Supported | FM: 76–108 MHz, AM: 522–1620 MHz, SW: 7–16 MHz |
| Speaker Output | 8W / 4Ω |
| Estimated Operating Time | Radio: approx. 20 hrs, LED Light: approx. 6 hrs, Bluetooth: approx. 5 hrs (at 75% volume) |
| Material | ABS Resin, Iron |
10. Warranty and Support
For warranty information and customer support, please refer to the documentation included with your purchase or contact the retailer. Keep your purchase receipt as proof of purchase.