1. Introduction
Thank you for purchasing the Virubi Tall Laundry Cabinet. This versatile storage solution is designed to enhance your bathroom or laundry room with its functional design, including two tilt-out laundry hampers, adjustable shelves, and a durable construction. This manual provides detailed instructions for assembly, operation, maintenance, and troubleshooting to ensure safe and efficient use of your new cabinet.

Figure 1.1: Virubi Tall Laundry Cabinet (Oak) with doors and tilt-out hampers open, displaying its storage capabilities.
2. Safety Information
Please read all safety instructions carefully before assembly and use. Failure to follow these instructions may result in injury or damage to the product.
- Anti-Tipping Device: This cabinet is equipped with an anti-toppling device. It is crucial to install this device and securely attach the cabinet to a wall to prevent accidental tipping, especially in households with children or pets.
- Weight Capacity: Do not exceed the maximum weight capacity of 25 lbs per shelf, 25 lbs per drawer, and 80 lbs total for the entire cabinet. Overloading can cause instability and damage.
- Assembly: Assemble the cabinet on a soft, clean surface to prevent scratches. Ensure all screws and fasteners are tightened securely before use.
- Placement: Place the cabinet on a level, stable surface. Avoid placing it in areas with excessive moisture or direct sunlight, which can affect the wood finish.
- Children: Keep small parts and packaging materials away from children during assembly. Do not allow children to climb on or play with the cabinet.

Figure 2.1: Key product details including the anti-tipping device for enhanced safety.
3. Package Contents
Before beginning assembly, verify that all parts are present and undamaged. If any parts are missing or damaged, please contact customer support.
- Cabinet Panels (various sizes for frame, shelves, doors, drawers)
- Hardware Pack (screws, dowels, hinges, handles, anti-tipping kit)
- Assembly Instruction Manual
4. Assembly Instructions
Assembly is required for this product. Please follow the included instruction manual carefully. It is recommended to have two people for assembly. Approximate assembly time: 1-2 hours.
Tools Required (Not Included):
- Phillips Head Screwdriver
- Hammer (for dowels)
- Drill (optional, for wall mounting anti-tipping device)
Assembly Steps:
- Unpack and Identify Parts: Lay out all cabinet panels and hardware. Refer to the parts list in your instruction manual to identify each component.
- Assemble the Main Frame: Connect the side panels to the base and top panels using the provided screws and dowels. Ensure all connections are secure.
- Install Fixed Shelves: Insert and secure any fixed shelves into the designated slots within the cabinet frame.
- Assemble Tilt-Out Hampers: Construct the two tilt-out hamper frames according to the manual. Attach the necessary hardware for the tilting mechanism.
- Attach Doors and Hampers: Securely attach the main cabinet door and the two tilt-out hamper doors using the provided hinges. Ensure they open and close smoothly.
- Install Adjustable Shelves: Place the adjustable shelf pins into the desired holes for the adjustable shelves. Insert the adjustable shelves onto these pins.
- Attach Handles: Securely fasten the metal bar handles to the cabinet door and tilt-out hamper doors.
- Install Anti-Tipping Device: This is a critical safety step. Follow the instructions to attach the anti-tipping device to the back of the cabinet and then securely fasten it to a wall stud.

Figure 4.1: Cabinet dimensions and internal structure diagram, useful for assembly planning.

Figure 4.2: Overview of storage sections, including adjustable shelves and tilt-out hampers.
5. Operating Instructions
Using the Storage Sections:
- Top Cabinet with Door: Open the single door to access the enclosed storage space. This section is ideal for items you wish to keep out of sight.
- Open Shelves: The four-layer open shelves provide easy access and are suitable for displaying decorative items or storing frequently used essentials.
- Tilt-Out Laundry Hampers: Gently pull the metal handles on the lower two doors to tilt out the laundry hampers. These are designed to hold towels, bath towels, or other laundry items, keeping them neatly concealed.
Adjusting Shelves:
The second shelf on the right side and the first and third shelves on the left side are adjustable. To adjust a shelf:
- Remove all items from the shelf.
- Carefully lift the shelf and remove the four shelf pins supporting it.
- Reinsert the shelf pins into the desired holes at the new height. Ensure all four pins are level.
- Place the shelf back onto the pins, ensuring it is stable before placing items on it.

Figure 5.1: Cabinet with all doors and hampers open, demonstrating accessibility.
6. Maintenance and Care
Proper care will extend the life and appearance of your Virubi Tall Laundry Cabinet.
- Cleaning: The cabinet is made of high-quality MDF boards with a painted finish, making the surface water-proof, smooth, and easy to clean. Wipe surfaces with a soft, damp cloth. Avoid using abrasive cleaners, harsh chemicals, or excessive moisture, which can damage the finish.
- Spills: Immediately wipe up any spills to prevent water damage or staining.
- Hardware: Periodically check all screws and fasteners to ensure they remain tight. Retighten if necessary.
- Ventilation: Ensure adequate ventilation in the room to prevent moisture buildup, especially in bathrooms or laundry rooms.
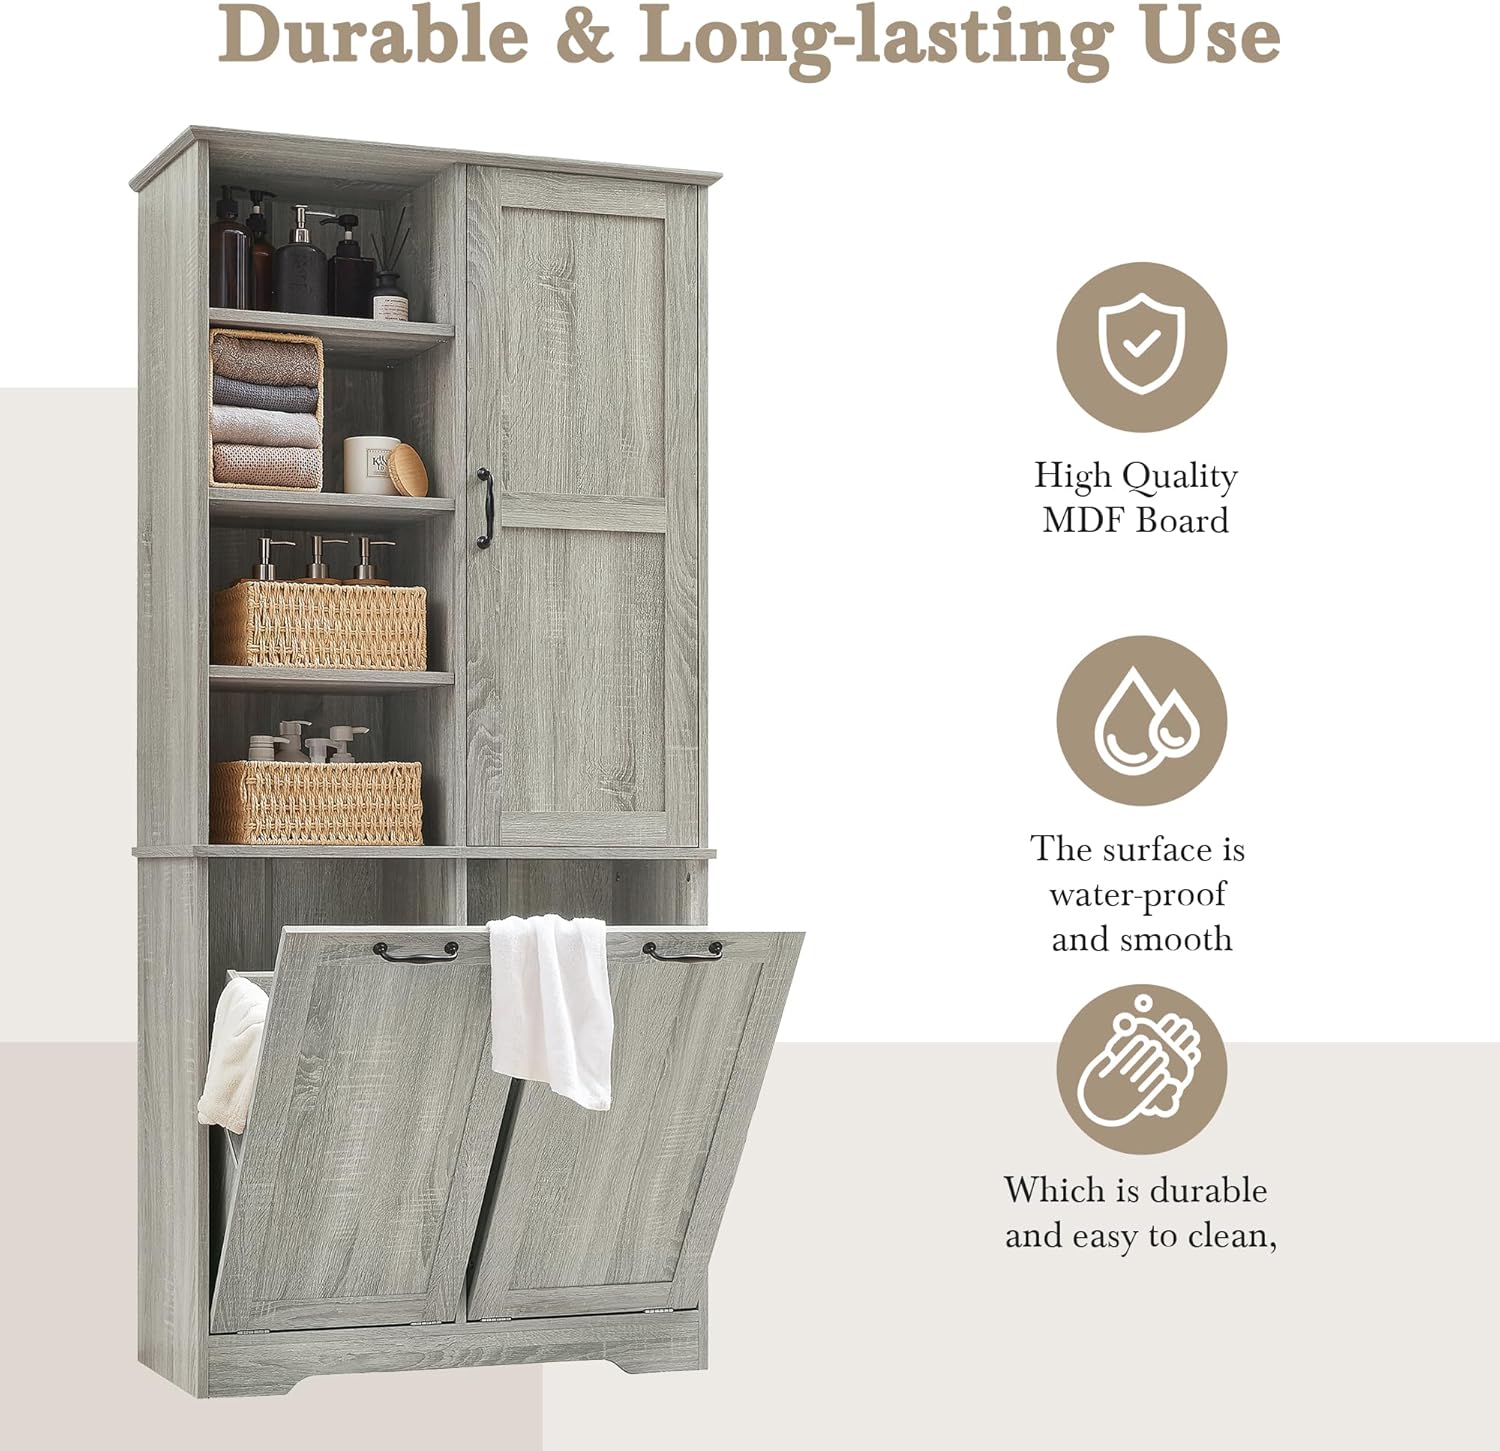
Figure 6.1: Features contributing to durability and ease of maintenance.
7. Troubleshooting
If you encounter any issues with your cabinet, refer to the following common problems and solutions:
| Problem | Possible Cause | Solution |
|---|---|---|
| Cabinet is wobbly or unstable. | Uneven floor; loose fasteners; anti-tipping device not installed. | Ensure cabinet is on a level surface. Tighten all assembly screws. Install the anti-tipping device securely to a wall stud. |
| Doors or hampers do not close properly. | Hinges misaligned; obstruction; cabinet not square. | Check hinge alignment and adjust if necessary. Remove any obstructions. Ensure the cabinet was assembled squarely. |
| Shelves are not level. | Shelf pins not inserted correctly or unevenly. | Remove the shelf and ensure all four shelf pins are fully inserted into the corresponding holes at the same height. |
| Damage to surface. | Impact; abrasive cleaning; excessive moisture. | For minor scratches, touch-up paint may be used (not included). Avoid harsh cleaning agents. Wipe spills immediately. |
8. Specifications
| Feature | Detail |
|---|---|
| Brand | Virubi |
| Model Name | N725P208543 |
| Color | Oak |
| Product Dimensions | 14"D x 31"W x 68"H |
| Material | High-quality MDF Board |
| Mounting Type | Floor Mount |
| Room Type | Bathroom, Laundry Room |
| Number of Shelves | 3 (adjustable) + fixed shelves |
| Number of Tilt-Out Drawers | 2 |
| Number of Doors | 1 (top cabinet) |
| Weight Capacity | 25 lbs/shelf; 25 lbs/drawer; 80 lbs total |
| Item Weight | 103.6 Pounds |
| Assembly Required | Yes |
| Country of Origin | China |
9. Warranty and Support
Warranty Information:
Virubi provides a ONE YEAR QUALITY GUARANTEE for this product from the date of purchase. This warranty covers manufacturing defects and issues arising from normal use. It does not cover damage caused by misuse, improper assembly, accidents, or unauthorized modifications.
Customer Support:
If you have any questions, concerns, or require assistance with your Virubi Tall Laundry Cabinet, please do not hesitate to contact our customer service team. We are committed to providing satisfactory service and will respond to your inquiries within 24 hours.
Please refer to your purchase documentation or the Virubi official website for specific contact details.