1. Introduction
This manual provides detailed instructions for the VEVOR 7-in-1 Wi-Fi Weather Station. This device is designed to monitor various environmental parameters including temperature, humidity, rainfall, wind speed, wind direction, and sunlight. It features a 190mm VA display for indoor monitoring and a solar-powered wireless outdoor sensor for comprehensive data collection. The system integrates with a mobile application for remote access and data analysis.
2. Product Overview
2.1 Components
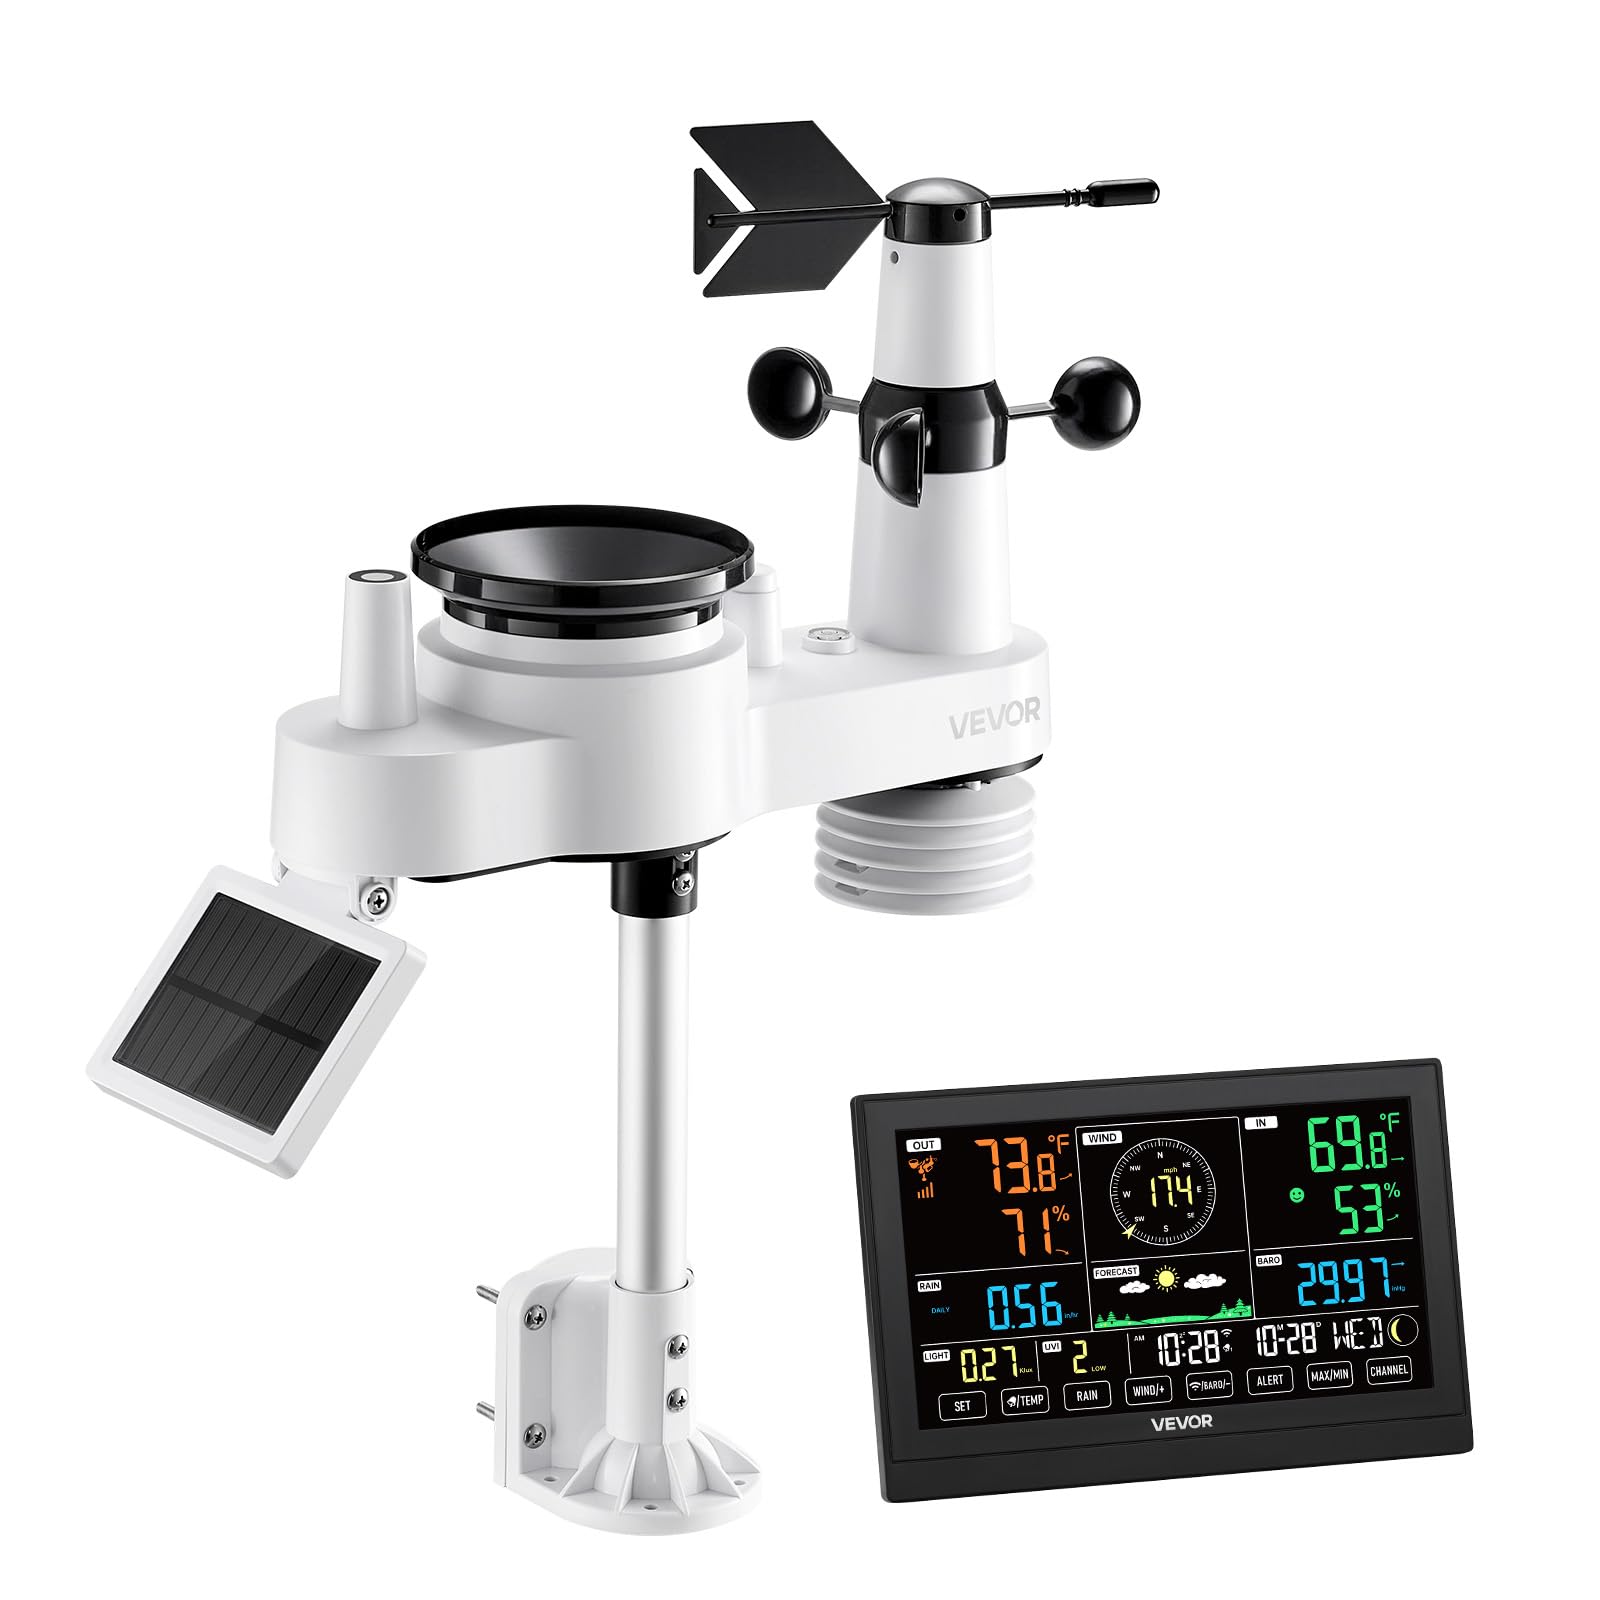
- Indoor Display Unit (190mm VA Display)
- Outdoor 7-in-1 Wireless Sensor (Temperature, Humidity, Rainfall, Wind Speed, Wind Direction, UV, Sunlight)
- Mounting Bracket and Hardware
- Power Adapter for Indoor Unit
- User Manual
2.2 Key Features
- 7-in-1 Outdoor Sensor: Monitors temperature, humidity, precipitation, wind speed, wind direction, sunlight, and UV index.
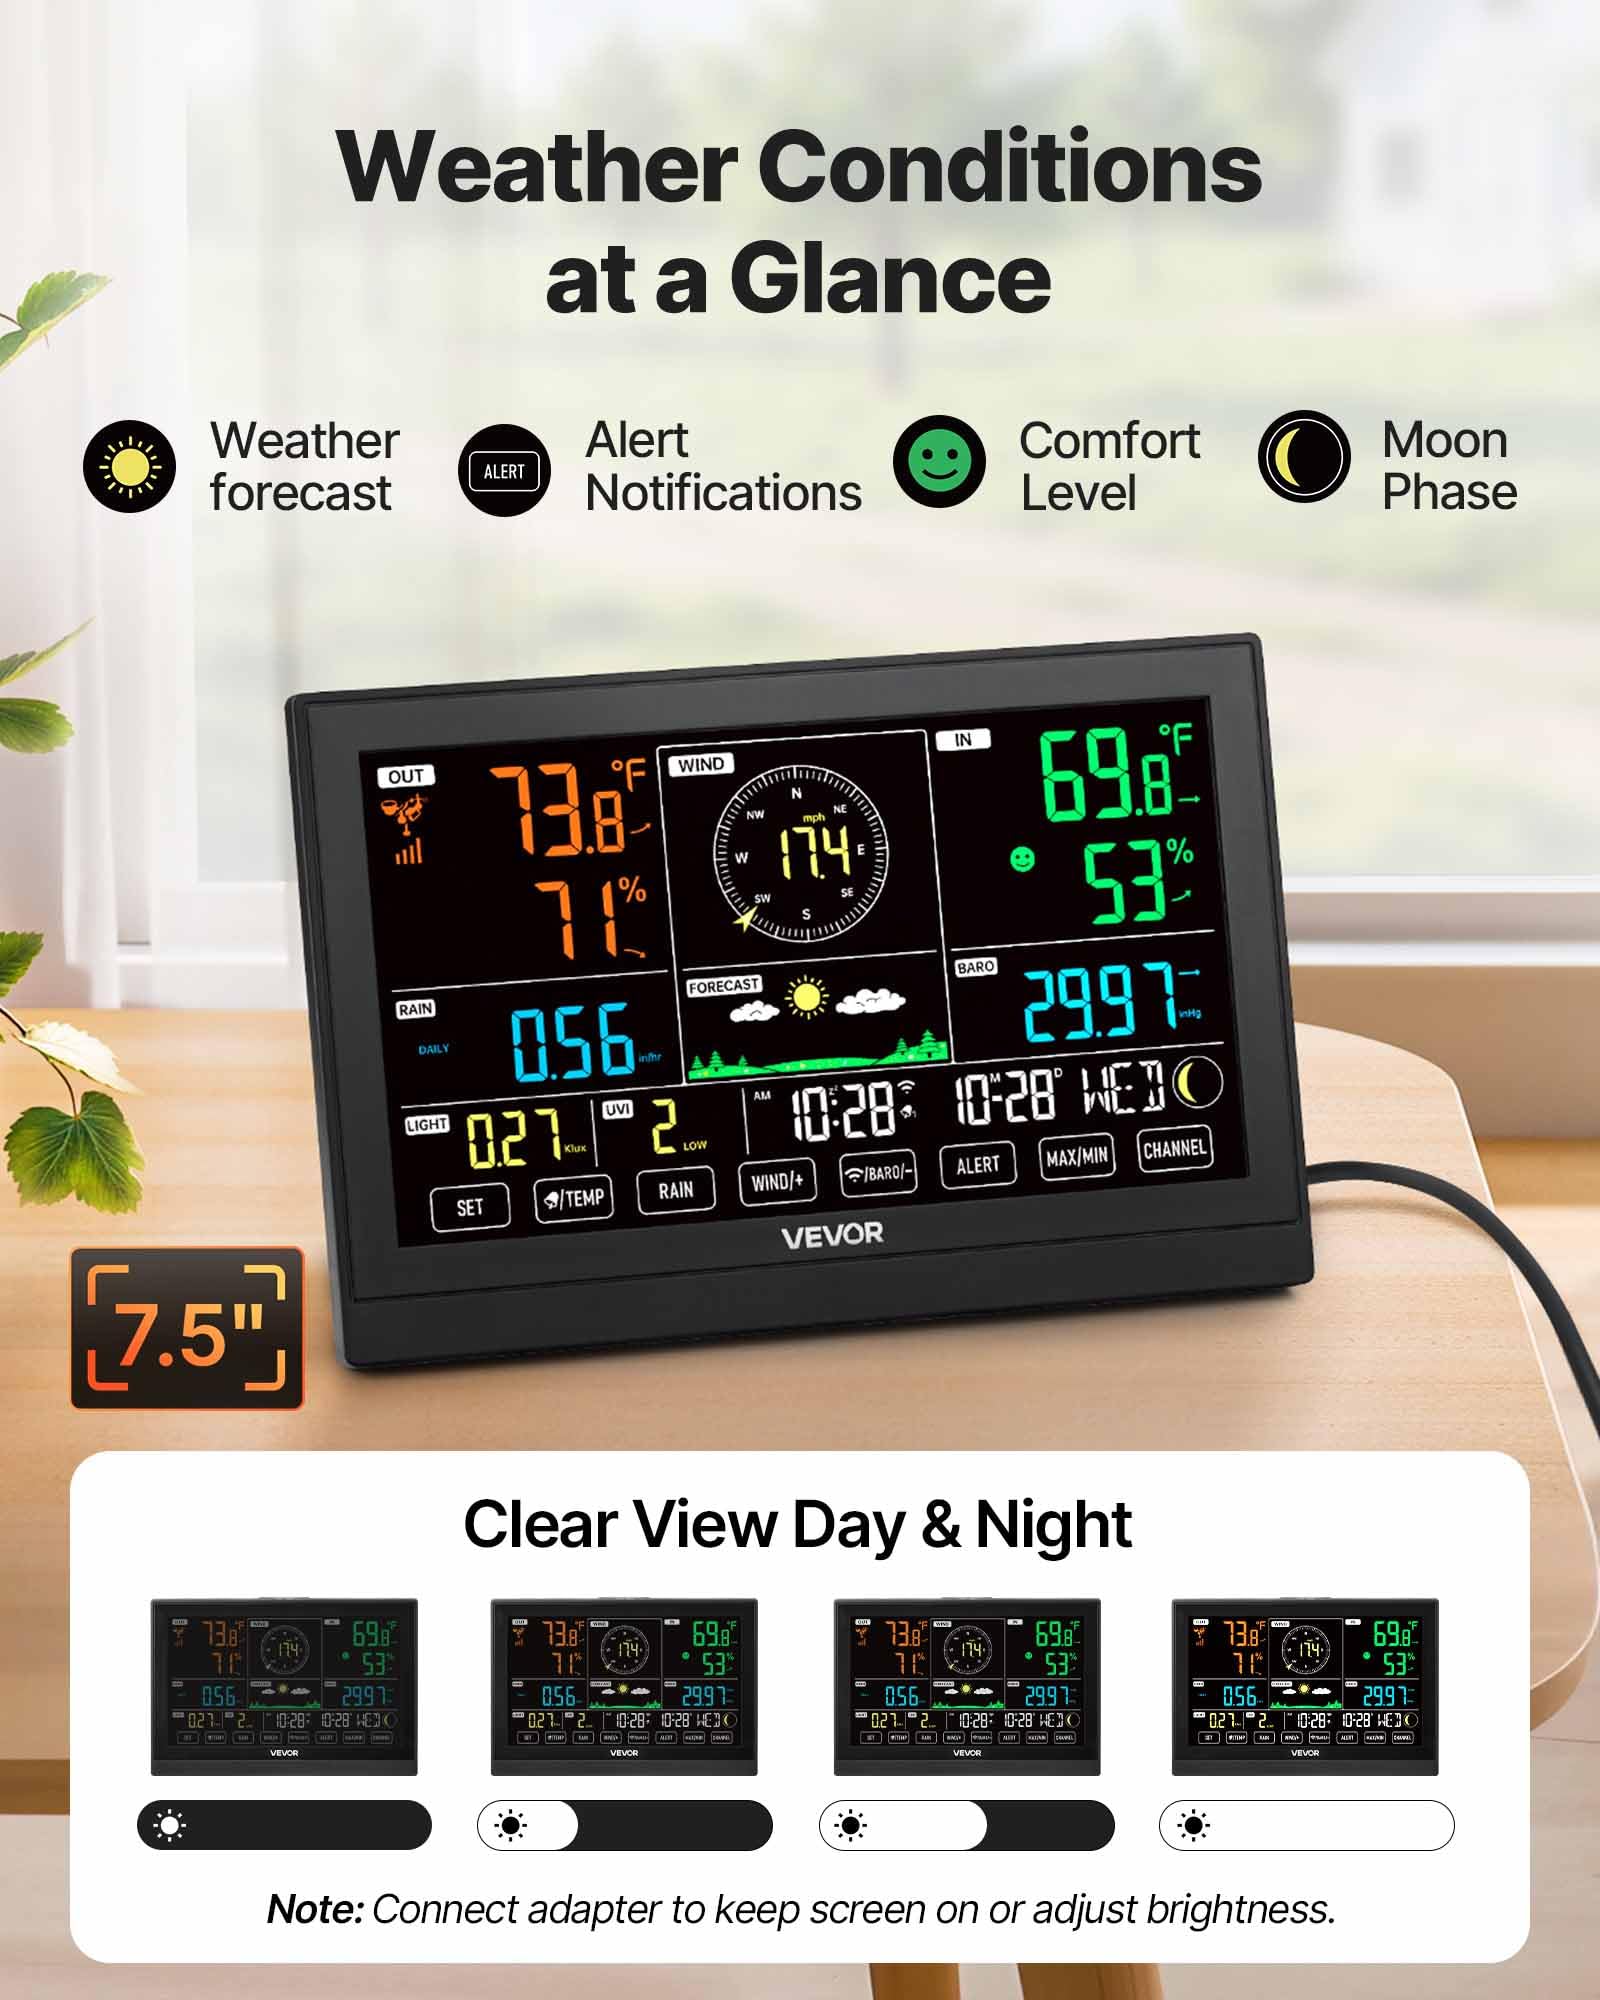
- Large VA Display: A 7.5-inch HD display with 4 levels of brightness for clear visibility of all weather data.
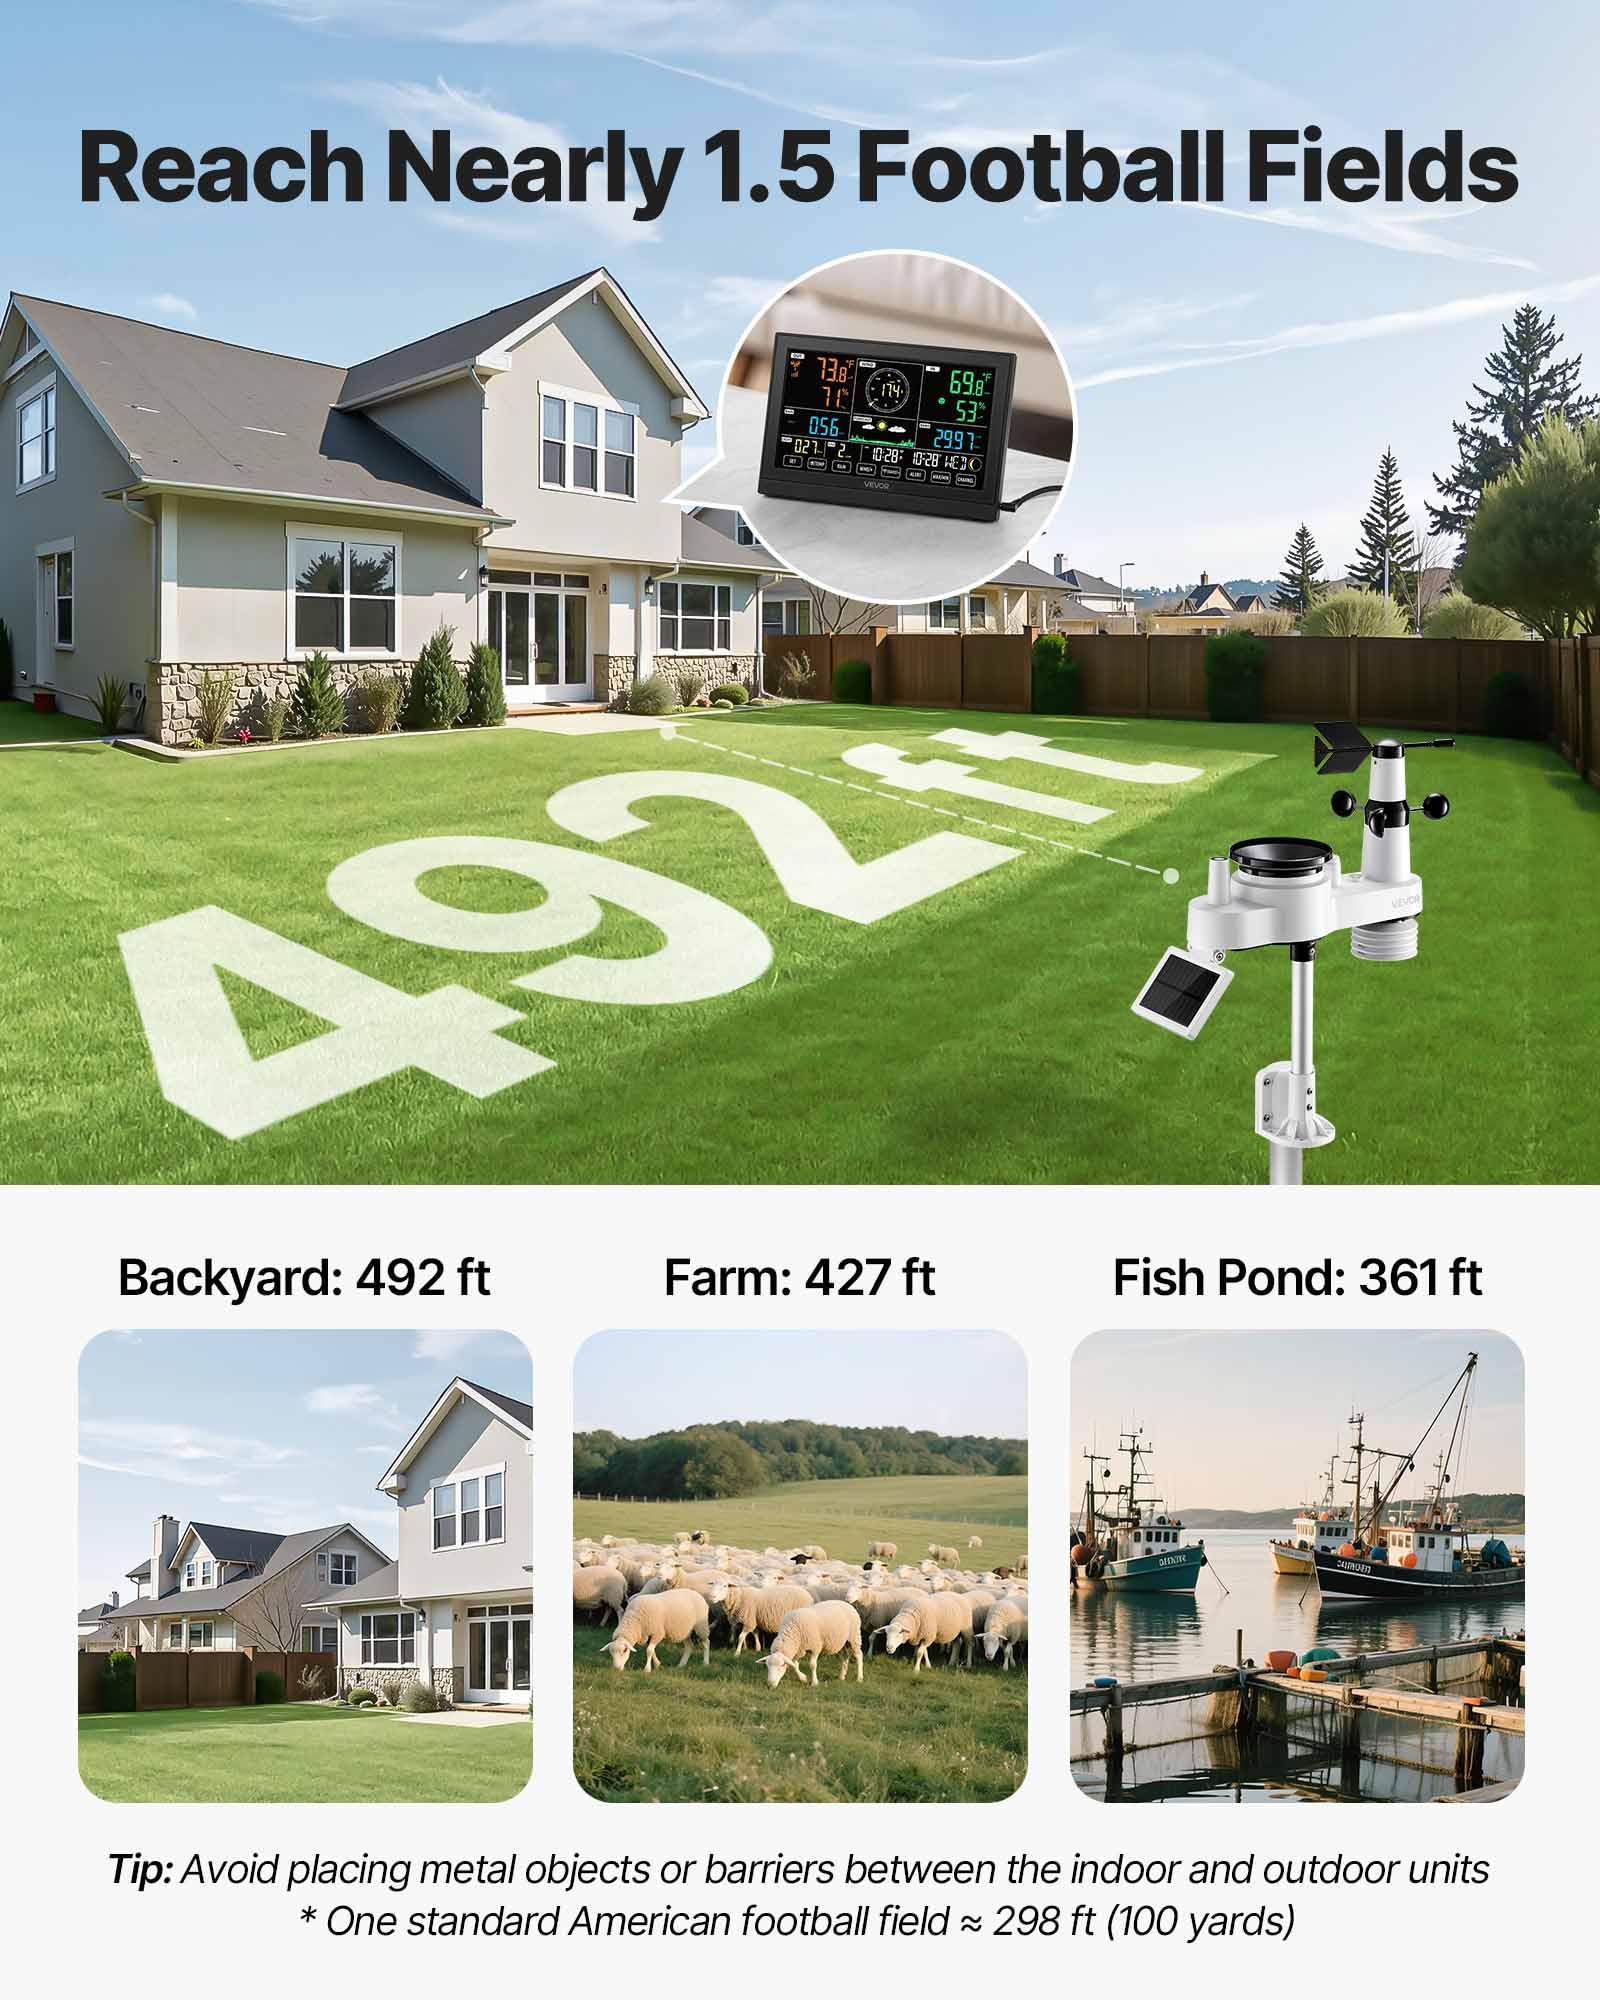
- Long Transmission Distance: The outdoor sensor offers a transmission range of up to 150 meters (492 feet) to the indoor unit.
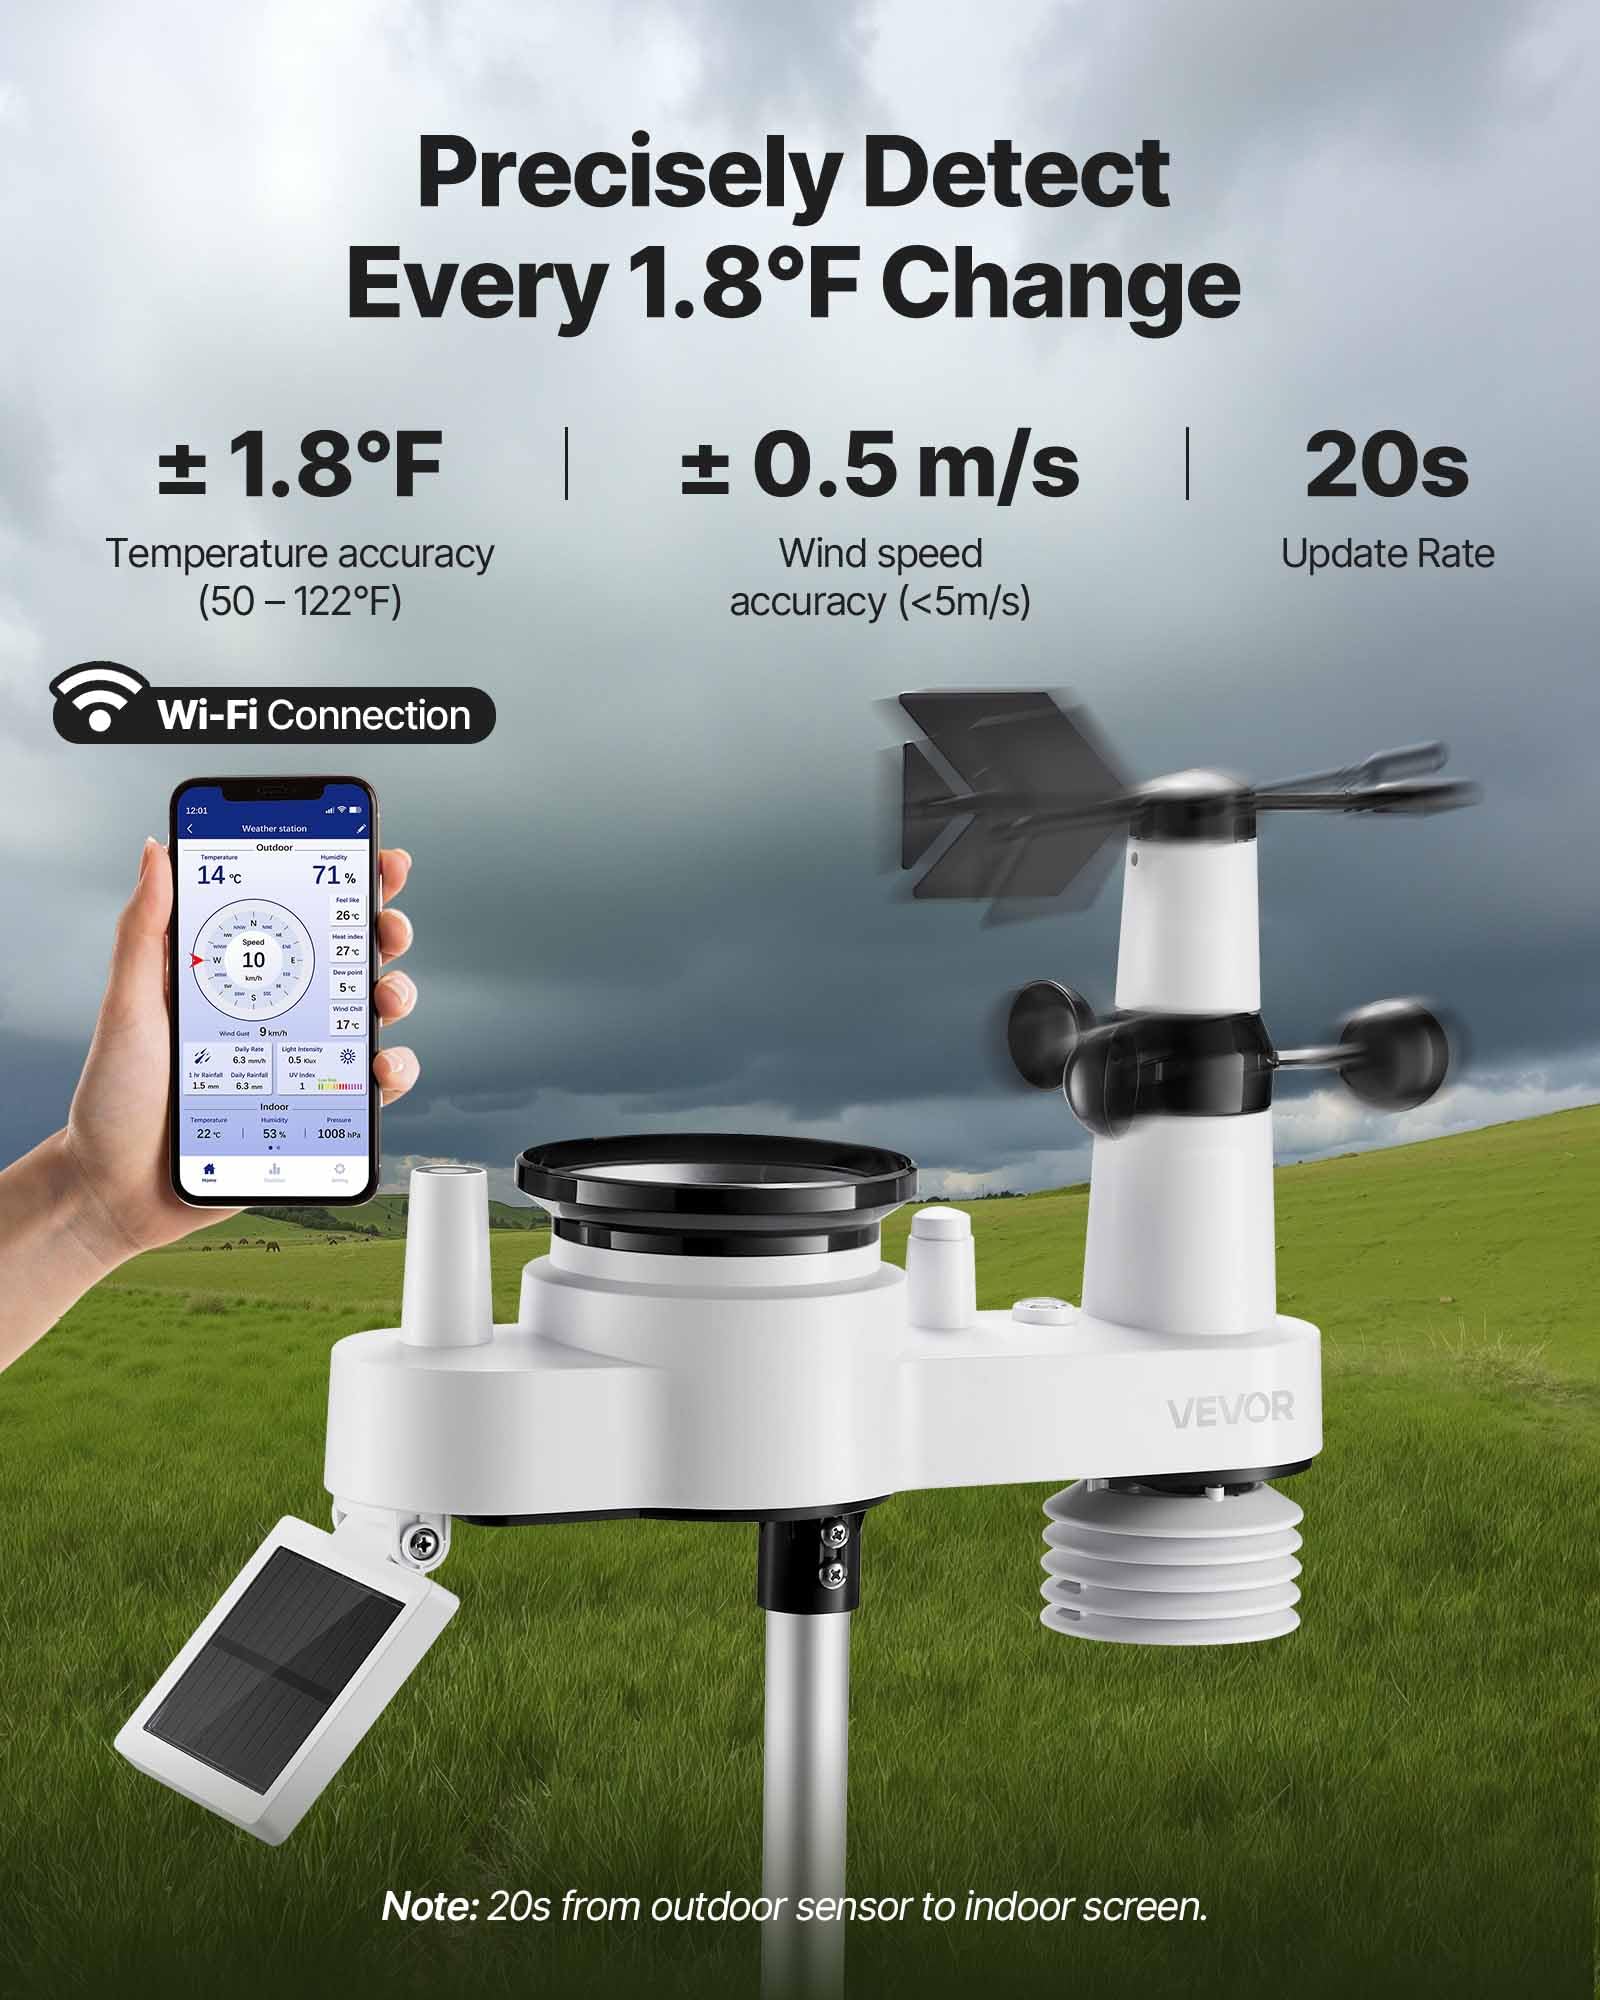
- Smart Wi-Fi and App Control: Connects to the Smart Life app for real-time data viewing, storage, analysis, and sharing.
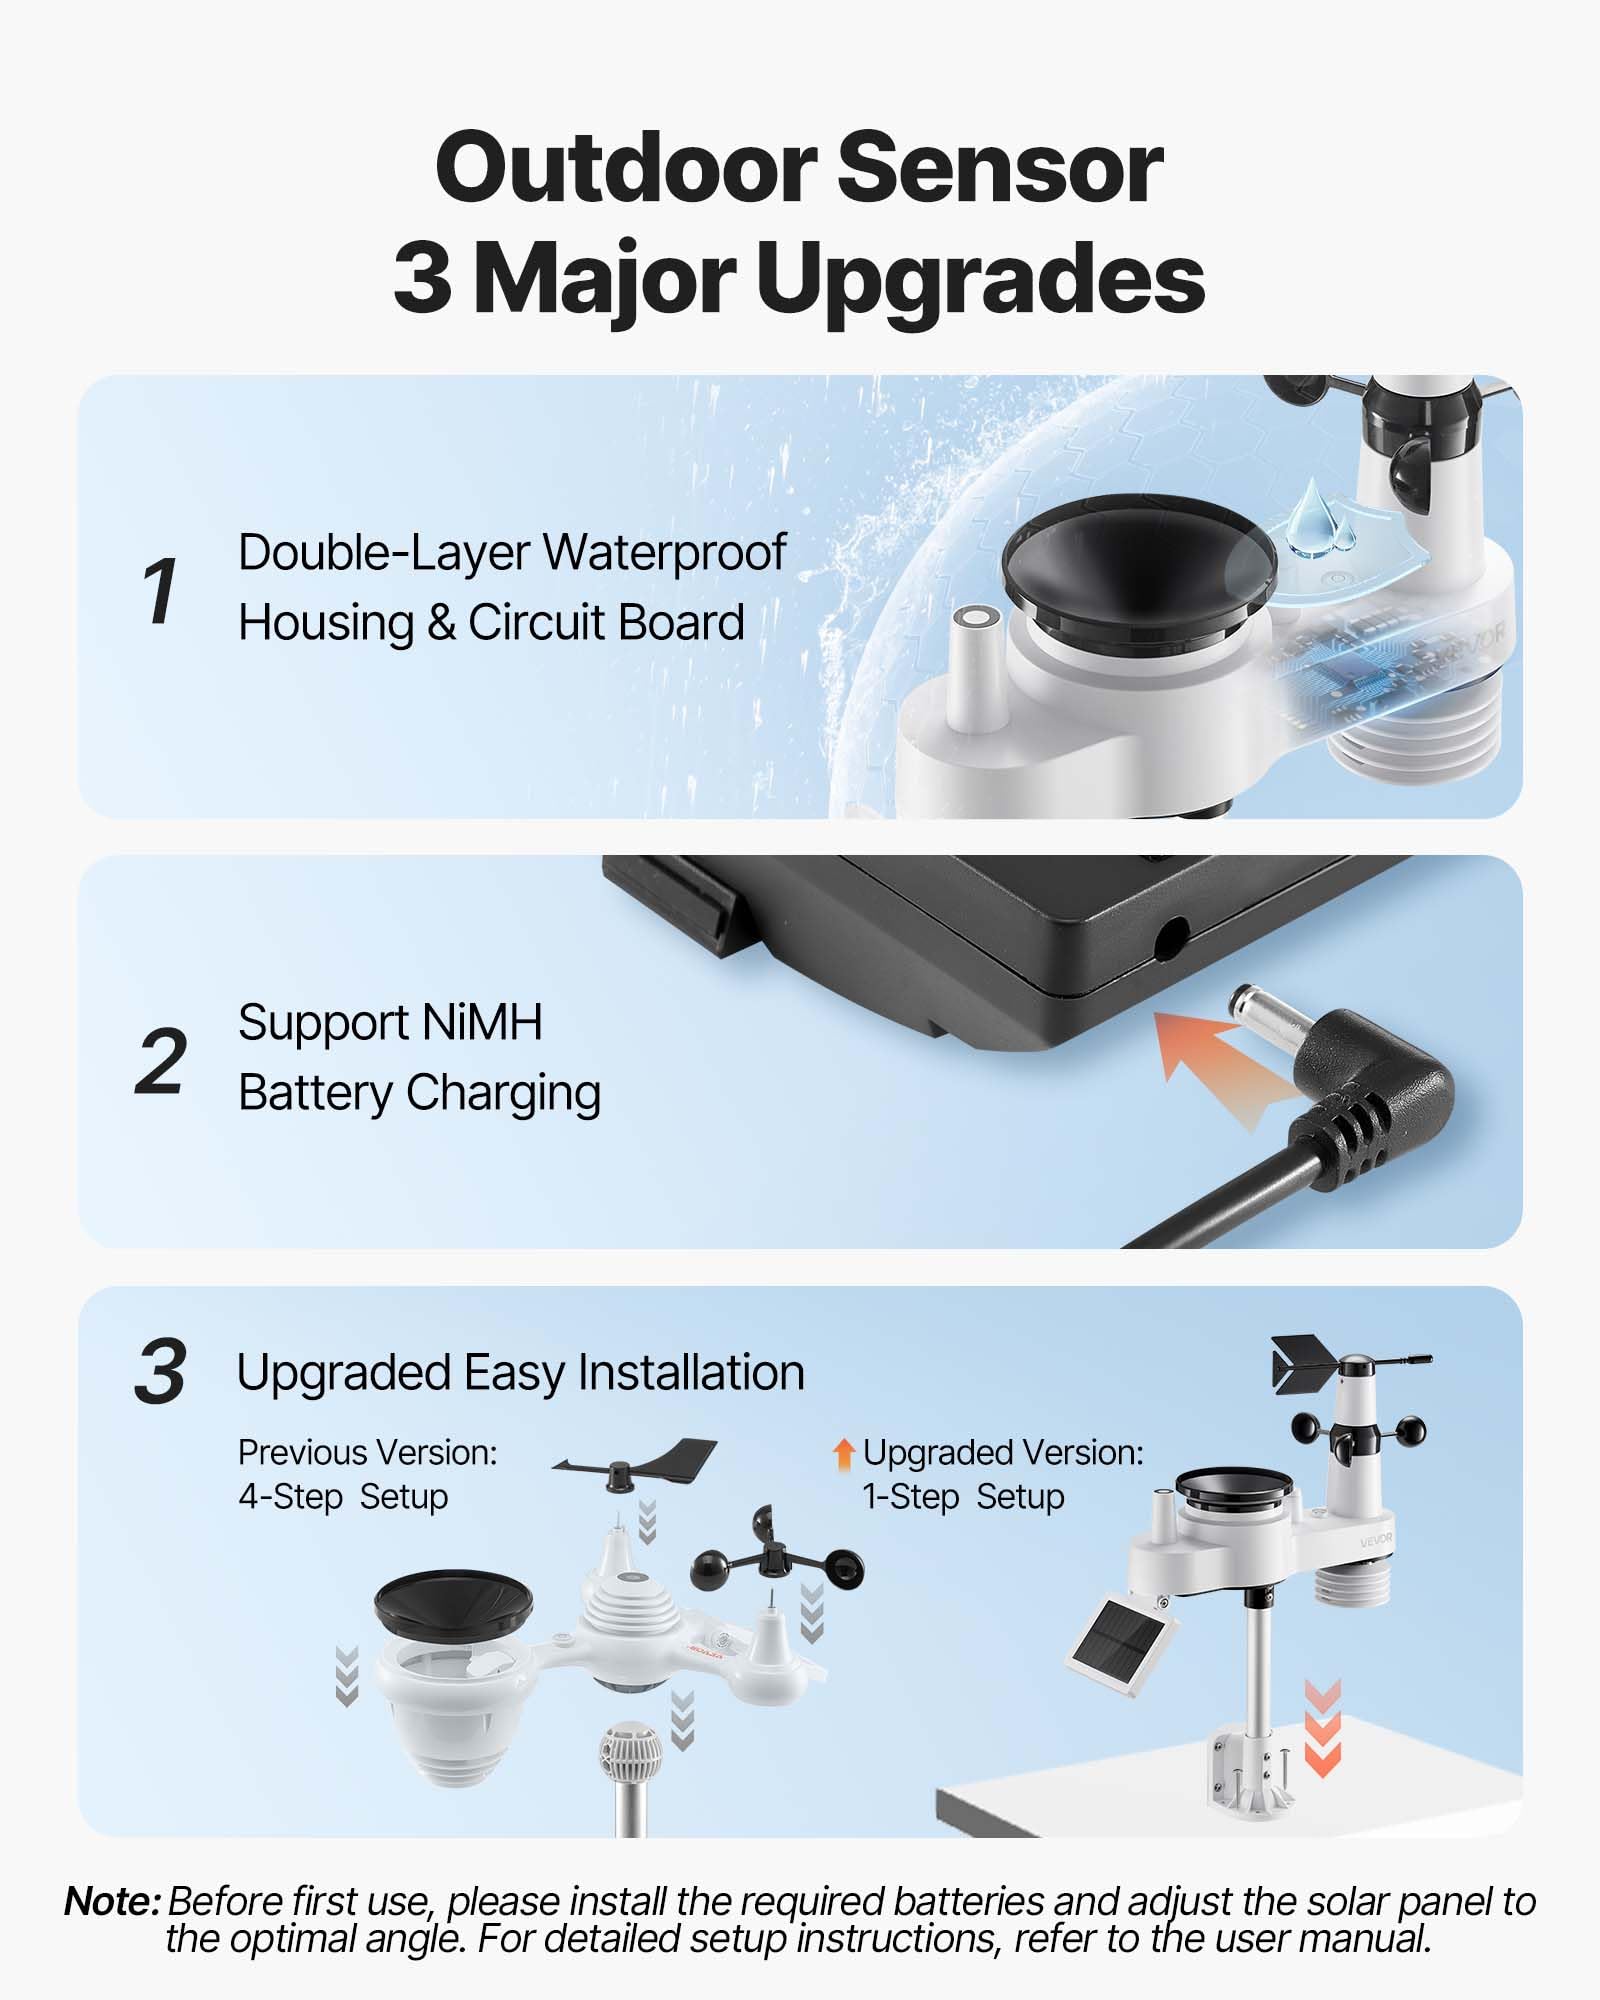
- Solar-Powered Sensor: High-efficiency solar panels power the outdoor sensor and recharge its internal battery.
- Durable Construction: The outdoor sensor features an IPX6 waterproof rating and an aluminum alloy fixed bracket for robust installation.

3. Setup
3.1 Unpacking and Inspection
Carefully unpack all components. Verify that all parts listed in Section 2.1 are present and undamaged. If any items are missing or damaged, contact customer support.
3.2 Outdoor Sensor Installation
- Battery Installation: Install the required batteries into the outdoor sensor. While the sensor is solar-powered, batteries provide backup during periods of low light.
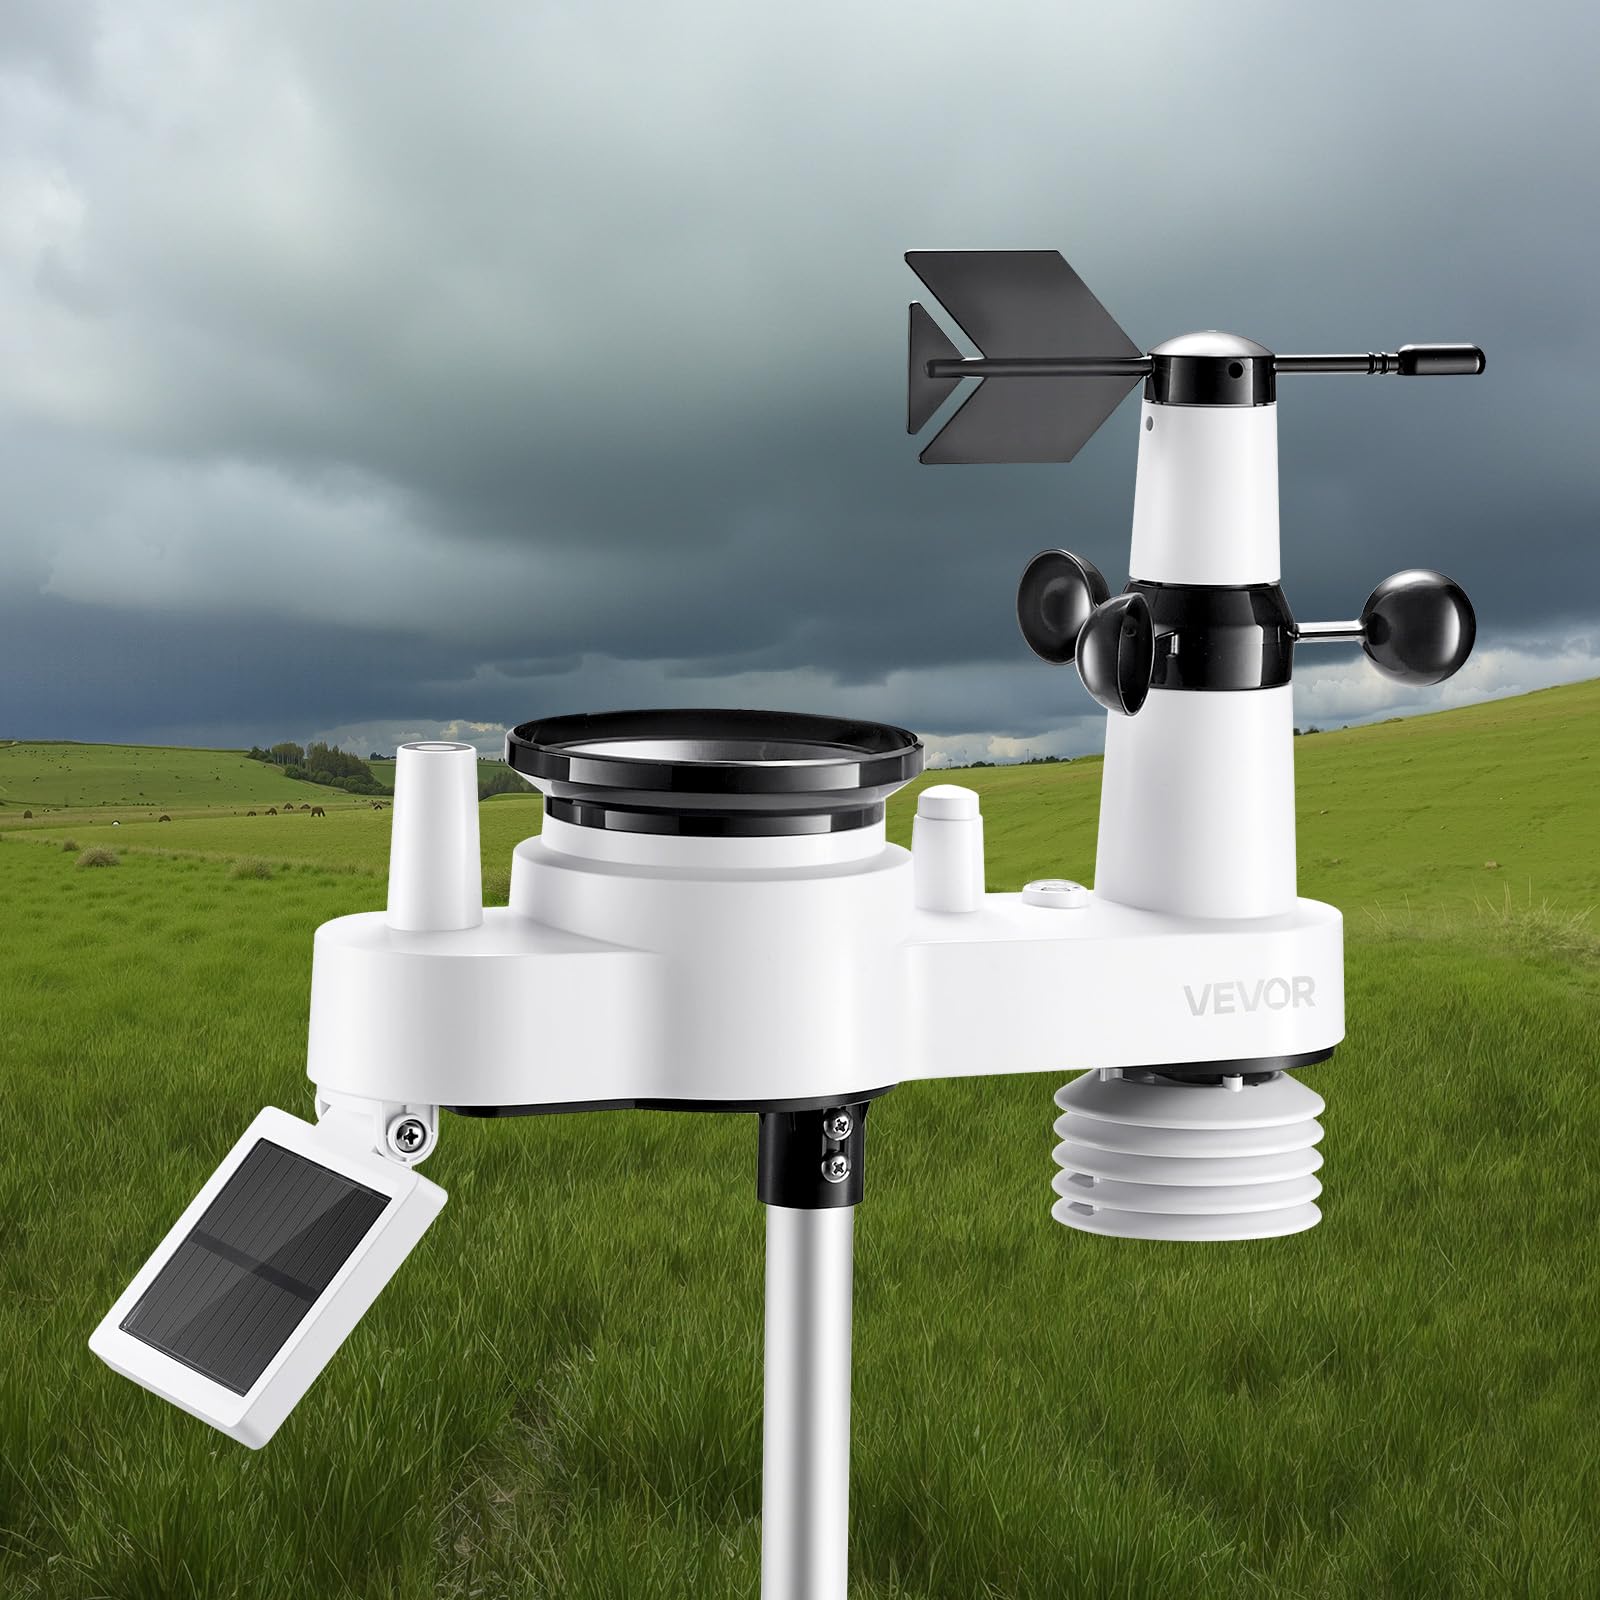
- Mounting Location: Select a location for the outdoor sensor that is clear of obstructions to ensure accurate readings for wind, rain, and sunlight. The sensor has a transmission range of up to 150 meters (492 feet). Avoid placing it near large metal objects, televisions, power lines, or other sources of electromagnetic interference. Ideal locations include rooftops, gardens, or open fields.
- Mounting the Sensor: Use the provided aluminum alloy fixed bracket and hardware to securely mount the sensor. The bracket supports mounting on top, side, or railing. Ensure the solar panel is oriented to receive maximum sunlight for optimal charging.
3.3 Indoor Display Unit Setup
- Power Connection: Connect the indoor display unit to a power outlet using the provided adapter. For continuous screen display, keep the adapter plugged in. The unit may also use backup batteries (not included) to retain settings during power outages.
- Initial Synchronization: Once powered on, the indoor unit will attempt to synchronize with the outdoor sensor. Ensure both units are within range. This process may take a few minutes.
- Wi-Fi Connection and App Setup:
- Download the 'Smart Life' app from your mobile device's app store.
- Register or log in to your Smart Life account.
- Follow the in-app instructions to add your VEVOR Weather Station. This typically involves putting the display unit into Wi-Fi pairing mode and connecting it to your home Wi-Fi network.
- Once connected, the app will display real-time weather data from your station.
4. Operation
4.1 Indoor Display Functions
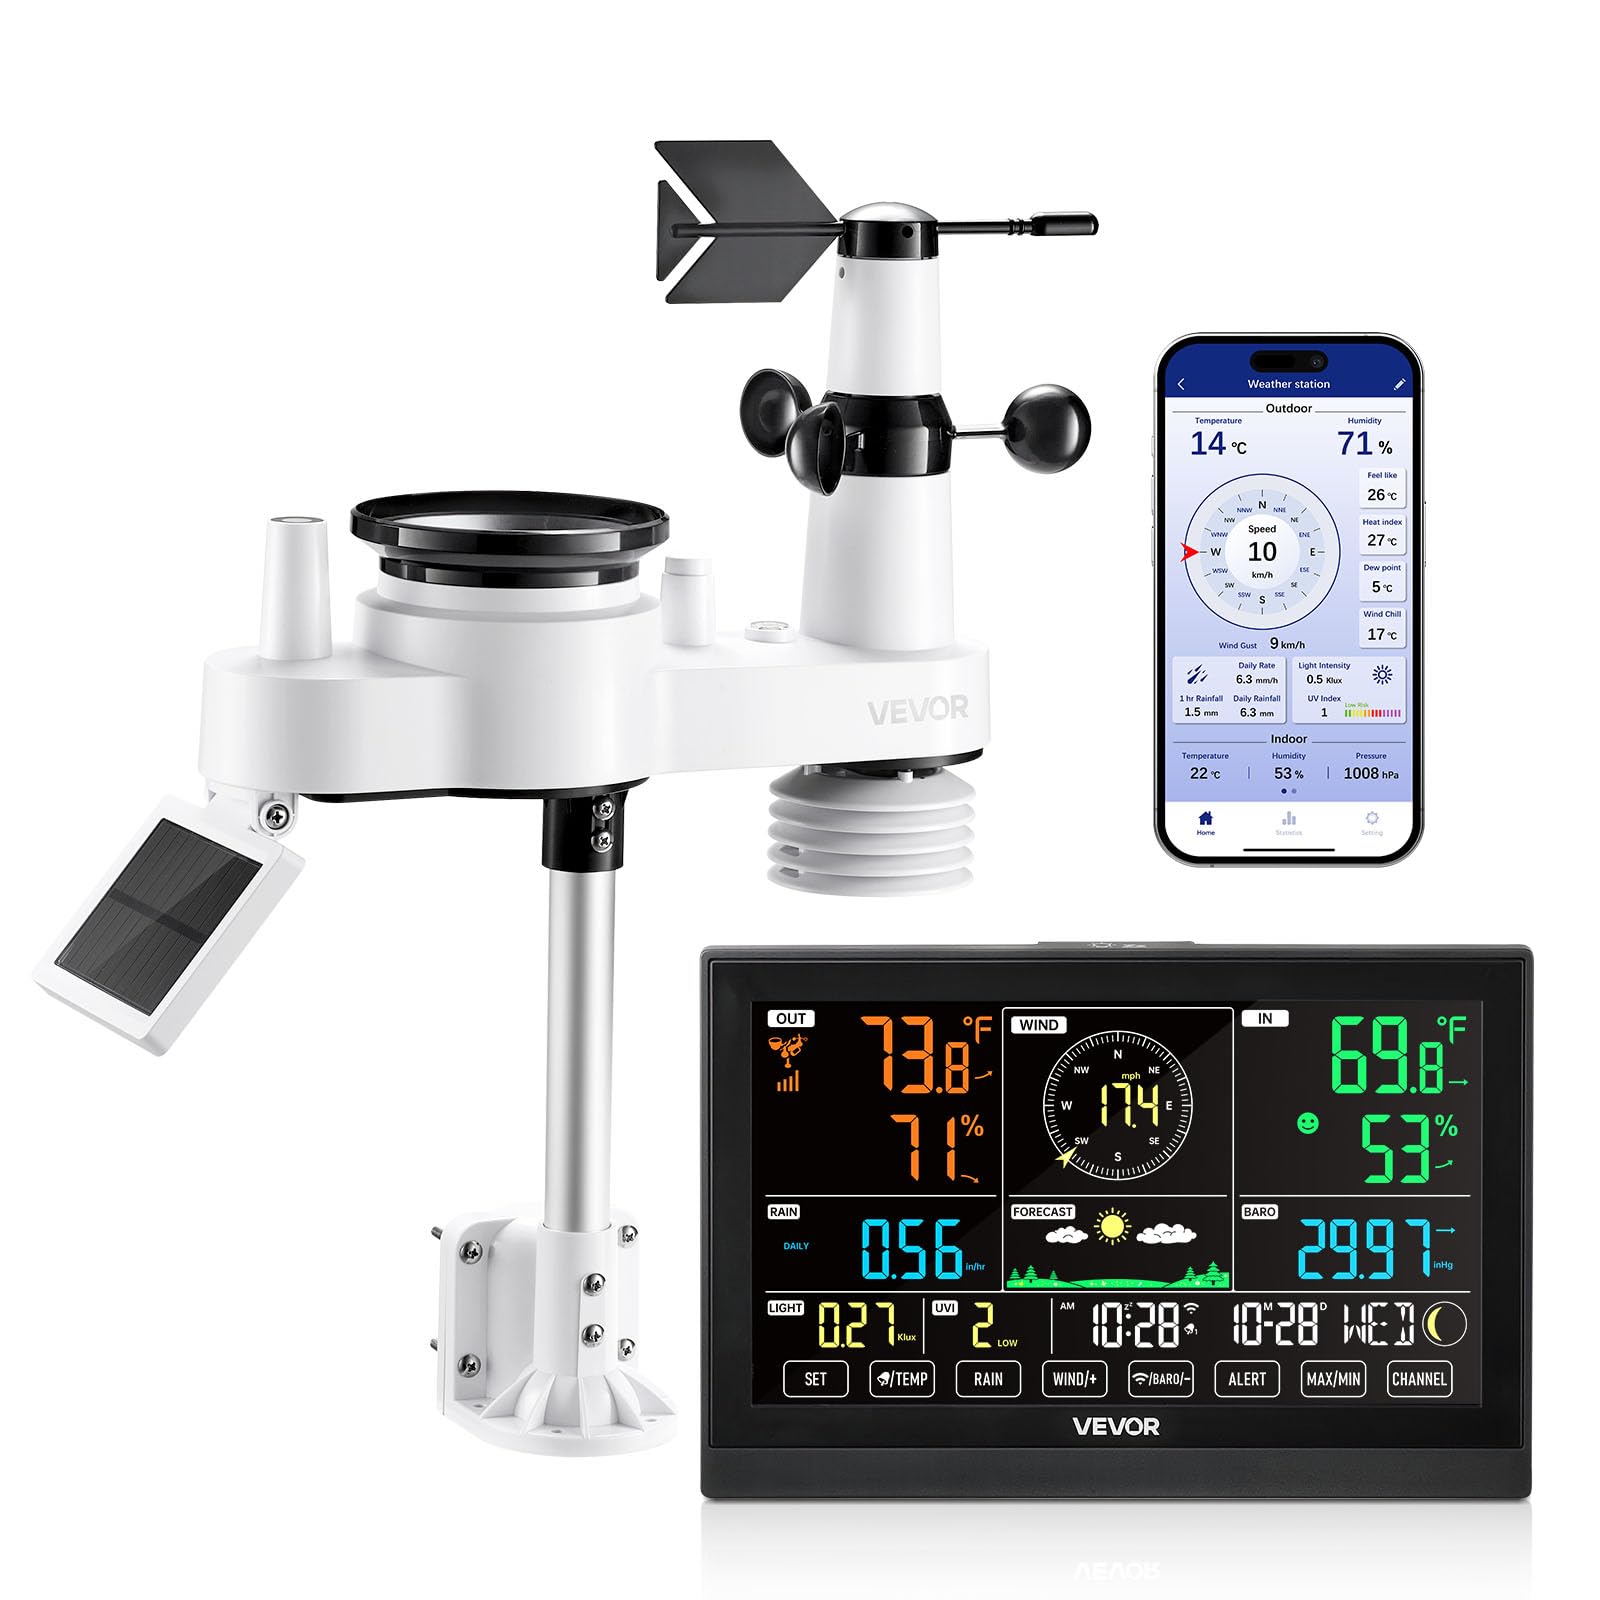
The indoor display unit presents a comprehensive overview of current weather conditions and forecasts. Key information includes:
- Outdoor Temperature and Humidity
- Indoor Temperature and Humidity
- Rainfall Data (hourly, daily, monthly, total)
- Wind Speed and Direction
- UV Index and Sunlight Intensity
- Atmospheric Pressure (relative or absolute)
- Moon Phase
- Weather Forecast for the next 6-12 hours
- Time and Date
The display offers 4 levels of brightness adjustment for comfortable viewing in various lighting conditions.
4.2 Smart Life App Usage
The Smart Life app allows you to:
- View real-time weather data from your station remotely.
- Access historical data for analysis.
- Share weather data with others.
- Set custom alerts and notifications.
4.3 Alerts and Notifications
The weather station can be configured to provide alerts for various conditions, ensuring you are informed of significant weather changes. These include:
- High Temperature Alarm
- Low Temperature Alarm
- High Wind Speed Alarm
- Daily Rainfall Alarm
- Rain Rate Alarm
5. Maintenance
5.1 Cleaning the Outdoor Sensor
Periodically inspect and clean the outdoor sensor to ensure accurate readings. Dust, dirt, or debris can accumulate on the rain collector, wind cups, and solar panel. Use a soft, damp cloth to gently wipe surfaces. Avoid abrasive cleaners or harsh chemicals.
5.2 Battery Check
While the outdoor sensor is solar-powered, it relies on rechargeable batteries for continuous operation during low light conditions. Check the battery status periodically via the indoor display or app. Replace batteries if they no longer hold a charge effectively.
5.3 Solar Panel Orientation
Ensure the solar panel on the outdoor sensor remains oriented to receive maximum direct sunlight throughout the day. Adjust its angle if necessary due to seasonal changes or new obstructions.
6. Troubleshooting
- No Wi-Fi Signal / Connectivity Issues:
- Ensure the indoor display unit is powered on and within range of your Wi-Fi router.
- Verify your Wi-Fi network credentials in the Smart Life app.
- Restart both the display unit and your Wi-Fi router.
- If issues persist, try re-pairing the device with the Smart Life app.
- Outdoor Sensor Not Transmitting Data:
- Check the batteries in the outdoor sensor.
- Ensure the outdoor sensor and indoor display unit are within the 150m transmission range and there are no significant obstructions (e.g., thick walls, large metal structures) between them.
- Restart both units.
- Inaccurate Rain Level Readings:
- Inspect the rain collector for any debris (leaves, dirt, insects) that might be blocking the tipping bucket mechanism.
- Ensure the sensor is level. An unlevel installation can affect rain measurement accuracy.
- Refer to the advanced settings in the display unit or app for any calibration options, if available.
- Display Not Turning On / Blank Screen:
- Ensure the power adapter is securely connected to both the display unit and a working power outlet.
- Check if the power outlet is functional.
- If using backup batteries, ensure they are correctly installed and charged.
7. Specifications
| Feature | Specification |
|---|---|
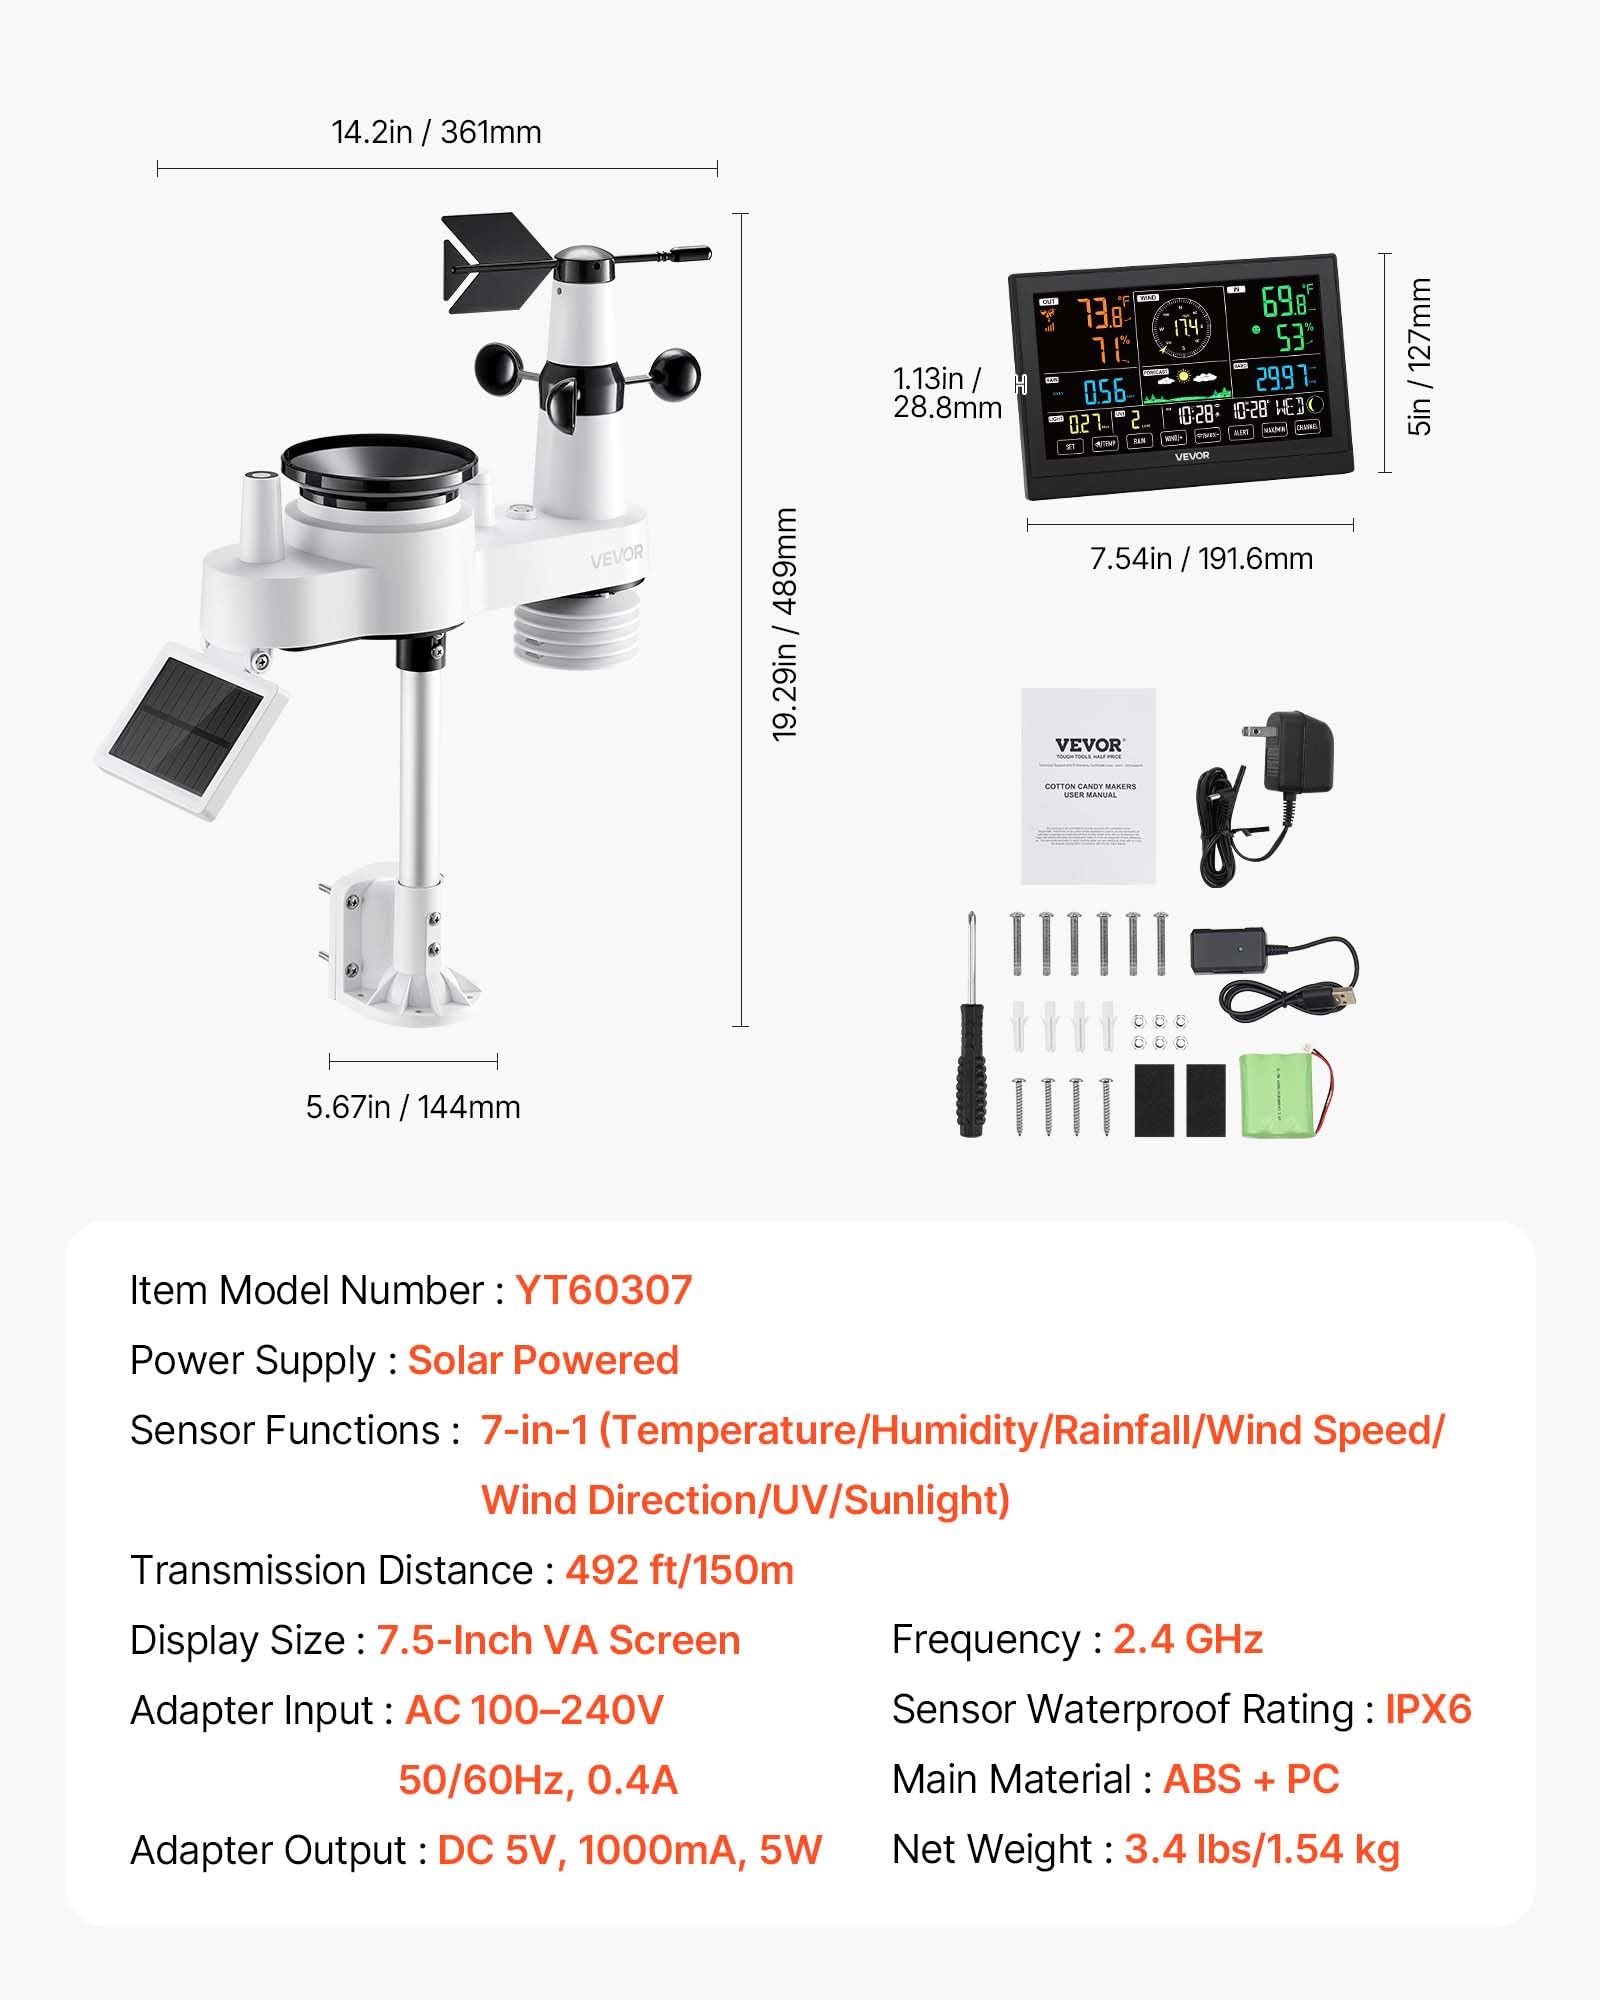
| Model Number | YT60307 |
| Sensor Functions | 7-in-1 (Temperature, Humidity, Rainfall, Wind Speed, Wind Direction, UV, Sunlight) |
| Power Supply (Outdoor Sensor) | Solar Powered |
| Transmission Distance | Up to 150m (492 ft) |
| Display Size | 7.5-inch VA Screen |
| Connectivity Technology | Wi-Fi (2.4 GHz) |
| Sensor Waterproof Rating | IPX6 |
| Main Material | ABS + PC |
| Indoor Unit Adapter Input | AC 100-240V, 50/60Hz, 0.4A |
| Indoor Unit Adapter Output | DC 5V, 1000mA, 5W |
| Product Weight | 1.8 kg (3.97 lbs) |
| Package Dimensions | 38.99 x 38.99 x 16.99 cm |
8. Warranty and Support
For warranty information, technical support, or service inquiries, please refer to the warranty card included with your product or visit the official VEVOR website. You can also contact VEVOR customer service directly through their official channels. For additional resources, visit the VEVOR Store on Amazon.