
1. Introduction
Thank you for choosing the YIYEIE 46-Pc Digital Torque Screwdriver. This precision instrument is designed to provide accurate torque application for various tasks, including bike repair, scope mounting, and electronics assembly. Featuring a digital display, multiple unit conversions, and audible/visual alerts, this tool ensures fasteners are tightened to their exact specifications, preventing damage from over-tightening or loosening from under-tightening.

Image 1: YIYEIE Digital Torque Screwdriver and included accessories.
2. Safety Information
Please read and understand all safety warnings and instructions before using this product. Failure to follow these instructions may result in electric shock, fire, and/or serious injury.
- Do not exceed 110% of the maximum torque capacity (70.8 in-lbs / 8 N·m). Exceeding this limit can damage the tool and lead to inaccurate readings.
- Avoid dropping the tool. Impact can affect its accuracy and functionality.
- Keep the tool away from water and excessive heat. This is an electronic device and can be damaged by moisture or high temperatures.
- Clean the tool with a dry cloth only. Do not use alcohol or other solvents, as they may damage the display or housing.
- Store the tool in its protective case when not in use to prevent damage.
- This tool is not insulated. Do not use it on live electrical circuits.
3. Package Contents
Verify that all items are present in your package:
- 1 x Digital Torque Screwdriver
- 2 x AAA Batteries
- 20 x Standard Screwdriver Bits
- 15 x S2 Steel Gunsmithing Bits
- 5 x Chrome Vanadium Sockets (6-Point)
- 2 x Extension Bars
- 1 x 1/4" to 3/8" Adapter
- 1 x Bit Adapter
- 1 x Storage Case
- 1 x Product Manual (this document)
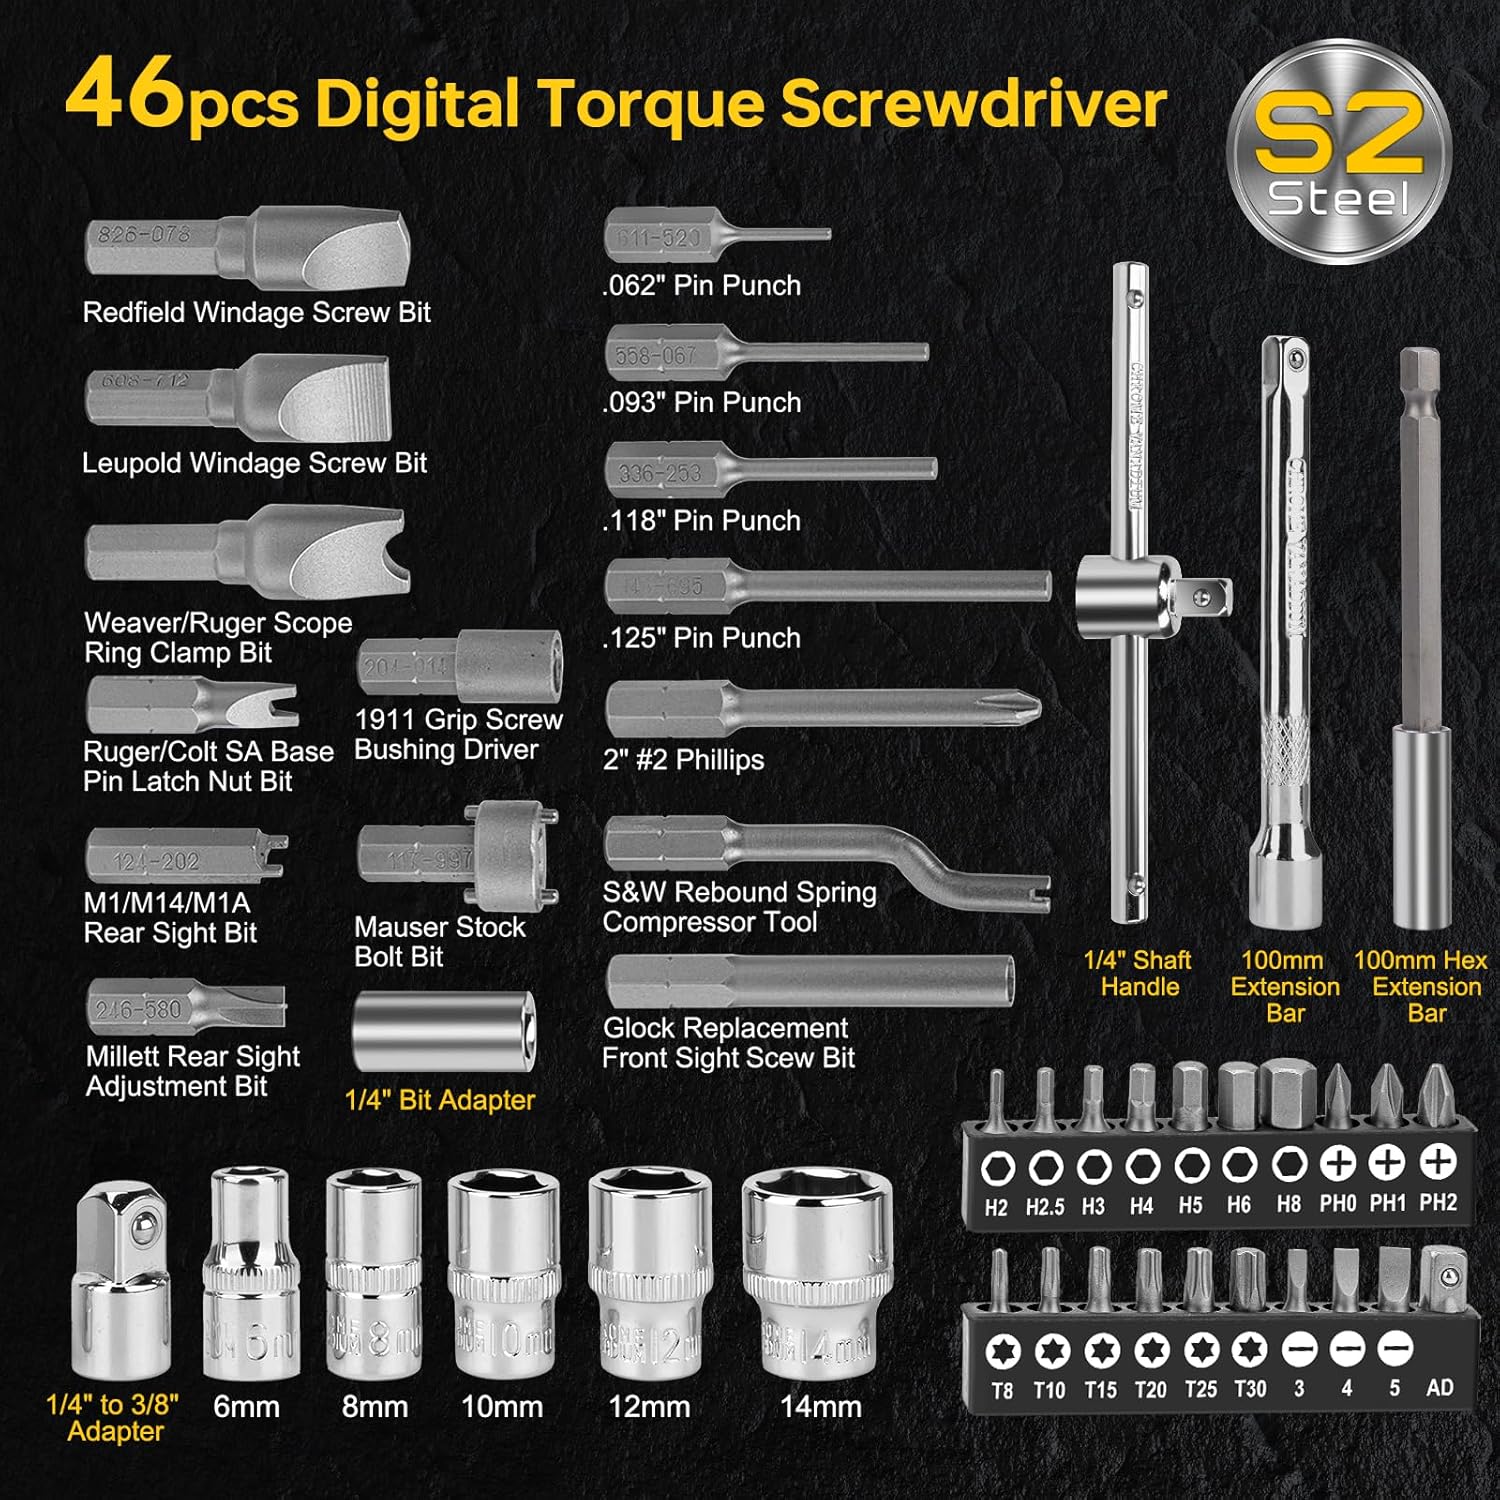
Image 2: All components included in the 46-piece kit.
4. Setup
4.1 Battery Installation
- Unscrew the battery cap at the bottom of the screwdriver handle.
- Insert two AAA batteries, ensuring correct polarity (+/-).
- Securely screw the battery cap back on. Ensure a firm connection to prevent power interruptions.
4.2 Attaching Bits and Sockets
The screwdriver features a magnetic 1/4-inch quick-change chuck.
- Select the appropriate screwdriver bit or socket for your task.
- Insert the bit or socket into the 1/4-inch hex chuck until it is securely held by the magnet.
- To remove, simply pull the bit or socket out of the chuck.

Image 3: Magnetic Quick Change Chuck in use.
5. Operating Instructions
5.1 Power On/Off
- Press the 'C' button to power on the device.
- The device will automatically shut down after 3 minutes of inactivity to conserve battery life.
5.2 Unit Selection
Press the 'U' button to cycle through the available torque units:
- N·m (Newton-meters)
- ft-lb (Foot-pounds)
- in-lb (Inch-pounds)
- kg-cm (Kilogram-centimeters)
- kg-m (Kilogram-meters)
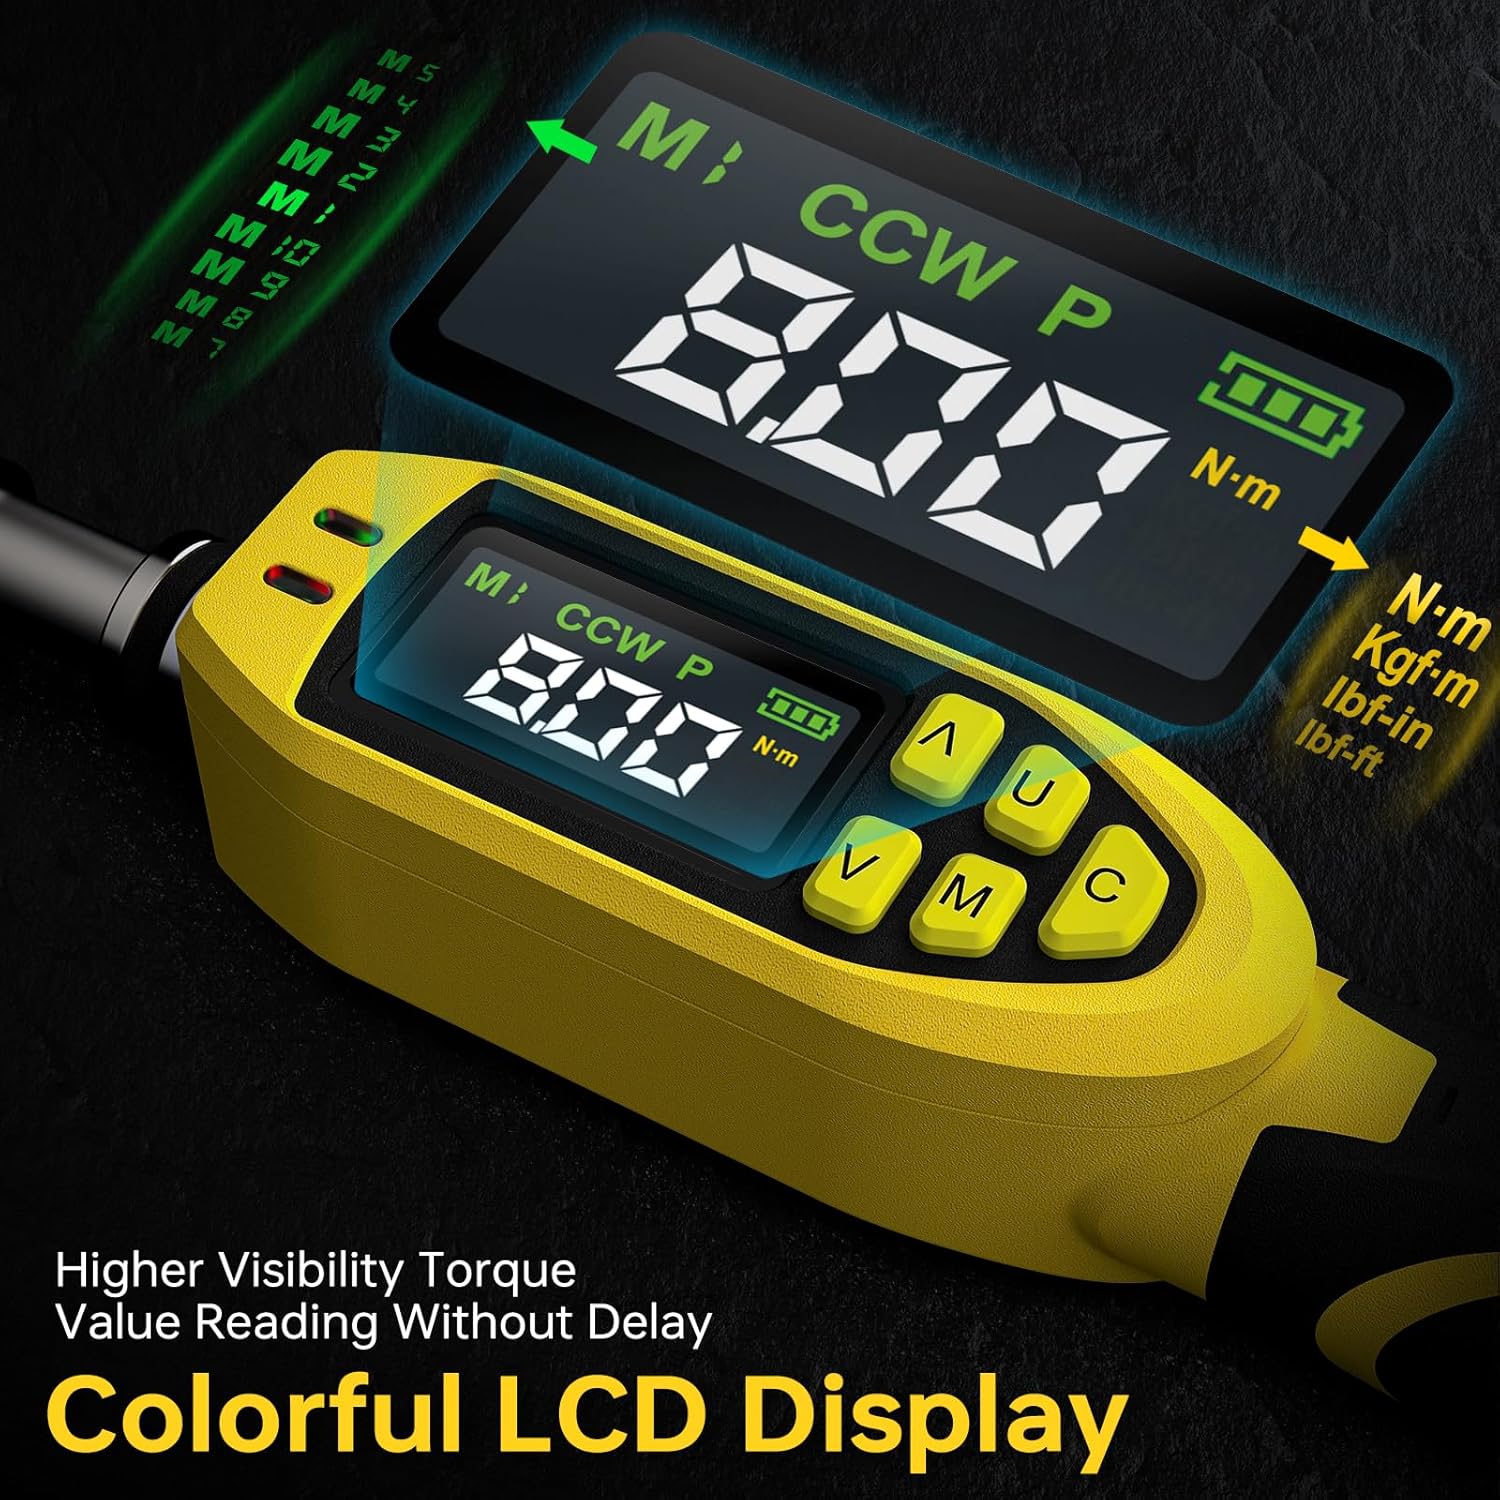
Image 4: Colorful LCD display for clear visibility and unit selection.
5.3 Mode Selection (Peak / Track)
Press the 'M' button to switch between measurement modes:
- Track Mode (T): Displays torque values in real-time as force is applied.
- Peak Mode (P): Records and displays the maximum torque value achieved during the tightening process.

Image 5: Track and Peak measurement modes.
5.4 Setting Target Torque and Presets
The screwdriver allows you to set a target torque value and store up to 10 preset values for quick recall.
- In either Track or Peak mode, press the 'M' button until the preset number (e.g., M1, M2) appears.
- Use the 'Up' (▲) and 'Down' (▼) buttons to adjust the target torque value.
- To save a preset, press and hold the 'M' button until the display flashes, indicating the value is saved.
- To recall a preset, cycle through the preset numbers using the 'M' button.
5.5 Torque Application and Alerts
As you apply torque, the digital display will show the real-time or peak value. The tool provides progressive alerts:
- Green LED: Illuminates when 80% of the target torque is reached.
- Red LED: Illuminates when 90% of the target torque is reached.
- Both LEDs ON with Buzzer: Activates when 100% of the target torque is reached. Stop applying force immediately.

Image 6: Visual and audible alerts for precise torque control.
Video 1: Demonstration of LED and Buzzer Alerts on the YIYEIE Digital Torque Screwdriver.
5.6 General Applications
This digital torque screwdriver is suitable for a wide range of applications requiring precise torque, including:
- Bike component assembly (e.g., carbon fiber parts, brake levers).
- Scope mounting and gunsmithing (e.g., scope rings, action screws).
- Electronics assembly and repair.
- Automotive light-duty fastening.
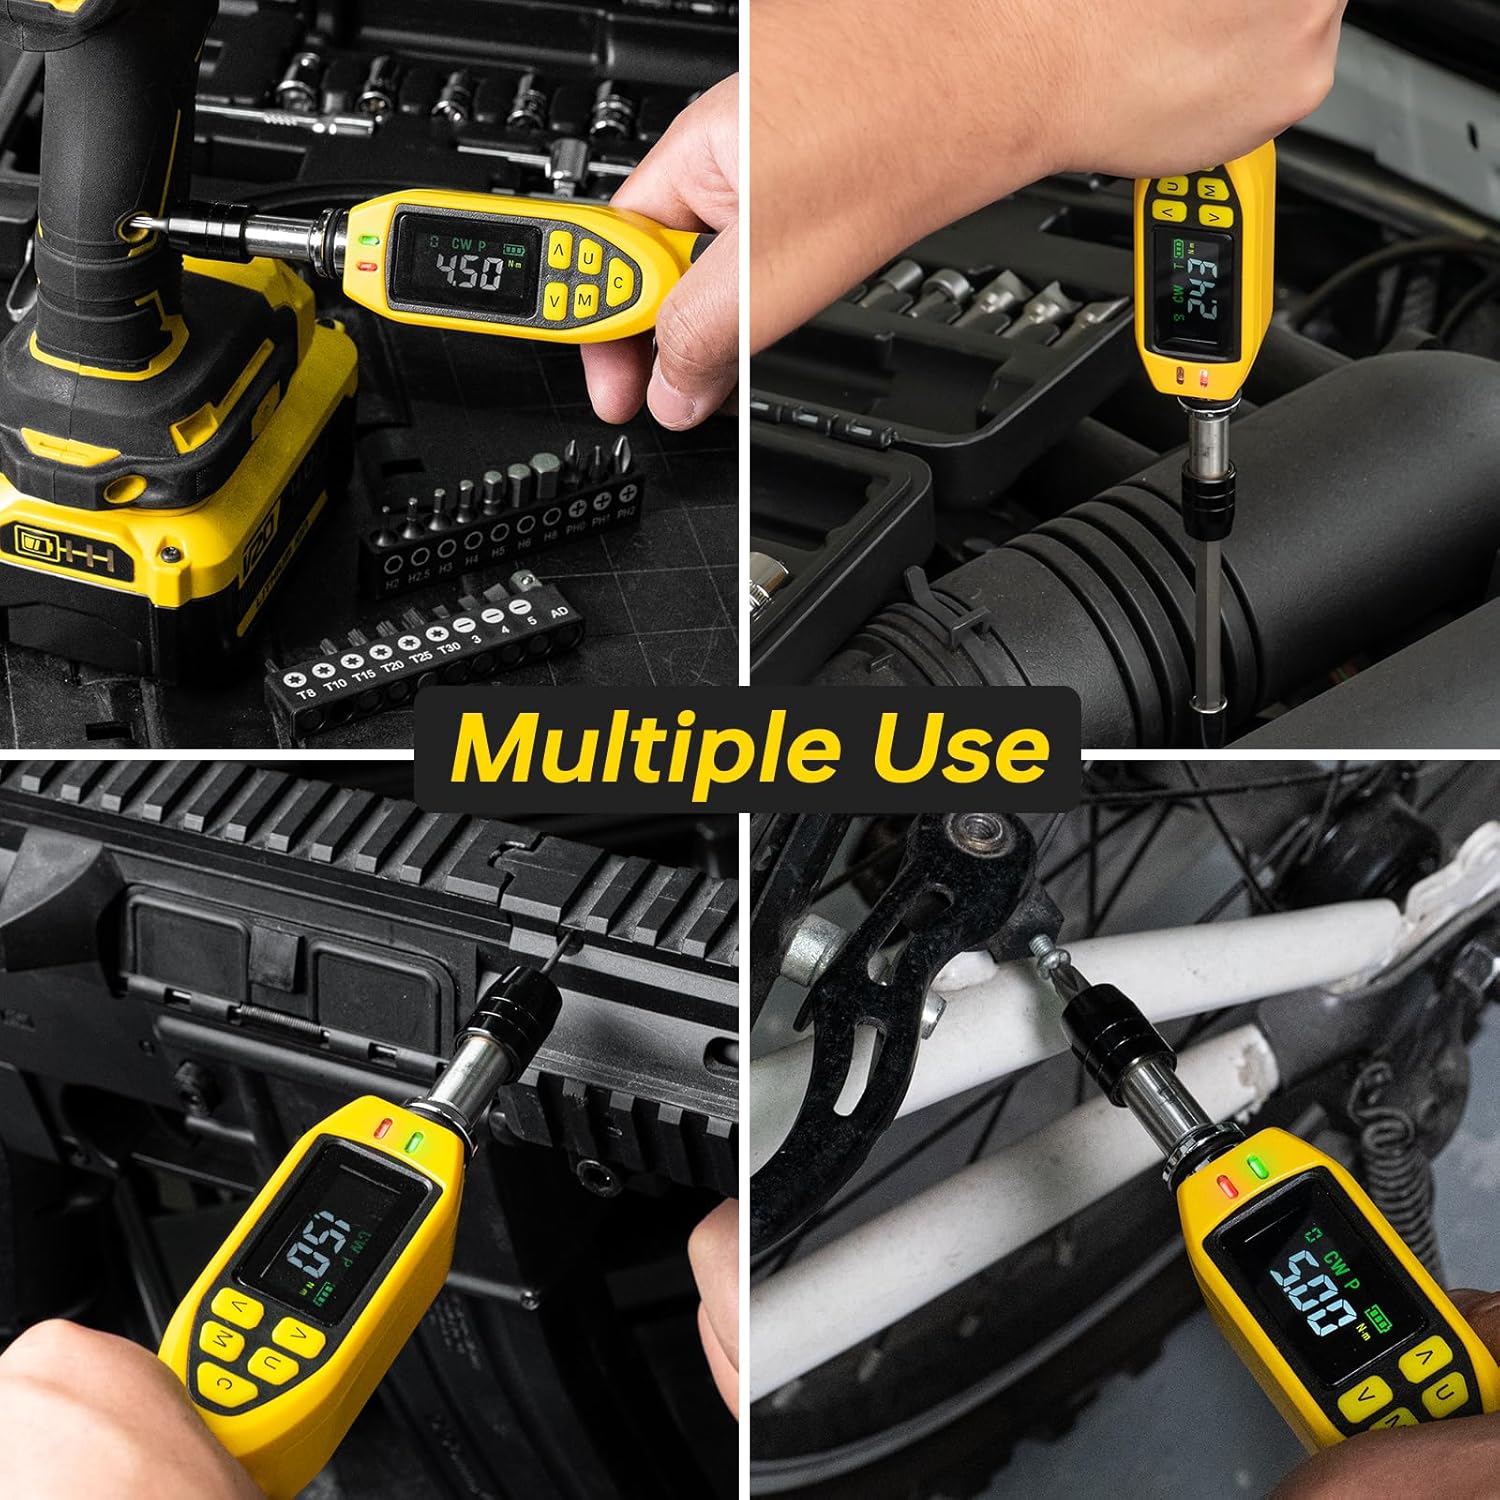
Image 7: Examples of multiple uses for the digital torque screwdriver.
6. Maintenance
6.1 Cleaning and Storage
- Wipe the tool clean with a dry, soft cloth after each use. Do not use abrasive cleaners or solvents.
- Store the screwdriver and its accessories in the provided storage case in a dry, cool place, away from direct sunlight and extreme temperatures.
- Remove batteries if the tool will not be used for an extended period to prevent leakage.
6.2 Calibration
The YIYEIE Digital Torque Screwdriver is factory calibrated and delivers ±1% certified accuracy with an ASME & DIN-ISO traceable certificate. For optimal performance, periodic re-calibration by a qualified service center is recommended, especially after significant impacts or prolonged heavy use.
7. Troubleshooting
| Problem | Possible Cause | Solution |
|---|---|---|
| Tool does not power on or powers off unexpectedly. | Low or dead batteries; improper battery installation; loose battery cap connection. | Replace batteries with fresh AAA batteries. Ensure batteries are inserted with correct polarity. Tighten the battery cap securely to ensure proper contact. |
| Inaccurate torque readings. | Incorrect unit selected; bit/socket not fully seated; tool used beyond its specified range; tool requires re-calibration. | Verify the correct torque unit is selected. Ensure the bit or socket is fully and securely seated in the chuck. Do not exceed 110% of the maximum torque. Consider professional re-calibration if issues persist. |
| LEDs or buzzer alerts not functioning. | Target torque not set; low battery; internal malfunction. | Ensure a target torque value is set. Check battery level and replace if low. If alerts still fail, contact customer support. |
| Bits/sockets fall out of chuck. | Bit not fully inserted; magnetic chuck worn. | Ensure bits are pushed firmly into the magnetic chuck. If the magnetic hold weakens significantly, contact customer support. |
8. Specifications
| Feature | Detail |
|---|---|
| Model Number | Y0083 |
| Torque Range | 3.5-70.8 in-lbs (0.4-8 N·m) |
| Accuracy | ±1% CW, ±1% CCW |
| Chuck Size | 1/4 Inch Hex |
| Measurement Units | N·m, ft-lb, in-lb, kg-cm, kg-m |
| Measurement Modes | Peak, Track |
| Alerts | Buzzer & LED (80% Green, 90% Red, 100% Both + Buzzer) |
| Power Source | 2 x AAA Batteries |
| Auto Shut-off | 3 minutes of inactivity |
| Material | Chrome Vanadium Steel (bits/sockets), Impact-resistant housing |
9. Warranty and Support
YIYEIE products are manufactured to high-quality standards. For warranty information, technical support, or service inquiries, please refer to the contact details provided with your purchase documentation or visit the official YIYEIE website. Please retain your proof of purchase for warranty claims.