1. Introduction
Thank you for choosing the Aeitto Countertop Ice Maker. This manual provides important information regarding the safe operation, installation, maintenance, and troubleshooting of your new ice maker. Please read this manual thoroughly before use and retain it for future reference.
This portable ice maker is designed to produce bullet-shaped ice cubes quickly and efficiently, offering two different ice cube sizes to suit your preferences. Its compact design makes it suitable for various settings, including home kitchens, offices, bars, and RVs.
2. Safety Instructions
- Read all instructions before operating the appliance.
- Ensure the voltage matches the rating label on the appliance.
- Do not immerse the appliance, power cord, or plug in water or other liquids.
- Unplug the appliance from the outlet when not in use, before cleaning, or before adding/removing parts.
- Keep the appliance away from heat sources and direct sunlight.
- Do not operate the appliance with a damaged cord or plug.
- This appliance is for indoor household use only.
- Children should be supervised to ensure they do not play with the appliance.
- Use only potable water in the ice maker.
3. Product Overview & Features
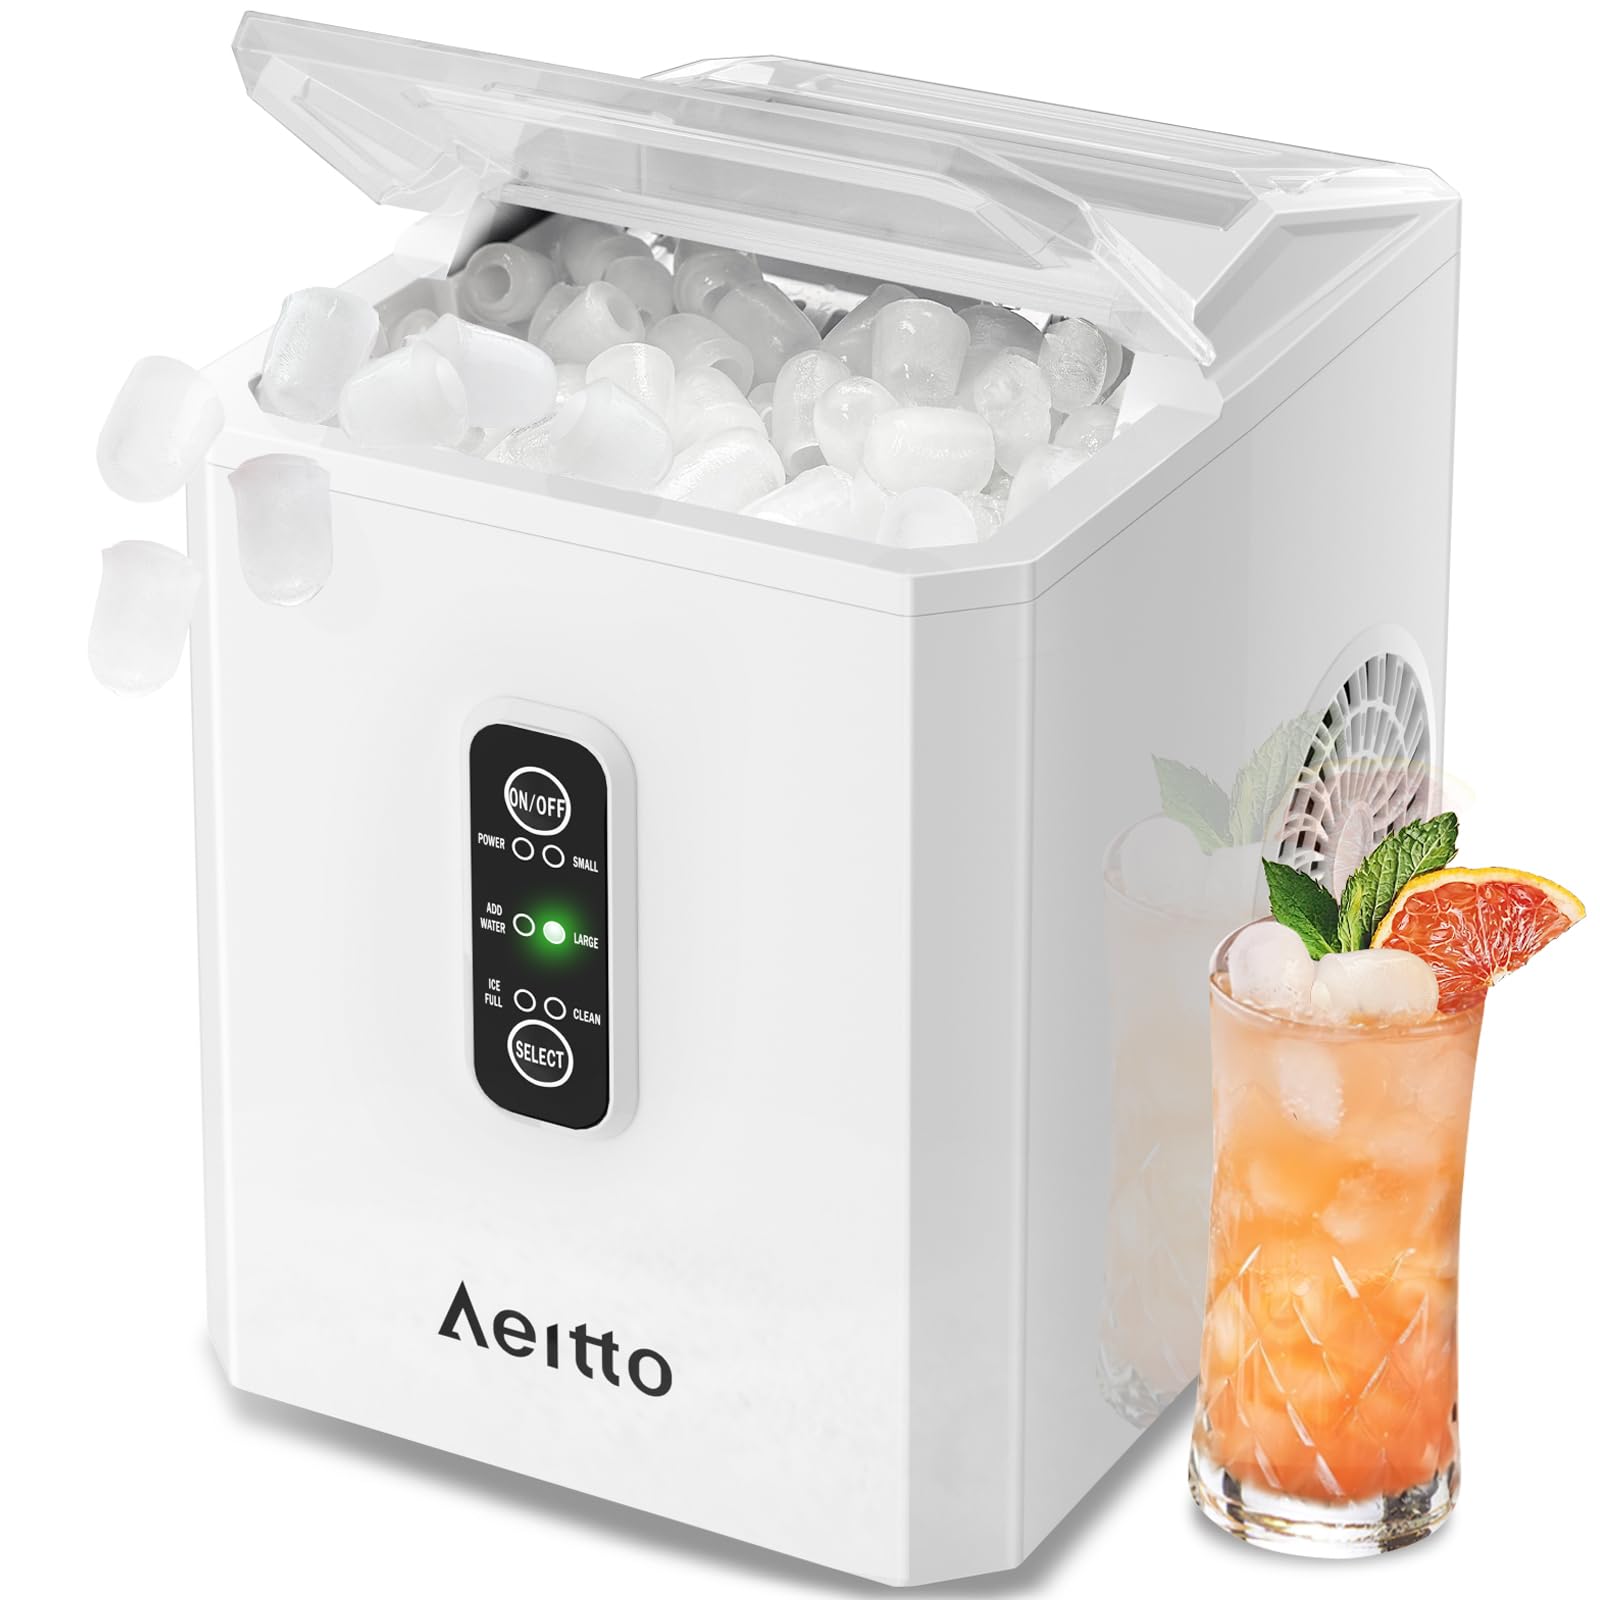
The Aeitto Ice Maker can produce up to 26 pounds of ice per day, ensuring a continuous supply for your needs.

Produces 9 ice cubes in as little as 6 minutes, providing quick access to fresh ice.

Offers two sizes of bullet ice cubes (Small and Large) to cater to different beverage and cooling requirements.

Features dual viewing windows to monitor the ice-making process and check the ice storage level without opening the lid.
4. Setup
- Unpacking: Carefully remove the ice maker from its packaging. Remove all packing materials, including tape and labels.
- Placement: Place the ice maker on a flat, stable surface away from direct sunlight and heat sources. Ensure there is adequate ventilation around the unit.
- Initial Cleaning: Before first use, clean the interior of the ice maker. Remove the ice basket and wash it with warm water and mild detergent. Wipe the interior with a soft cloth.
- Power Connection: Plug the power cord into a grounded electrical outlet.
- Fill Water Reservoir: Open the lid and pour potable water into the water reservoir up to the 'MAX' fill line. Do not overfill.

Ensure proper placement and water filling for optimal performance.
5. Operating Instructions
- Power On: Press the 'ON/OFF' button to turn on the ice maker. The 'POWER' indicator light will illuminate.
- Select Ice Size: Press the 'SELECT' button to choose between small (S) or large (L) ice cubes. The corresponding indicator light will illuminate.
- Ice Production: The ice maker will begin the ice-making cycle. The first batch of ice typically takes 6-13 minutes, depending on the selected size and ambient temperature.
- Ice Full Indicator: When the ice basket is full, the 'ICE FULL' indicator light will turn on, and the ice maker will automatically stop producing ice. Remove ice from the basket to resume production.
- Add Water Indicator: If the water reservoir is low, the 'ADD WATER' indicator light will turn on. Add more water to the reservoir to continue ice production.
- Power Off: Press the 'ON/OFF' button to turn off the ice maker when not in use.
Watch this video for a demonstration of the ice maker's operation, including water filling, ice production, and ice removal.
6. Maintenance and Cleaning
Regular cleaning and maintenance will ensure the longevity and optimal performance of your Aeitto Ice Maker.
- Self-Cleaning Function: The ice maker features a built-in auto-cleaning function. To activate, ensure the water reservoir is filled, then press and hold the 'ON/OFF' button for 5 seconds. The 'CLEAN' indicator light will illuminate, and the cleaning cycle will run for approximately 15 minutes.
- Manual Cleaning: For thorough cleaning, unplug the unit. Remove the ice basket. Drain any remaining water from the reservoir by removing the drain plug located at the bottom of the unit. Clean the interior with a soft cloth and a mild detergent solution. Rinse thoroughly and dry.
- Exterior Cleaning: Wipe the exterior of the ice maker with a soft, damp cloth. Do not use abrasive cleaners or solvents.
- Storage: If storing the ice maker for an extended period, ensure it is completely dry. Store it in a cool, dry place.

Follow these steps to utilize the self-cleaning function for a hygienic ice maker.
7. Troubleshooting
| Problem | Possible Cause | Solution |
|---|---|---|
| Ice maker not producing ice. | No water in reservoir. | Add potable water to the reservoir up to the 'MAX' line. |
| Ice cubes are too small or cloudy. | Water temperature is too high. | Use colder water. Ensure the ice maker is in a cool environment. |
| Ice maker stops working. | Ice basket is full. | Remove ice from the basket. |
| 'ADD WATER' indicator is on. | Water level is low. | Refill the water reservoir. |
| Unusual noise during operation. | Unit not level or internal components vibrating. | Ensure the unit is on a stable, level surface. Contact customer support if noise persists. |
8. Specifications
- Brand: Aeitto
- Model Name: 10D3
- Product Dimensions: 9.9"D x 7.37"W x 10.6"H
- Capacity: 26 Pounds (Ice Production per Day)
- Wattage: 105 watts
- Voltage: 110 Volts
- Refrigerant: R600a
- Material: Plastic
- Item Weight: 14.33 pounds
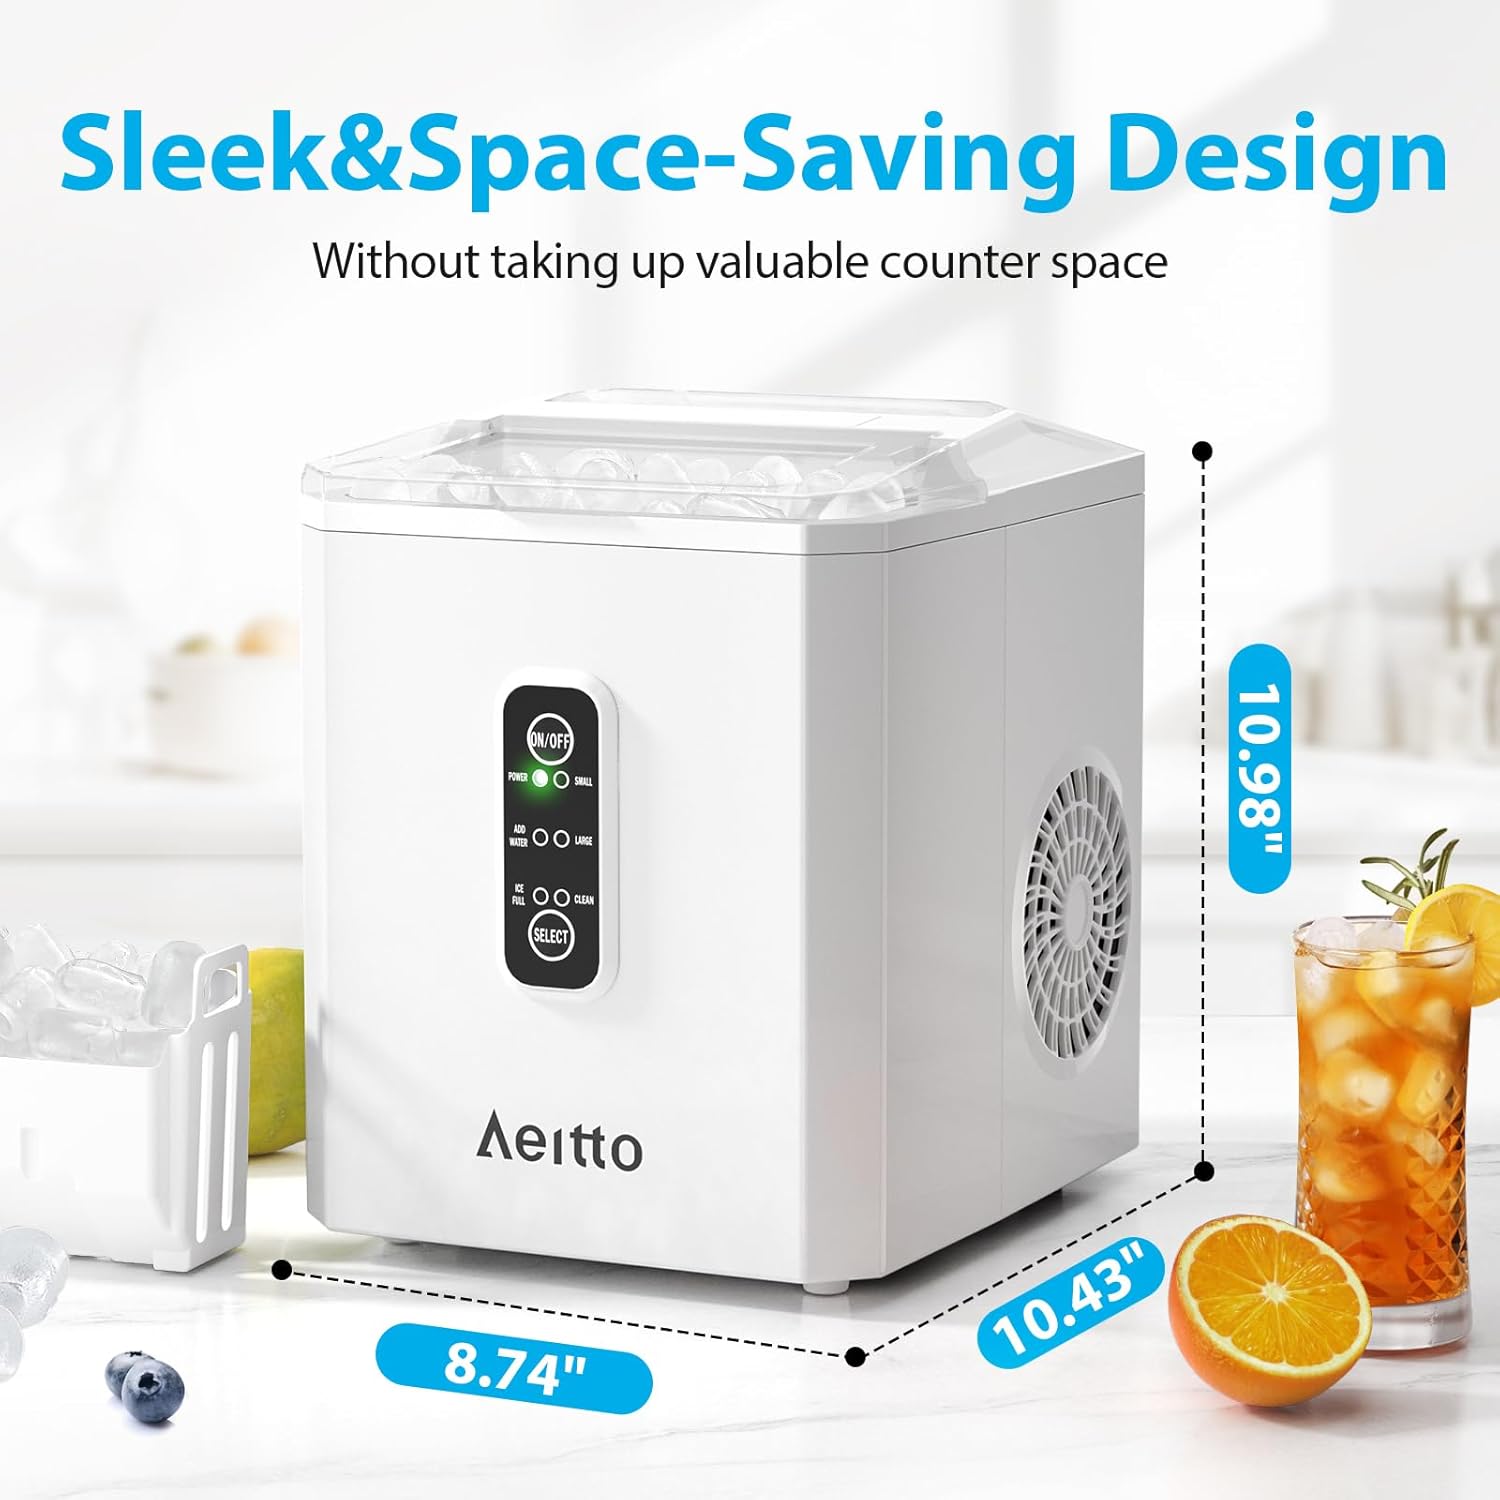
Compact and space-saving design for various environments.
9. What's in the Box
- Ice Maker x 1
- Ice Scoop x 1
- Ice Basket x 1
10. Warranty and Support
For warranty information or technical support, please refer to the product packaging or contact Aeitto customer service directly. Keep your purchase receipt as proof of purchase.


