1. Introduction
This manual provides detailed instructions for the assembly, operation, and maintenance of your Merkisa 4-Tier 360° Rotating Bookshelf. Please read this manual thoroughly before assembly and use to ensure proper function and safety.
2. Important Safety Information
WARNING:
- Do not overload shelves. Overloading can cause instability and potential collapse.
- Ensure the bookshelf is stable and level on a flat surface before use.
- Keep away from heat sources and flammable materials.
- Use caution when rotating the bookshelf to prevent injury or items falling.
- This product is intended for indoor use only.
- Keep small parts away from children during assembly.
3. Package Contents
Please verify that all parts are present before beginning assembly. If any parts are missing or damaged, contact customer support.

Figure 1: All components included in the package. This includes circular wooden plates (top, middle, bottom), various gold metal rods, screws, and an assembly tool.
Components List:
- Top Plate: 1 unit (with two large holes in the middle)
- Middle Plates: 3 units (for 4-tier model)
- Bottom Plate: 1 unit (with four metal parts)
- Long Rods: 16 units (for vertical support)
- M Rods: 10 units (curved book supports)
- N Rods: 22 units (curved book supports)
- Top Rods: 4 units (shorter vertical supports for top tier)
- Turntable: 1 unit (for 360° rotation)
- Screws (A): 72 units
- Screws (B): 4 units
- Assembly Tool: 1 unit (Hex key)
4. Assembly Instructions
Follow these steps carefully to assemble your rotating bookshelf. It is recommended to have a clear, flat workspace.
Video Guide:
Video 1: Detailed installation instructions for the Merkisa Rotating Bookshelf. This video demonstrates each step of the assembly process, from attaching the turntable to securing the shelves and rods.
- Step 1: Prepare the Bottom Plate
Identify the bottom plate (with four metal parts). Attach the four long rods (7) to the designated holes on the bottom plate using Screw A. Ensure they are securely tightened with the assembly tool.

Figure 2: Attaching the long rods to the bottom plate.
- Step 2: Attach the Turntable
Place the turntable (C) onto the bottom plate, aligning its holes with the four metal parts on the bottom plate. Secure it using Screw B. Ensure the side with the larger hole on the turntable faces upwards.

Figure 3: Securing the turntable to the bottom plate.
- Step 3: Install First Middle Plate and M Rods
Place one middle plate (2) onto the long rods, ensuring the holes align horizontally with the rods below. Insert the curved M rods (6) into the designated holes on this middle plate. Note that two M rods should be installed crosswise for stability and book support.

Figure 4: Installing the first middle plate and M rods.
- Step 4: Add Long Rods for Next Tier
Insert four long rods (7) into the holes on the first middle plate, aligning them with the corresponding holes for the next tier.

Figure 5: Adding long rods for the subsequent tier.
- Step 5: Repeat for Remaining Middle Plates
Repeat Steps 3 and 4 for the remaining two middle plates (2), ensuring all rods and plates are securely fitted and aligned horizontally.

Figure 6: Bookshelf structure with multiple tiers assembled.
- Step 6: Install the Top Plate
Place the top plate (1) onto the uppermost long rods, aligning the holes. Insert the shorter top rods (5) into the two large holes in the middle of the top plate. Then, insert the curved N rods (1) into the remaining holes on the top plate.

Figure 7: Final assembly of the top plate and rods.
- Step 7: Final Tightening
Once all plates and rods are in place, carefully tighten all screws (A) using the assembly tool to ensure the bookshelf is stable and secure.
5. Operating Instructions
5.1 Placing Items
Distribute books and other items evenly across the shelves to maintain balance. Avoid placing excessively heavy items on a single side or shelf. The curved rods are designed to hold books securely in place.
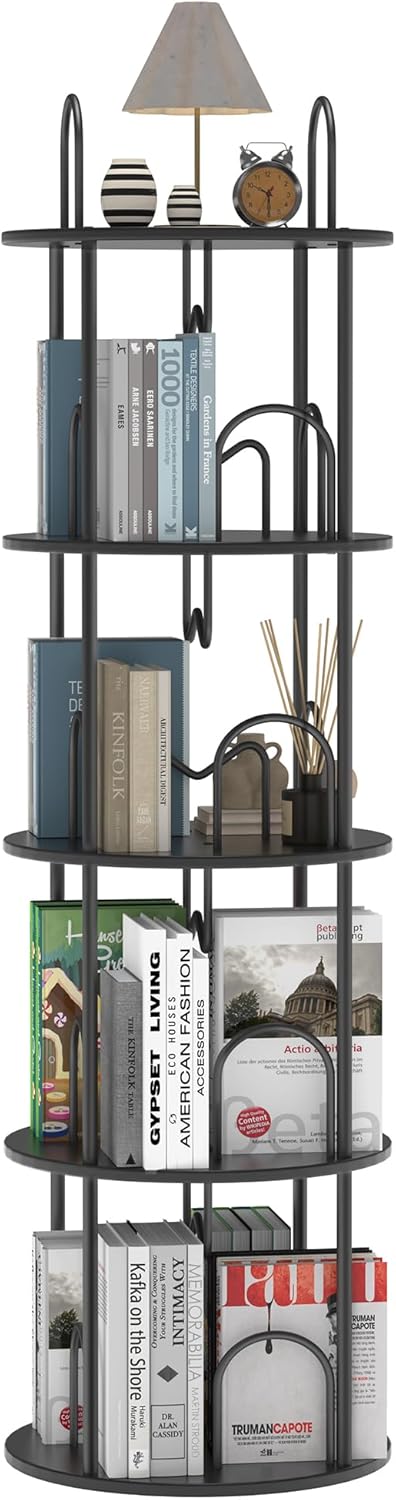
Figure 8: Example of a fully loaded 4-tier rotating bookshelf.
5.2 Rotating the Bookshelf
The bookshelf features a 360° spinning base for easy access to all sides. To rotate, gently push on any part of the bookshelf. Ensure there are no obstructions around the base that could impede rotation.
Video 2: Demonstration of the smooth 360° rotation feature of the bookshelf, showing how easily it spins to access items.
6. Maintenance
- Cleaning: Wipe surfaces with a soft, damp cloth. Avoid harsh chemicals or abrasive cleaners that could damage the finish.
- Inspection: Periodically check all screws and connections to ensure they remain tight. Re-tighten if necessary.
- Placement: Avoid prolonged exposure to direct sunlight or extreme humidity, which can affect the wood finish.
7. Troubleshooting
| Problem | Possible Cause | Solution |
|---|---|---|
| Bookshelf is wobbly. | Loose screws or uneven surface. | Check and tighten all screws. Ensure the bookshelf is on a flat, level surface. |
| Bookshelf does not rotate smoothly. | Obstruction under the base or turntable not properly installed. | Clear any debris from under the base. Re-check turntable installation (Step 2) to ensure it's correctly aligned and secured. |
| Items fall off when rotating. | Bookshelf overloaded or items not properly secured by rods. | Reduce load on shelves. Ensure books are placed snugly against the curved rods. Rotate gently. |
8. Specifications
- Brand: Merkisa
- Model Name: Rotating Bookshelf
- Number of Tiers: 4
- Product Dimensions: 17.7"D x 17.7"W x 55"H
- Item Weight: 23.4 pounds
- Material: High-quality boards, sturdy metal frame
- Special Feature: 360° Rotation, Durable
- Room Type: Living Room, Bedroom, Study, Office
- Assembly Required: Yes

Figure 9: Product dimensions for the 4-tier model.
9. Warranty and Support
For warranty information or customer support, please refer to the product packaging or contact Merkisa customer service directly. Keep your purchase receipt for any warranty claims.


