
1. Introduction
This manual provides comprehensive instructions for the setup, operation, and maintenance of the DM1306D Digital Decibel Sound Meter. This device is designed to accurately measure sound levels, temperature, and humidity, making it suitable for various indoor environments requiring noise monitoring.
Key features include an LED screen for clear display, a wide measuring range of 30-130dBA, and integrated temperature and humidity monitoring capabilities. Its compact design allows for both portable use and wall-mounted installation.
2. Setup
2.1 What's in the Box
Upon opening the package, verify that all components are present:
- DM1306D Digital Decibel Sound Meter
- USB Charging Cable
- Wall Mounting Hardware (screws and anchors)

Image: Contents of the DM1306D package, including the meter, charging cable, and mounting accessories.
2.2 Charging the Device
The DM1306D is powered by a built-in 2000 mAh Lithium battery. Before first use, or when the battery indicator is low, charge the device using the provided USB cable.
- Locate the DC adapter input port on the side of the device.
- Connect the small end of the USB charging cable to the device's input port.
- Connect the larger end of the USB cable to a standard 5V DC power source (e.g., USB wall adapter, computer USB port).
- The battery indicator on the LED screen will show charging status.

Image: Detailed view of the DC adapter input port and the battery icon on the display, indicating charging capability.
2.3 Placement and Mounting
The DM1306D can be placed on any flat surface or mounted on a wall. For accurate readings, ensure the device is placed in an area with clear air circulation and away from direct heat sources, extreme cold, or strong vibrations.
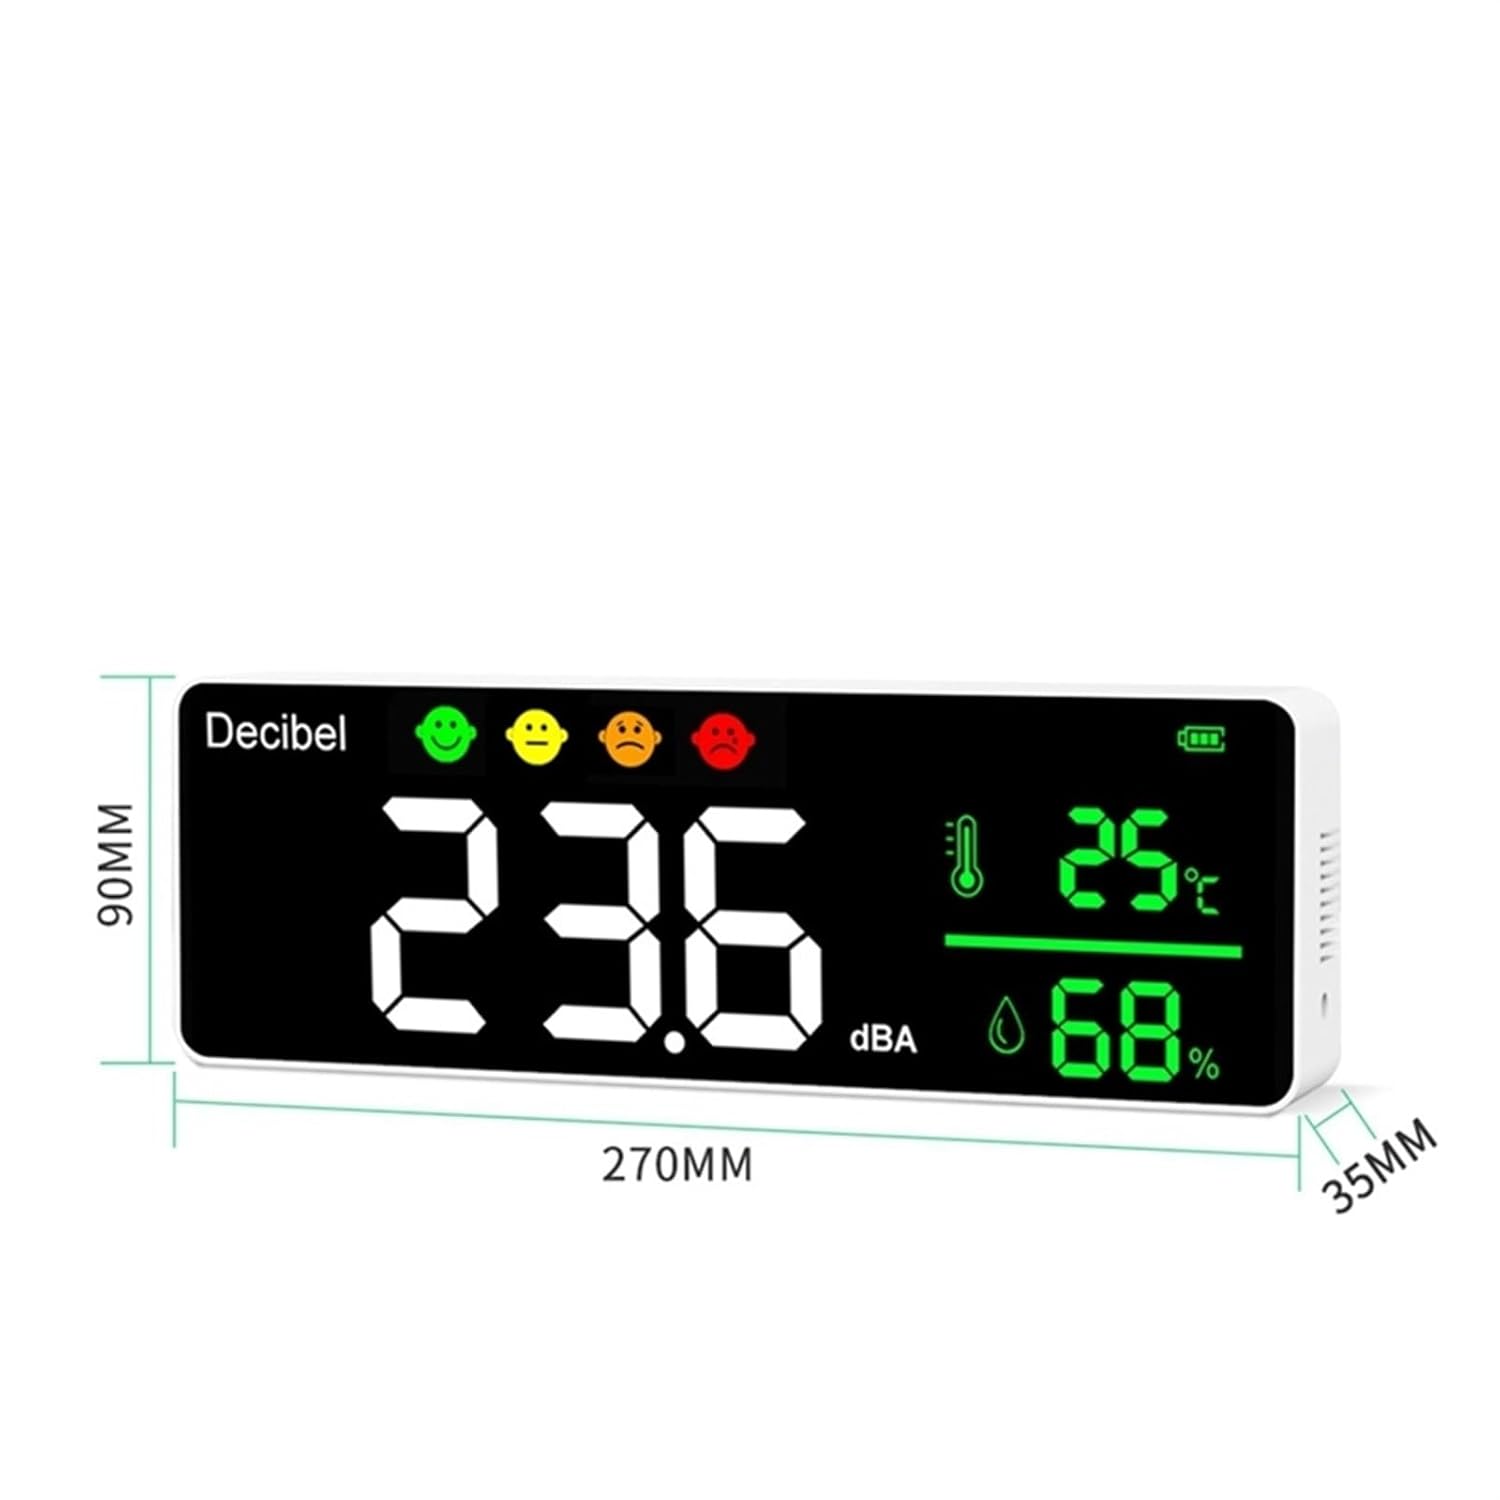
Image: The DM1306D device with its dimensions (270mm x 90mm x 35mm) highlighted, illustrating its compact size for placement or mounting.
To wall mount, use the provided screws and anchors. Mark the desired location on the wall, drill pilot holes, insert anchors, and secure the device using the mounting slots on its back.
3. Operating Instructions
3.1 Powering On/Off
To power on the device, press and hold the Power On/Off button (indicated by a circle with a vertical line) located on the top panel. To power off, press and hold the same button again.
3.2 Display Overview
The large LED screen provides real-time data. The main display shows the current decibel level in dBA. Below this, the temperature in degrees Celsius (°C) and relative humidity percentage (%) are displayed.
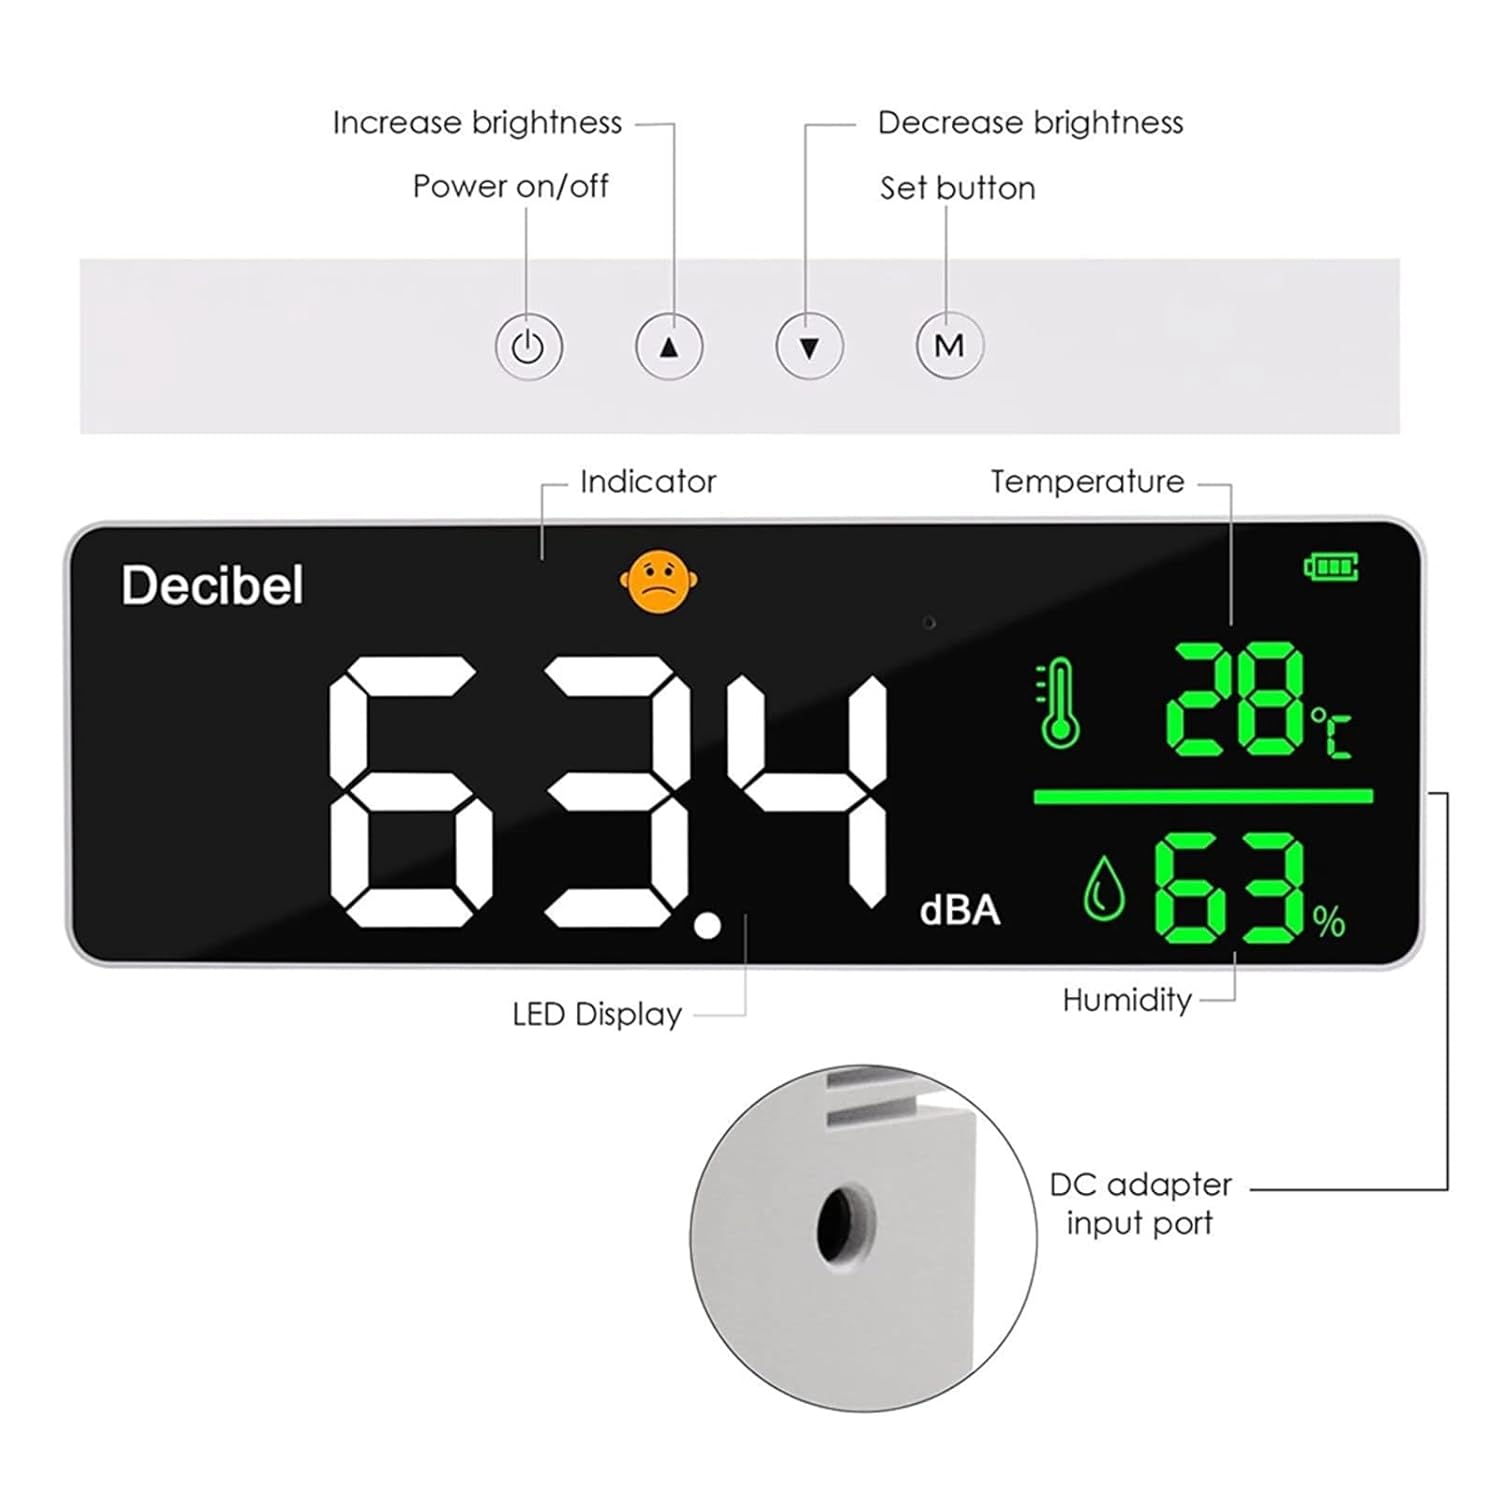
Image: An annotated diagram showing the LED display, indicator, temperature, humidity, and the functions of the control buttons (Power On/Off, Increase Brightness, Decrease Brightness, Set button).
3.3 Button Functions
- Power On/Off Button: Press and hold to turn the device on or off.
- Increase Brightness Button (Up Arrow): Press to increase the brightness of the LED display.
- Decrease Brightness Button (Down Arrow): Press to decrease the brightness of the LED display.
- Set Button (M): Used for accessing settings or cycling through display modes, if applicable. Refer to future firmware updates for advanced functions.
3.4 Taking Measurements
Once powered on, the DM1306D automatically begins measuring sound levels, temperature, and humidity. The sampling time for measurements is approximately 1.5 seconds, providing near real-time data.

Image: The DM1306D device displayed on a desk, demonstrating a typical operating environment.
3.5 Typical Applications
The DM1306D is versatile and can be used for noise monitoring in various settings:
- Classrooms: To ensure optimal learning environments.
- Meditation Rooms: To maintain quiet and peaceful atmospheres.
- Studio Rooms: For monitoring ambient noise during recordings or creative work.
- Study Rooms: To help maintain concentration and minimize distractions.

Image: A visual representation of the DM1306D being used in different environments, including a classroom, meditation room, studio room, and study room.
4. Maintenance
4.1 Cleaning
To clean the device, gently wipe the exterior with a soft, dry, or slightly damp cloth. Do not use abrasive cleaners, solvents, or strong chemicals, as these can damage the display or casing.
4.2 Battery Care
To maximize the lifespan of the built-in Lithium battery, avoid frequent deep discharges. It is recommended to recharge the device when the battery indicator shows low power, rather than waiting for it to completely drain.
4.3 Storage
When not in use for extended periods, store the DM1306D in a cool, dry place, away from direct sunlight and extreme temperatures. The recommended storage temperature range is -10°C to 60°C.
5. Troubleshooting
If you encounter issues with your DM1306D, refer to the following common problems and solutions:
- Device does not power on:
Ensure the battery is sufficiently charged. Connect the device to a 5V DC power source using the provided USB cable and allow it to charge for at least 30 minutes before attempting to power on again. - Inaccurate readings (decibel, temperature, humidity):
Verify that the device is placed in an area free from obstructions, strong air currents, or direct heat/cold sources. Allow the device to stabilize for a few minutes after powering on, especially if moved from one environment to another. Ensure the microphone is not obstructed. - Display is dim or unreadable:
Use the 'Increase Brightness' button (up arrow) on the top panel to adjust the screen brightness. Ensure the device is not exposed to excessively bright ambient light that might wash out the display. - Device not charging:
Check that the USB cable is securely connected to both the device and the power source. Try using a different 5V DC USB power adapter or a different USB port.
6. Specifications
| Feature | Specification |
|---|---|
| Display Method | LED Screen |
| Measuring Range (Noise) | 30~130dBA |
| Detection Method for Noise | Electret Condenser microphone |
| Detection Temperature Range | -10°C to 50°C |
| Relative Humidity Range | 20% - 85% |
| Sampling Time | 1.5 seconds |
| Atmospheric Pressure | 86Kpa - 106Kpa |
| Power Source | Lithium battery with 2000 mAh capacity; 5V DC power charging |
| Storage Temperature | -10°C to 60°C |
| Processor | ARM, High-speed complex calculations |
| Material | ABS |
| Product Dimensions (L x W x H) | 270 x 90 x 35mm |
| Product Weight | 350g (0.77 lbs) |
| Item Model Number | FPRRXFAAP |
| ASIN | B0FCRJCDQM |
| Date First Available | June 11, 2025 |
7. Warranty and Support
This product is covered by a standard manufacturer's warranty. For specific details regarding warranty coverage, duration, and terms, please refer to the documentation provided at the time of purchase or contact the seller directly.
For technical support, troubleshooting assistance beyond what is covered in this manual, or to inquire about warranty claims, please reach out to the seller or manufacturer. Contact information can typically be found on your purchase receipt or the product packaging.