Hodozzy Hodozzy 9-inch Android Car Stereo for Jumpy 3/Expert/Proace
Hodozzy 9-inch Android Car Stereo User Manual
Model: For Citroën Jumpy 3 / Peugeot Expert / Toyota Proace (2016-2021)
1. Introduction
This manual provides detailed instructions for the installation, operation, and maintenance of your Hodozzy 9-inch Android Car Stereo. Please read this manual thoroughly before installation and use to ensure proper function and safety.
This device is designed for specific vehicle models: Citroën Jumpy 3, Peugeot Expert, and Toyota Proace (2016-2021). Verify compatibility with your vehicle's interfaces before proceeding.
2. Package Contents
Carefully unpack the box and ensure all items listed below are present and undamaged. If any items are missing or damaged, contact your retailer.

Image 2.1: Package Contents Overview
This image displays the main car stereo unit, RCA cable, rear camera input cable, Canbus decoder, USB cables, rear camera, microphone, GPS antenna, power cable, radio antenna, installation tools, and user manual.
- Hodozzy 9-inch Android Car Stereo Unit
- Power Cable
- RCA Input/Output Cables
- Reversing Camera Input Cable
- USB Cables (Dual Port)
- GPS Antenna
- Radio Antenna
- Rear Camera
- External Microphone
- Canbus Decoder (if applicable for vehicle model)
- Installation Tools
- User Manual
3. Specifications
| Feature | Specification |
|---|---|
| Chipset | 8257 (8-core) |
| Screen Size | 9 inches |
| Memory (RAM + ROM) | 6GB RAM + 128GB ROM |
| Screen Resolution | 1280 x 720 |
| Radio Chip | 8035 |
| Output Power | 4 x 45W |
| Bluetooth Version | 5.0 |
| Operating Temperature | -20 °C to 75 °C |
| Steering Wheel Control | Supported |
| Power Amplifier Chip | YD7388 |
| Radio Band | FM/RDS |
| Video Output | Supported |
| Reverse Input | AHD/CVBS |
| External Microphone | Supported |
| Split Screen | Supported |
| Maps | Built-in offline maps (requires internet for data download) |
| WiFi | Supported |
| USB Ports | Dual USB ports |
| Audio Formats | APE/FLAC/WAV/MP3/WMA, etc. |
| Video Formats | MKV/RMVB/AVI/MP4/MDV, etc. |
| Image Formats | PNG/JPEG/JPG/GIF/WBMP/BNP, etc. |
| Default Keyword Setting | 1234 |
| Supported Languages | Chinese, English, French, Italian, Korean, Japanese, Arabic, Spanish, Portuguese, Russian, Turkish, Vietnamese, Hebrew, Polish, German |
4. Installation and Setup
Professional installation is recommended. Ensure the vehicle's power is disconnected before starting installation.
4.1 Vehicle Compatibility
This unit is specifically designed for Citroën Jumpy 3, Peugeot Expert, and Toyota Proace models manufactured between 2016 and 2021. Verify your vehicle's dashboard and wiring harness match the provided unit and accessories.

Image 4.1: Vehicle Compatibility and Installation Example
This image illustrates the car stereo unit's fit within the dashboard of compatible vehicles (Citroën Jumpy 3, Peugeot Expert, Toyota Proace 2016-2021), showing a comparison of the dashboard before and after installation.
4.2 Wiring Diagram
Refer to the wiring diagram provided with your unit for specific connections. Key connections include:
- Power Cable: Connect to vehicle's power supply (ACC, B+, GND).
- RCA Cables: For audio/video input/output to external amplifiers or monitors.
- USB Cables: For connecting USB devices, Android Auto, or CarPlay (wired).
- GPS Antenna: Mount in a location with a clear view of the sky for optimal signal reception.
- Radio Antenna: Connect to the vehicle's radio antenna.
- Reversing Camera Input: Connect the included AHD camera.
- External Microphone: Plug into the designated port for improved call quality.
Image 4.2: Rear Panel Connections
This image shows the various ports on the back of the car stereo unit, including connections for power, RCA, USB, GPS antenna, radio antenna, and reversing camera input.
4.3 Reversing Camera Installation
The included AHD reversing camera provides a clear view when backing up. Connect the camera as follows:
- Connect the camera's video output to the "Reversing Camera Input" on the head unit.
- Connect the camera's power cable (RED) to the vehicle's backup light positive (+12V).
- Connect the camera's ground cable (BLACK) to the vehicle's chassis ground.
- Connect the trigger wire (labeled "back" or "reverse") from the head unit to the vehicle's reversing light positive. This signals the head unit to switch to the camera view when reverse gear is engaged.
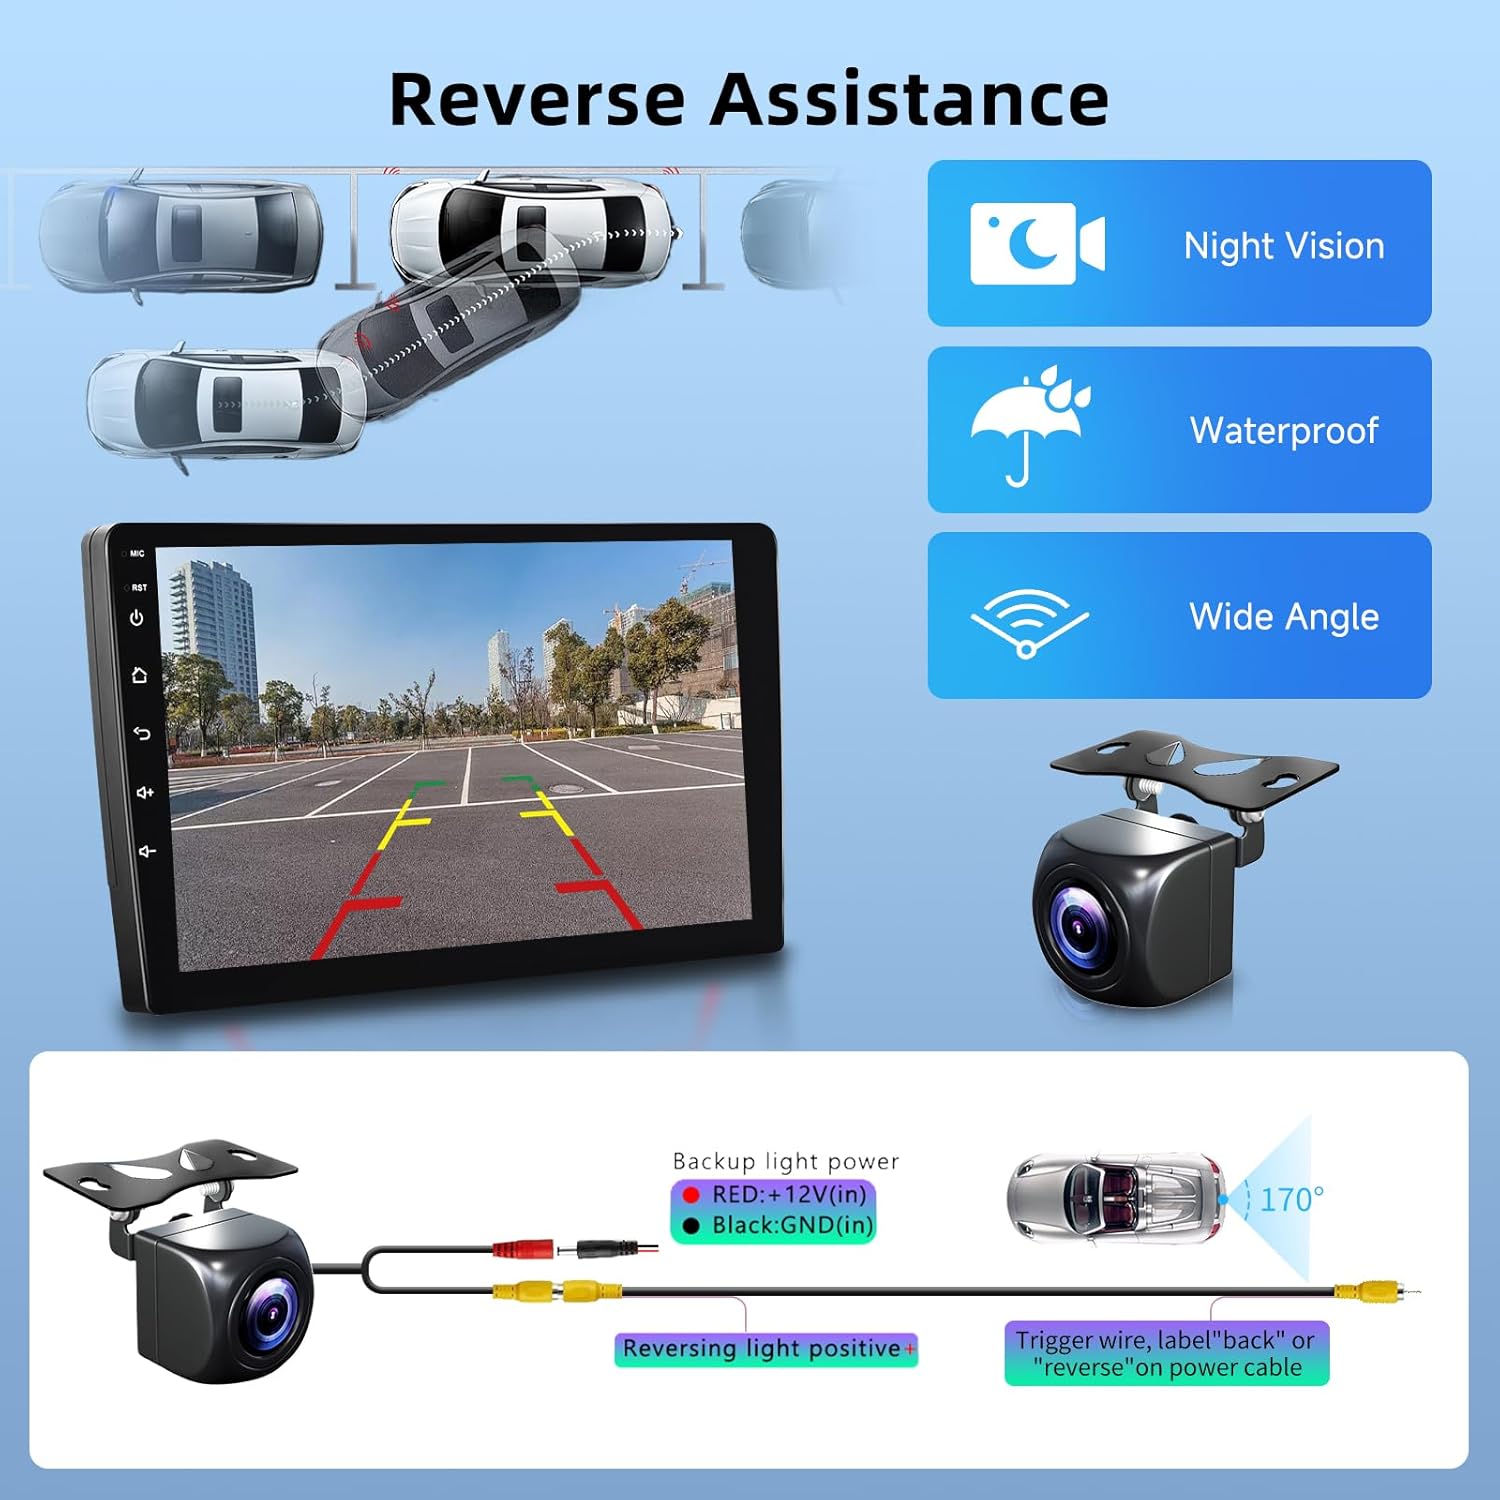
Image 4.3: Reversing Camera Wiring Diagram
This diagram details the electrical connections for the reversing camera, including power, ground, and the trigger wire that activates the camera display when the vehicle is in reverse.
5. Operating Instructions
5.1 Basic Operation
- Power On/Off: The unit powers on automatically with the vehicle's ignition. Press and hold the power button (if available) for manual power control.
- Volume Control: Adjust using the on-screen controls or steering wheel buttons.
- Touchscreen Interface: Navigate through menus and applications by tapping and swiping on the 9-inch touchscreen.
5.2 Wireless CarPlay & Android Auto
The unit supports both wireless CarPlay and Android Auto for seamless smartphone integration.
- Ensure Bluetooth is enabled on your smartphone and the car stereo.
- Pair your phone with the car stereo via Bluetooth.
- Follow the on-screen prompts to activate CarPlay or Android Auto.
- For wired connection, connect your phone via a USB cable.
Note: Compatible with iOS 5-17 and Android 4-13. Samsung phones may not be fully supported for all features.
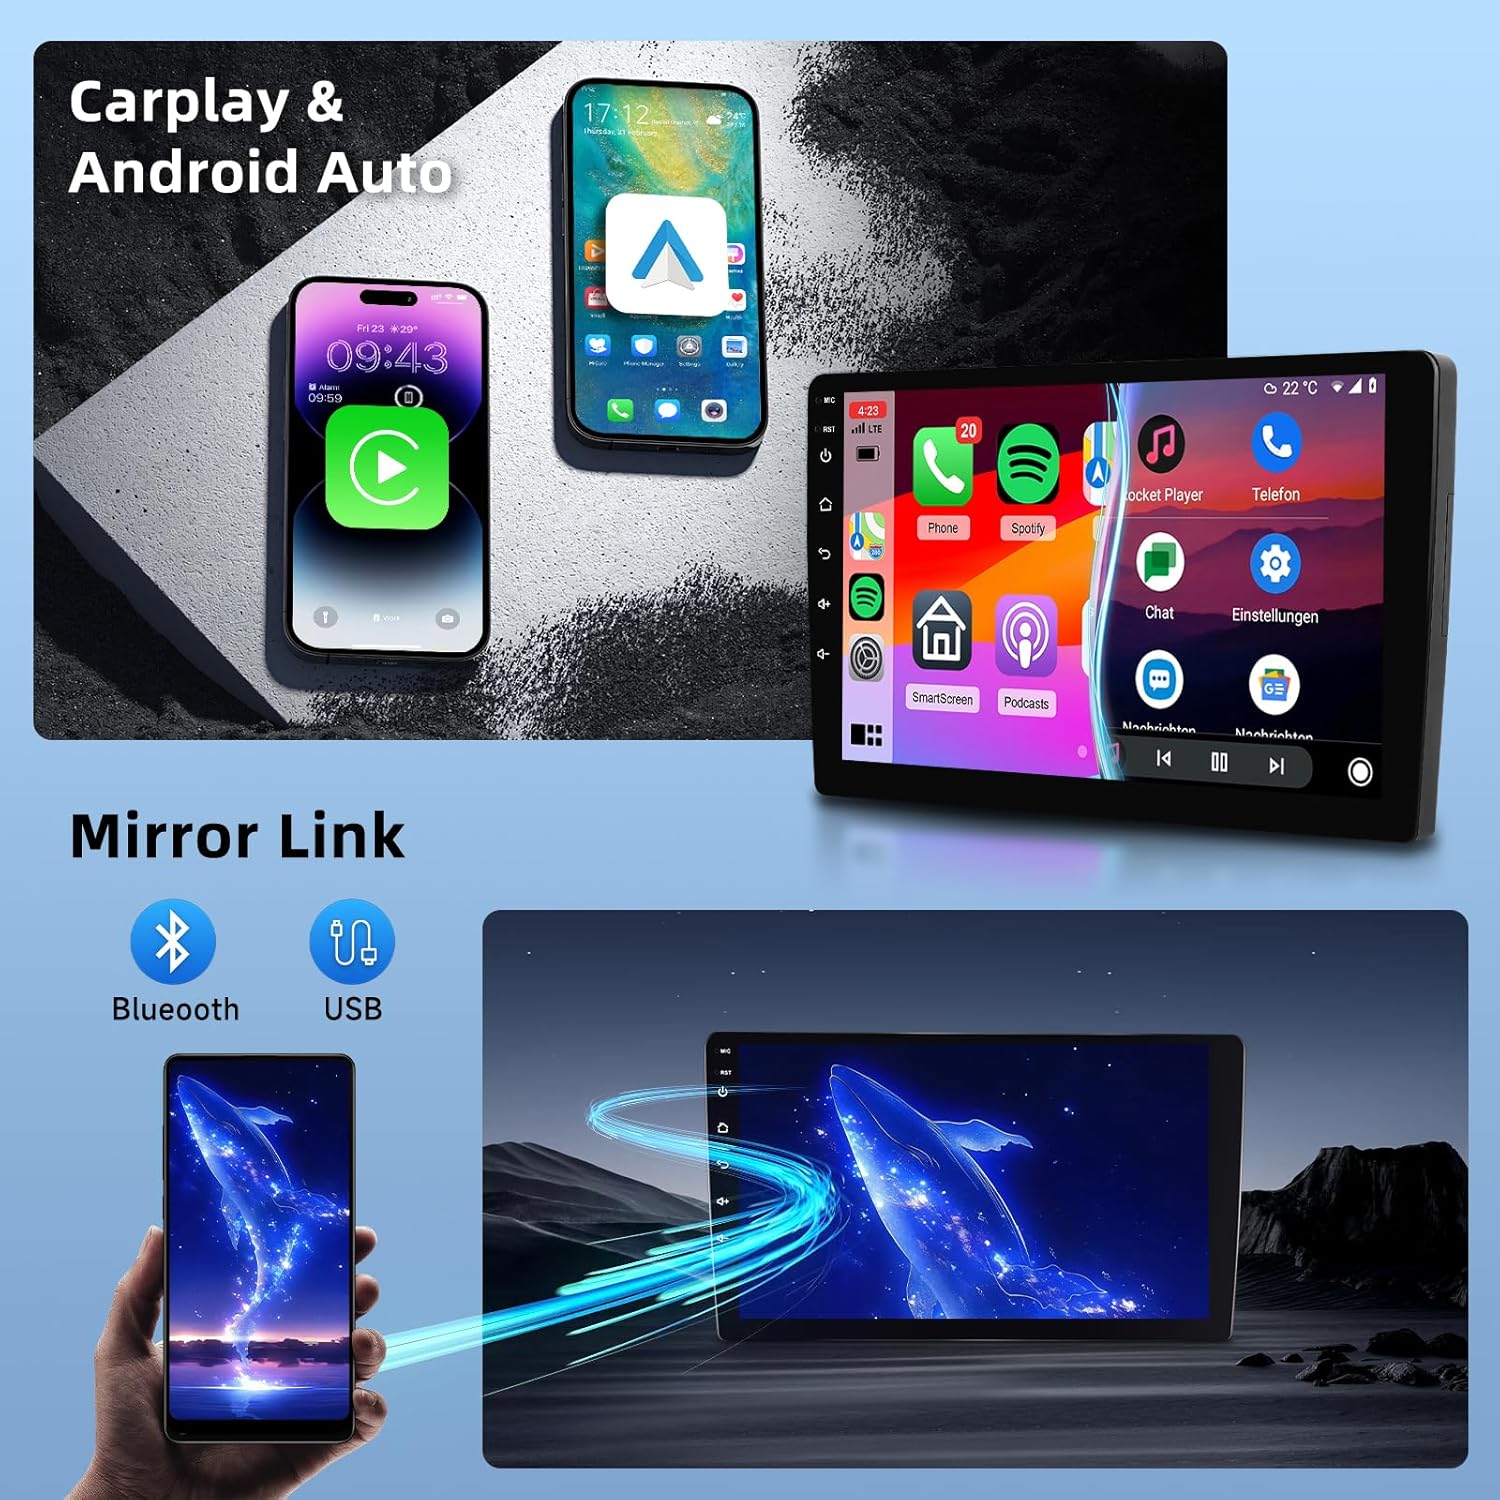
Image 5.1: CarPlay and Android Auto Interface
This image illustrates the integration of CarPlay and Android Auto with the car stereo, showing how smartphone applications are mirrored and controlled on the unit's display.
5.3 GPS Navigation & WiFi
The unit features integrated GPS and WiFi connectivity.
- WiFi Connection: Connect to a WiFi hotspot to access online features, download apps, and update maps.
- Offline Maps: The unit comes with built-in offline maps. To download map data, connect to the internet and use the "Here We Go" application or other navigation apps.
- Online Navigation: Use any compatible online navigation application after connecting to WiFi.

Image 5.2: WiFi and GPS Navigation
This image demonstrates the car stereo's capability to connect to WiFi for internet access and its integrated GPS navigation system, showing both online and offline map options.
5.4 Bluetooth 5.0 & FM RDS Radio
- Bluetooth: Pair your phone for hands-free calling and audio streaming. The built-in microphone ensures clear communication.
- FM RDS Radio: Tune into FM stations (87.5 MHz-107.5 MHz). RDS (Radio Data System) provides station information.
- DSP (Digital Sound Processor): Enhances audio quality by reducing noise and distortion.
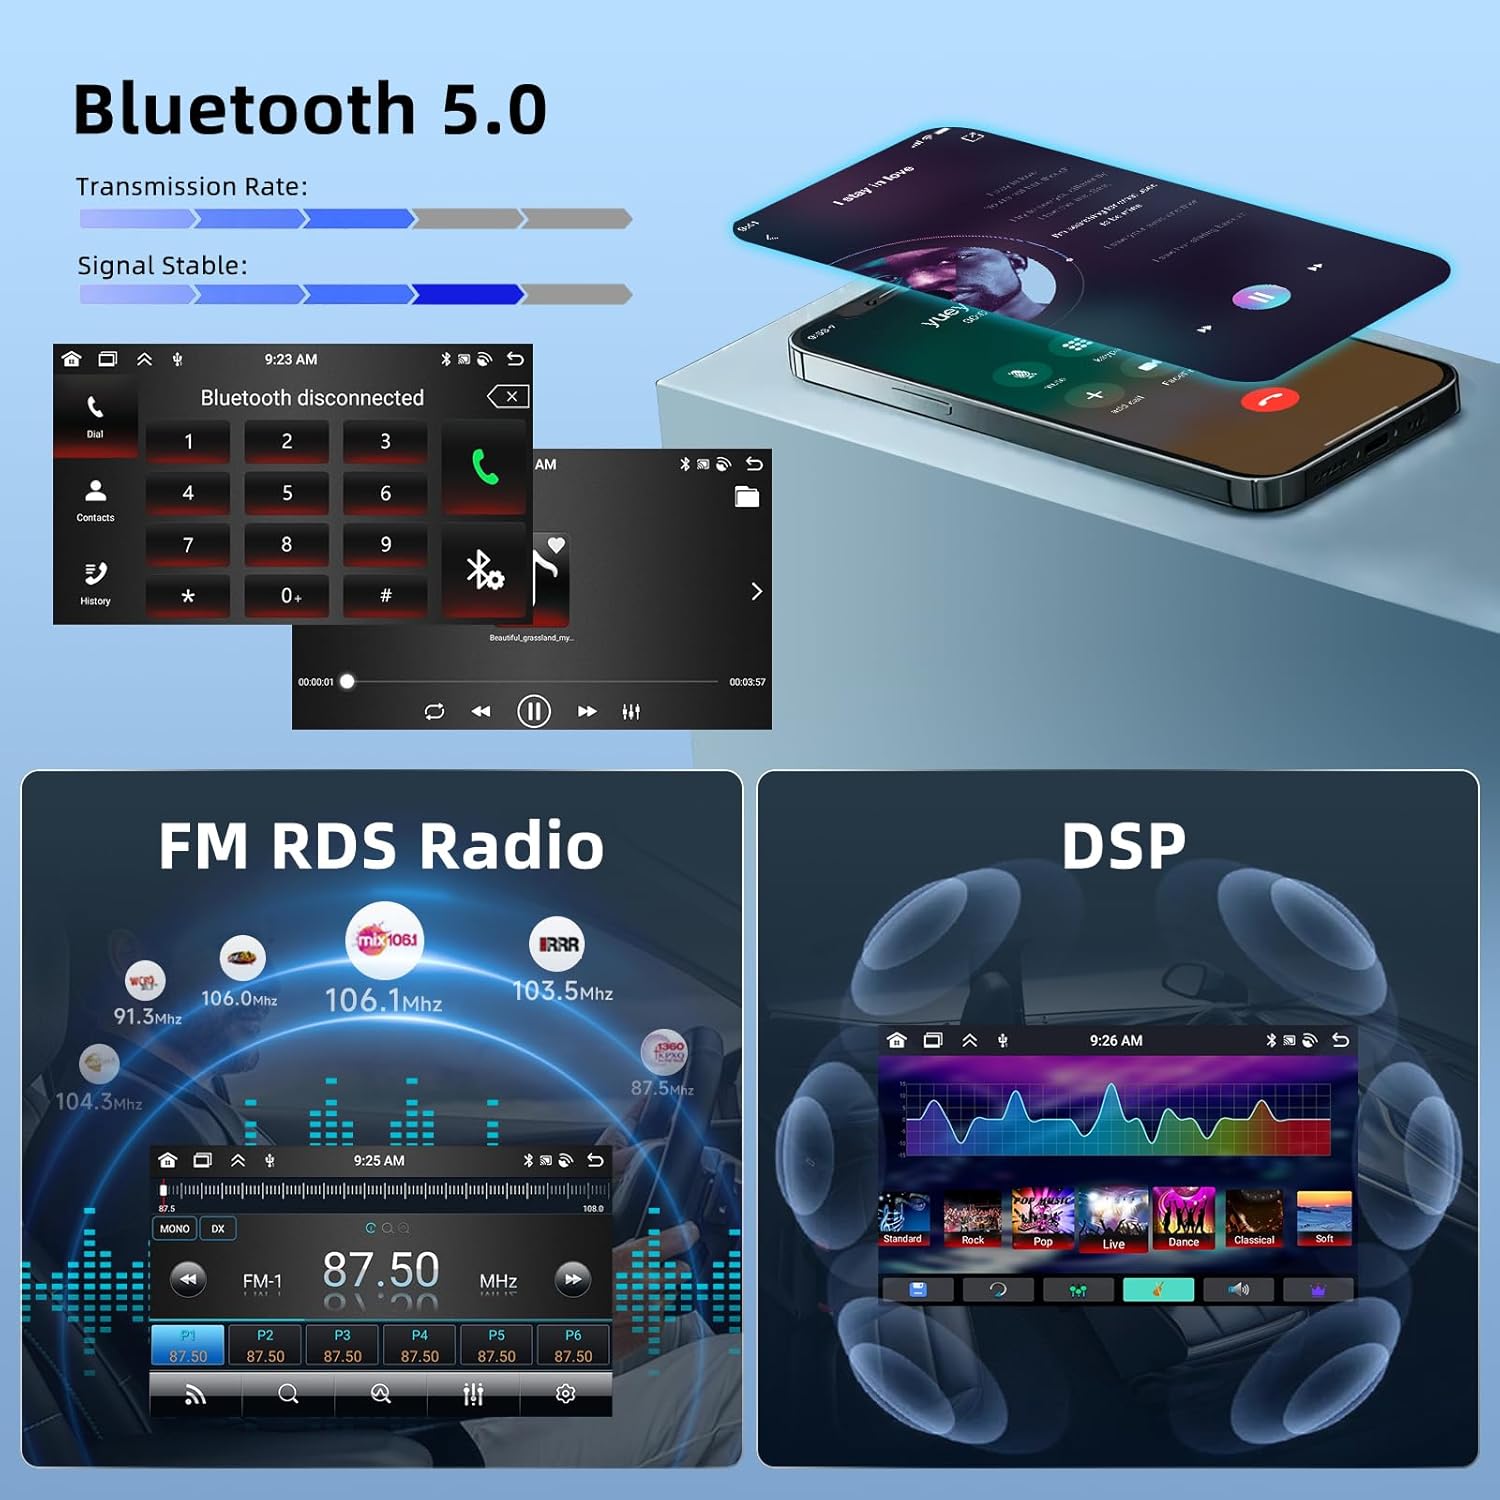
Image 5.3: Bluetooth and Radio Functions
This image highlights the Bluetooth 5.0 connectivity for stable signal transmission and hands-free operation, as well as the FM RDS radio interface and the Digital Sound Processor (DSP) for enhanced audio.
5.5 Split Screen & Mirror Link
- Split Screen: Allows two applications to run simultaneously on the screen, e.g., navigation and music.
- Mirror Link: Synchronize your smartphone screen to the car stereo display via USB cable or WiFi. Android phones support two-way control, while iOS phones support one-way control.

Image 5.4: Split Screen and Mirror Link
This image illustrates the split-screen functionality, allowing two apps to run concurrently, and the Mirror Link feature, which projects a smartphone's display onto the car stereo screen.
5.6 Steering Wheel Control
The unit supports integration with your vehicle's existing steering wheel controls for safe and convenient operation.
- Access volume, track changes, and other functions directly from your steering wheel.
- Configuration may be required in the unit's settings menu.
Image 5.5: Retained Vehicle Functions
This image highlights how the car stereo integrates with and retains original vehicle functions such as steering wheel controls, door open alerts, factory amplifier compatibility, radar, lane watch/right camera, and A/C information display.
6. Maintenance
- Screen Cleaning: Use a soft, lint-free cloth to clean the touchscreen. Do not use abrasive cleaners or solvents.
- Software Updates: Periodically check for software updates via WiFi to ensure optimal performance and access to new features.
- General Care: Avoid exposing the unit to extreme temperatures, direct sunlight for prolonged periods, or excessive moisture.
7. Troubleshooting
| Problem | Possible Cause | Solution |
|---|---|---|
| Unit does not power on. | Incorrect power wiring; Blown fuse; Vehicle ignition off. | Check power cable connections (ACC, B+, GND). Inspect vehicle fuses. Ensure vehicle ignition is on. |
| No sound. | Volume too low; Mute activated; Speaker wiring issue; Incorrect audio output settings. | Increase volume. Check if mute is active. Verify speaker connections. Adjust audio output settings in the menu. |
| GPS signal weak or lost. | GPS antenna improperly installed or obstructed. | Ensure GPS antenna is mounted in a clear, unobstructed location (e.g., dashboard, not under metal). |
| Bluetooth connection issues. | Bluetooth off on phone/unit; Pairing failed; Interference. | Ensure Bluetooth is enabled on both devices. Delete previous pairings and re-pair. Move closer to the unit. |
| Reversing camera not displaying. | Camera wiring incorrect; Trigger wire not connected; Camera faulty. | Check all camera power and video connections. Verify the trigger wire is correctly connected to the reverse light. |
| Steering wheel controls not working. | CANbus not connected or configured; Incorrect settings. | Ensure CANbus decoder is correctly installed and connected. Configure steering wheel controls in the unit's settings menu. |
8. Warranty and Support
For warranty information and technical support, please refer to the documentation provided with your purchase or contact Hodozzy customer service through the retailer where the product was purchased.
Please have your product model and purchase date ready when contacting support.
Ask a question about this manual
Ask about setup, troubleshooting, compatibility, parts, safety, or missing instructions. Manuals+ will review the question and use this page’s manual context to help answer it.