1. Introduction
Thank you for choosing the Gilubfckin Stackable Outdoor Compost Bin. This manual provides essential information for the proper assembly, operation, and maintenance of your compost bin. Designed for efficient composting of kitchen and yard waste, this bin helps you create nutrient-rich compost for your garden while reducing landfill waste. Please read this manual thoroughly before use to ensure optimal performance and longevity of your product.
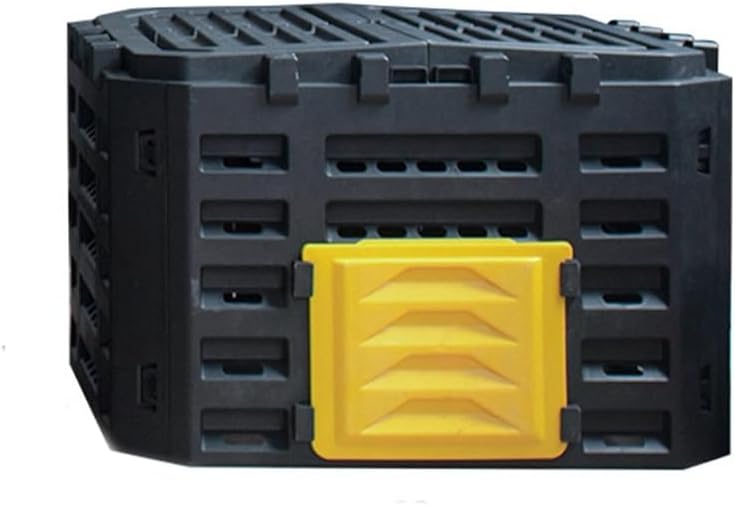
Image 1.1: The Gilubfckin Stackable Outdoor Compost Bin, featuring a black body with a yellow access door.
2. Product Overview and Features
The Gilubfckin Stackable Outdoor Compost Bin is constructed from durable plastic, designed to withstand outdoor elements and facilitate efficient decomposition. It is available in multiple sizes to suit various composting needs.
Key Features:
- Dual-Opening Flip Lid: Allows easy addition of materials from either side, providing wide access for various types of waste.
- Multiple Ventilation Ports: Strategically placed vents ensure optimal airflow, crucial for aerobic decomposition and faster composting.
- Snap-Lock Fertilizer Door: A secure bottom door enables convenient removal of finished compost without disturbing the ongoing composting process.
- Heavy-Duty Plastic Construction: Made from robust, weather-resistant plastic for long-lasting outdoor use and insulation.
- Space-Saving Stackable Design: Compact yet capacious, the design allows for efficient use of space in various outdoor settings.
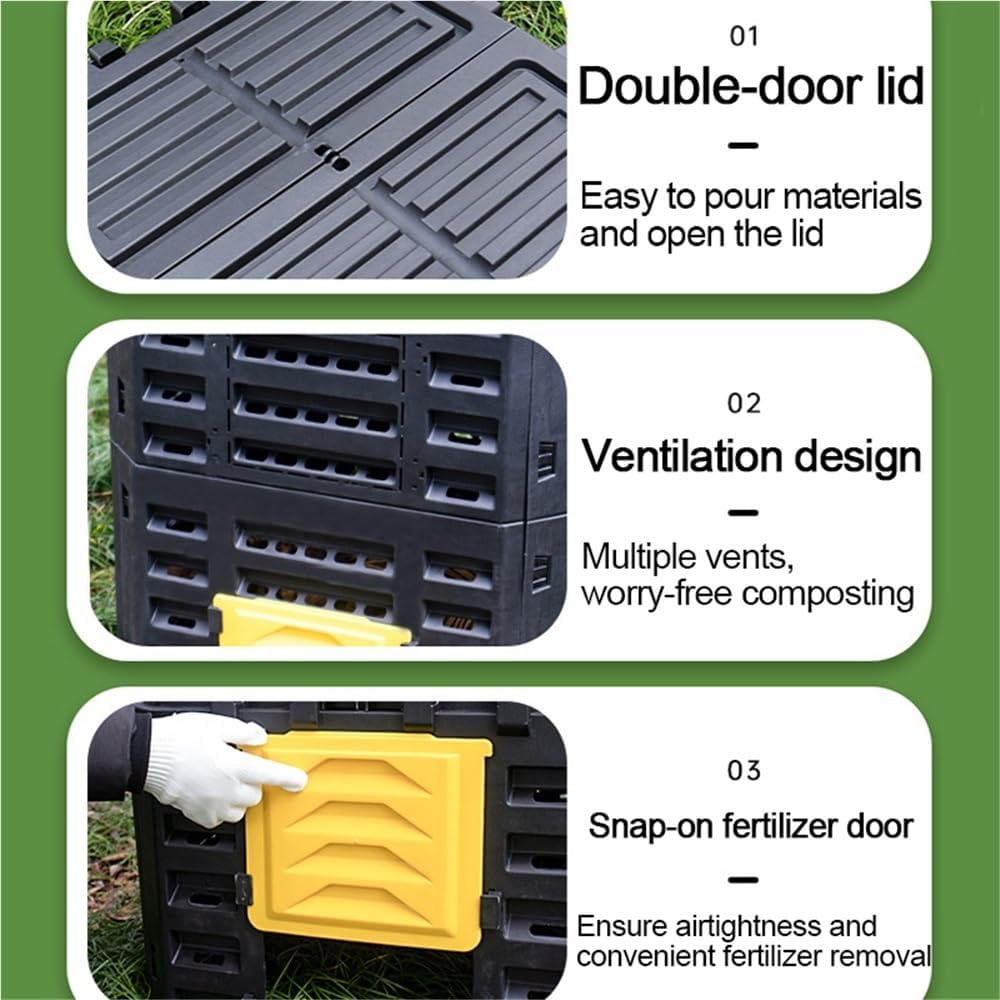
Image 2.1: Illustration of key features including the double-door lid, ventilation design, and snap-on fertilizer door.

Image 2.2: The Gilubfckin compost bin available in three sizes (180L, 340L, 500L) in an outdoor environment.
3. Assembly Instructions
Assembly is required for this product. Please follow these steps carefully.
- Unpack Components: Carefully remove all parts from the packaging. Verify that all panels, the lid, and the access door are present.
- Assemble Side Panels: Connect the side panels by aligning the interlocking tabs and slots. Press firmly until they click into place, forming the main body of the bin. Ensure all connections are secure.
- Attach Bottom Access Door: Insert the snap-lock fertilizer door into its designated opening at the bottom of one of the side panels. Ensure it latches securely.
- Install Top Lid: Place the dual-opening flip lid onto the top of the assembled bin body. The lid should fit snugly and allow for easy opening and closing of both halves.
- Placement: Position the assembled compost bin on a level surface in your garden or yard, ideally in a shaded or partially shaded area to prevent excessive drying.
For visual guidance, refer to the product images that illustrate the assembled unit and its features.
4. Operation Guide
4.1 What to Compost
Successful composting relies on a balance of "green" (nitrogen-rich) and "brown" (carbon-rich) materials.
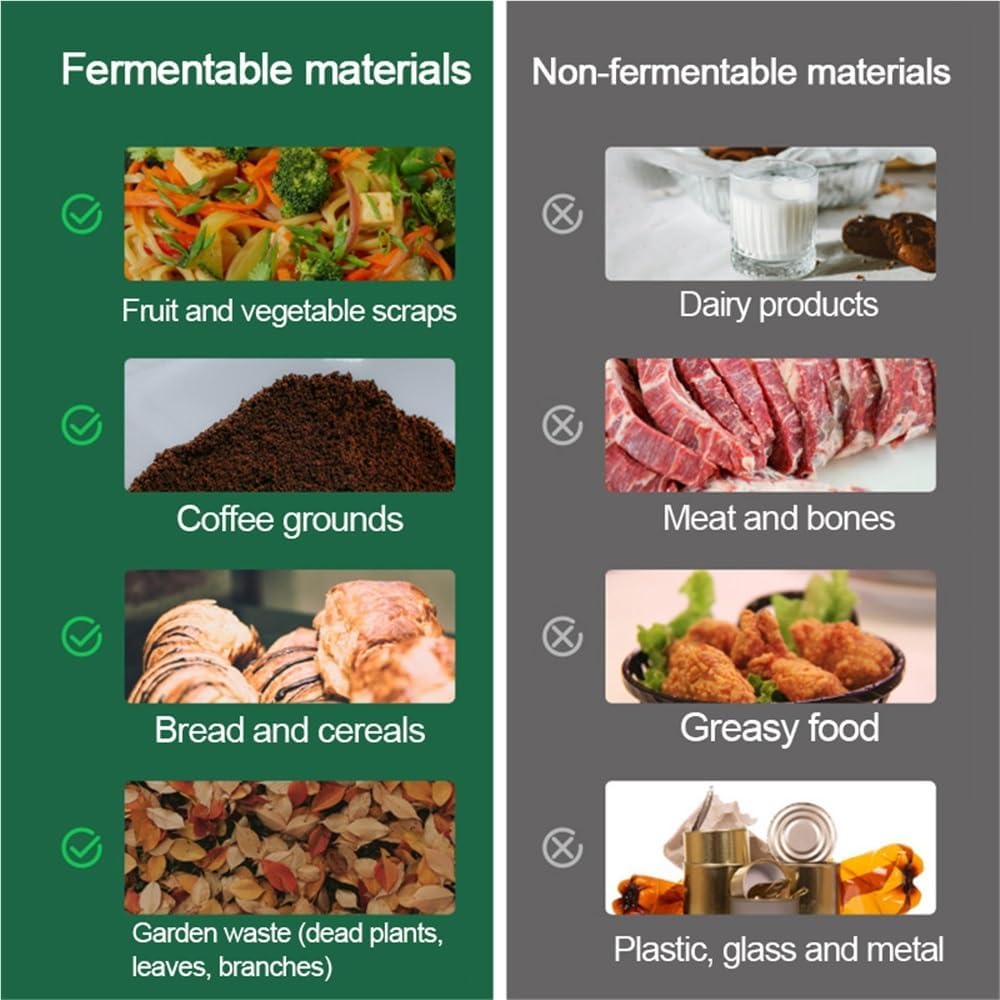
Image 4.1: Guide to fermentable (compostable) and non-fermentable (non-compostable) materials.
Fermentable Materials (Suitable for Composting):
- Fruit and vegetable scraps
- Coffee grounds and tea leaves
- Bread and cereals
- Garden waste (dead plants, leaves, small branches)
- Eggshells (crushed)
Non-Fermentable Materials (NOT Suitable for Composting):
- Dairy products
- Meat and bones
- Greasy food
- Plastic, glass, and metal
- Pet waste
- Diseased plants
4.2 Adding Materials
To add materials, simply open one side of the dual-opening flip lid.
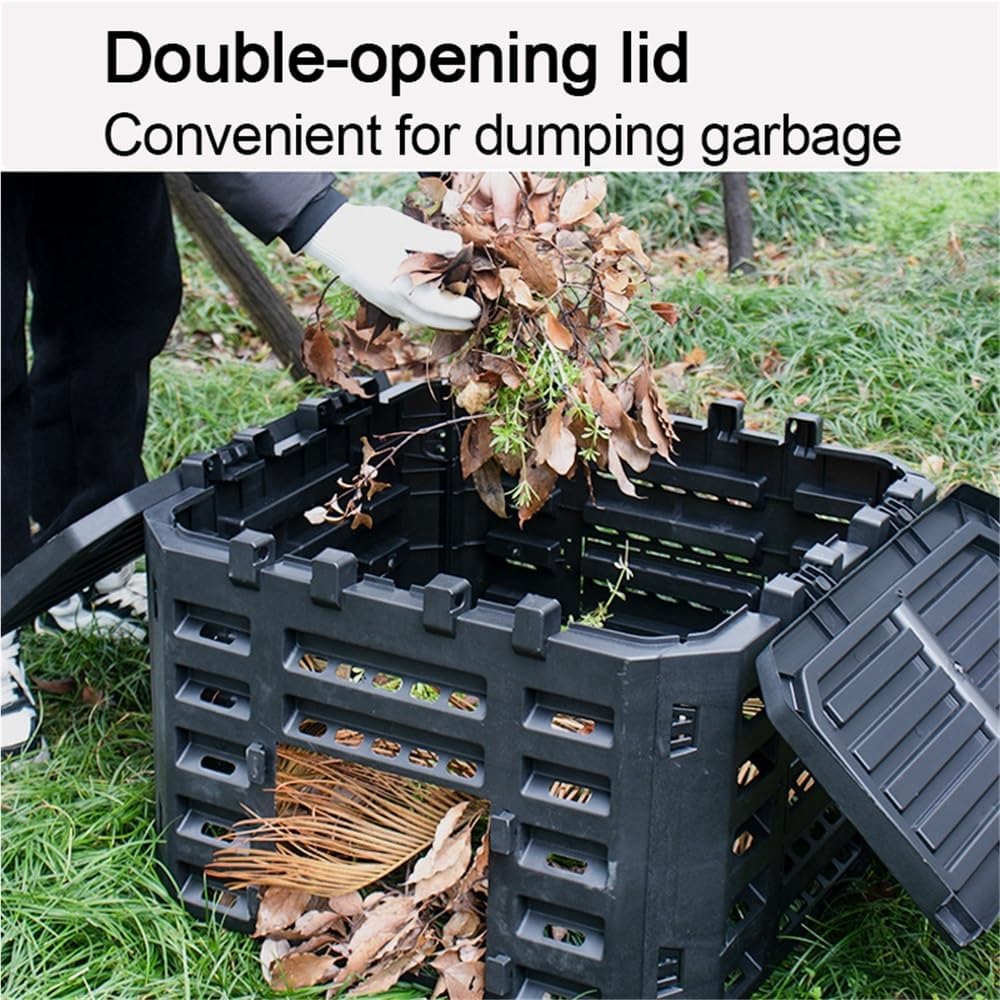
Image 4.2: Adding garden waste to the compost bin using the convenient double-opening lid.
For best results, aim for a mix of green and brown materials. Chop larger items into smaller pieces to speed up decomposition.
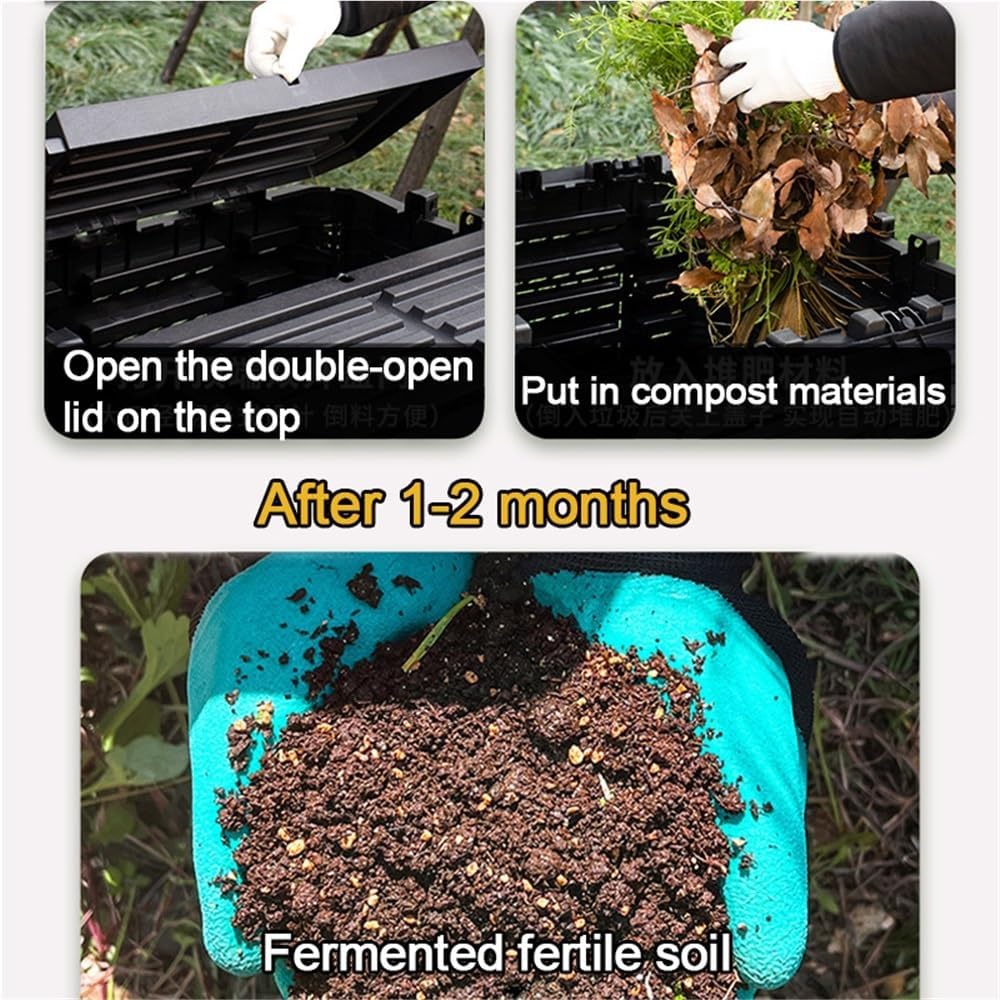
Image 4.3: The process of adding materials and the appearance of fermented soil after 1-2 months.
4.3 Retrieving Finished Compost
Once materials have fully decomposed (typically 1-2 months depending on conditions and materials), the nutrient-rich compost can be retrieved from the bottom of the bin.
- Locate the snap-lock fertilizer door at the bottom of the bin.
- Unlatch and open the door.
- Scoop out the finished compost. The compost at the bottom will be the oldest and most decomposed.
- Close the door securely after retrieving compost.
5. Maintenance
- Moisture Levels: The compost pile should be consistently moist, like a wrung-out sponge. If too dry, add water; if too wet, add more brown materials (e.g., dry leaves, shredded paper).
- Aeration: While the bin has ventilation ports, occasionally turning the compost with a pitchfork or aerator can speed up the process and prevent compaction.
- Cleaning: Periodically clean the exterior of the bin with water and a mild detergent if desired. Ensure ventilation holes remain clear of debris.
- Pest Control: Proper composting (avoiding meat, dairy, and greasy foods) helps deter pests. Ensure the lid is always closed securely.
6. Troubleshooting
| Problem | Possible Cause | Solution |
|---|---|---|
| Compost smells bad (rotten eggs/ammonia) | Too much green material, not enough air, too wet. | Add more brown materials (leaves, cardboard), turn the pile, ensure ventilation ports are clear. |
| Compost is not breaking down | Too dry, not enough nitrogen, lack of aeration. | Add water, add more green materials (food scraps), turn the pile. |
| Pests (flies, rodents) | Exposed food waste, unsuitable materials (meat, dairy). | Bury food scraps under brown material, ensure lid is closed, avoid adding prohibited items. |
| Compost is too wet/slimy | Too much moisture, not enough brown material. | Add dry brown materials (shredded paper, dry leaves), turn the pile to aerate. |
7. Specifications
The Gilubfckin Stackable Outdoor Compost Bin is available in three sizes.
| Attribute | 180L (47.6 Gallon) | 340L (89.8 Gallon) | 500L (132.1 Gallon) |
|---|---|---|---|
| Material | Plastic | ||
| Dimensions (L x W x H) | 63 x 63 x 43 cm (24.8 x 24.8 x 16.9 in) | 63 x 63 x 80 cm (24.8 x 24.8 x 31.5 in) | 63 x 63 x 120 cm (24.8 x 24.8 x 47.2 in) |
| Assembly Required | Yes | ||
| Item Weight (approx.) | 10.14 pounds (4.6 kg) | (Not specified for 340L) | (Not specified for 500L) |
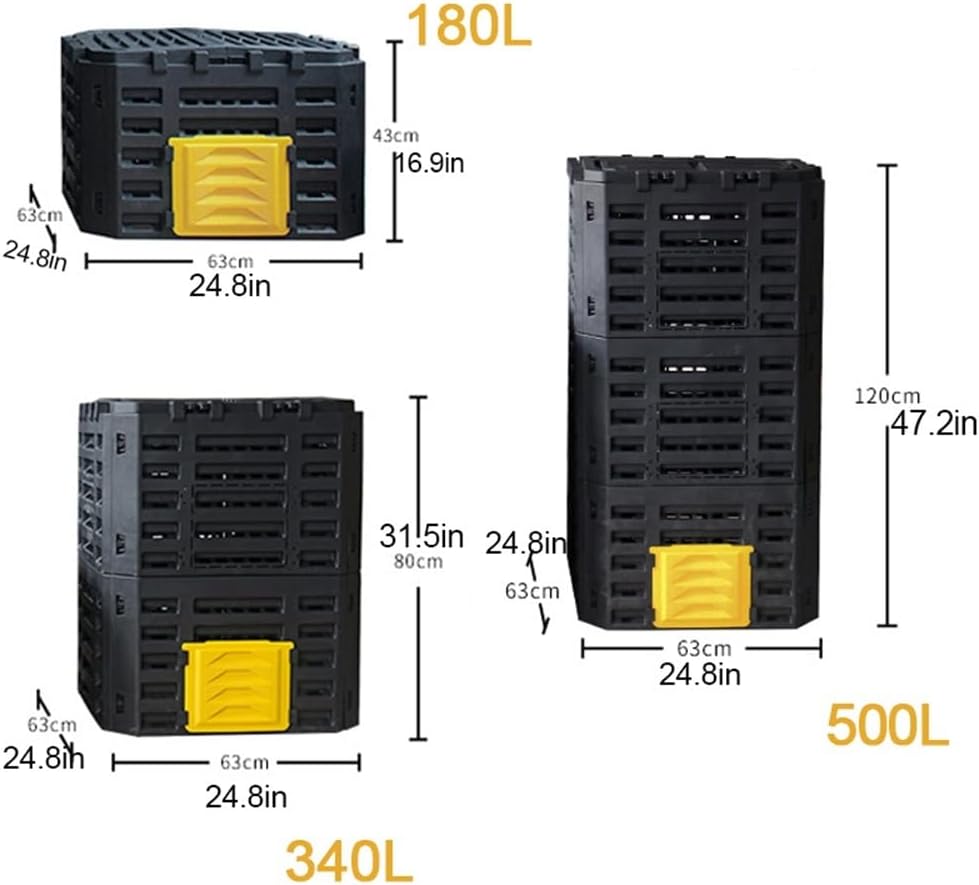
Image 7.1: Detailed dimensions for the 180L, 340L, and 500L compost bin models.
8. Warranty and Support
For warranty information or technical support, please refer to the product packaging or contact Gilubfckin customer service directly. Keep your purchase receipt as proof of purchase.
Manufacturer: Gilubfckin
Model Number: Gilubfckin (refer to specific size for variant)
ASIN: B0FCMMSHC6 (for 180L Yellow model)