Fenamx 14304
Fenamx Mjx Hyper Go VW Polo 14304 Brushless RC Car Instruction Manual
Model: 14304
1. Introduction
This manual provides essential information for the safe operation, setup, and maintenance of your Fenamx Mjx Hyper Go VW Polo 14304 Brushless RC Car. Please read this manual thoroughly before operating the vehicle to ensure proper function and longevity.
1.1 Safety Information
- Always operate the RC car in open areas, away from people, pets, and obstacles.
- Keep hands, hair, and loose clothing away from moving parts.
- Do not operate the vehicle in wet conditions unless specifically designed for it. This model features a dust cover, but is not fully waterproof.
- Adult supervision is recommended for users under 15 years of age.
- Ensure batteries are charged correctly and handled with care.
- Turn off the vehicle and remote control when not in use.
2. What's in the Box
Upon unboxing, verify that all the following components are present:
- Fenamx Mjx Hyper Go VW Polo 14304 RC Car
- Remote Control
- Play Mat
- Screwdriver
- AA Batteries (for remote control)
- LiPo Battery (for RC car)
- USB Charger

Image: Overview of the Fenamx Mjx Hyper Go VW Polo 14304 RC Car and its included accessories, including the remote control, brushless motor, ESC, and battery.
3. Key Features
The Fenamx Mjx Hyper Go VW Polo 14304 is engineered for high performance and durability:
- Brushless Power System: Equipped with a 45A brushless Electronic Speed Controller (ESC) and a 2845 quad-pole brushless motor for powerful acceleration and responsive control.
- High Speed Capability: Achieves a top speed of 42 km/h with the included battery. Can reach up to 55 km/h with an optional 3S battery (sold separately).
- Extended Control Range: The remote control offers a range of up to 120 meters, ensuring reliable connection during operation.
- Long Run Time: Enjoy approximately 13 minutes of continuous operation on a single charge.
- Independent Receiver & Upgradeability: Features a standard standalone receiver for consistent control and allows for easy modifications and upgrades.
- Full Metal Hydraulic Shock Absorbers: Provides a smooth driving experience over varied terrains, enhancing stability and handling.
- Metal Chassis: Durable metal chassis for enhanced structural integrity and protection.
- Sealed Metal Differential: Ensures reliable power delivery to the wheels and protects internal gears from debris.
- Full Vehicle Linkage Light Set: Realistic lighting system for enhanced visual appeal.
- Dust Cover: Protects internal electronics from dust and minor splashes.
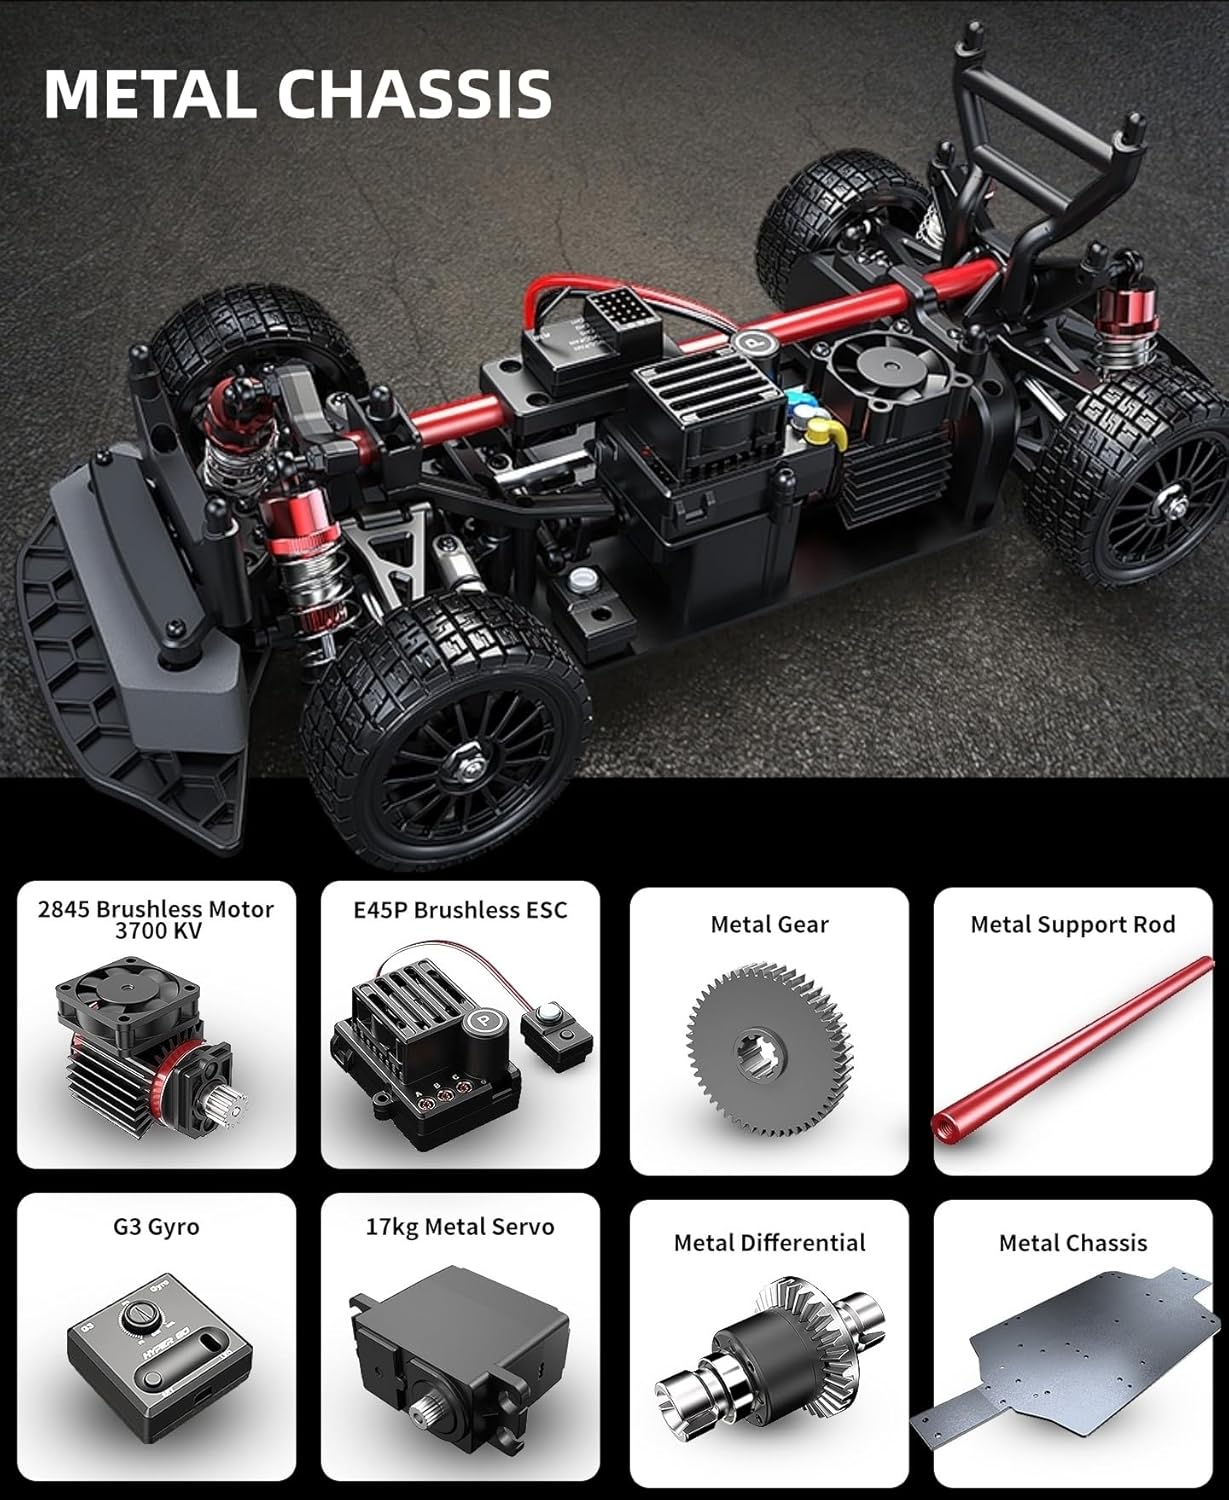
Image: Detailed view of the RC car's metal chassis and key internal components, highlighting the brushless motor, ESC, metal gears, and G3 Gyro.
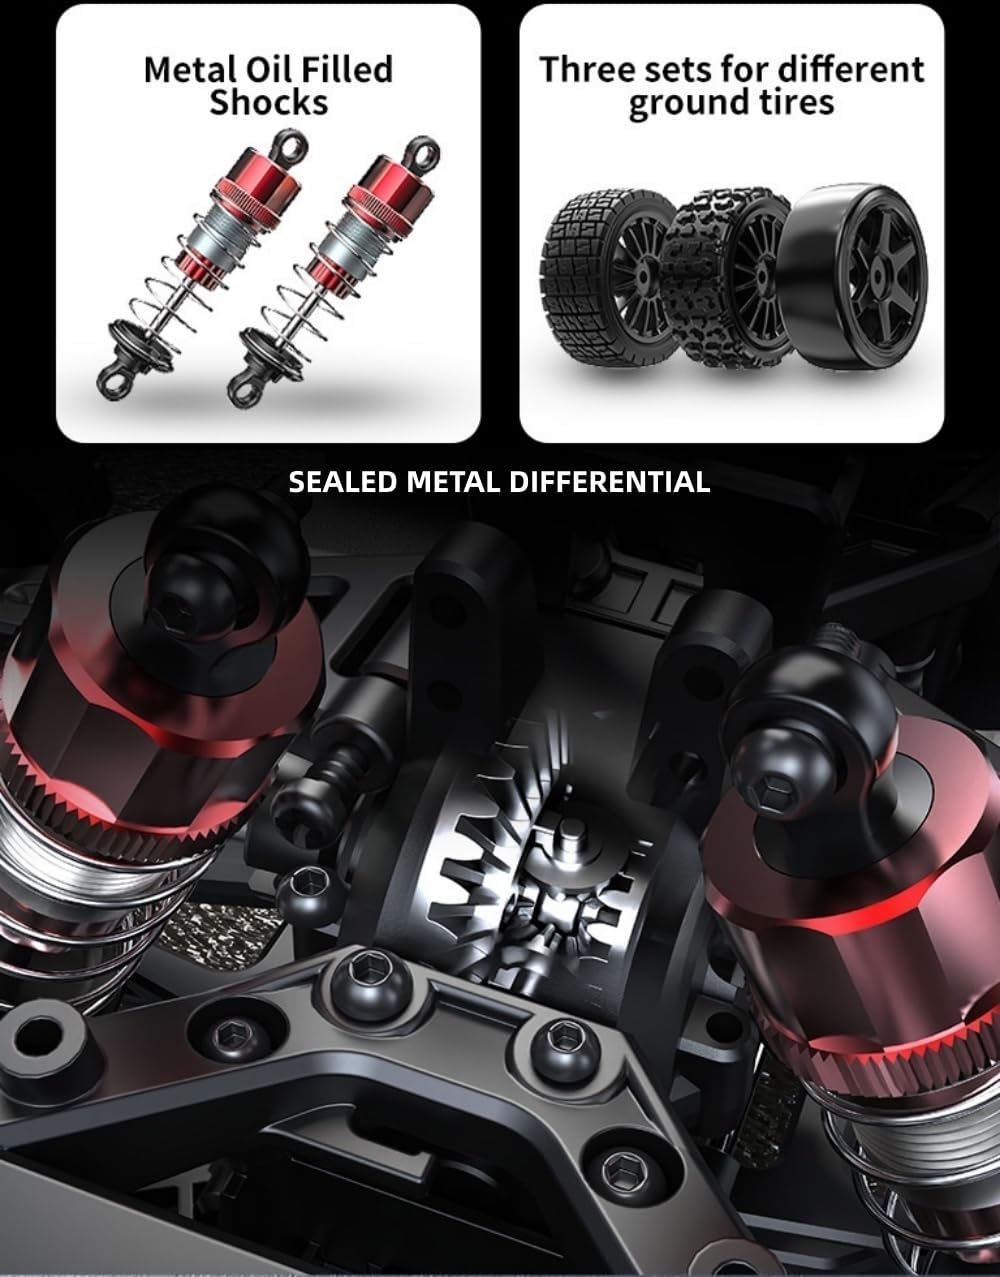
Image: Close-up illustrating the metal oil-filled shocks, the variety of included tires for different terrains, and the sealed metal differential.

Image: Demonstrating the full vehicle linkage light set and the protective dust cover over the internal components.
4. Setup Guide
4.1 Charging the Car Battery
- Connect the included USB charger to a compatible USB power source (e.g., computer USB port, USB wall adapter).
- Connect the LiPo battery to the charger.
- The charger's indicator light will show the charging status (refer to charger instructions for specific light patterns).
- Once fully charged, disconnect the battery from the charger. Do not overcharge the battery.
4.2 Installing Batteries
4.2.1 Car Battery Installation
- Carefully remove the car body shell.
- Insert the charged LiPo battery into the designated battery compartment.
- Secure the battery to prevent movement during operation.
- Connect the battery to the ESC. Ensure correct polarity.
- Reattach the car body shell.
4.2.2 Remote Control Battery Installation
- Open the battery compartment on the back of the remote control.
- Insert the AA batteries, observing the correct polarity (+/-).
- Close the battery compartment securely.
4.3 Pairing the Remote Control
- Turn on the remote control. The indicator light should flash.
- Turn on the RC car. The car's receiver light should also flash.
- Wait a few seconds for the remote and car to automatically pair. The indicator lights on both devices should become solid, indicating a successful connection.
- If pairing fails, turn off both devices and repeat the process.
5. Operating Instructions
5.1 Basic Controls
- Throttle Trigger: Pull the trigger to accelerate forward. Push the trigger to brake, then push again for reverse.
- Steering Wheel: Turn the wheel left or right to steer the vehicle.
- Steering Trim: Adjust the steering trim dial on the remote control to ensure the car drives straight when the steering wheel is centered.
- Throttle Trim: Adjust the throttle trim dial to ensure the car remains stationary when the throttle trigger is in the neutral position.
- D/R (Dual Rate) Switch: Adjusts the maximum steering angle. Useful for fine-tuning control.
- G3 Gyro (if equipped): The G3 Gyro helps stabilize the vehicle, especially during drifts or on loose surfaces. Adjust its sensitivity using the dedicated dial on the remote or gyro unit.

Image: The Fenamx Mjx Hyper Go VW Polo 14304 RC Car, highlighting its 1:14 scale and brushless motor system.
5.2 Driving Tips
- Start slowly to get a feel for the controls.
- Practice steering and throttle control in an open area.
- Avoid driving into obstacles at high speeds to prevent damage.
- Monitor battery life and return the vehicle before the battery is completely depleted to avoid sudden power loss.
- Experiment with different tire sets for optimal performance on various surfaces.

Image: The RC car navigating through water, showcasing its robust design suitable for various terrains.
6. Maintenance
Regular maintenance will extend the life and performance of your RC car.
6.1 Cleaning
- After each use, especially in dirty or dusty conditions, clean the car using a soft brush or compressed air.
- Wipe down the body with a damp cloth. Avoid using harsh chemicals.
- Ensure the dust cover is properly sealed to protect electronics.
6.2 Inspection
- Regularly check all screws and fasteners for tightness.
- Inspect tires for wear and tear. Replace if necessary.
- Check the metal oil-filled shocks for leaks or damage. Ensure smooth operation.
- Examine the sealed metal differential for any signs of damage or excessive play.
- Ensure all moving parts, such as suspension arms and steering linkages, move freely.
6.3 Battery Care
- Store LiPo batteries in a cool, dry place, away from direct sunlight and extreme temperatures.
- Never store batteries fully charged or fully discharged for extended periods. Charge them to a storage voltage (typically around 3.8V per cell) if storing for more than a few days.
- Always use the recommended charger.
7. Troubleshooting
If you encounter issues with your RC car, refer to the following common problems and solutions:
| Problem | Possible Cause | Solution |
|---|---|---|
| Car does not respond to remote. | Low battery in car or remote; Not paired; Power switch off. | Charge/replace batteries; Re-pair remote and car; Ensure power switches are ON. |
| Car drives erratically or not straight. | Steering trim incorrect; Damaged steering components; Gyro settings. | Adjust steering trim; Inspect steering linkages; Adjust G3 Gyro sensitivity. |
| Reduced speed or power. | Low car battery; Motor/ESC overheating; Debris in drivetrain. | Recharge car battery; Allow components to cool; Clean drivetrain. |
| Unusual noises during operation. | Loose gears; Debris in moving parts; Damaged bearings. | Inspect and tighten gears; Clean car thoroughly; Replace damaged parts. |
| Laggy throttle response. | Remote signal interference; ESC calibration issue. | Move to an area with less interference; Recalibrate ESC (refer to ESC manual). |
8. Specifications
| Feature | Detail |
|---|---|
| Model Number | 14304 |
| Product Dimensions | 1 x 1 x 0.5 inches |
| Item Weight | 5 pounds |
| Manufacturer | Fenamx |
| Recommended Age | 15 years and up |
| Batteries Required | 1 AA batteries (included for remote), LiPo battery (included for car) |
| Motor Type | 2845 Brushless Motor |
| ESC | 45A Brushless ESC |
| Top Speed (2S Battery) | 42 km/h |
| Top Speed (3S Battery) | 55 km/h (with optional 3S battery) |
| Control Range | 120 meters |
| Run Time | Approximately 13 minutes |
9. Warranty and Support
For warranty information, technical support, or to purchase replacement parts, please refer to the contact information provided with your product packaging or visit the official Fenamx website. Keep your proof of purchase for warranty claims.