
Introduction
Thank you for choosing the Oskkude 10-inch Car Stereo. This manual provides detailed instructions for the installation, operation, and maintenance of your new car stereo system. Please read this manual thoroughly before installation and use to ensure proper function and to prevent damage. Keep this manual for future reference.
Important Safety Information: Always prioritize safety. Do not operate the device in a way that distracts you from driving. Ensure all wiring is correctly connected to prevent electrical hazards. Professional installation is recommended.
Product Overview
The Oskkude 10-inch Car Stereo is designed to enhance your driving experience with advanced features and seamless integration for Honda Civic models from 2006 to 2011.

This image shows the Oskkude 10-inch car stereo unit and its custom frame designed for Honda Civic 2006-2011. It also provides a visual comparison of the original car dashboard versus the dashboard with the new stereo installed.
Key Features:
- Vehicle Specific Fitment: Custom designed for Honda Civic 2006-2011 with a 10-inch touchscreen.
- Android 14 Operating System: Equipped with 2GB RAM and 32GB ROM for smooth operation and quick response.
- Wireless CarPlay & Android Auto: Seamless integration with your smartphone for navigation, calls, messages, and music.
- GPS Navigation: Built-in Wi-Fi module supports online and offline maps for North America.
- Steering Wheel Control: Compatible with existing steering wheel controls for easy media and app navigation.
- AHD Backup Camera Support: Includes a backup camera with night vision and a 170° wide field of view for safer reversing.
- High-Definition IPS Touchscreen: 10-inch IPS display for a clear visual experience.
- Multimedia Player: USB/SD/AUX input for various media playback.
- Built-in Bluetooth: For hands-free calling and audio streaming.
- FM/RDS Radio: Supports automatic or manual station searching.
- Split Screen Functionality: Run two applications simultaneously.
Package Contents:
- Car Stereo Head Unit
- Power Cable
- RCA Input/Output Cables
- 2 USB Cables
- Camera Input Cable
- GPS Antenna
- Instruction Manual
- Mounting Buttons
- Screws
- Car Compass

This image displays all items included in the package: the 10-inch car stereo head unit, power cable, RCA input/output cables, two USB cables, camera input cable, GPS antenna, instruction manual, mounting buttons, and screws for installation.
Setup and Installation
Proper installation is crucial for the optimal performance of your car stereo. If you are not familiar with car audio system installation, it is highly recommended to seek professional assistance.
Pre-Installation Checklist:
- Verify vehicle compatibility (Honda Civic 2006-2011).
- Gather necessary tools (screwdrivers, wire strippers, electrical tape, etc.).
- Disconnect the vehicle's battery before starting any electrical work.
Wiring Diagram Overview:
Refer to the detailed wiring diagram provided in the included instruction manual for specific connections. The image below provides a general overview of the rear connections.

This image shows the rear of the car stereo unit with its connected wiring harnesses. It illustrates the various input and output ports for power, audio, video, and data connections, which are crucial for proper installation.
General Installation Steps:
- Remove Old Unit: Carefully remove the existing car stereo and dashboard trim.
- Connect Wiring: Connect the power harness, speaker wires, antenna, and other auxiliary cables to the new Oskkude stereo according to the wiring diagram. Ensure all connections are secure.
- Install GPS Antenna: Mount the GPS antenna in a location with a clear view of the sky, typically on the dashboard or under the windshield.
- Install Backup Camera (Optional): If using the included backup camera, route its cable to the rear of the vehicle and connect it to the designated input on the stereo.
- Mount Stereo: Secure the new stereo unit into the dashboard opening using the provided mounting buttons and screws.
- Test Functionality: Reconnect the vehicle's battery and test all functions of the stereo (power, audio, radio, GPS, Bluetooth, camera, etc.) before fully reassembling the dashboard.
- Reassemble Dashboard: Carefully reassemble the dashboard trim.
Operating Instructions
Wireless CarPlay and Android Auto:
This stereo supports both wireless CarPlay for Apple devices and wired Android Auto for Android devices, allowing you to integrate your smartphone's features directly onto the stereo display.
- For Wireless CarPlay: Ensure your iPhone's Wi-Fi and Bluetooth are enabled. On the stereo, select the CarPlay icon. Your iPhone should appear in the list of available devices. Select it to connect.
- For Wired Android Auto: Connect your Android phone to the stereo via a USB cable. Ensure Android Auto is installed on your phone. The stereo should automatically detect and launch Android Auto.
- Once connected, you can use voice commands (Siri or Google Assistant) for navigation, calls, messages, and music playback.

This image demonstrates the user interface for both Wireless CarPlay and Android Auto on the car stereo. It highlights how phone functions like navigation, calls, messages, and music can be accessed through the stereo display, along with examples of voice commands.
GPS Navigation:
The stereo comes with a built-in GPS module and supports both online and offline navigation.
- Offline Maps: North American offline maps are pre-installed. Access them via the 'Navigation' or 'Maps' application.
- Online Maps: Connect the stereo to a Wi-Fi hotspot (e.g., from your smartphone) to use online navigation apps like Google Maps, Waze, or others downloaded from the app store.
- Enter your destination and follow the on-screen directions and voice prompts.

This image illustrates the GPS navigation capabilities of the car stereo, showing different map applications and the ability to use both online and pre-loaded offline maps for guidance.
Bluetooth Connectivity:
Connect your smartphone via Bluetooth for hands-free calling and audio streaming.
- Pairing: Go to the Bluetooth settings on the stereo and enable Bluetooth. On your phone, search for available devices and select the stereo's name (e.g., 'Oskkude Car Stereo'). Enter the pairing code if prompted (usually '0000' or '1234').
- Hands-Free Calling: Once paired, you can make and receive calls directly through the stereo's interface. Your phone's contacts can be synchronized.
- Audio Streaming: Play music from your phone through the car's speakers.

This image displays the built-in Bluetooth interface, allowing users to pair their smartphones for hands-free calling, access contacts, and stream audio directly to the car stereo.
Steering Wheel Control:
The stereo supports your vehicle's original steering wheel controls, allowing you to manage functions without taking your hands off the wheel.
- Configuration: Access the 'Steering Wheel Control' settings in the stereo's menu. Follow the on-screen instructions to map your steering wheel buttons to the desired functions (e.g., volume up/down, track skip, mode change).
- Usage: Once configured, use your steering wheel buttons to control audio playback, adjust volume, and navigate through menus.

This image demonstrates the steering wheel control integration, allowing users to manage audio playback, volume, and navigation functions directly from their steering wheel for enhanced safety and convenience.
FM/RDS Radio:
Enjoy your favorite radio stations with the built-in FM tuner and RDS (Radio Data System) functionality.
- Tuning: Select the 'Radio' application. You can manually tune to frequencies or use the automatic scan function to find available stations.
- Presets: Save your favorite stations to preset buttons for quick access.
- RDS: When available, RDS will display information such as station name, song title, or traffic announcements.
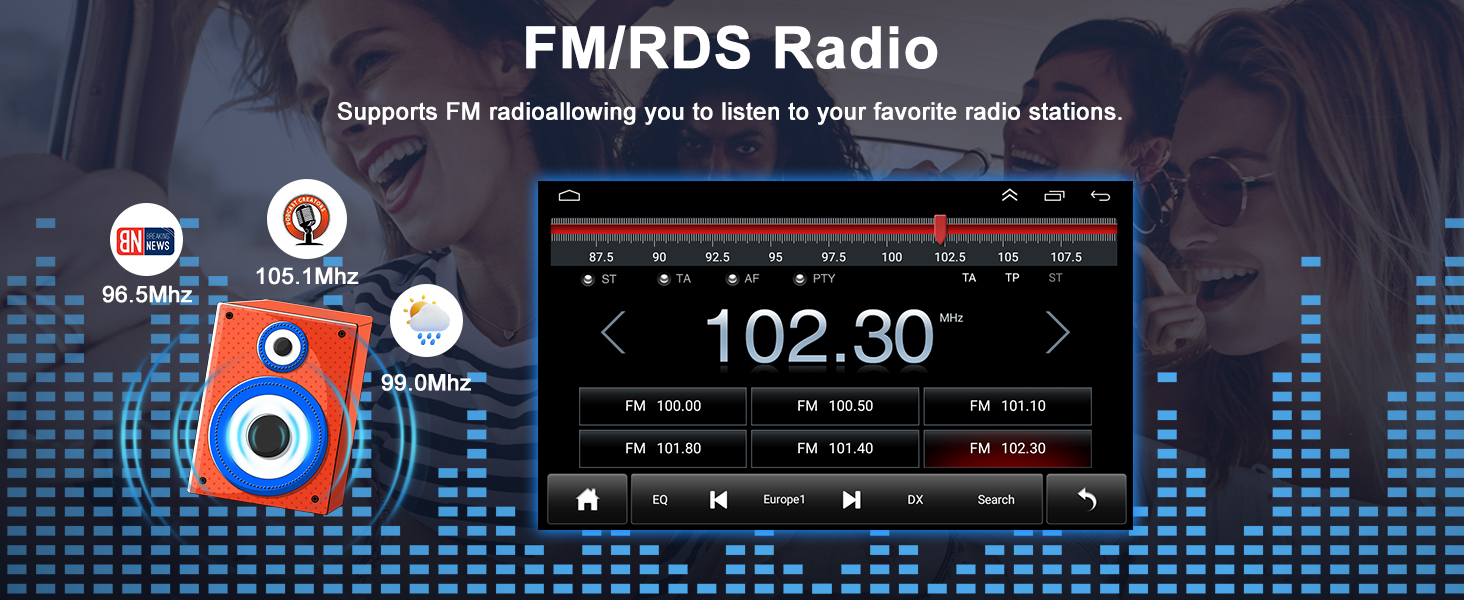
This image shows the FM/RDS radio interface, allowing users to tune into their favorite radio stations, view station information (RDS), and save presets for quick access.
Split Screen Functionality:
The split-screen feature allows you to run two applications side-by-side on the 10-inch display.
- Activating Split Screen: While an application is open, press and hold the recent apps button (or follow specific gestures as per the Android interface) and drag the app to one side of the screen. Then select another app to fill the other half.
- Benefits: This is useful for multitasking, such as having navigation open on one side while controlling music on the other.
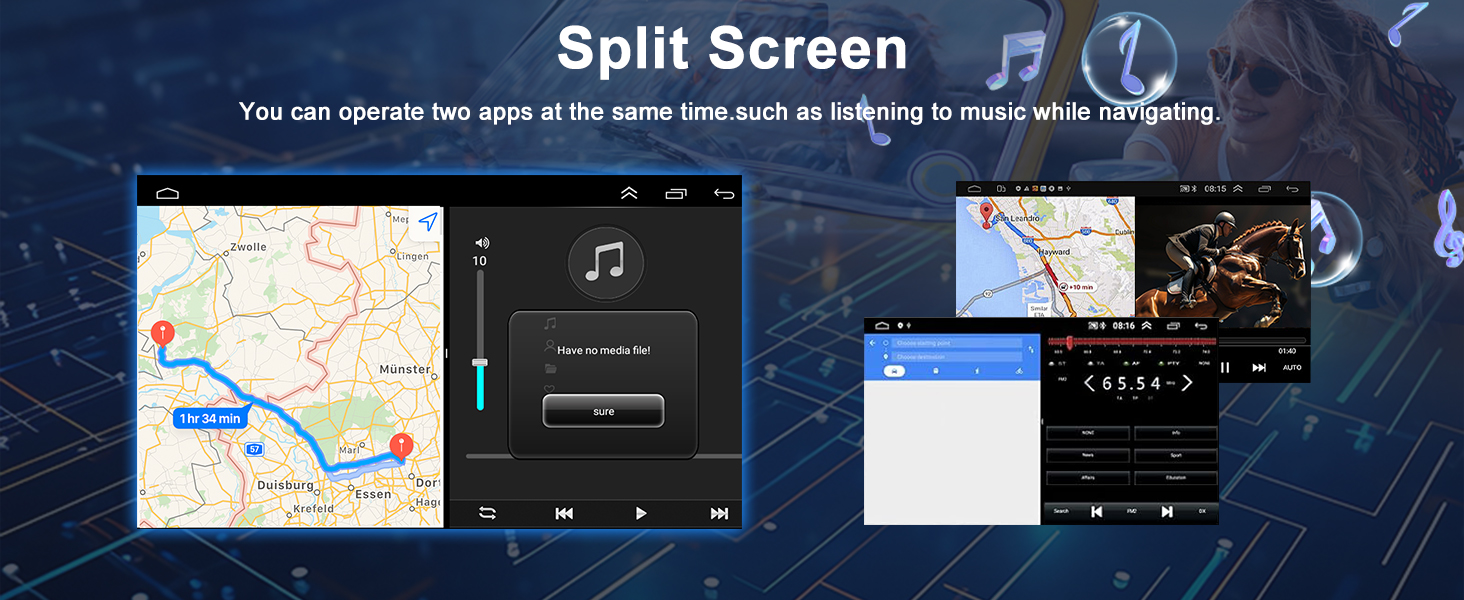
This image illustrates the split-screen feature, enabling users to run two applications simultaneously, such as navigation and music playback, for improved multitasking.
AHD Backup Camera:
The included AHD backup camera provides a clear, wide-angle view of the area behind your vehicle when reversing.
- Automatic Display: When the vehicle is shifted into reverse gear, the stereo display will automatically switch to the backup camera view.
- Parking Guidelines: Dynamic parking guidelines may appear on the screen to assist with parking maneuvers.
- Night Vision: The camera features night vision capabilities for improved visibility in low-light conditions.
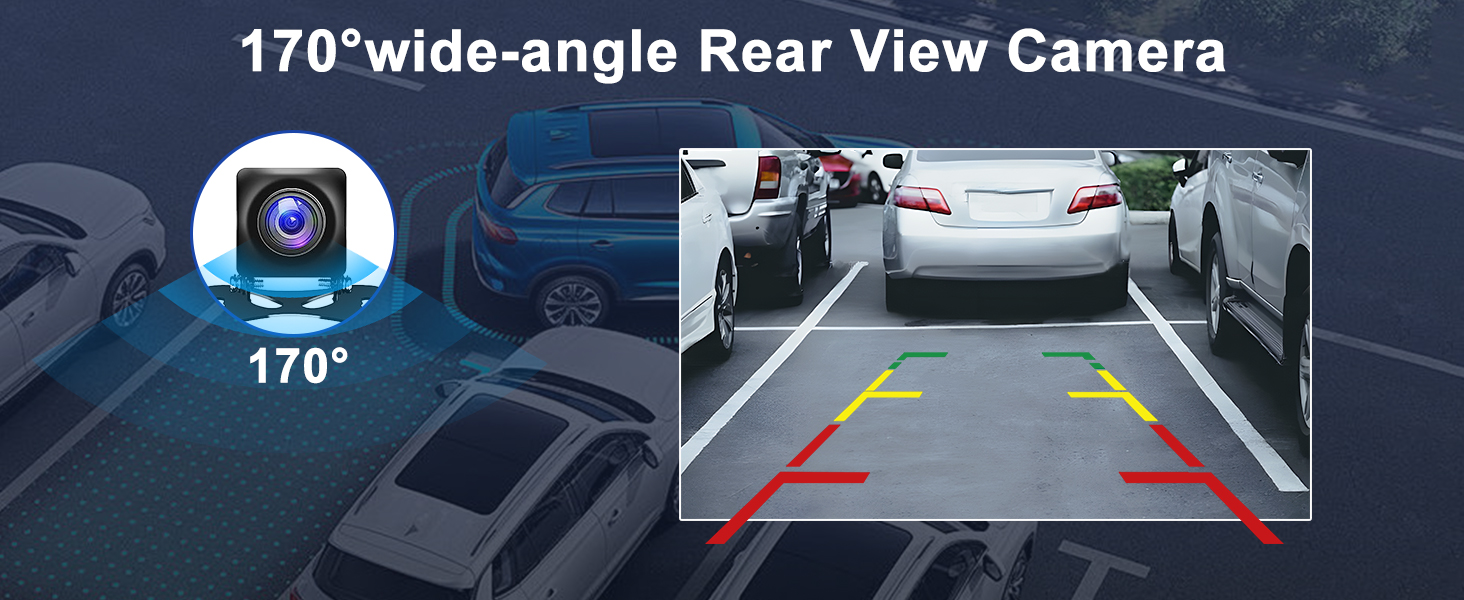
This image depicts the AHD backup camera functionality, providing a wide-angle rear view with parking guidelines on the car stereo display when the vehicle is in reverse, enhancing safety during parking maneuvers.
Maintenance
Cleaning the Screen:
Use a soft, lint-free cloth slightly dampened with water or a screen cleaner specifically designed for electronic displays. Avoid harsh chemicals or abrasive materials that could damage the touchscreen.
Software Updates:
Periodically check the manufacturer's website or the stereo's system settings for available software updates. Updates can improve performance, add new features, or fix bugs. Follow the provided instructions carefully when performing updates.
Troubleshooting
If you encounter issues with your Oskkude car stereo, refer to the following common problems and solutions:
| Problem | Possible Cause | Solution |
|---|---|---|
| No Power | Blown fuse, incorrect wiring, loose power connection. | Check vehicle fuses and stereo wiring. Ensure all power cables are securely connected. |
| No Sound | Speaker wires disconnected, volume too low, audio settings incorrect. | Verify speaker wire connections. Increase volume. Check audio balance and fader settings. |
| GPS Signal Lost/Inaccurate | GPS antenna obstructed or improperly installed, weak signal. | Ensure GPS antenna has a clear view of the sky. Check antenna connection. Move to an open area. |
| Bluetooth Not Connecting | Bluetooth off on phone/stereo, incorrect pairing process, interference. | Ensure Bluetooth is enabled on both devices. Delete previous pairings and re-pair. Restart both devices. |
| Touchscreen Unresponsive | Software glitch, screen calibration issue. | Restart the stereo. If issue persists, perform a factory reset (refer to the full manual for instructions). |
Specifications
Technical Specifications:
- Brand: Oskkude
- Model Name: TISU-06-DYY
- Model Number: TISU-06-DYY-25QJ1143X
- Operating System: Android 14 (Android 13.0 System mentioned in feature bullets, using the most recent info from title/feature bullets)
- RAM: 2GB
- Memory Storage Capacity: 32 GB (ROM)
- Screen Size: 10 Inches
- Display Type: LED IPS Touchscreen (Capacitive)
- Connectivity Technology: Bluetooth, USB, Wi-Fi
- Special Features: Wireless CarPlay, Wired Android Auto, Steering Wheel Control, GPS Navigation, Split Screen, AHD Backup Camera, FM/AUX, AV IN, RCA, RLV
- Vehicle Service Type: Car (Honda Civic 2006-2011)
- Audio Output Mode: Stereo
- Supported Satellite Navigation System: GPS
- Control Method: Touch, Voice
- Item Weight: 2400 Grams
Warranty and Support
For warranty information, please refer to the documentation included with your purchase or contact Oskkude customer support directly. If you require technical assistance or have questions not covered in this manual, please visit the Oskkude official website or contact their customer service team for further support.