1. Introduction
Thank you for choosing the Sunster TB10 8KW Portable Diesel Heater. This manual provides essential information for the safe and efficient operation of your device. Please read it thoroughly before use and retain it for future reference.
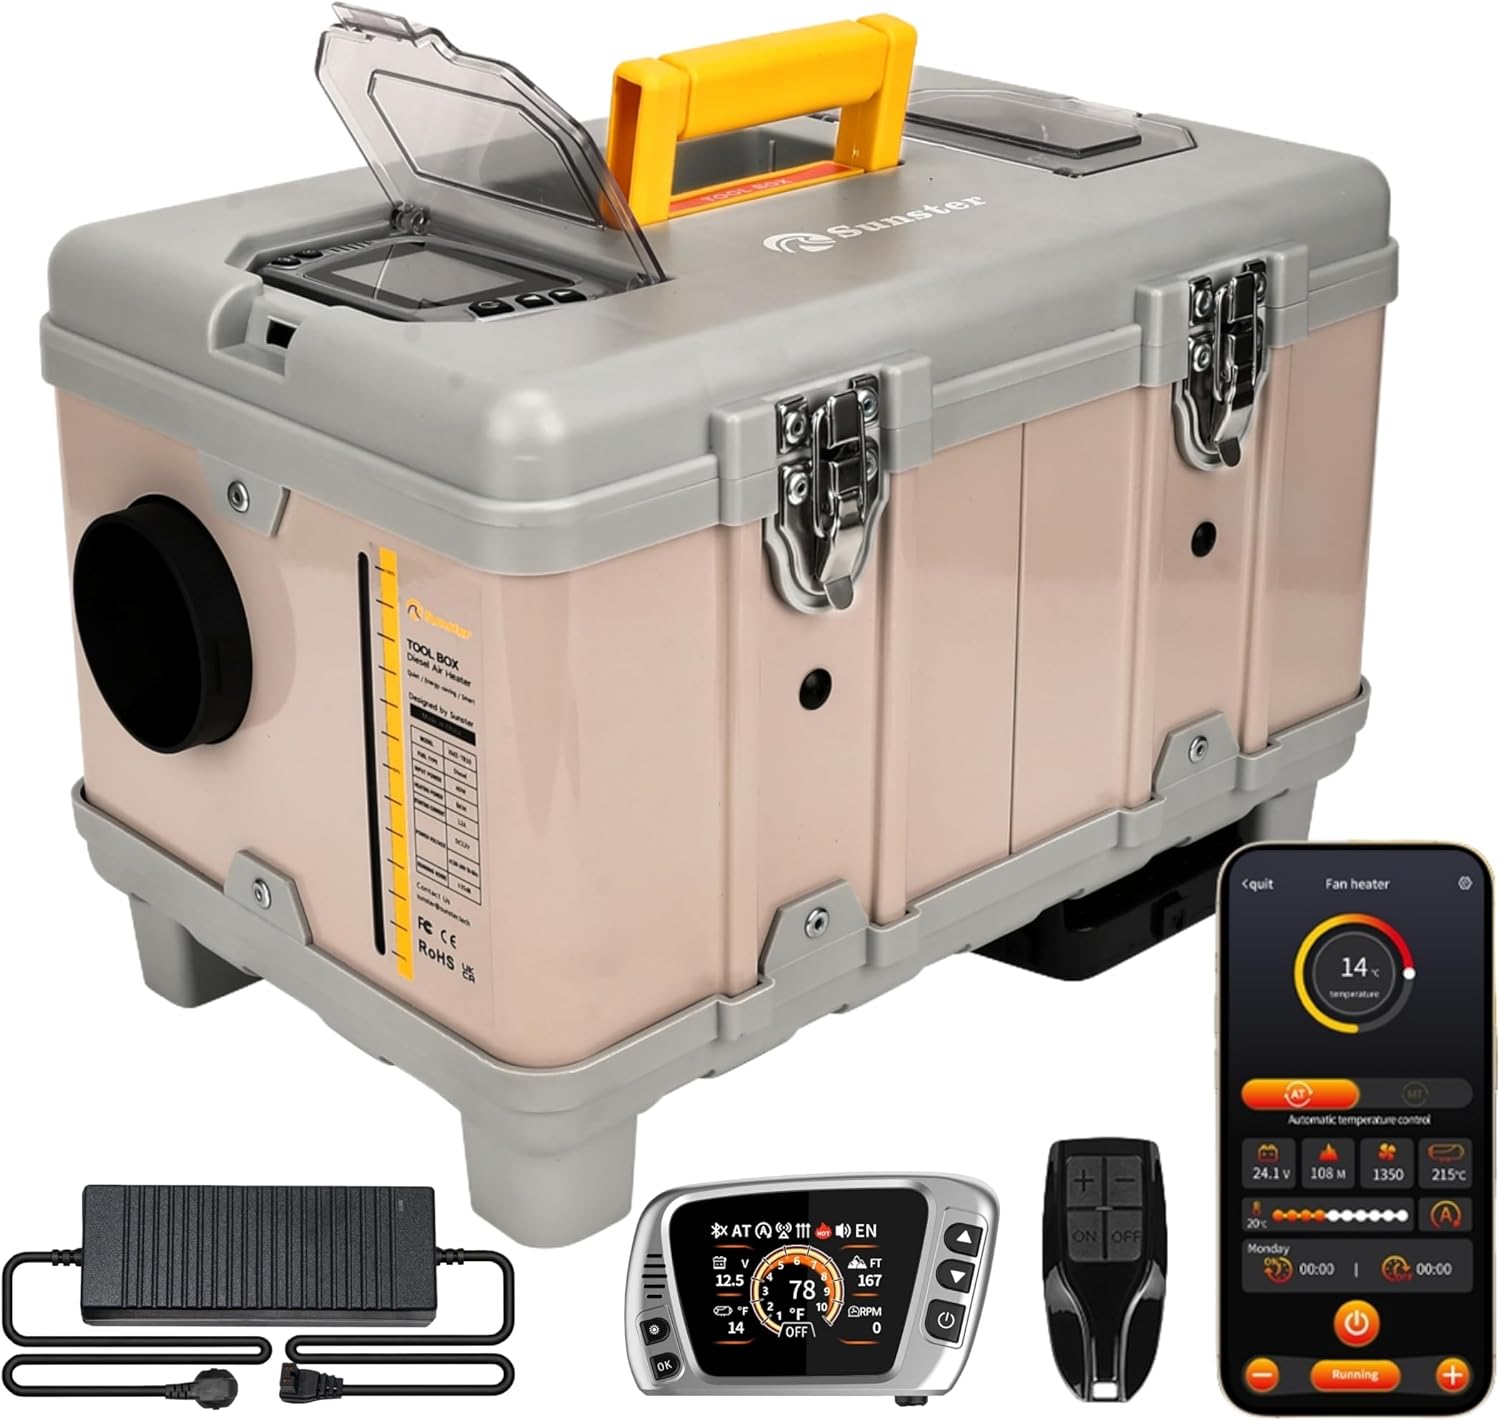
Figure 1: Sunster TB10 8KW Portable Diesel Heater and included accessories.
2. Safety Information
Your safety is paramount. Always adhere to the following precautions:
- Carbon Monoxide Warning: Diesel heaters produce carbon monoxide. Always ensure adequate ventilation when operating the heater. Never use in enclosed spaces without proper exhaust routing and ventilation. Consider using a CO alarm.
- Fuel Type: Use only diesel fuel. Never use gasoline or other flammable liquids.
- Placement: Place the heater on a stable, non-flammable surface. Ensure sufficient clearance from combustible materials.
- Exhaust: Ensure the exhaust pipe is properly installed and vented outdoors, away from any air intakes.
- Power Source: Use only the specified DC 12V or AC 110-240V power sources. Ensure connections are secure.
- Children and Pets: Keep children and pets away from the heater during operation.
- Maintenance: Regularly inspect the heater for any damage or blockages. Do not operate if damaged.
3. Package Contents
Upon unpacking, please verify that all items listed below are present and undamaged:

Figure 2: Complete package contents of the TB10 Diesel Heater.
- TB10 Portable Diesel Heater Unit
- Warm Air Outlet Pipe (Black, flexible)
- Exhaust Pipe (Stainless steel, flexible)
- Muffler
- Heat Insulation Cloth for Exhaust Pipe
- Clamps (various sizes for pipes)
- AC-DC Power Adapter
- Battery Power Cord (for 12V DC connection)
- LCD Switch with 4m/13.1ft Extension Cable
- Remote Control
- User Manual
- Fixture Accessories Set (screws, brackets)
4. Product Overview
The Sunster TB10 8KW Portable Diesel Heater is designed for versatile heating in various environments, including cars, trucks, RVs, garages, and outdoor camping. It features an integrated toolbox design for portability and ease of use.

Figure 3: Internal structure diagram of the TB10 Diesel Heater.
Key Features:
- Smart APP Control: Full control over temperature, timers, power levels, altitude mode, constant temperature, and ventilation mode.
- Upgraded S-DZ06LCD Switch: Features Bluetooth function, Automatic Start & Stop, Turbo Heat Mode, Ventilation Function, and Cleaning mode.
- Integrated Toolbox Design: Portable with a built-in 6-liter fuel tank and handle.
- Dual Power Options: Supports 12V DC and 110-240V AC.
- Indoor Climate Control: Includes a 4-meter extension cable for the control panel.
- Ventilation Function: Circulates air for cooling in warm weather.
- Adaptive Plateau Mode: Automatically adjusts fuel output for altitudes up to 4500 meters.
- Energy Saving & Silent: High heating efficiency with low fuel consumption (0.16-0.45L/h) and quiet operation (≤ 35 dB).
5. Setup and Installation
Follow these steps for proper setup and installation:
5.1. Warm Air Duct Installation
- Open the warm air duct by extending it.
- Place a clamp at the pipe opening.
- Attach the duct to the air outlet on the heater unit.
- Tighten the clamp securely.
5.2. Exhaust Pipe and Muffler Installation
- Straighten the flexible exhaust pipe.
- Wrap the heat-insulating cloth around the exhaust pipe.
- Secure the heat-insulating cloth with clamps at both ends of the pipe.
- Screw the assembled exhaust pipe into the side interface of the heater unit.
- Tighten the clamp at the interface.
- Attach the muffler to the other end of the exhaust pipe using a clamp and tighten it.
5.3. Power Connection
The heater supports both AC and DC power:
- AC 110-240V: Connect the provided AC-DC power adapter to a power strip or wall outlet. Insert the adapter's plug into the socket below the air outlet on the heater. Ensure the power adapter's indicator light is green.
- DC 12V: Use the provided battery power cord. Connect the positive (red) and negative (black) copper rings to the corresponding terminals of a 12V battery. Insert the plug into the socket below the air outlet on the heater.
Important: Always ensure the voltage used matches the product's specifications (12V DC or 110-240V AC).
Video 1: TB10 Installation Operation - This video demonstrates the step-by-step process of installing the air duct, exhaust pipe, and connecting power to the Sunster TB10 diesel heater.
6. Operating Instructions
Your TB10 heater can be controlled via the integrated LCD switch, remote control, or Bluetooth APP.

Figure 4: Overview of the LCD Monitor functions and settings.
6.1. Power On/Off
- To Power On: In shutdown state, press the power button to wake up the screen. Then, press and hold the power button until 'ON' appears on the screen.
- To Power Off: Long press the power button until 'OFF' appears on the screen.
6.2. Language Switch
- Press the 'Settings' key to enter the basic settings menu.
- Select 'Language selection' (usually the first item).
- Use the Up/Down buttons to select the desired language flag.
- Press 'OK' to confirm.
6.3. Mode Switching
- Press the 'Settings' key to enter the menu.
- Select 'Mode selection' (usually the second item).
- Use the Up/Down buttons to navigate through options:
- MT (Manual Mode) / AT (Automatic Mode): Press 'OK' to switch between manual and automatic heating modes.
- Altitude (M/FT): Press 'OK' to switch between meters and feet for altitude display.
- Temperature Units (°C/°F): Press 'OK' to switch between Celsius and Fahrenheit.
- Automatic Start/Stop (ON/OFF): Press 'OK' to enable or disable automatic start/stop based on set temperature.
- Instant Heating Mode (ON/OFF): Press 'OK' to enable or disable instant heating.
- Press the 'Settings' key to save and exit.
6.4. Remote Control Matching
- Press the 'Settings' key to enter the menu.
- Select 'Remote control pairing' (usually the third item).
- Press 'OK' to enter the matching interface.
- Use Up/Down buttons to select the corresponding remote control icon.
- Press 'OK'. The remote control icon will flash.
- Press any key on your physical remote control. The heater will automatically return to the main interface upon successful pairing.
6.5. Manual Fuel Pump
This function is used to prime the fuel system or manually pump fuel.
- Press the 'Settings' key to enter the menu.
- Select 'Manual oil pump' (usually the fourth item).
- Press 'OK'.
- Press the Up button to start pumping fuel.
- Press the Down button to stop pumping fuel.
- Press the 'Settings' key to exit.
6.6. Timing Function
Set automatic power on/off times for specific days.
- Press the 'Settings' key to enter the menu.
- Select 'Timing setting up' (usually the fifth item).
- Press 'OK' to enter the timing function.
- First, select the alarm clock icon on the right (for time calibration).
- Press 'OK' to enter time calibration. Adjust the time using the Up/Down buttons and press 'OK' to confirm. Set the time to your local region.
- Press the 'Settings' key to return.
- Select the first alarm clock icon (for setting daily timers).
- Adjust to the current day (e.g., SUN for Sunday) and press 'OK'.
- Set the automatic start time and automatic shutdown time using the Up/Down buttons and 'OK' to confirm.
- Select 'ON' to activate the timer for that day.
- Press the 'Settings' key to return.
6.7. Bluetooth Connection
Control your heater via a smartphone app.
- Press the 'Settings' key to enter the menu.
- Navigate to the Bluetooth connection option (often represented by a QR code icon).
- Press 'OK'. A QR code will appear on the screen.
- Use your smartphone to scan the QR code. This will direct you to download the 'AirHeater' app.
- Open the app after downloading and turn on Bluetooth on your phone.
- Connect to the device within the app.
- At this time, the Bluetooth icon will be displayed on the heater's switch.
- Press 'OK' on the heater's switch to confirm the connection. You can now operate the heater via your mobile phone.
6.8. Cleaning Mode
The cleaning mode helps maintain the combustion chamber.
- In shutdown state, long press the Down button to turn on the cleaning mode.
- The heater will automatically shut down after cleaning the residual fuel from the combustion chamber.
Video 2: DZ06 Switch Operation - This video provides a detailed guide on operating the DZ06 Bluetooth LCD switch, including power, language, mode, remote pairing, manual pump, timing, Bluetooth, and cleaning functions.
Video 3: LCD Switch Operation - A comprehensive video demonstrating the various functions and settings of the LCD control switch.
7. Maintenance
Regular maintenance ensures optimal performance and longevity of your heater:
- Cleaning: Regularly clean the exterior of the heater. Use the cleaning mode to clean the combustion chamber.
- Air Filter: Check and clean the integrated air filter periodically to ensure proper airflow.
- Fuel Tank: Ensure the 6-liter fuel tank is free from contaminants.
- Connections: Periodically check all pipe and electrical connections for tightness and wear.
- Storage: When not in use for extended periods, drain the fuel tank and store the heater in a dry, safe place.
8. Troubleshooting
If you encounter issues, refer to the following common problems and solutions:
- Heater not starting: Check power connections (AC or DC), ensure sufficient fuel, and verify the power button is pressed correctly.
- Error Code E5 (Overheating): This indicates overheating. Check for blocked air intake or exhaust, ensure proper ventilation, and allow the unit to cool down before restarting.
- White Smoke from Intake: If the power source is interrupted during operation, partially combusted diesel may vent from the combustion air intake. Ensure a stable power supply and proper exhaust routing.
- No Heat Output: Check fuel level, ensure the heater is in 'ON' mode, and verify temperature settings.
- Remote/App Not Connecting: Ensure Bluetooth is enabled on your device, the app is installed, and follow the remote pairing instructions.
For persistent issues, please contact Sunster customer support.
9. Specifications
| Feature | Specification |
|---|---|
| Brand | Sunster |
| Model | TB10 8KW Portable Diesel Heater |
| Power Source | DC 12V / AC 110-240V |
| Heating Power | 8 KW |
| Heating Efficiency | ≥ 96% |
| Fuel Consumption | 0.16-0.45 L/h |
| Fuel Tank Capacity | 6 L (1.58 gal) |
| Heating Coverage | 215 ft² / 20 m² |
| Operating Noise | ≤ 35 dB |
| Min Temperature Setting | 46°F (8°C) |
| Max Temperature Setting | 95°F (35°C) |
| Altitude Adaptation | Up to 4500 meters |
| Item Weight | 21.7 pounds |
| Package Dimensions | 18.25 x 15 x 12.5 inches |
10. Warranty and Support
Your Sunster TB10 Portable Diesel Heater comes with a standard manufacturer's warranty. Please refer to the warranty card included in your package for specific terms and conditions.
For technical support, troubleshooting assistance, or warranty claims, please contact Sunster customer service through the official website or your retailer.


