1. Introduction
Thank you for choosing the NBBUFF LED Motion Sensor Dimmable Cabinet Lights. This manual provides detailed instructions for the safe and efficient use of your new lighting system. These 11.81-inch lights are designed for various indoor applications, offering convenience with motion sensing, adjustable brightness, and three color temperature modes.

Figure 1: Overview of the NBBUFF 11.81-inch LED Motion Sensor Cabinet Lights and included USB cables.
2. Product Features
- Motion Sensor: Automatically detects movement within a 120° range, turning the light on when motion is detected and off after a period of inactivity.
- Dimmable Brightness: Adjustable light intensity to suit various needs and environments.
- 3 Color Modes: Choose between Warm White (3000K), Natural White (4500K), and Cold White (6000K) light temperatures.
- USB Rechargeable: Built-in battery for convenient recharging via USB-C.
- Magnetic Installation: Easy and tool-free installation with magnetic adhesive strips.
- Versatile Application: Ideal for cabinets, closets, stairs, hallways, bedrooms, and kitchens.

Figure 2: Key features of the LED cabinet lights, including USB rechargeability and multiple light modes.
3. Package Contents
Please check the package for the following items:
- 3 x NBBUFF 11.81-inch LED Motion Sensor Cabinet Lights
- 3 x USB-C Charging Cables
- 6 x Magnetic Adhesive Strips (2 per light for secure mounting)
- 1 x User Manual (this document)
4. Setup and Installation
The NBBUFF cabinet lights feature a magnetic design for easy, tool-free installation.
- Prepare Surface: Clean and dry the desired installation surface to ensure optimal adhesion for the magnetic strips.
- Attach Magnetic Strips: Peel the protective film from one side of the magnetic adhesive strip and firmly press it onto the back of the LED light. Repeat for the second strip, ensuring they are evenly spaced.
- Mount Light: Peel the protective film from the other side of the magnetic adhesive strips (now attached to the light) and press the light firmly onto the cleaned installation surface. The magnets will hold the light in place.
- Adjust Position: The light can be easily removed from the magnetic strips for charging or repositioning.

Figure 3: Detailed view of the light's components, including the magnetic attachment points.
5. Operating Instructions
5.1. Charging the Lights
Before first use, fully charge the lights. When the battery is low, the light indicator will signal. Use the provided USB-C cable to charge the device.
- Connect the USB-C end of the cable to the charging port on the light.
- Connect the USB-A end to a standard USB power adapter (not included), computer USB port, or power bank.
- The indicator light will show charging status (e.g., red for charging, green for fully charged).
5.2. Power On/Off and Mode Selection
Locate the multi-function button/switch on the light. This controls power, light color, and brightness.
- Power On/Off: Press and hold the button for a few seconds to turn the light on or off.
- Cycle Color Modes: Short press the button to cycle through the three color temperatures: Warm White (3000K), Natural White (4500K), and Cold White (6000K).
- Adjust Brightness: When the light is on, press and hold the button to continuously adjust the brightness level. Release the button when the desired brightness is reached.

Figure 4: Illustration of available light color modes and brightness adjustment functionality.

Figure 5: Visual representation of the three distinct color temperatures provided by the lights.
5.3. Motion Sensor Functionality
The integrated motion sensor allows for automatic illumination when movement is detected.
- Activation: Ensure the light is in motion sensor mode (refer to the switch on the light, often labeled "AUTO" or a motion sensor icon).
- Sensing Range: The sensor detects motion within a 120° angle. For optimal performance, position the light where movement is expected within this range.
- Automatic On/Off: The light will turn on automatically when motion is detected in low-light conditions and turn off after approximately 15-20 seconds of no further motion.
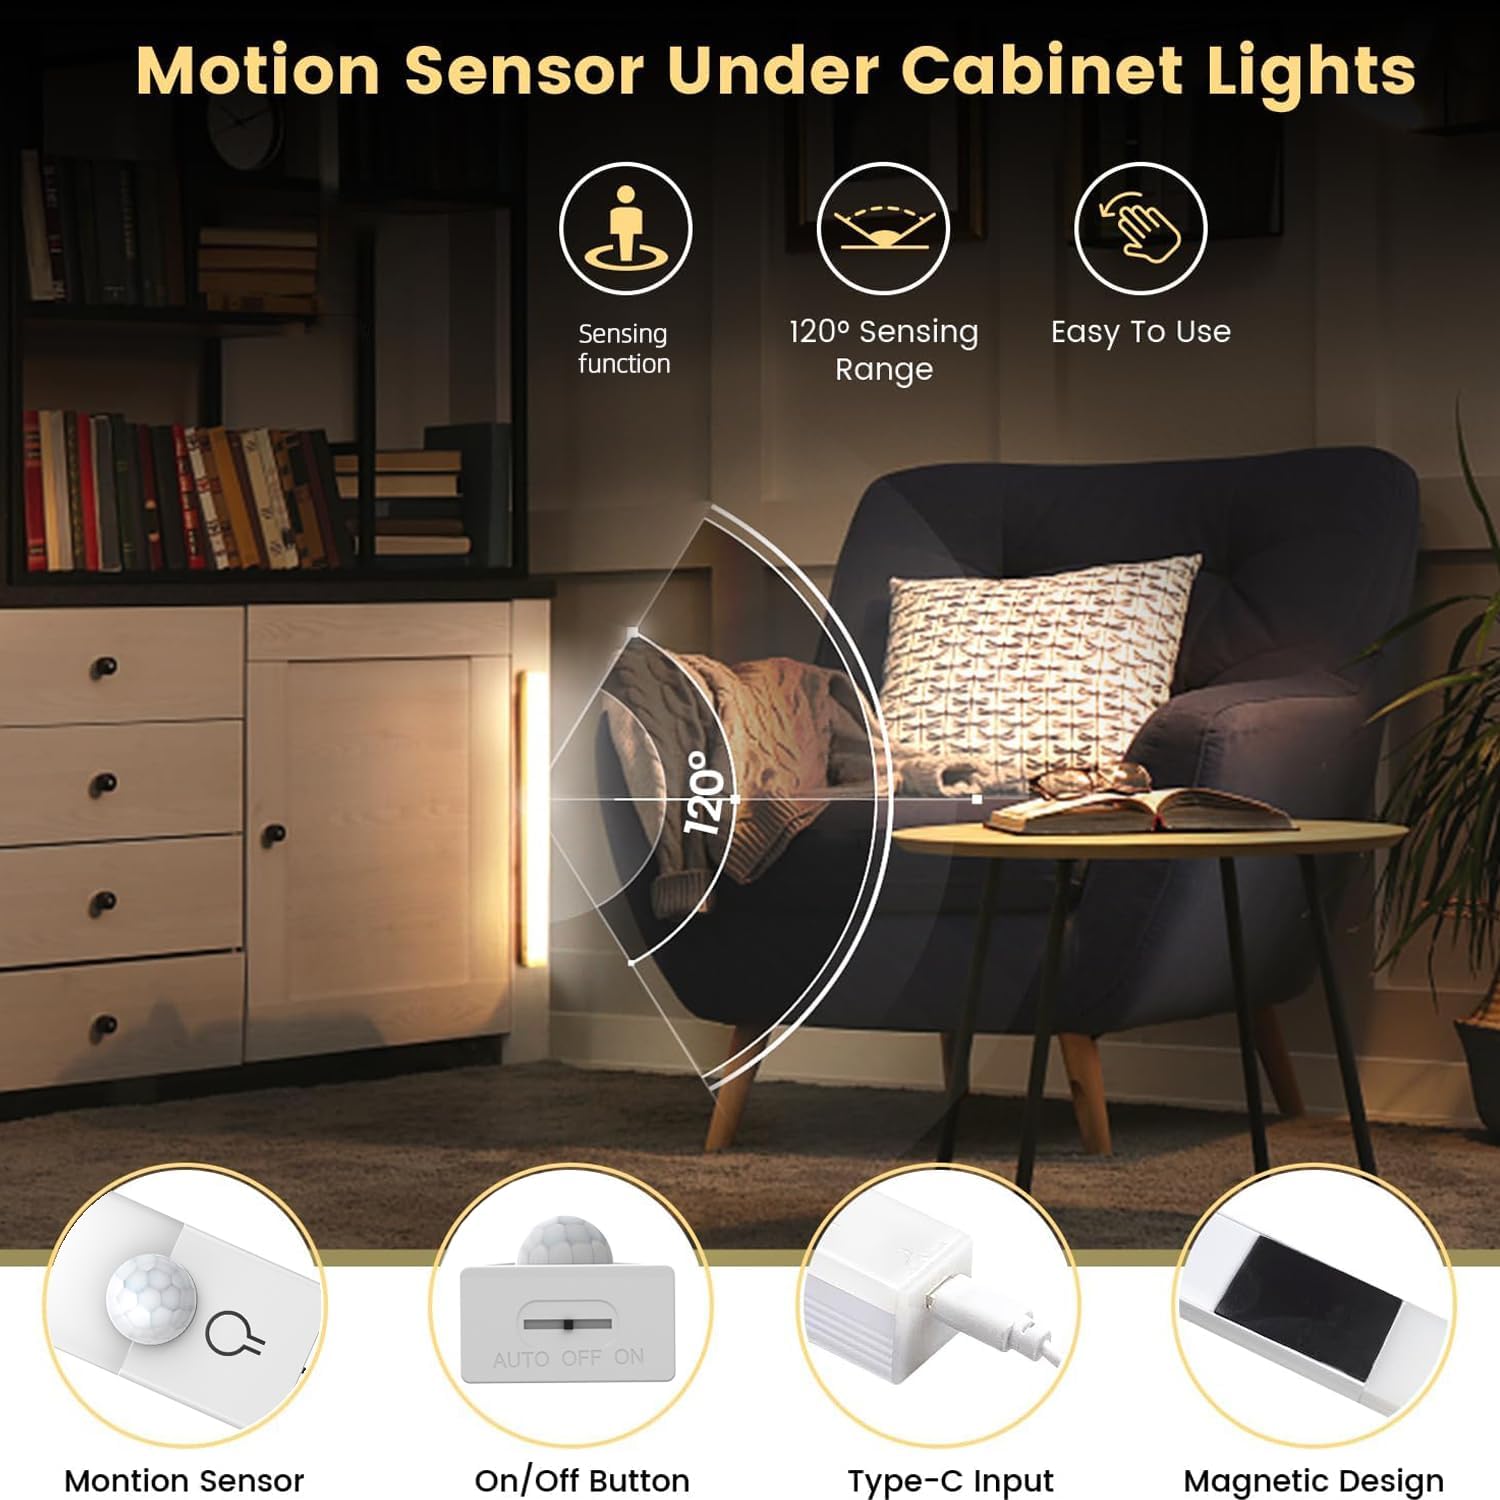
Figure 6: Explanation of the motion sensor's detection capabilities and range.
6. Maintenance
- Cleaning: Wipe the lights with a soft, dry cloth. Do not use abrasive cleaners or solvents.
- Battery Care: To prolong battery life, avoid fully discharging the lights frequently. Recharge them when the low battery indicator appears. If storing for an extended period, charge the lights every 3-6 months.
- Storage: Store the lights in a cool, dry place away from direct sunlight and extreme temperatures.
7. Troubleshooting
| Problem | Possible Cause | Solution |
|---|---|---|
| Light does not turn on. | Battery is depleted. Light is switched off. Insufficient ambient light for motion sensor mode. | Charge the light using the USB-C cable. Press and hold the power button to turn on. Ensure the light is in the correct mode or test in a darker environment. |
| Motion sensor not working. | Light is not in motion sensor mode. Sensor is obstructed. Ambient light is too bright. | Switch the light to motion sensor (AUTO) mode. Ensure the sensor is clear of obstructions. The sensor only activates in low-light conditions. |
| Light flickers or is dim. | Low battery. | Recharge the light fully. |
| Light falls off mounting surface. | Surface not clean/dry. Magnetic strips not applied firmly. Surface material incompatible. | Clean and dry the surface thoroughly before re-applying. Press magnetic strips firmly for 30 seconds. Ensure the surface is smooth and non-porous. |
8. Specifications
- Brand: NBBUFF
- Model: T-UnderCabinetLight01
- Product Dimensions: 12.13 x 2.64 x 0.91 inches (30.8 x 6.7 x 2.3 cm)
- Size: 11.81 inches (length)
- Material: Plastic
- Color: White
- Power Source: Battery Powered (USB Rechargeable)
- Color Modes: 3 (3000K Warm White, 4500K Natural White, 6000K Cold White)
- Motion Sensor Range: 120°
- Indoor/Outdoor Usage: Indoor Only
9. Safety Information
- Do not expose the lights to water or excessive moisture.
- Do not disassemble or attempt to repair the lights yourself.
- Keep away from high temperatures and open flames.
- This product is intended for indoor use only.
- Keep out of reach of children.
10. Warranty and Support
NBBUFF products are manufactured with quality and performance in mind. For any questions, technical support, or warranty inquiries, please contact your retailer or visit the official NBBUFF website. Please retain your proof of purchase for warranty claims.
11. Product Application Examples
These versatile LED lights can be used in various indoor settings to enhance visibility and convenience.

Figure 7: Examples of light placement in stairs, toilet areas, kitchens, and closets.

Figure 8: Further examples of multi-purpose use in stairways, kitchens, bookcases, and bedrooms.
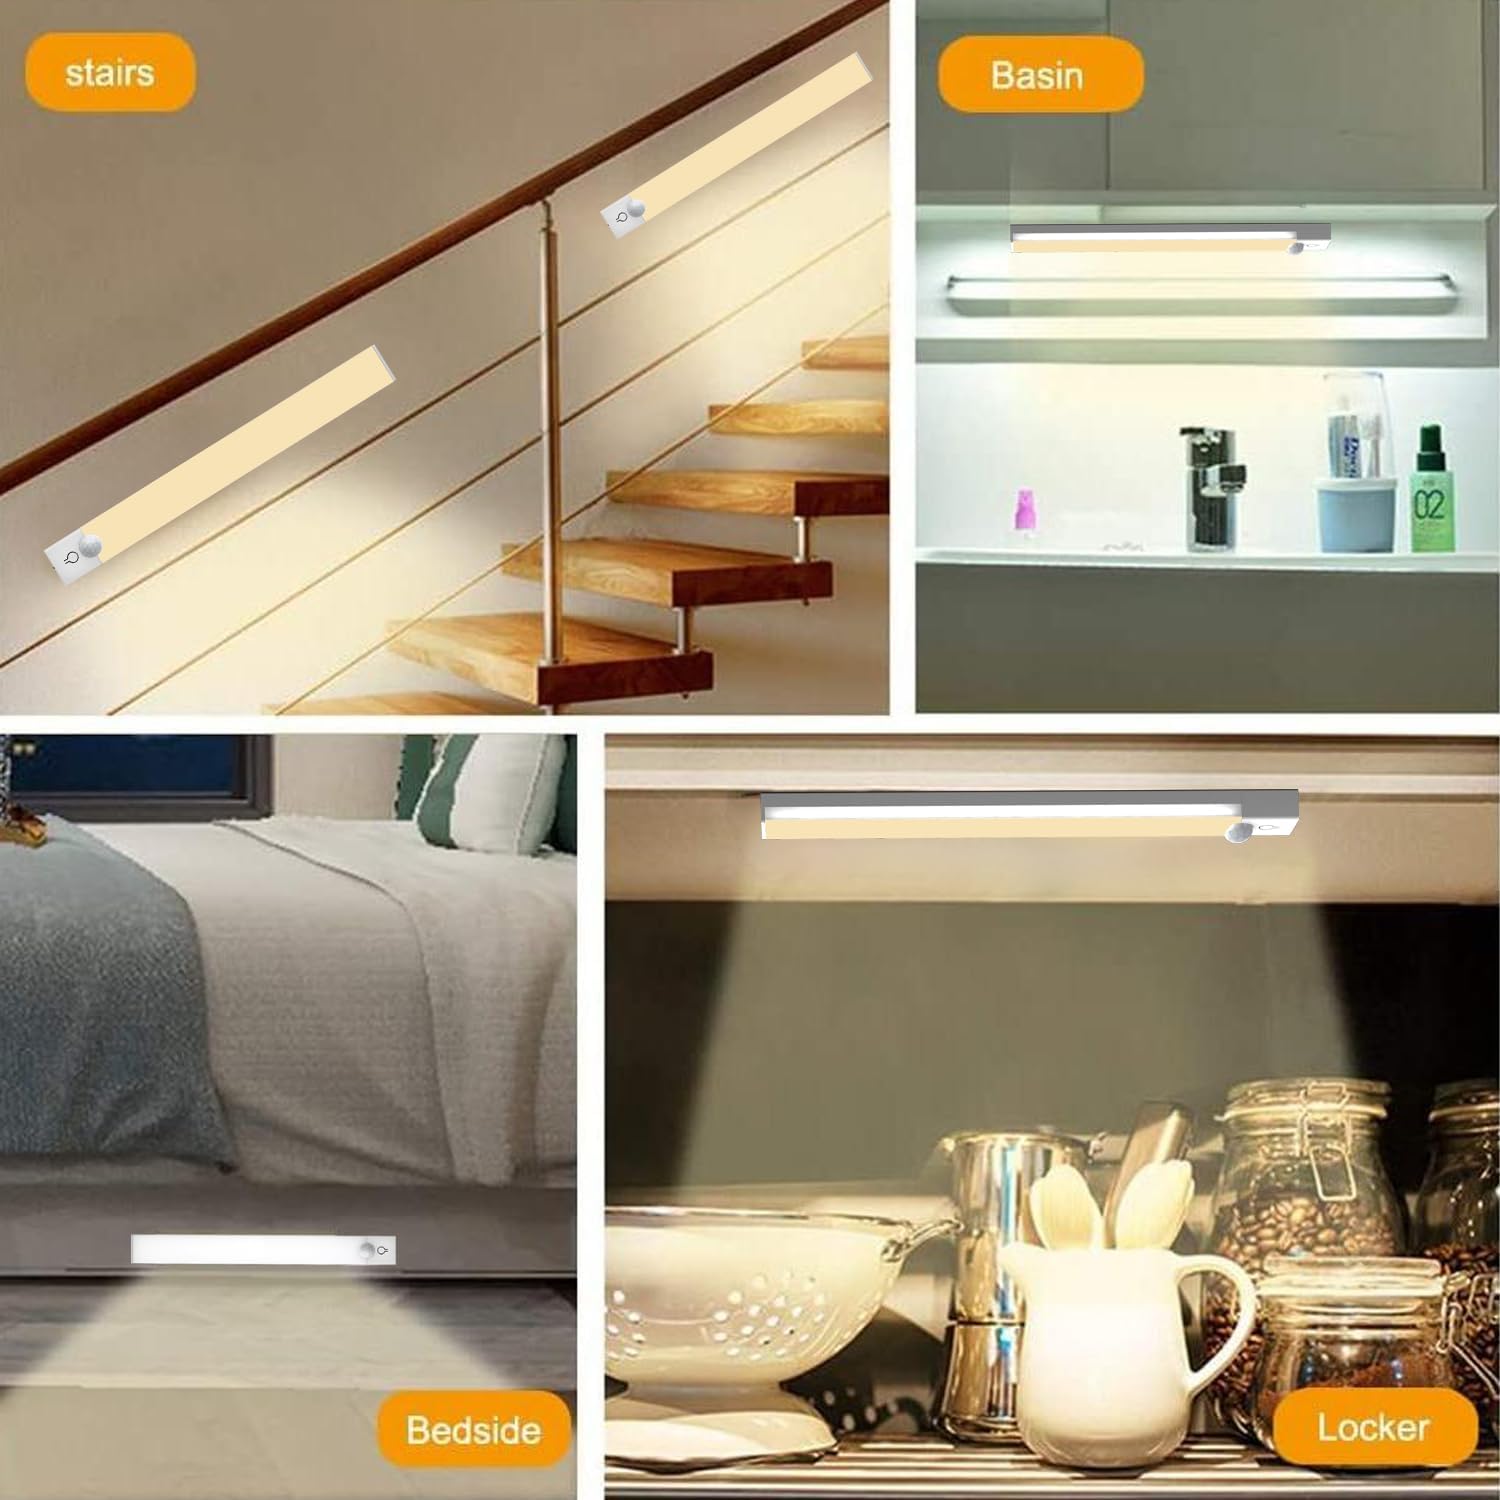
Figure 9: Additional application examples including hallways, bathrooms, stairs, and inside closet drawers.


