
1. Introduction
1.1 Welcome
Thank you for choosing the HLOIE H1 GEN2 Electric Scooter. This manual provides essential information for the safe operation, assembly, maintenance, and troubleshooting of your scooter. Please read this manual thoroughly before your first ride to ensure proper use and to maximize your riding experience.
1.2 Safety Guidelines
WARNING: Riding an electric scooter carries inherent risks. Always wear a helmet and appropriate protective gear. Adhere to local laws and regulations regarding electric scooter use. Failure to follow safety instructions can result in serious injury or death.
- Always wear a certified helmet and other protective gear (knee pads, elbow pads, wrist guards).
- Do not ride under the influence of alcohol or drugs.
- Be aware of your surroundings and other road users.
- Avoid riding in wet conditions, heavy rain, or on slippery surfaces.
- Maintain a safe speed and always be prepared to stop.
- Regularly inspect your scooter for damage or loose parts before each ride.
- Ensure all lights are functional, especially when riding at night.
- Do not exceed the maximum load capacity of 800 lbs.

Image: The HLOIE H1 GEN2 Electric Scooter shown with its detachable seat, tool kit, charger, and keys.
1.3 Package Contents
Your HLOIE H1 GEN2 Electric Scooter package includes the following items:
- Electric Scooter (95% pre-assembled)
- Charger x 1
- Tool Kit x 1
- Detachable Seat x 1
- User Manual x 1
- Keys x 2
2. Setup
2.1 Unfolding the Scooter
- Place the scooter on a flat surface.
- Locate the folding mechanism at the base of the handlebar stem.
- Release the locking latch and carefully lift the handlebar stem until it clicks into place.
- Secure the safety lock to prevent accidental folding.
2.2 Handlebar Adjustment
The handlebar height can be adjusted to suit your preference:
- Loosen the quick-release clamp on the handlebar stem.
- Adjust the handlebar to the desired height.
- Ensure the handlebar is aligned with the front wheel.
- Tighten the quick-release clamp securely.
2.3 Seat Installation
To install the detachable seat:
- Insert the seat post into the designated slot on the scooter deck.
- Adjust the seat height to a comfortable position.
- Secure the seat post with the quick-release clamp.
2.4 Initial Charging
Before first use, fully charge the scooter's battery. The charging time is approximately 10 hours.
- Ensure the scooter is powered off.
- Locate the charging port, typically covered by a rubber flap.
- Connect the charger to the charging port, then plug the charger into a power outlet.
- The indicator light on the charger will show the charging status (e.g., red for charging, green for fully charged).
- Once fully charged, disconnect the charger and secure the charging port cover.
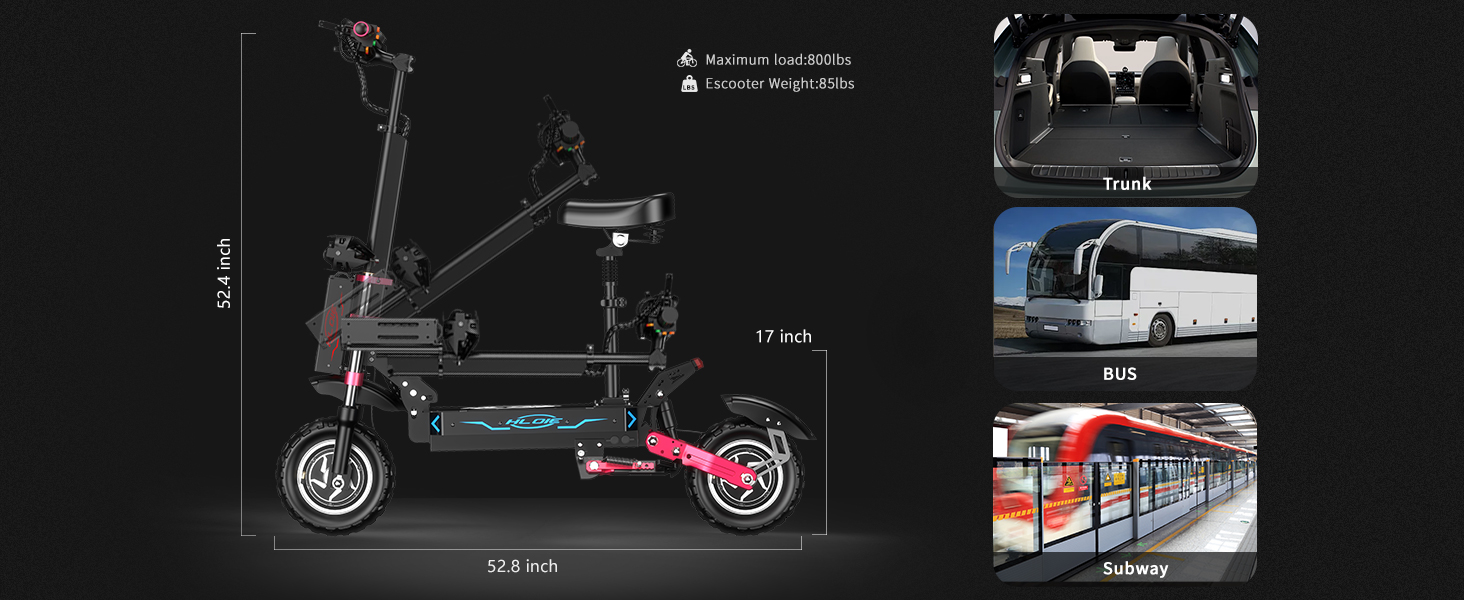
Image: The HLOIE H1 GEN2 Electric Scooter demonstrating its folded and unfolded states, highlighting its compact storage capabilities for transport in a trunk, bus, or subway.
3. Operating Instructions
3.1 Control Panel Overview

Image: Detailed diagram of the HLOIE H1 GEN2 Electric Scooter's handlebar controls, including oil brake, lighting, turn signal, horn, ECO mode, single/dual motor switch, keyhole, voltmeter, indicator panel, gear level, dashboard on button, and gas pedal.
Familiarize yourself with the controls on the handlebar:
- A: Oil Brake: Front and rear hydraulic brakes for stopping.
- B: Lighting: Controls the scooter's lights.
- C: Vehicle Turn Signal: Activates left or right turn indicators.
- D: Horn: Sound signal for alerting others.
- E: ECO Mode: Engages energy-saving mode for extended range.
- F: Single/Dual Motor Switch: Toggles between single motor (for efficiency) and dual motor (for maximum power/speed).
- G: Keyhole: Ignition for the scooter.
- H: Voltmeter: Displays current battery voltage.
- I: Indicator Panel: Shows real-time speed, battery status, and cycling mileage.
- J: Gear Level: Adjusts power output/speed limits.
- K: Dashboard On Button: Powers on the display.
- L: Gas Pedal: Accelerates the scooter.
3.2 Power On/Off
To power on the scooter, insert the key into the keyhole (G) and turn it. Press the Dashboard On Button (K) to activate the display. To power off, turn the key to the off position and the display will shut down.
3.3 Riding Modes
The H1 GEN2 offers versatile riding modes:
- Single Motor Mode: Use the Single/Dual Motor Switch (F) to engage one motor for a more energy-efficient ride, suitable for longer distances or lower speeds.
- Dual Motor Mode: Engage both motors via the switch (F) for maximum power and speed, ideal for climbing inclines or achieving the top speed of 50 mph.
- ECO Mode: Activate ECO Mode (E) to optimize battery usage and extend your range. This mode typically reduces acceleration and top speed.
3.4 Speed Control
Use the Gas Pedal (L) to accelerate. The scooter's speed can reach up to 50 mph. Adjust the Gear Level (J) on the indicator panel to set different speed limits or power outputs according to your riding environment and preference.
3.5 Braking System
The scooter is equipped with a dual braking system for effective stopping power:
- Hydraulic Disc Brakes: Operate the Oil Brake levers (A) on the handlebar to engage the front and rear hydraulic disc brakes. These provide strong and responsive stopping.
- EABS System: The Electronic Anti-lock Braking System (EABS) enhances braking safety by preventing wheel lock-up during sudden stops.

Image: A detailed view of the HLOIE H1 GEN2 Electric Scooter's hydraulic braking system, illustrating the front disc brake and rear oil brake for agile and safe stopping.
3.6 Lighting System
The scooter features an upgraded 3rd-generation lighting system for visibility and safety:
- Front Headlights: Ultra-bright LED headlights illuminate your path.
- Turn Signals: Use the Vehicle Turn Signal (C) to indicate your turning direction.
- Brake Lights: Automatically activate when braking to alert traffic behind you.
- Ambient Lights: Color LED ambient lights enhance visibility and aesthetics.
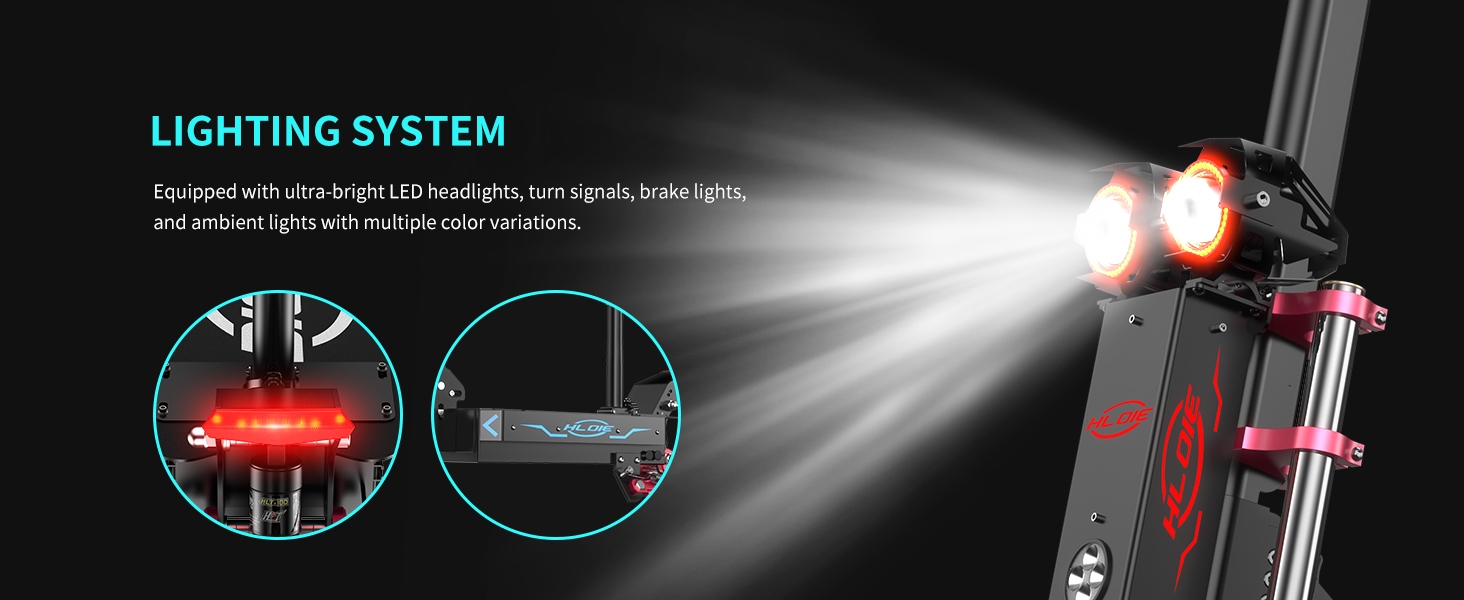
Image: The HLOIE H1 GEN2 Electric Scooter's comprehensive lighting system, showcasing its ultra-bright LED headlights, integrated turn signals, brake lights, and colorful ambient lights for enhanced night riding safety.
4. Maintenance
4.1 Battery Care
Proper battery care ensures longevity and optimal performance:
- Charge the battery fully after each use.
- Avoid completely draining the battery.
- Store the scooter in a cool, dry place when not in use, and charge it periodically if stored for extended periods.
- The intelligent Battery Management System (BMS) protects against overcharging, over-discharging, overheating, over-voltage, short-circuits, over-current, under-voltage, and over-power.

Image: Illustration of the HLOIE H1 GEN2 Electric Scooter's 48V 26AH lithium prismatic battery, highlighting its UL certification and intelligent BMS protection features against various electrical faults.
4.2 Tire Maintenance
The 11-inch off-road pneumatic tires require regular inspection:
- Check tire pressure before each ride and inflate to the recommended PSI.
- Inspect tires for any cuts, punctures, or excessive wear.
- Ensure tire treads are clear of debris for optimal traction.

Image: Close-up view of the HLOIE H1 GEN2 Electric Scooter's 11-inch off-road pneumatic tires, emphasizing their deep tread design for strong grip and stability on various terrains.
4.3 General Cleaning and Storage
- Clean the scooter regularly with a damp cloth. Avoid using high-pressure water jets.
- Do not immerse the scooter in water.
- Store the scooter in a dry, secure location away from direct sunlight and extreme temperatures.
4.4 Brake System Check
- Regularly check the brake levers for proper tension and responsiveness.
- Inspect brake pads for wear and replace them if necessary.
- Ensure brake cables are not frayed or damaged.
5. Troubleshooting
This section addresses common issues you might encounter with your HLOIE H1 GEN2 Electric Scooter. For problems not listed here, please contact customer support.
| Problem | Possible Cause | Solution |
|---|---|---|
| Scooter does not power on | Low battery; Key not turned; Loose connections | Charge battery; Ensure key is in 'ON' position; Check all visible connections. |
| Reduced range or power | Under-inflated tires; Battery degradation; Riding uphill frequently; Heavy load | Inflate tires to correct pressure; Ensure full charge; Reduce load or avoid steep inclines. |
| Brakes feel weak | Worn brake pads; Loose brake cables; Air in hydraulic system | Inspect and replace brake pads; Adjust brake cable tension; Consult a professional for hydraulic system bleeding. |
| Unusual noises during operation | Loose components; Debris in wheels/brakes; Motor issue | Check for loose screws or parts; Clean wheels and brakes; If motor noise persists, contact support. |
6. Specifications
The HLOIE H1 GEN2 Electric Scooter (Model FW106) features advanced components for performance and durability.
6.1 Performance
- Motor: Dual 2800W (Peak 5600W) Brushless Motors
- Max Speed: Up to 50 MPH
- Max Climbing Angle: 35-40 degrees
- Max Load Capacity: 800 lbs

Image: Diagram illustrating the HLOIE H1 GEN2 Electric Scooter's powerful 5600W peak dual motors, capable of reaching 50 MPH and climbing slopes of 35-40 degrees.
6.2 Battery
- Type: 48V 26AH Lithium Prismatic Battery (1248Wh)
- Max Range: Up to 55 Miles
- Charging Time: Approximately 10 Hours
- Protection: Intelligent BMS (Overcharge, Over-discharge, Temperature, Over-voltage, Short-circuit, Over-current, Under-voltage, Over-power)
6.3 Dimensions & Weight
- Item Weight: 101 Pounds
- Wheel Size: 11 Inches
- Package Dimensions: 53 x 24 x 12 inches
6.4 Materials
- Frame Material: High-Carbon Steel
- Wheel Material: Polyvinyl Chloride (PVC)
- Body Material: Aluminum
6.5 Features
- Adjustable Handlebar Height
- Digital Display
- Dual Braking System (Hydraulic Disc + EABS)
- Dual Charging Port
- Foldable Design
- Detachable Seat
- Dual Suspension (Front & Rear Hydraulic Shock Absorption)
- 11-inch Off-Road Pneumatic Tires
- LED Headlights, Turn Signals, Brake Lights, Color LED Ambient Lights

Image: Detailed view of the HLOIE H1 GEN2 Electric Scooter's hydraulic shock absorption system, highlighting its role in delivering optimal damping effects for a smooth and stable ride.
7. Warranty and Support
7.1 Warranty Information
The HLOIE H1 GEN2 Electric Scooter comes with a 180-day limited warranty from the date of purchase. This warranty covers manufacturing defects and material flaws under normal use. Please retain your proof of purchase for warranty claims.
Our products are SGS tested and certified to meet UL2849, GCC, and UL2272 policies, ensuring quality and safety standards.

Image: SGS certification logo, indicating that HLOIE products meet safety standards including UL2849, GCC, and UL2272.
7.2 Customer Support
For any assistance, questions, or warranty claims, please contact HLOIE customer support. Our team is available to help you with product inquiries, technical support, and troubleshooting.
Please refer to the contact information provided with your purchase or visit the official HLOIE website for support details.
