1. Introduction
The Spirograph Electric Machine offers an innovative way to create intricate spiral art designs with ease. This kit combines classic Spirograph principles with electronic assistance, allowing for precise and beautiful patterns at the touch of a button. Designed for artists aged 8 and up, it provides a screen-free activity that fosters creativity and an understanding of art and mathematics.

Image: The Spirograph Electric Machine packaging, highlighting its features and a child enjoying the creations.
What's Included:
- Electronic Spirograph Machine
- 5 Markers
- 2 Marker Holders
- Drawing Template (to make more paper)
- 30 Sheets of Circular Paper
- Illustrated Design Guide with machine tips and design examples
Note: 3 AA batteries are not included and must be purchased separately.
2. Setup
Before you begin creating, ensure your Spirograph Electric Machine is properly set up.
2.1 Battery Installation
- Locate the battery compartment on the underside of the machine.
- Using a Phillips head screwdriver, open the battery compartment cover.
- Insert 3 AA batteries, ensuring correct polarity (+/-).
- Replace the battery compartment cover and secure it with the screw.
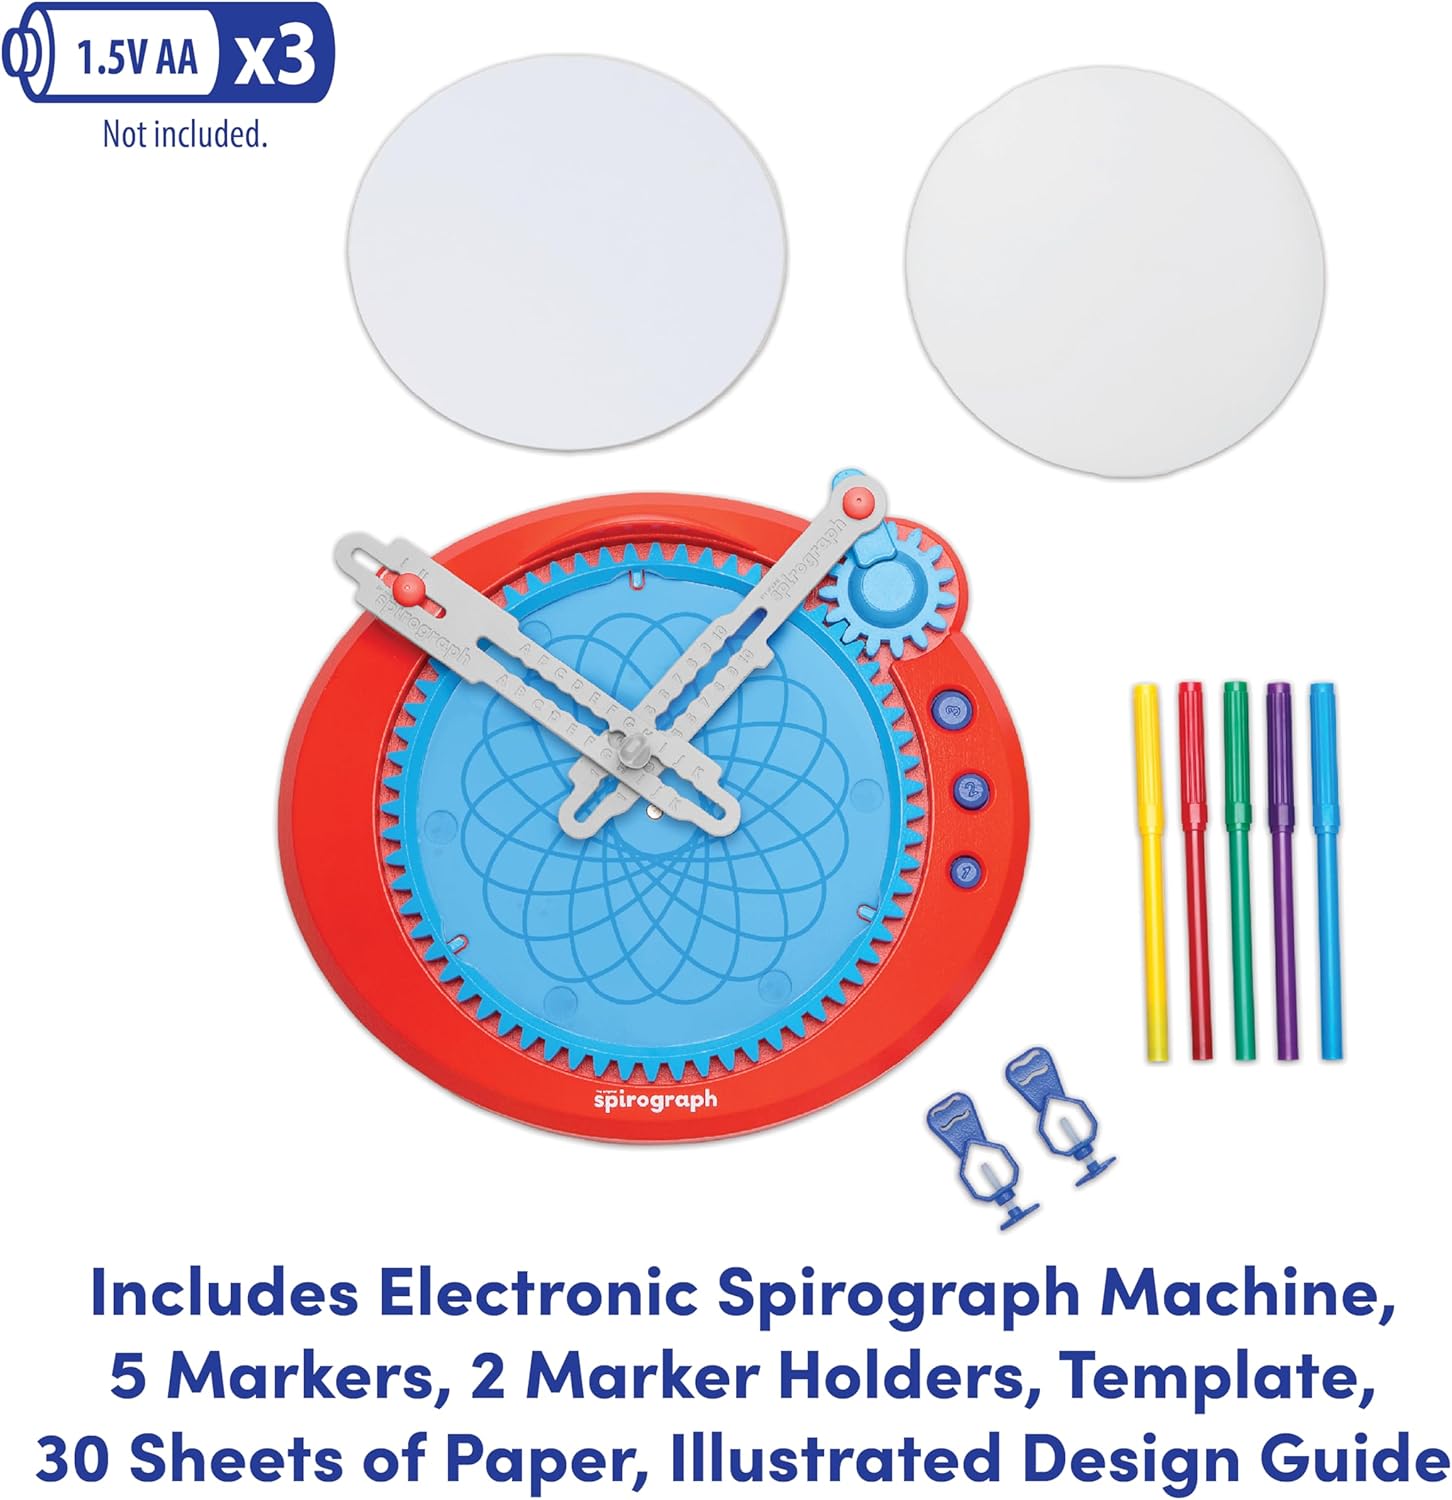
Image: All components of the Spirograph Electric Machine, including markers, paper, and the main unit.
2.2 Preparing the Drawing Surface
- Open the top cover of the Spirograph Electric Machine.
- Place one of the circular paper sheets onto the designated drawing area. The paper should fit snugly.
- Close the top cover, ensuring the paper is held securely in place.
2.3 Attaching Marker Holders
- Select your desired markers. The marker holders are designed to accommodate various drawing implements.
- Insert a marker into each of the two adjustable marker holders on the machine's arms. Ensure the marker tip is positioned correctly to touch the paper.
3. Operating Instructions
Follow these steps to create stunning spiral designs with your Spirograph Electric Machine.
3.1 Choosing Your Design Settings
- The machine features adjustable arms and three levels of machine rotation. Experiment with different arm positions and rotation speeds to achieve unique patterns.
- Refer to the included Illustrated Design Guide for inspiration and specific settings to replicate various designs.

Image: A child's hands adjusting the arms and settings on the Spirograph Electric Machine.
3.2 Creating a Spiral Design
- Once your desired settings are selected and markers are in place, press the start button on the machine.
- Watch as the machine automatically draws intricate spiral patterns on the paper.
- The machine can draw in two colors simultaneously if two markers are inserted.
- Allow the machine to complete its cycle for a full design.
- To stop the machine mid-cycle, press the stop button.

Image: A close-up showing the adjustable arms, the circular paper template, and the three buttons for different rotation levels on the Spirograph Electric Machine.
3.3 Official Product Video
Video: An official product demonstration of the Spirograph Electric Machine in action, showcasing its automatic drawing capabilities and various design possibilities.
4. Maintenance
Proper care will ensure the longevity and optimal performance of your Spirograph Electric Machine.
4.1 Cleaning
- Wipe the machine's surface with a soft, dry cloth.
- If markers leave residue, gently clean the drawing area with a slightly damp cloth. Avoid harsh chemicals.
4.2 Storage
- Store the machine and all its components in a dry, cool place away from direct sunlight.
- Remove batteries if the machine will not be used for an extended period to prevent leakage.
5. Troubleshooting
If you encounter any issues with your Spirograph Electric Machine, try the following:
- Machine not turning on: Check if batteries are inserted correctly and are not depleted. Replace with fresh batteries if necessary.
- Markers not drawing: Ensure marker tips are touching the paper and that the markers are not dried out. Replace markers if needed.
- Inconsistent designs: Verify that the paper is securely placed and the marker holders are firmly attached. Ensure the machine is on a flat, stable surface.
If problems persist, please refer to the warranty and support information.
6. Specifications
| Feature | Detail |
|---|---|
| Brand | Spirograph |
| Model Name | Electronic Spirograph Machine |
| Item Model Number | 25315 |
| Age Range (Description) | Kid (Ages 8+) |
| Color | Multi |
| Theme | Floral |
| Item Dimensions (L x W x H) | 11.75 x 2.5 x 11.75 inches |
| Item Weight | 1.5 pounds |
| Material | Plastic |
| Paint Type | Marker |
| Batteries Required | 3 AA (not included) |
7. Warranty and Support
For warranty information, product support, or to purchase replacement parts, please contact PlayMonster, the manufacturer of the Spirograph Electric Machine. Refer to the product packaging or their official website for the most current contact details.
Manufacturer: PlayMonster