1. Introduction
This manual provides essential information for the safe and efficient operation, maintenance, and troubleshooting of your Mujocooker 4-Wheel Foldable Mobility Scooter. Please read this manual thoroughly before using the scooter to ensure proper function and to prevent injury or damage.
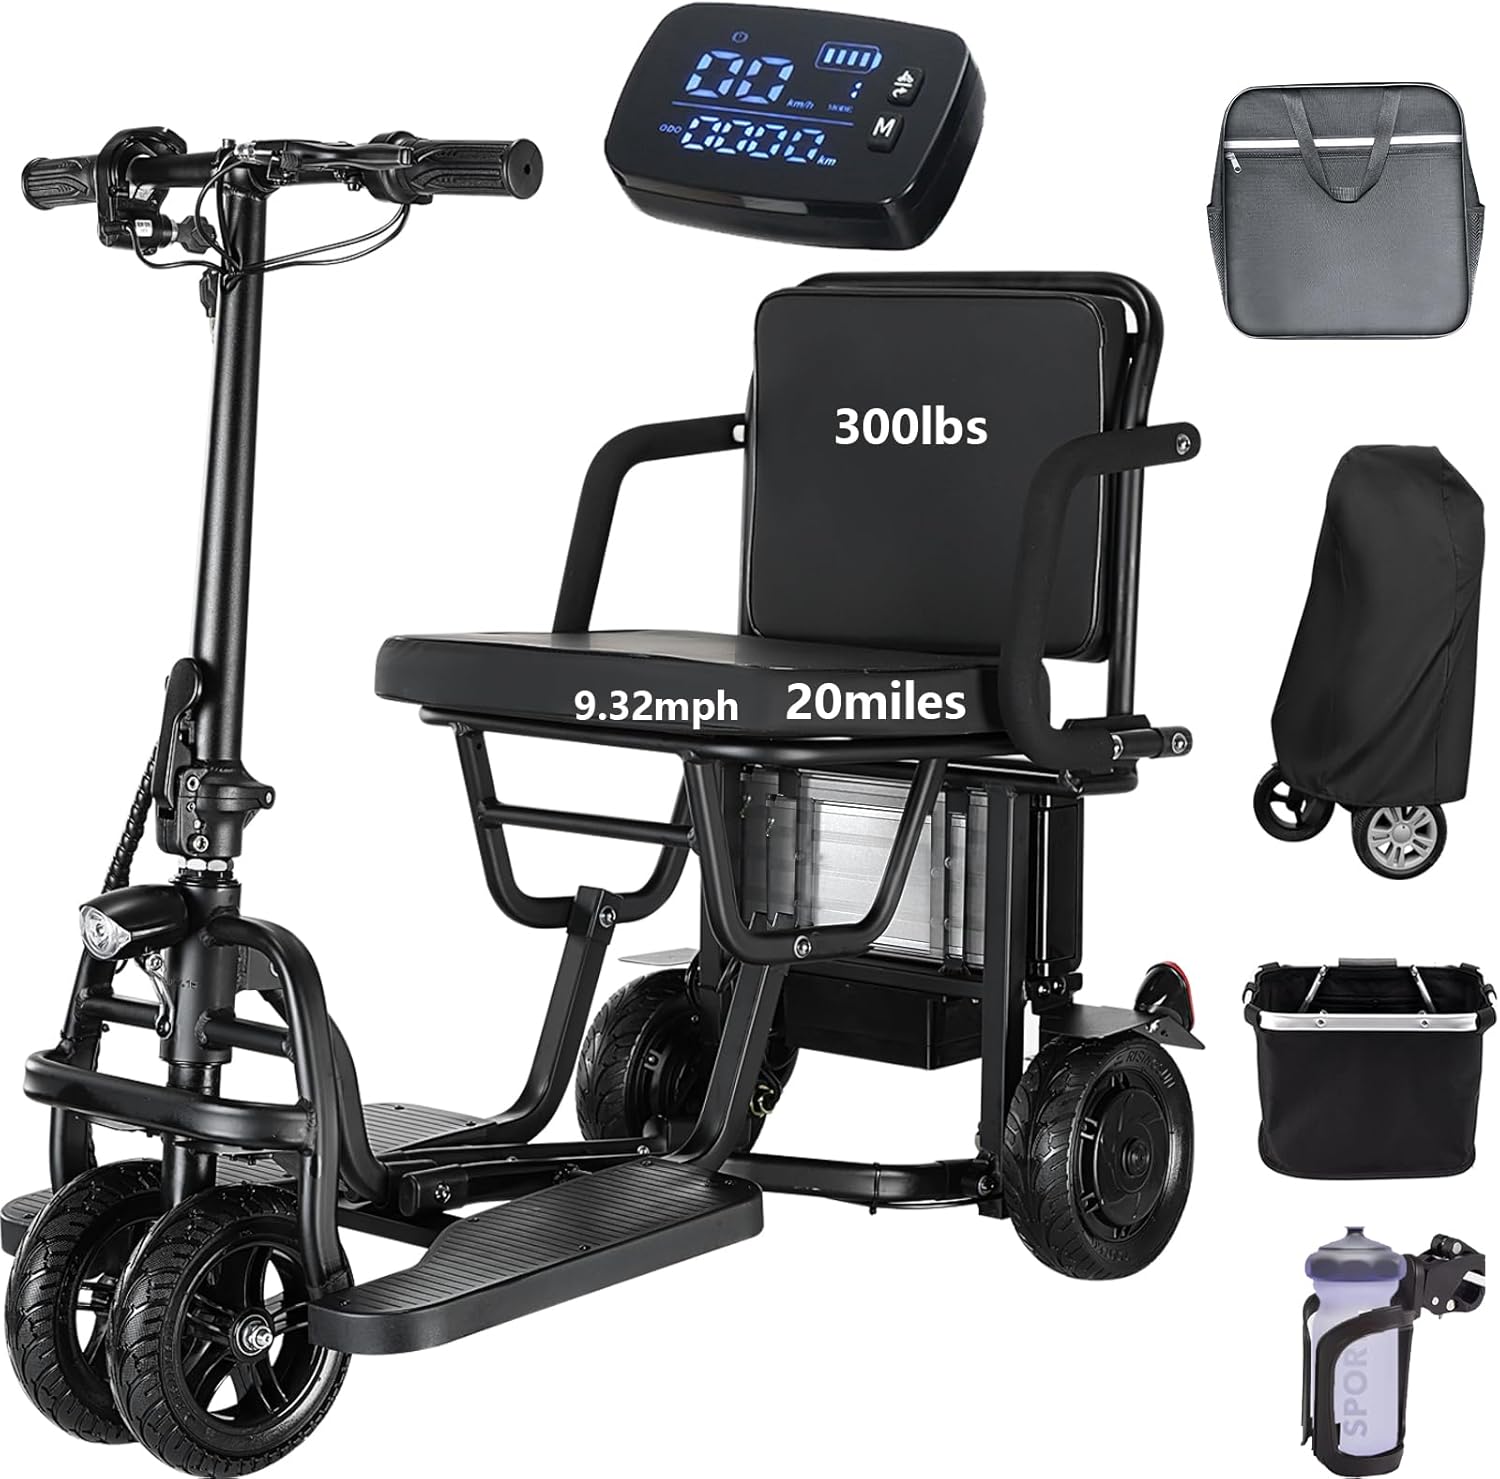
Image 1.1: The Mujocooker 4-Wheel Foldable Mobility Scooter, showcasing its compact design and accessories.
2. Safety Information
Your safety is paramount. Adhere to all warnings and instructions to avoid accidents and ensure safe operation.
- Read the Manual: Always read and understand the entire user manual before operating the scooter.
- Weight Capacity: Do not exceed the maximum weight capacity of 300 lbs (136 kg).
- Terrain: Operate the scooter on stable, level surfaces. Exercise caution on uneven terrain, inclines, and slippery surfaces. While designed for various terrains, avoid extreme conditions.
- Incline Limits: Be aware of the scooter's maximum climbing angle. Avoid steep inclines that may compromise stability.
- Turning: Reduce speed when turning, especially on uneven surfaces, to prevent tipping. The dual front wheel design enhances stability compared to single-wheel designs.
- Braking: Always use the hand brake to slow down or stop. Utilize the brake buckle when parked to prevent unintended rolling.
- Visibility: Ensure headlights and taillights are functional, especially in low-light conditions. Use turn signals to indicate direction changes.
- Children and Pets: Keep children and pets away from the scooter during operation and charging.
- Airline Approval: This scooter is designed to be airline approved for travel. Consult your airline for specific battery regulations before flying.

Image 2.1: Illustration of the scooter's capability on various terrains and the stability provided by the dual front wheel design.
3. Package Contents
Verify that all items are present upon unboxing:
- Mujocooker 4-Wheel Foldable Mobility Scooter
- 8AH Lithium Battery (pre-installed or separate)
- Battery Charger
- Detachable Front Basket
- Cup Holder
- Storage Cover
- Keys (for ignition and battery lock)
- User Manual

Image 3.1: Overview of user-friendly features such as the large capacity storage basket and cup holder.
4. Components Overview
Familiarize yourself with the main components and controls of your scooter.

Image 4.1: Detailed view of the intuitive controls and large display on the handlebar.
Handlebar Controls:
- Forward/Reverse Button (D/R): Toggles between forward and reverse driving modes.
- Left/Right Turn Indicator: Activates the corresponding turn signal.
- Horn Button: Sounds the horn.
- Cruise Control System: Engages cruise control to maintain a constant speed.
- Three Speed Adjustable: Cycles through low, medium, and high-speed settings.
- Battery Charge Indicator: Displays the current battery level.
- Speedometer: Shows current driving speed.
- Total Mileage: Displays accumulated distance traveled.
- Brake Lever: Activates the mechanical brake.
- Keyholes: For ignition and battery lock.

Image 4.2: The scooter is equipped with a bright headlight for forward visibility and a red taillight for rear visibility.
5. Setup
5.1 Unfolding the Scooter
- Place the folded scooter on a flat, stable surface.
- Release any locking mechanisms that secure the scooter in its folded position.
- Carefully unfold the main frame, ensuring all joints click securely into place.
- Raise the handlebar stem and lock it into the upright position.
- Adjust the handlebar height to a comfortable position and secure it.
- Attach the seat and any accessories like the front basket or cup holder.
5.2 Battery Installation (if not pre-installed)
- Locate the battery compartment, typically under the seat.
- Insert the battery pack, ensuring it is correctly oriented and securely seated.
- Lock the battery with the provided key to prevent theft and ensure proper connection.
5.3 Initial Charging
Before first use, fully charge the battery. Refer to Section 7 for detailed battery information.
6. Operating Instructions
6.1 Power On/Off
Insert the key into the ignition and turn it to the 'ON' position to power on the scooter. Turn the key to 'OFF' to power down.
6.2 Driving (Forward/Reverse)
Use the D/R button on the handlebar to switch between forward (D) and reverse (R) modes. Gently twist the accelerator grip to control speed.

Image 6.1: Location of the Reverse (D/R) button and Horn button on the handlebar.
6.3 Speed Modes
The scooter features three adjustable speed settings. Press the speed button (often labeled 'M' or a gear icon) to cycle through low, medium, and high speeds. The maximum speed for each gear is approximately 3.73 mph, 6.21 mph, and 9.32 mph respectively. Select a speed appropriate for your environment and comfort level.
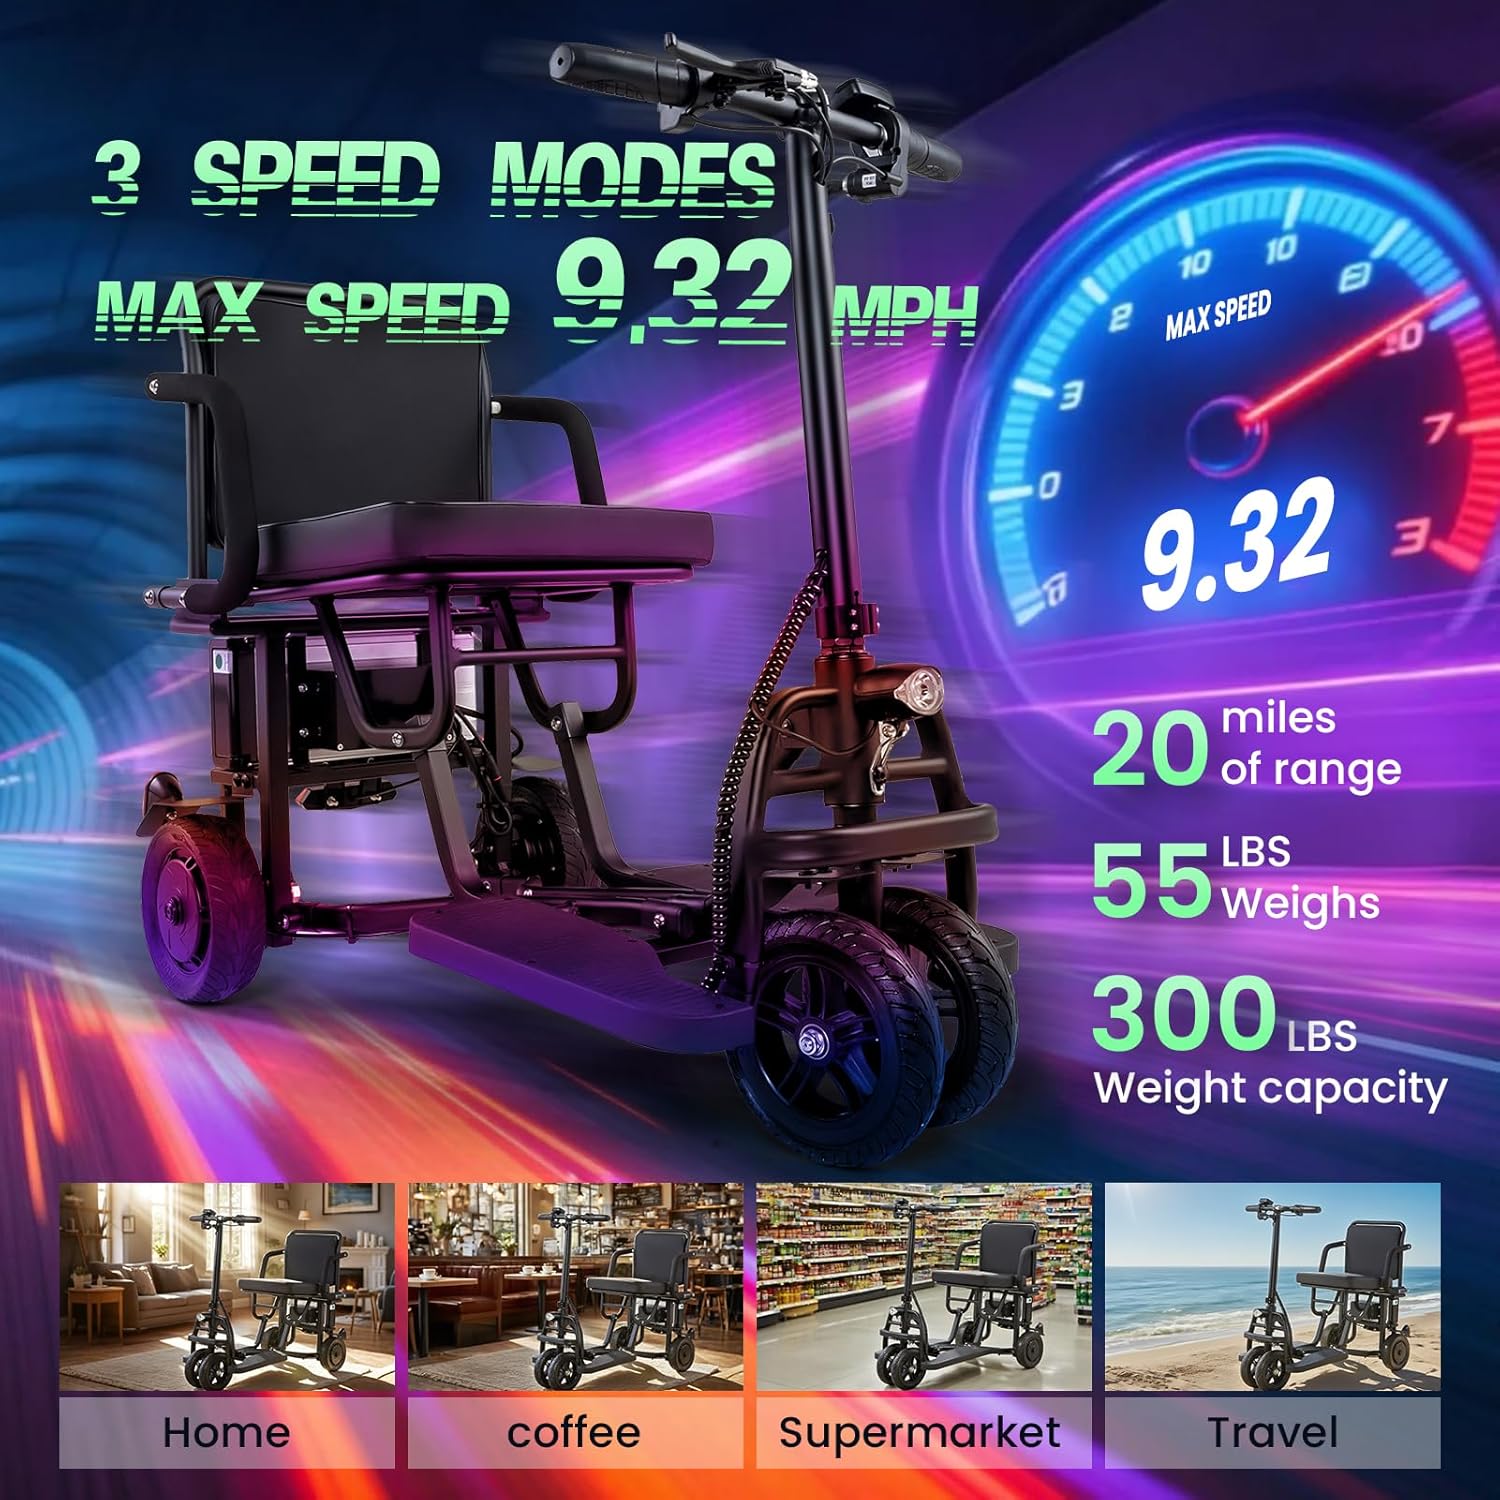
Image 6.2: Visual representation of the three speed modes and the maximum speed of 9.32 mph.
6.4 Cruise Control
To activate cruise control, reach your desired speed and press the cruise control button. The scooter will maintain this speed without continuous accelerator input. Press the brake or accelerator again to disengage cruise control.

Image 6.3: The display indicating active cruise control, allowing the scooter to maintain a constant speed.
6.5 Braking
Pull the brake lever on the handlebar to engage the brake. For parking, use the brake buckle to lock the brake lever in place, preventing the scooter from rolling.

Image 6.4: Step-by-step guide on how to engage the brake buckle to secure the scooter when parked.
6.6 Turn Signals and Horn
Use the left/right turn indicator switch to activate the corresponding turn signal. Press the horn button to alert pedestrians or other vehicles.

Image 6.5: Close-up of the left and right turn signal indicators on the handlebar and their corresponding lights.
7. Battery Information
7.1 Charging the Battery
Connect the charger to the scooter's charging port and then to a standard electrical outlet. The charging indicator on the charger will show the charging status. A full charge typically takes 4-5 hours. Do not overcharge the battery.

Image 7.1: Details of the 36V 8AH lithium battery, including 4-5 hours charging time and various protection features.
7.2 Battery Care
- Charge the battery regularly, even if the scooter is not in use, to maintain battery health.
- Avoid completely draining the battery before recharging.
- Store the battery in a cool, dry place away from direct sunlight and extreme temperatures.
- The battery is extractable for convenient charging indoors.

Image 7.2: The 8AH lithium battery provides an extended travel range of up to 20 miles per charge.
7.3 Anti-theft Feature
The battery is designed with an anti-theft mechanism. Use the separate key to lock and unlock the battery, securing it in place and preventing unauthorized removal.

Image 7.3: The anti-theft battery design ensures security and protection against water ingress, extending service life.
8. Folding and Storage
8.1 Folding Procedure
The scooter features a quick-fold design, allowing it to be folded in approximately 3 seconds for easy transport and storage.
- Ensure the scooter is powered off and the key is removed.
- Remove any detachable accessories like the basket.
- Release the handlebar locking mechanism and fold the handlebar stem down.
- Engage the main folding mechanism, typically a lever or latch, and carefully fold the scooter into its compact form.
- Ensure all parts are securely latched in the folded position.

Image 8.1: The scooter folds quickly into a compact size, similar to a suitcase, making it suitable for car trunks and airline travel.
8.2 Storage
Store the folded scooter in a dry, protected area. Use the provided storage cover to protect it from dust and light when not in use for extended periods.
9. Maintenance
Regular maintenance ensures the longevity and safe operation of your scooter.
- Cleaning: Wipe the scooter with a damp cloth. Avoid using harsh chemicals or direct water spray.
- Tire Inspection: Regularly check the solid rubber tires for wear or damage.
- Brake Check: Ensure the brake system is functioning correctly and the brake lever has proper tension.
- Electrical Connections: Periodically inspect all electrical connections for tightness and signs of corrosion.
- Fasteners: Check all bolts and screws for tightness and secure them as needed.
10. Troubleshooting
This section addresses common issues you might encounter.
| Issue | Possible Cause | Solution |
|---|---|---|
| Scooter does not power on | Battery not charged; Battery not properly installed; Key not in 'ON' position; Loose electrical connection. | Charge battery; Reinstall battery securely; Turn key to 'ON'; Check connections. |
| Scooter moves slowly or lacks power | Low battery charge; Scooter in low-speed mode; Exceeding weight capacity; Operating on steep incline. | Recharge battery; Switch to higher speed mode; Reduce load; Avoid steep inclines. |
| Brakes are not effective | Brake cable loose or damaged; Brake pads worn. | Adjust brake cable tension; Inspect and replace brake pads if necessary. Contact support if issue persists. |
| Unusual noises during operation | Loose components; Obstruction in wheels/motor. | Inspect scooter for loose parts and tighten; Check wheels and motor area for obstructions. |
11. Specifications
| Feature | Specification |
|---|---|
| Model | 4wheels+Autopilot Mode |
| Brand | Mujocooker |
| Motor Power | 300W Brushless Motor |
| Maximum Speed | 9.3 mph (15 km/h) |
| Speed Settings | 3.73 mph / 6.21 mph / 9.32 mph |
| Travel Range | Up to 20 miles (32 km) per charge |
| Battery Type | 36V 8AH Lithium Battery |
| Charging Time | 4-5 hours |
| Weight Capacity | 300 lbs (136 kg) |
| Net Weight | Approximately 49-55 lbs (22-25 kg) |
| Brake Style | Hand brake |
| Tires | 8-inch Solid Rubber Tires |
| Turning Radius | Approximately 34 inches |
| Ground Clearance | Approximately 4.9 inches |

Image 11.1: Details of the 300W motor, rated power, max speed, and max climbing angle.

Image 11.2: The scooter boasts a remarkable turning radius of just 34 inches for enhanced maneuverability.

Image 11.3: The scooter's 4.9-inch ground clearance allows for multi-terrain driving on various surfaces.
12. Warranty and Support
12.1 Warranty Details
The Mujocooker Mobility Scooter comes with a 1-year warranty for parts and a 3-month warranty for the battery from the date of purchase. This warranty covers manufacturing defects under normal use. It does not cover damage due to misuse, accidents, or unauthorized modifications.
12.2 Contact Information
For technical support, warranty claims, or any inquiries, please contact us via email. Our support team aims to respond within 24 hours.
Email: mujocooker@163.com

Image 12.1: Contact information for customer support, including email and return policy details.

Image 12.2: Overview of Mujolife service, including warranty periods and contact email.