1. Product Overview
The Gosasa Model 6016 is a versatile unisex digital sports watch designed for daily wear and outdoor activities. It features a dual analog and digital display, providing clear timekeeping with an EL backlight for visibility in low-light conditions. This watch is equipped with multiple functions including a stopwatch, alarm, countdown timer, and dual time zones, making it suitable for various needs.
Its durable construction, including an ABS+TPU case and soft TPU band, ensures comfort and resilience against bumps and drops. With 5ATM water resistance, it is suitable for hand-washing, rain, and cold showers.
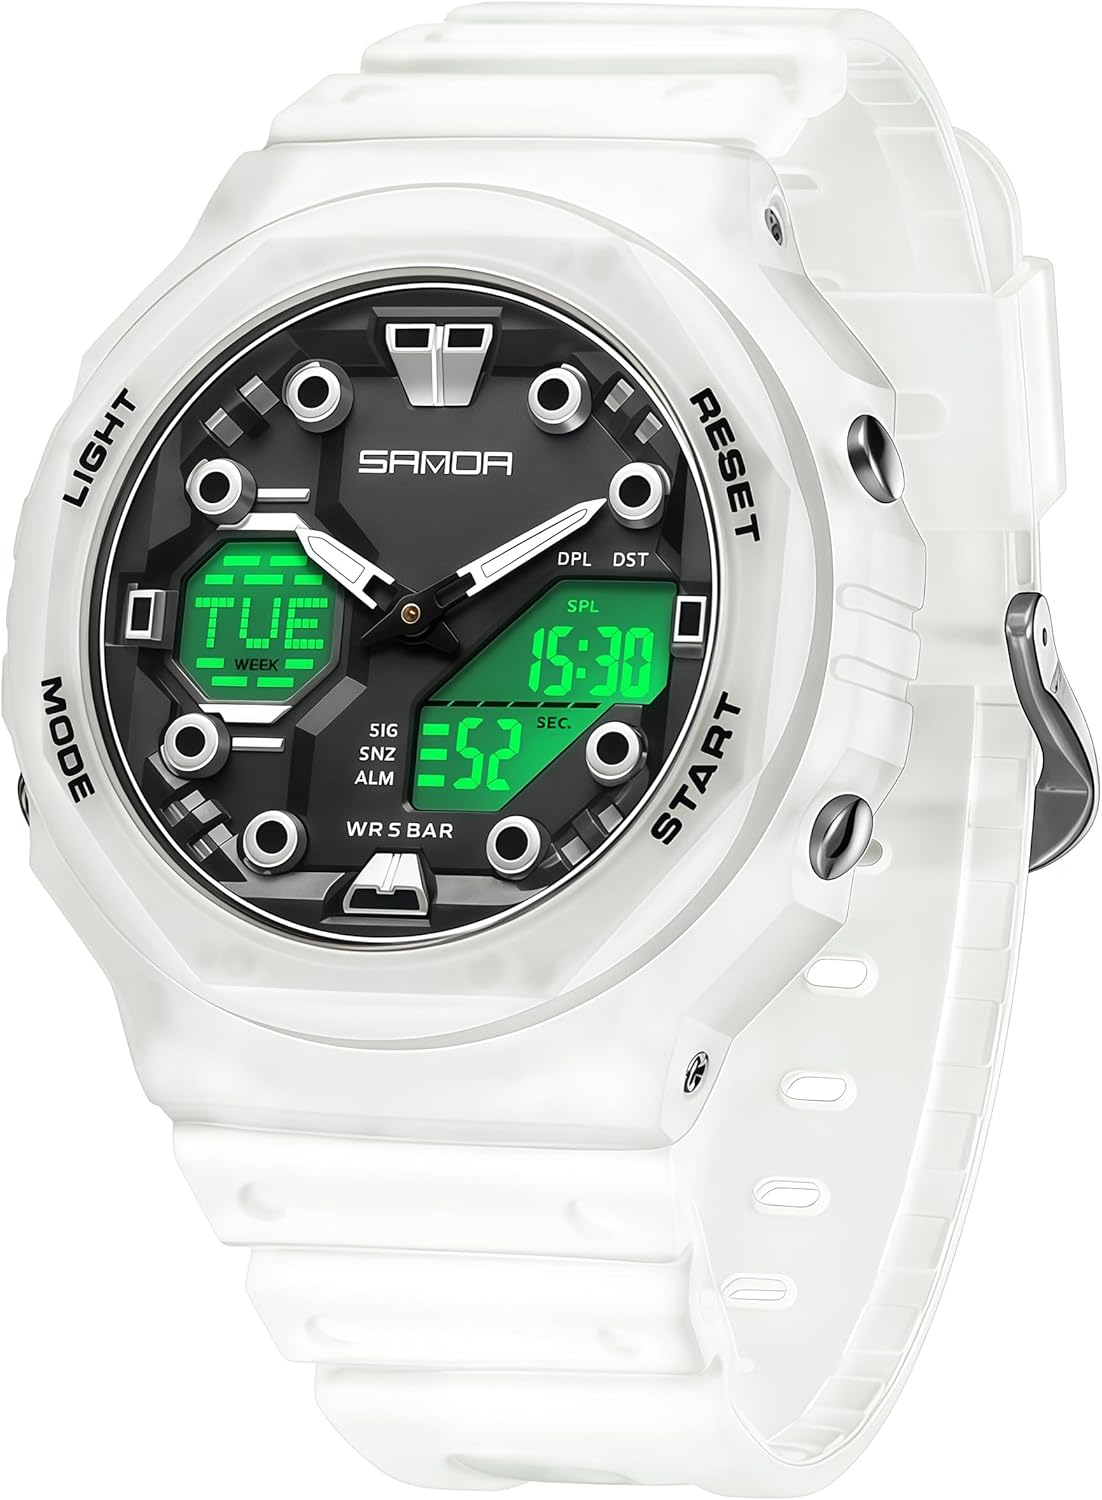
Image 1.1: Front view of the Gosasa Model 6016 Digital Sports Watch in transparent white.

Image 1.2: Overview of key product features including time functions, alarms, and durability.

Image 1.3: The Gosasa Model 6016 watch worn on a wrist, showcasing its size and fit.
2. Initial Setup
2.1 Button Functions
The watch features four primary buttons for navigation and function control:
- LIGHT: Activates the EL backlight for illumination.
- MODE: Cycles through different modes (Time, Alarm, Stopwatch, Countdown, Dual Time).
- RESET: Used for resetting values or selecting options during setting.
- START: Used for starting/stopping functions or adjusting values during setting.

Image 2.1: Close-up of the watch face, highlighting the four control buttons: LIGHT, MODE, RESET, and START.
2.2 Setting Time and Date
- In normal time mode, press the MODE button repeatedly until the time setting display flashes (usually seconds).
- Press the RESET button to cycle through the settings: seconds, hour, minute, year, month, day.
- Use the START button to adjust the flashing value. Hold START to change values quickly.
- Once all values are set, press the MODE button to exit the setting mode.
2.3 12/24 Hour Format
While in time setting mode, when the hour is flashing, press the RESET button to toggle between 12-hour (with AM/PM indicator) and 24-hour formats.
3. Operating Instructions
3.1 Backlight Function
Press the LIGHT button to illuminate the digital display for a few seconds. This feature is useful in dark environments.

Image 3.1: Comparison of the watch display in normal mode versus luminous mode with the backlight activated.
3.2 Stopwatch
- Press the MODE button until "STW" or "SPL" appears on the display, indicating stopwatch mode.
- Press START to begin timing.
- Press START again to pause timing.
- Press RESET to clear the stopwatch to zero.
- To record lap times, press RESET while the stopwatch is running. The lap time will display briefly, and the stopwatch will continue timing in the background.
3.3 Alarm Setting
- Press the MODE button until "ALM" appears, indicating alarm mode.
- Press RESET to select the hour or minute to set. The selected value will flash.
- Use the START button to adjust the flashing value.
- Press MODE to exit alarm setting.
- To activate/deactivate the alarm or hourly chime, press START while in alarm mode to cycle through options (Alarm ON, Chime ON, Both ON, Both OFF).
3.4 Countdown Timer
- Press the MODE button until "TMR" appears, indicating countdown timer mode.
- Press RESET to enter setting mode (the hour or minute will flash).
- Use the START button to adjust the flashing value. Press RESET to switch between hour and minute.
- Press MODE to exit setting mode.
- Press START to begin the countdown. Press START again to pause.
- Press RESET to reset the timer to its initial set value.
3.5 Dual Time Zone (GMT)
The watch supports a second time zone display, often labeled "GMT" or "DPL" (Dual Time). To set:
- Press the MODE button until "GMT" or "DPL" appears.
- Press RESET to enter setting mode (the hour or minute will flash).
- Use the START button to adjust the flashing value. Press RESET to switch between hour and minute.
- Press MODE to exit setting mode.
4. Care and Maintenance
4.1 Water Resistance (5ATM)
The Gosasa Model 6016 watch is rated 5ATM (50 meters) water resistant. This means it is suitable for:
- Daily use, such as hand-washing and rain.
- Cold showers.
- Brief immersion in water.
Important Precautions:
- DO NOT press any buttons while the watch is underwater.
- Avoid hot water, saunas, or prolonged soaking, as this can compromise the water seals.
- Avoid exposing the watch to steam or extreme temperature changes.

Image 4.1: Visual guide to the 50M water resistance, showing suitability for swimming, rain, and hand washing.
4.2 Cleaning
Wipe the watch case and strap with a soft, damp cloth. For stubborn dirt, a mild soap solution can be used, followed by rinsing with clean water and drying thoroughly. Avoid harsh chemicals or abrasive cleaners.
4.3 Battery Replacement
The watch uses 1 nonstandard battery (included). When the display dims or functions become erratic, it may be time to replace the battery. It is recommended to have battery replacement performed by a qualified watch technician to ensure proper sealing and water resistance.
5. Troubleshooting
| Problem | Possible Cause | Solution |
|---|---|---|
| Display is blank or dim. | Low battery. | Replace the battery. |
| Buttons are unresponsive. | Watch may be in a locked mode or internal malfunction. | Try pressing all four buttons simultaneously for a few seconds to reset. If issue persists, contact support. |
| Time is incorrect. | Time not set correctly or battery is low. | Refer to Section 2.2 to reset the time. If the problem recurs, replace the battery. |
| Water inside the watch. | Water resistance compromised (e.g., buttons pressed underwater, exposure to hot water). | Immediately take the watch to a professional for inspection and repair to prevent further damage. Do not attempt to dry it yourself. |
6. Specifications
| Feature | Detail |
|---|---|
| Movement | Electron + Quartz |
| Mirror Material | Acrylic |
| Case Material | ABS |
| Strap Material | TPU |
| Clasp Type | Buckle (Stainless Steel Pin Buckle) |
| Battery | 1 Nonstandard Battery (included) |
| Water Resistance | 50M (5ATM) |
| Case Thickness | 15mm |
| Case Diameter | 46mm |
| Case Height | 47mm |
| Strap Width | 19mm |
| Total Length of Watch | 220mm |
| Wearing Range | 120-200mm (approx. 4.72–7.87 inches) |
| Watch Weight | 45g (1.6 ounces) |

Image 6.1: Detailed product information including materials, dimensions, and weight.

Image 6.2: Diagram illustrating the key dimensions of the watch, including case and strap measurements.
7. Warranty and Support
This Gosasa watch is backed by a 12-month after-sales service from the date of purchase. This warranty covers manufacturing defects under normal use.
The warranty does not cover:
- Damage resulting from improper use, accidents, or unauthorized repairs.
- Normal wear and tear of the case, strap, or crystal.
- Battery replacement.
For warranty claims, technical support, or any inquiries regarding your Gosasa watch, please contact our customer service team through the retailer where the product was purchased or visit the official Gosasa website for contact information.
8. Product Video
Video 8.1: An official product video showcasing the Gosasa Unisex 5ATM Waterproof Sports Analog-Digital Watch, demonstrating its features and various color options.